i-PRO WV-S1536LTN Installation Manual
Hide thumbs
Also See for WV-S1536LTN:
- Manual (26 pages) ,
- Installation manual (2 pages) ,
- Basic information (26 pages)
Table of Contents
Advertisement
Quick Links
Installation Guide
Included Installation Instructions
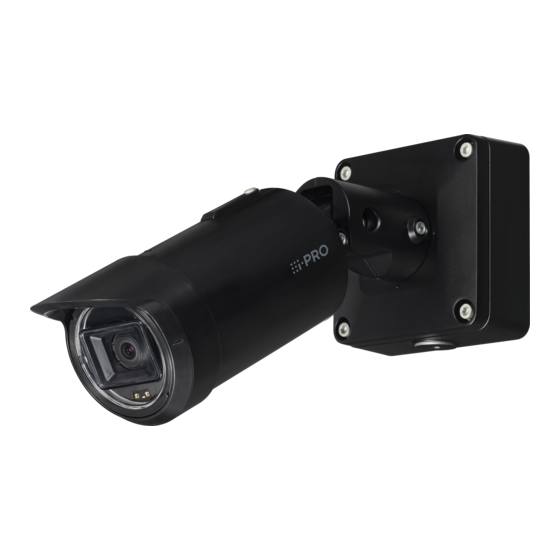
Network Camera
WV-S1536LTN
Model No.
WV-S1536LT
WV-S1536LN
WV-S1536L
WV-S1536LNS
About the user manuals
Product documentation is composed of the following documents.
• Installation Guide (this document): Provides information about "Precautions",
"Precautions for installation" and the installation method.
• Basic Information (in the following manual website): Provides information
about "Precautions for use", "Parts and functions" and "Detail specifications".
• Operating Instructions (in the following manual website): Explains how to
perform the settings and how to operate this camera.
https://i-pro.com/products_and_solutions/en/surveillance/documentation-database
"<Control No.: C****>" used in these documents should be used to search for
information on our technical information website
(https://i-pro.com/products_and_solutions/en/surveillance/learning-and-support/
knowledge-base/technical-information) and will guide you to the right information.
• Before attempting to connect or operate this product, please read these instructions
carefully and save Important Safety Instructions leaflet for future use.
• microSDXC/ microSDHC/ microSD memory card is described as microSD memory card.
• The external appearance and other parts shown in this manual may differ from the actual product within the
scope that will not interfere with normal use due to improvement of the product.
Tokyo, Japan
https://www.i-pro.com/
© i-PRO Co., Ltd. 2024
For professional use only
(Heavy salt damage resistance)
1
Outdoor use
Authorised Representative in EU:
i-PRO EMEA B.V.
Laarderhoogtweg 25, 1101 EB
Amsterdam, Netherlands
i-PRO EMEA B.V. UK Branch
1010 Cambourne Business Park,
Cambridgeshire CB23 6DP
WV-S1536LTN
C0224-0
PGQP3734ZA
Advertisement
Table of Contents

Related Manuals for i-PRO WV-S1536LTN


Summary of Contents for i-PRO WV-S1536LTN
- Page 1 Authorised Representative in EU: i-PRO EMEA B.V. Laarderhoogtweg 25, 1101 EB Amsterdam, Netherlands Tokyo, Japan i-PRO EMEA B.V. UK Branch 1010 Cambourne Business Park, https://www.i-pro.com/ Cambridgeshire CB23 6DP C0224-0 © i-PRO Co., Ltd. 2024...
-
Page 2: About Notations
This equipment generates, uses, and can Trade name : i-PRO radiate radio frequency energy and, if not installed Model No. : WV-S1536LTN, WV-S1536LT and used in accordance with the instruction man- WV-S1536LN, WV-S1536L ual, may cause harmful interference to radio com- Responsible Party : munications. - Page 3 Caution: Notice: • The DC power supply connected to the camera • This product is not suitable for use in locations must be in the same building. where children are likely to be present. • The network camera is only intended for a •...
- Page 4 „ Do not sprinkle more water, exceeding the performance limit of waterproof with a high pressure cleaning machine, etc. Fire or electrical shock may be caused by immersion. „ Do not attempt to disassemble or modify this product. Failure to observe this may cause fire or electric shock. Consult the dealer for the repair or inspections. „...
-
Page 5: Open Source Software
• All other trademarks identified herein are the property of their respective owners. Precautions for installation i-PRO Co., Ltd. assumes no responsibility for injuries or property damage resulting from failures arising out of improper installation or operation inconsistent with this documentation. - Page 6 • Locations that have a specific environment that is subject to an inflammable atmosphere or solvents • Locations where a radiation, an X-ray, a strong radio wave or a strong magnetic field is generated • S1536LT S1536LT S1536L S1536L Locations near coasts directly subjected to sea breezes, or locations subject to corrosive gases such as from hot springs, volcanic regions, etc.
-
Page 7: Specifications
Outer fixing screws: Stainless steel (Corrosion-resistant treatment) Front panel: PC resin, Clear (with ClearSight coating) <WV-S1536LTN><WV-S1536LN> <WV-S1536LNS> *1 Refer to our technical information website <Control No.: C0106> for further information about Power source and Power consumption information. *2 When using with the IR LED light constantly lit, the upper limit of the operating temperature range is... -
Page 8: Optional Accessories
*3 The audio output can be switched to the monitor output. Refer to the “Operating Instructions” on our support website for descriptions of how to switch the output. *4 Only when installation work is properly performed according to the Installation Guide and appropriate waterproof treatment is performed. -
Page 9: Standard Accessories
M4×8 mm {5/16 inches}×2 Grommet ×2 mounting pin ×1 (of them, 1 for spare) (of them, 1 for spare) RJ45 cap ×1 <WV-S1536LTN> <WV-S1536LN> <WV-S1536LNS> Rain wash coating label ×1 (with ClearSight coating) Other items that are needed (not included) Mounting screws... - Page 10 Installation Procedure ☞ Technical Support Video Parts and functions Indicators/Buttons Adapter box lock Name plate screw Side cable Grommet TILT Front part access hole* cover lock lock (External: sunshade, Internal: main case) screw screw * Conduit connection part (Compliant with CTG22 of JIS C 8305 (conduit tube threads), or G3/4 of JIS B 0202 (parallel pipe threads)) Indicators/Buttons : Lights : Blinks...
-
Page 11: Installation Method
Installation method For installing on a ceiling For desktop use For installing on a wall Example of explanation for installation... - Page 12 Preparations Step 1 „ Common Use only for image rotation...
- Page 13 Preparations Step 1 (continued) „ When using a microSD card microSD ② A click sound is heard. ① • Operating Instructions “Format” • It is recommended to use a microSD memory card for i-PRO devices.
- Page 14 Preparations Step 1 (continued) „ When using an I/O cable (WV-QCA501A: option) Grommet cover (accessory) Grommet...
- Page 15 Step 2 Vertical direction Horizontal direction 46 mm {1-13/16 inches} 83.5 mm {3-9/32 inches} (47.6 mm {1-7/8 inches}) (82.5 mm {3-1/4 inches}) 46 mm {1-13/16 inches} 83.5 mm {3-9/32 inches} (47.6 mm {1-7/8 inches}) (82.5 mm {3-1/4 inches}) 83.5 mm {3-9/32 inches} –...
- Page 16 Step 3 „ Preparations for connecting RJ45 network cable RJ45 cap (accessory) Grommet (accessory) Inside Center Outside RJ45 Ethernet (PoE) category 5e or better, straight, 4 pairs (8 pins) < 100 m {328 feet} Reuse ø5 mm to ø8.5 mm Outside {ø3/16 inches to ø11/32 inches} Inside...
- Page 17 „ When using an I/O cable (WV-QCA501A: option) Audio in < 1 m {3.28 feet} (Mic) (white) < 10 m {32.8 feet} (Line) Audio out (black) Monitor out < 10 m {32.8 feet} GND (black) 4P alarm cable EXT I/O (accessory of WV-QCA501A) ALARM IN3 (gray) ALARM IN2 (red)
- Page 18 The following illustrations are examples when connecting only Step 4 the RJ45 network cable. Left-hand opening Grommet cover (At the time of shipment from the factory, a grommet is attached in the left hole.) Right-hand opening • When installing with a right-hand opening, move a grommet in the left hole to the right hole.
- Page 19 The following illustrations show examples of installation for Step 5 a left-hand opening. Adapter box mounting pin (accessory) Mounting screw (accessory) Recommended tightening torque: 0.69 N·m {0.51 lbf·ft}...
- Page 20 Step 6 Grommet cover (accessory) 0.69 N·m {0.51 lbf·ft}...
- Page 21 Step 7 LAN cable Inside Outside I/O cable (WV-QCA501A: option) ① ② ① 2.45 N·m {1.81 lbf·ft} 5 mm {3/16 inches} hexagon wrench (locally procured)
- Page 22 * Coarsely adjust the camera direction before adjusting it. Step 8 The following is an example with the camera direction turned to the right. 5 mm {3/16 inches} hexagon wrench (locally procured)
- Page 23 Step 9 → Power On (12 V DC/PoE) TELE+AF WIDE+AF Readjustment Step 8 TILT 5 mm {3/16 inches} hexagon wrench (locally procured) PAN lock screw: 2.7 N·m {1.99 lbf·ft} TILT lock screw: 4.3 N·m {3.17 lbf·ft} YAW lock screw: 2.7 N·m {1.99 lbf·ft}...
- Page 24 Step 10 “△” mark OPEN OPEN LOCK 0.69 N·m {0.51 lbf·ft}...
- Page 25 Step 11 Technical information website “IP Setting Software” <Control No.: C0123> “i-PRO Configuration Tool (iCT)” <Control No.: C0133> “Extra optical zoom” <Control No.: C0124> “How to take a wide depth of field” <Control No.: C0127> „ When using “Image rotation” → Rotate the sunshade Technical information website “Installation method for rotating the sunshade”...
Need help?
Do you have a question about the WV-S1536LTN and is the answer not in the manual?
Questions and answers