Sign In
Upload
Download
Table of Contents
Contents
Add to my manuals
Delete from my manuals
Share
URL of this page:
HTML Link:
Bookmark this page
Add
Manual will be automatically added to "My Manuals"
Print this page
×
Bookmark added
×
Added to my manuals
Manuals
Brands
Pfeiffer Vacuum Manuals
Measuring Instruments
OMNISTAR
Operating instructions manual
Pfeiffer Vacuum OMNISTAR Operating Instructions Manual
Gsd 320 gas analysis system
Hide thumbs
1
2
Table Of Contents
3
4
5
6
7
8
9
10
11
12
13
14
15
16
17
18
19
20
21
22
23
24
25
26
27
28
29
30
31
32
33
34
35
36
37
38
39
40
41
42
43
44
45
46
47
48
49
50
51
52
53
54
55
56
57
58
59
60
61
62
63
64
65
66
67
68
69
70
71
72
73
74
75
76
77
78
79
80
81
82
83
84
85
86
87
88
89
90
91
92
93
94
95
96
97
98
page
of
98
Go
/
98
Contents
Table of Contents
Bookmarks
Table of Contents
Trademarks
Disclaimer
Copyright
Contents
Table of Contents
1 Introduction
Product Identification
Validity
Intended Use
2 Safety
Safety Instructions
Pictograph Definitions
Personnel Qualifications
General Safety Instructions
Gases
Liability and Warranty
Training
3 Instrument Overview
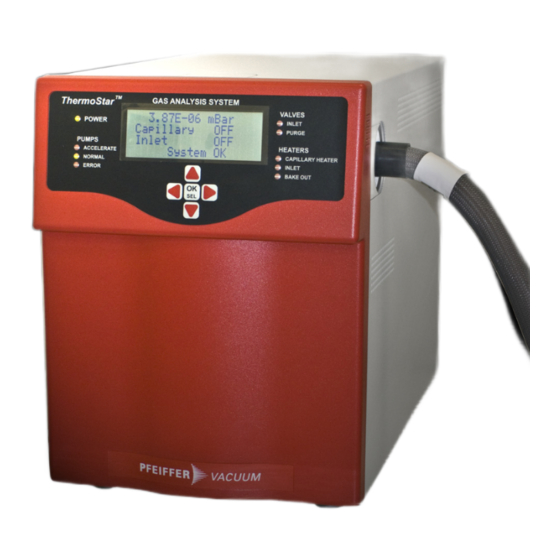
Front View
Connections
Front Panel Controls and Indicators
4 Technical Data
Detector Type
Ion Source
Mass Range
Calibration Compound (Option)
Scan Speed
Capillary Gas Connection
Process Gas (Measuring Gas)
Corrosive Service (Option)
Exhaust Gas
Materials on the Vacuum Side
Pumping Characteristics
Ambient Conditions
Noise Level
Power Connection
User Interfaces
User Control
Weight
Dimensions
5 Installation
Carrying and Transporting the Unit
Removal of Transport Locking Parts
Ventilation Requirements
Connecting the Exhaust Gas Line
Connecting the Purge Gas
Connecting the Capillary
Connecting the Interfaces
Power Connection
QUADERA Installation
6 Initial Start up
Precondition
Procedure
7 Operation
Front Panel Operation
Operation from QUADERA
8 Vari Omnistar
Safety
Intended Use
Design
Installation
Initial Start up
Vari Omnistar Maintenance
Overview of All Parts in the Inlet System
EVR 116 Replacement
9 Care of the GSD 320
Maintenance Courses
Cleaning the Unit
10 Maintenance
Shortening the Capillary (Omnistar)
Shortening the Capillary (Thermostar)
Capillary Replacement Instructions
Inlet Heater Orientation Instructions
Removing the Prismaplus from the GSD 320
Filament Replacement
Filter Mat
Replacing the Orifice of the Omnistar
Replacing the Orifice of the Thermostar
Diaphragm Pump Maintenance
Turbo Pump Maintenance
Maintenance and Service Schedule
11 Accessories
12 Spare Parts
Introduction
Parts for both Systems
Omnistar
Thermostar
13 Service
14 Disposal
Separating the Components
Appendix Arvc 300 Settings
Configuration
Sensor Settings
Serial Interface
General
Parameters
Declaration of Conformity
Advertisement
Quick Links
1
Operation
Download this manual
OPERATING INSTRUCTIONS
EN
Translation of the original instructions
OMNISTAR™
THERMOSTAR™
GSD 320 Gas Analysis System
Table of
Contents
Previous
Page
Next
Page
1
2
3
4
5
Advertisement
Table of Contents
Need help?
Do you have a question about the OMNISTAR and is the answer not in the manual?
Ask a question
Questions and answers
Related Manuals for Pfeiffer Vacuum OMNISTAR
Measuring Instruments Pfeiffer Vacuum OMNISTAR GSD 350 Operating Instructions Manual
Gas analysis system (120 pages)
Measuring Instruments Pfeiffer Vacuum OmniStar GSD 300 C Series Operating Manual
Gas analysis system for reactive/explosive gases (40 pages)
Measuring Instruments Pfeiffer Vacuum OmniStar GSD 350 Operating Instructions Manual
(30 pages)
Measuring Instruments Pfeiffer Vacuum OmniStar GSD 300 O1 Operating Manual
Gas analysis system (40 pages)
Measuring Instruments Pfeiffer Vacuum GSD 350 OMNISTAR Operating Instructions Manual
Gas analysis system (110 pages)
Measuring Instruments Pfeiffer Vacuum GSD 350 Operating Instructions Manual
Gas analysis system omnistar/thermostar (114 pages)
Measuring Instruments Pfeiffer Vacuum THERMOSTAR Operating Instructions Manual
Gsd 320 gas analysis system (98 pages)
Measuring Instruments Pfeiffer Vacuum HPT 200 Operating Instructions Manual
Digital pirani/bayard alpert gauge (54 pages)
Measuring Instruments Pfeiffer Vacuum FullRange PBR 260 Operating Instructions Manual
Compact ba gauge (32 pages)
Measuring Instruments Pfeiffer Vacuum IKR 270 Operating Instructions Manual
Compact cold cathode gauge, all-metal (28 pages)
Measuring Instruments Pfeiffer Vacuum TPG 362 Operating Instructions Manual
Singlegauge, dualgauge, single- and dual-channel measurement and control unit for activeline transmitter (68 pages)
Measuring Instruments Pfeiffer Vacuum TPG 201 Operating Instructions Manual
Pirani handheld measurement instrument (42 pages)
Measuring Instruments Pfeiffer Vacuum PrismaPlus QMG 220 Operating Instructions Manual
Compact mass spectrometer (58 pages)
Measuring Instruments Pfeiffer Vacuum TPG 202 Operating Instructions Manual
Pirani handheld measurement instrumen (42 pages)
Measuring Instruments Pfeiffer Vacuum PKR 261 Operating Instructions Manual
Compact fullrange gauge, all-metal (28 pages)
Measuring Instruments Pfeiffer Vacuum TPR 261 Operating Manual
Compact pirani gauge (4 pages)
This manual is also suitable for:
Thermostar
Table of Contents
Save PDF
Print
Rename the bookmark
Delete bookmark?
Delete from my manuals?
Login
Sign In
OR
Sign in with Facebook
Sign in with Google
Upload manual
Upload from disk
Upload from URL


Need help?
Do you have a question about the OMNISTAR and is the answer not in the manual?
Questions and answers