Pfeiffer Vacuum OmniStar GSD 350 Operating Instructions Manual
Hide thumbs
Also See for OmniStar GSD 350:
- Operating instructions manual (110 pages) ,
- Operating instructions manual (120 pages)

Related Manuals for Pfeiffer Vacuum OmniStar GSD 350


Summary of Contents for Pfeiffer Vacuum OmniStar GSD 350
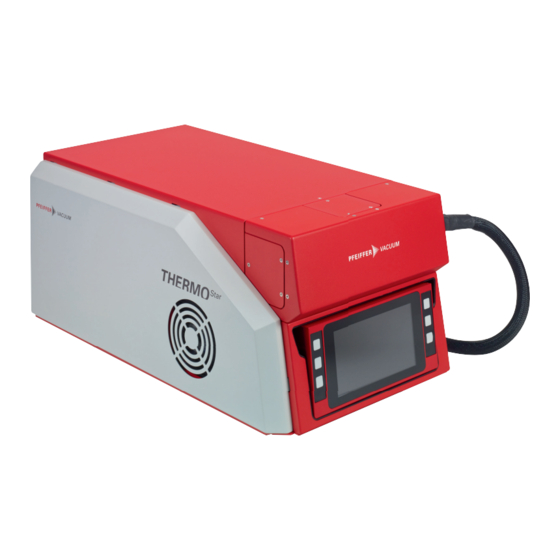
- Page 1 OPERATING INSTRUCTIONS Translation of the Original GSD 350 OMNISTAR ∣ THERMOSTAR Operation via web interface and PV MassSpec...
- Page 2 Dear Customer, Thank you for choosing a Pfeiffer Vacuum product. Your new gas analysis system is designed to support you in your individual application with full performance and without malfunctions. The name Pfeiffer Vacuum stands for high-quality vacuum technology, a comprehensive and complete range of top-quality products and first-class service.
-
Page 3: Table Of Contents
Table of contents Table of contents About this manual Validity 1.1.1 Applicable documents 1.1.2 Variants Target group Conventions 1.3.1 Instructions in the text 1.3.2 Pictographs 1.3.3 General safety information 1.3.4 Abbreviations Trademark proof Introduction to the web interface System requirements Connect to web interface Connect web interface via pre-set IP address Connect web interface via user-defined IP address... - Page 4 List of tables List of tables Tbl. 1: Applicable documents Tbl. 2: Variants Tbl. 3: Features of variants Tbl. 4: Abbreviations used Tbl. 5: Minimum computer requirements Tbl. 6: Unit overview Tbl. 7: Symbols and colors of the vacuum diagram and manual control elements Tbl.
- Page 5 List of figures List of figures Fig. 1: "Monitoring" window with vacuum diagram Fig. 2: Buttons in the menu bar's main menus Fig. 3: Icon for system settings with dropdown list Fig. 4: Equipment group and equipment list with information and settings Fig.
-
Page 6: About This Manual
Gas analysis system Software documentation (part of the software) PV MassSpec Tbl. 1: Applicable documents You can find this document in the Pfeiffer Vacuum Download Center. 1.1.2 Variants This document applies to products with the following part numbers: Variant Version Analyzer with filament... -
Page 7: Target Group
Features of variants You can find the part number on the rating plate of the product. Pfeiffer Vacuum reserves the right to make technical changes without prior notification. The figures in this document are not to scale. Dimensions are in mm unless stated otherwise. -
Page 8: Abbreviations
Abbreviations used 1.4 Trademark proof ● OmniStar ® , ThermoStar ® and PrismaPro ® are trademarks of Pfeiffer Vacuum GmbH. ● Windows ® and Internet Explorer ® are trademarks of Microsoft Corporation. ● Firefox ® is a trademark of Mozilla Foundation. -
Page 9: Introduction To The Web Interface
Introduction to the web interface 2 Introduction to the web interface Web interface does not support data storage The web interface is a remote monitoring and diagnostic tool. The web interface is de- signed for data monitoring and simple vacuum diagnostics. It is not possible to store data or display data in a trend graph with the web interface. -
Page 10: System Requirements
System requirements 3 System requirements Browsers for GSD 350 communication via web interface ● Google Chrome (recommended) ● Mozilla Firefox ● Microsoft Internet Explorer ● Apple Safari ● Opera Browsers for PrismaPro communication via web interface ● Google Chrome (recommended) ● Mozilla Firefox ●... -
Page 11: Connect To Web Interface
Connect to web interface 4 Connect to web interface Fig. 1: "Monitoring" window with vacuum diagram Connect operating unit with web interface ► Connect operating unit to same network as GSD 350. ► If needed, open connection to computer using Remote Desktop to access same network as GSD 350. - Page 12 Connect to web interface Procedure 1. Type the user-defined IP address into the browser address bar. 2. Press Enter. – The browser connects to the GSD 350. If the GSD 350 is switched on, the web interface "Monitoring" window is displayed. 12/30...
-
Page 13: Operate Via Web Interface
Operate via web interface 5 Operate via web interface The GSD 350's functions are distributed across various menus and windows in the web interface. You can use the menu bar at any time and in any window to navigate to the 4 main menus. You can use the System settings icon's dropdown list to configure settings for all units. -
Page 14: Change Parameters
Operate via web interface "Settings" submenu This is where you can edit unit parameters. "VSM" submenu Online tool for automatic service processing. For further information, select Virtual Service Manage- ment. 5.1.1 Change parameters Procedure 1. Select unit from equipment list. 2. Select "Settings" submenu. 3. -
Page 15: Unit Overview
Operate via web interface 5.1.3 Unit overview Device Stand- Submenu group alone unit General Values Settings GSD 350 Unit designation Controller cycle Autostart vacuum VSM-ID Serial number GSD mode Autostart heating Config. Push message Order number Heating coil type Autostart pump Push config. -
Page 16: Control" Menu
Operate via web interface Device Stand- Submenu group alone unit General Values Settings Heating Capillary Unit designation Temperature Set temperature VSM-ID units Serial number (none) Config. Push message Inlet Set temperature (cannot be Order number Push config. attributes changed) Vacuum Temperature Bake out set tem- chamber... -
Page 17: Fig. 5: Vacuum Diagram
Operate via web interface Fig. 5: Vacuum diagram Color Meaning light green activated, operating status reached dark green activated, operating status not yet reached light gray not activated dark gray switched off, switched off status not yet reached Tbl. 8: Colors of the status and components icons Fig. -
Page 18: Measurement" Menu
Operate via web interface ● Switch electron multiplier on/off ● Define "Autostart" function ─ Vacuum system ─ Heating units ─ Inlet Indicate (to) ● Vacuum system operating statuses ● Total pressure curve with current total pressure ● Heating temperatures ● Status of gas inlet, emission and electron multiplier ●... -
Page 19: Creating And Editing Measurement Recipes
Operate via web interface Fig. 8: Measurement Procedure 1. Select "Measurement" in menu bar. 2. Select "Measurement" submenu. 3. Click on "Start scan" top right. 4. Select desired measurement program in drop-down menu. 5. If required, toggle the axis scaling for the ion current between logarithmic and linear display. 6. -
Page 20: Alarm" Menu
Improper changes in the Service menu impair unit functions and cause damage to the unit and its components. The Service menu is reserved for use by Pfeiffer Vacuum Service and is only accessible after logging ► Contact Pfeiffer Vacuum Service. -
Page 21: Fig. 10: Icon For System Settings With Dropdown List
Operate via web interface Fig. 10: Icon for system settings with dropdown list Fig. 11: Submenu for settings 21/30... -
Page 22: Fig. 12: Set Date And Time
Set date and time You can use the "System settings" menu to view and edit parameters for all units. The "Login" submenu is used by Pfeiffer Vacuum Service for service purposes. Access to this submenu is protected by a code. -
Page 23: Pv Massspec
10. Enter your name and company name in the "Customer Information" window. 11. Confirm your entries with "Next". – The software performs and completes the installation, and stores the program data on the C drive in the newly created "Pfeiffer Vacuum" folder. There is now a desktop shortcut. 23/30... -
Page 24: System Setup
PV MassSpec 6.2 System setup Information for PrismaPro Detailed information on the setup, parameterization and measurement recipes can be found in the PrismaPro operating instructions. Information about PV MassSpec You can find detailed information in the "Help" section of the software. Prerequisites ●... -
Page 25: Fig. 15: Pv Massspec Tcp/Ip Connection
PV MassSpec Fig. 15: PV MassSpec TCP/IP connection Fig. 16: PV MassSpec system status Procedure 1. Start the PV MassSpec software. 2. Use Configuration menu item to navigate to Connections (Sensors). 3. Select HTTP. 4. Press Edit and then press OK to confirm. 5. - Page 26 PV MassSpec 7. Press OK. 8. Press Close to close input window. – The data for the connection to the PrismaPro is saved. The PrismaPro is now integrated into the PV MassSpec software and available for analytical measure- ments. 26/30...
-
Page 27: Operate Qmg 250 Prismapro Via Web Ui
Operate QMG 250 PrismaPro via Web UI 7 Operate QMG 250 PrismaPro via Web UI You can use the PrismaPro Web UI in a web browser to directly access the GSD 350's PrismaPro mass spectrometer. Detailed information on the use of PrismaPro Web UI can be found in the corresponding operating in- structions. -
Page 28: Decommissioning
Decommissioning 8 Decommissioning Shut down unit via web interface or PV MassSpec 1. If still active, close PrismaPro Web UI or quit PV MassSpec software to shut down direct access to GSD 350's PrismaPro. 2. In "Monitoring" menu, switch off electron multiplier (EM) and emission (FIL). 3. -
Page 29: Malfunctions
– If the web interface starts working, it is likely that the GSD 350 has an IP address conflict (an- other unit on the network has the same IP address) or the network/router is blocking the port that the GSD 350 uses. ► If the connection to the web interface still does not work, contact Pfeiffer Vacuum. 29/30...
Need help?
Do you have a question about the OmniStar GSD 350 and is the answer not in the manual?
Questions and answers