Table of Contents
Advertisement
Quick Links
Advertisement
Table of Contents

Subscribe to Our Youtube Channel
Summary of Contents for DaytonAudio A400
- Page 1 A400 Product Manual...
-
Page 3: Table Of Contents
Connecting Sources ................................7 Connecting Outputs .................................8-9 Stereo Operation ................................8 Bridged Operation ................................9 Rear Panel Controls ................................10 Auto On ................................... 10 Remote Trigger ................................10 System Protection ................................10 Troubleshooting ................................11 Dimensions ..................................12 Specifications ..................................13 A400 DAYTONAUDIO... -
Page 4: Welcome
Welcome Thank you for purchasing the Dayton Audio A400 Amplifier. This amplifier has been designed to provide nothing but pure Class A/B output power for use with your favorite speakers. Capable of stereo and bridged configuration the A400 can easily integrate into any setup with built-in Auto-ON and external 12V trigger modes. We hope you enjoy listening to your new A400 as much as we have enjoyed designing it. -
Page 5: Installing The Amplifier
Proper Cooling Anytime the A400 is in use, there should be a minimum of 2" of clearance on the top and sides of the amplifier. When installed in an equipment rack leave 2 open rackspaces above the amplifier to increase airflow in and around the amplifier. -
Page 6: Controls And Functions
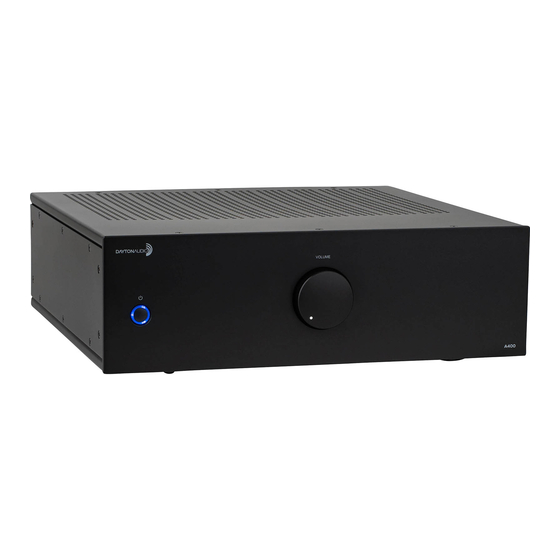
Controls and Functions Front Panel VOLUME A400 1. POWER SWITCH Turns the device on and off. 2. POWER/STANDBY/PROTECTION INDICATOR The ring surrounding the power switch will illuminate blue when the amplifier is on. It will also illuminate red when in standby or to indicate amplifier clipping. -
Page 7: Rear Panel
5. FRONT LED ON/OFF SWITCH The power indicator light on the front can be turned off when the A400 is installed in low light environments like near your TV. This switch will disable all lights on the front of the amplifier including standby and protection indicators 6. -
Page 8: Connections
5. Set all connected audio sources to their optimal level and begin playing audio to the amplifier. 6. Turn the amplifier’s volume control up until the desired loudness is achieved. NOTE: Always turn the amplifier on last and off first to avoid accidental output to any connected speakers; potentially damaging the speakers. A400 DAYTONAUDIO... -
Page 9: Connecting Sources
Selection between balanced and unbalanced inputs can be performed on a per channel basis to allow for different connections to different channels. The balanced and unbalanced outputs will pass audio from their respective inputs. They are not affected by the input selection switch or the front volume control. A400 DAYTONAUDIO... -
Page 10: Connecting Outputs
Connect the A400’s left speaker terminals marked “L-” and “L+” to the corresponding “-” and “+” terminals on your left speaker. Repeat the same process for the right channel. -
Page 11: Bridged Operation
Observe the proper polarity of the bridged outputs. The bridged output will only bass audio from the left channel input. The A400 is not designed to sum the two input channels to mono. -
Page 12: Rear Panel Controls
For ultimate control in any installation, the A400 has an auto sensing function that can turn off the amplifier when not in use and turn it back on when audio is detected. The A400’s standby mode is indicated by a red power indicator. To use auto sensing, set the ON MODE switch to AUTO;... -
Page 13: Troubleshooting
Verify that any volume control the connected preamplifier, mixer, turned down or playback device is turned up. The Sound output The speakers polarity is reversed Double check the speaker connections, ensuring that the + and - lacks Bass terminals are connected properly on both speakers. (p.9) A400 DAYTONAUDIO... -
Page 14: Dimensions
Dimensions A400 DAYTONAUDIO... -
Page 15: Specifications
Auto On Voltage .....................7 mV Dimensions (H X W x D) ............5.97" x 17" x 17.47" Weight ..................45.2 lbs. (20.52 kg) All specifications are accurate at the time of printing. Dayton Audio reserves the right to make improvements without notice. A400 DAYTONAUDIO... - Page 16 5-Year Limited Warranty See daytonaudio.com for details daytonaudio.com 705 Pleasant Valley Dr. tel + 937.743.8248 Springboro, OH 45066 info@daytonaudio.com Dayton Audio Last Revised: 11/17/2023 ®...


Need help?
Do you have a question about the A400 and is the answer not in the manual?
Questions and answers