Advertisement
Advertisement
Table of Contents

Related Manuals for DaytonAudio DAX88


Summary of Contents for DaytonAudio DAX88
- Page 1 8-SOURCE 8-ZONE DISTRIBUTED AUDIO MATRIX AMPLIFIER Model: DAX88 User Manual...
-
Page 2: Table Of Contents
DAX88 User Manual For the most up to date version of the DAX88 Manual and additional DAX88 information, see the following webpage or click the user manual link in the Dayton Audio Matrio Mobile App. - www.daytonaudio.com/topic/DAX88manual Table of Contents Safety..........................3... -
Page 3: Safety
Safety WARNING! TO REDUCE THE RISK OF FIRE OR ELECTRIC SHOCK, DO NOT EXPOSE THIS APPLIANCE TO RAIN OR MOISTURE. CAUTION! TO REDUCE THE RISK OF SHOCK, DO NOT REMOVE THE COVER, NO USER SERVICABLE PARTS INSIDE. REFER SERVICE TO A DAYTON AUDIO AUTHORIZED DEALER. IMPORTANT SAFETY INSTRUCTIONS •... -
Page 4: Overview
Perfect for whole home audio systems or for business, the DAX88 is a true matrix audio system that delivers an extensive list of features for professional and residential installations. The DAX88 was designed for ease of installation by the integrator and simple operation for the end user. - Page 5 DAX88 mobile control, see the dedicated Matrio section of this guide and also download the free app from the iOS or Android app store. The app can be fully explored in demo mode without a DAX88 unit. Page | 5...
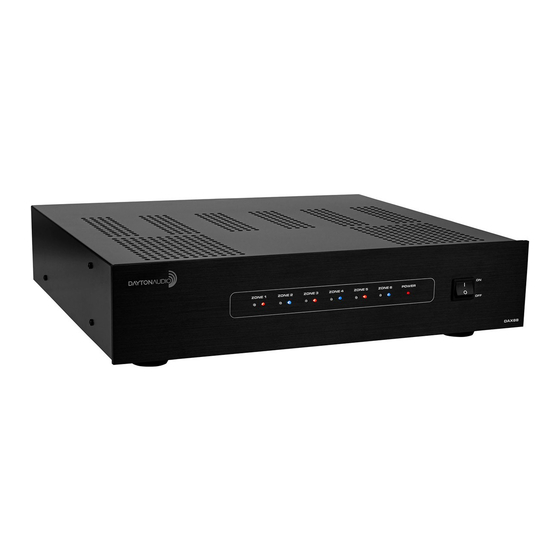
- Page 6 Matrio mobile app or a corresponding keypad. 3. Power LED – Indicates the power status of the DAX88. The LED displays RED if the DAX88 is connected to power and the power switch is ON, otherwise the LED is OFF.
- Page 7 The minimum impedance for bridged channels is 8 ohms. Also, please observe the proper speaker wiring when bridging channels. 4. Speaker Output Connections – Zones 1 - 6 on the DAX88 are stereo, powered speaker outputs for directly powering speakers. The DAX88 uses Phoenix Type Connectors (5 mm pitch) for the speaker connections.
- Page 8 Overview DAX88 Rear Panel 5. Zone 7 & 8 Preamp Outputs – Zone 7 and 8 on the DAX88 are Preamp outputs and represented on the back of the DAX88 as stereo RCA jacks. These zones are useful if you wish to add Matrio and / or keypad control to an external amplifier.
- Page 9 DAX88HUB- Keypad Hub (Optional) The DAX88HUB Keypad Hub allows up to eight keypads, one per zone, to be hooked up to your DAX88. The keypad hub connects to the DAX88 unit through a single ethernet patch cable. 8 RJ45 INPUTS...
- Page 10 DAX88IR – IR Remote for Keypads (Optional) The DAX88IR Infrared Remote Control provides complete zone control through the built-in IR receiver on the DAX88 keypads. All keypad functions can be accessed using the DAX88IR. In addition to the keypad functions, the DAX88IR has a mute button to temporarily mute audio in the corresponding zone.
- Page 11 IR target or an external IR target connected to the EXT-IR terminals on the rear of the keypad can relay commands to the DAX88 main unit by using a DAX88IR IR Remote. Each DAX88KP will control only one zone at a time. The zone number is assigned with configurable with dip switches on the back of the keypad.
- Page 12 Installation – DAX88 Install the DAX88 in a well-ventilated location; do not block the vents on the sides or top of the chassis, proper ventilation is required for normal operation. Do not expose the unit to excessive dust, do not allow dust to build up on the unit, and do block the vent holes in the chassis.
- Page 13 Due to the intelligent design of the app that controls the DAX88, Dayton Audio Matrio there is no limit to the amount of DAX88 devices that can be used on a single network. The app will seamlessly add any DAX88 units it can find on the network with no additional setup.
- Page 14 AC wires at least 10 inches apart in order to avoid hum or interference. If you must cross AC wires, always cross at a 90-degree angle. • The DAX88 amplifiers are capable of driving 4 - 8 ohm speaker loads in STEREO mode, and 8 ohm loads in BRIDGE mode.
- Page 15 Installation – Speakers Connecting speakers to the DAX88 in STEREO MODE Set the amplifier mode switch to STEREO. Remove approximately five inches from the speaker cable jacket, strip 1/4" of insulation from the speaker wire, and twist the copper strands. Insert the speaker wires into the connector per the label below the output terminals and tighten the set screws.
- Page 16 Repeat for the remaining zones. It is permissible to mix STEREO and BRIDGED mode zone outputs on one DAX88. For example, Zone 1 – 4 could be in BRIDGED mode, while Zone 6 – 7 are in STEREO mode.
- Page 17 Installation – Speakers Using DAX88 Preamp Outputs Zone 7 and 8 of the DAX88 are Preamp Zones and are represented on the unit as stereo RCA jacks for each zone. These Preamp Zones can be used for connecting external amplifiers, or could even be used to add a powered subwoofer to the location of another zone.
- Page 18 • Input 7 is a 3.5mm jack for analog, stereo audio. • Input 8 is Wi-Fi streaming, and is represented on the back of the DAX88 with a wireless antenna. More information about wireless streaming can be found in the “Wi-Fi Streaming”...
- Page 19 Wi-Fi input of your first DAX88, set either zone 7 or 8 of your first DAX88 to input 8 (Wi-Fi), and then connect zone 7 or 8 to one of the inputs on your second DAX88. This will effectively share the input between your device. (Note that you will need to have zone 7 or 8 switched on for this to work.)
- Page 20 Up to eight keypads (one per zone) can be installed to the DAX88 with the help of the DAX88HUB keypad hub. Keypads offer convenient control for volume, source input, bass adjustment and treble adjustment. The keypads also feature an IR sensor that can be used with the DAX88IR Remote Control.
- Page 21 Installation – Keypads 4) Use standard electrical boxes or low voltage rings to mount the keypads. Connect the DAX88HUB to the master controller/amplifier using a standard ethernet patch cable. 5) Although the DAX88HUB is labeled with 1 – 8 for each of the eight zones, the dip switches on the back of the keypads must be set so they correspond to the correct zone like the chart below shows.
- Page 22 5 GHz network in this case. If this is your network, you will want to connect your DAX88 to the 2.4 GHz Wi-Fi during the setup process. In most cases, the Matrio...
- Page 23 DAX88 will be ready to connect to the Matrio app on either Android or iOS after just a few moments. Make sure that you are connecting your DAX88 to the same exact network that your mobile devices are on.
- Page 24 IP address of your DAX88 unit (alternatively, you can enter the IP address into a web browser manually with any device that is connected to the same wireless network) .This allows for some additional information and settings...
- Page 25 Installation – Network Connection 6) Press “Save” in the top right corner of your screen. Your DAX88’s network will now be secure. Wireless Connection Only use the wireless connection if it is absolutely not possible to hardwire your DAX88 to your network, and do not use wireless connection if you are installing multiple DAX88 units onto your network.
- Page 26 Installation – Network Connection 2) Connect to your DAX88’s internal Wi-Fi by entering the Wi-Fi menu of any device that is on your network. This could be a laptop, desktop, Android phone/tablet or iPhone/iPad. Look for the Wi-Fi name called “DAX88_XXXX”, where XXXX is a unique string of characters to your DAX88.
- Page 27 Wi-Fi network, or you have typed the IP address incorrectly. 6) Select the Wi-Fi network that you are trying to connect your DAX88 to from the list, and enter the password as prompted. If you do not see your Wi-Fi network, this means your DAX88 is not receiving a strong enough signal from your wireless router, or that you do not have a 2.4 GHz network available.
- Page 28 Installation – 12V Triggers The DAX88 has two sets of 12V triggers for each zone on the rear of the device to automate your audio system even further. All connections should be made with a 3.5mm mono cable, and connect all signals as tip positive.
-
Page 29: Installation
2) Name all of your zones and inputs using the Matrio app immediately after installation so the DAX88 system is easy to use for those who did not do the installation. 3) Give your DAX88 a suitable custom name, especially if you are installing multiple units onto a single network. - Page 30 DAX88 unit on the current network. The app will say “DAX88 Demo” and function as it would if you had an actual DAX88 unit on the network. This mode can be launched if the device is not connected to Wi-Fi, or if the Matrio app does not find a DAX88 on the current Wi-Fi network.
-
Page 31: Matrio Tm - Mobile App Control
To see a list of all of the currently connected devices, and to switch between them, press the name of the current DAX88 or the three dots next to it as shown below. Selecting the correct device is necessary while in the zone control and settings menus. - Page 32 The Zone Control menu offers control over all possible settings for each particular zone of your DAX88. All zones of the currently selected DAX88 device will be found in a scrollable list. The settings include - power on/off, input selection, volume control, mute on/off.
- Page 33 Matrio - Mobile App Control Group Control The Group Control menu allows a user to send commands to many zones at once. This mode works as if you had a remote control that was pointed at all of the zones you select, and selecting the commands from the top of the screen is like pressing a button on that remote.
- Page 34 The Dayton Audio Matrio app offers many customization options to make your DAX88 easy to use for any user. As can be seen below, there are three options for customization. All custom names get stored on the DAX88 itself and retrieved by the...
-
Page 35: Wi-Fi Streaming
Android device as the streaming source. Make sure to set the appropriate zone of your DAX88 to Input 8 or ‘Wi-Fi’ before streaming. Your mobile device must be connected to the same wireless network as your DAX88 device before streaming. - Page 36 Google Play or iOS app store, and after launching the application you will see your DAX88 unit as an available device (as long as you are on the same network as your DAX88). Tap on your DAX88 and you will be given a list of steaming options as seen below.
- Page 37 3) With the wide range of inputs on the DAX88 and the ability to easily switch between them, external streaming devices such as smart assistants and Dayton Audio Hi-Fly devices can be easily added to the DAX88.
-
Page 38: Factory Reset
4) Press the Factory Reset button, and then press reset when you are sure you want to reset your unit. 5) You will see a message that says your DAX88 has been reset. If you only had the single unit on your network, the app will close. If you have an additional unit on the network, the app will continue to work with the other unit. - Page 39 Factory Reset the app after Matrio is relaunched. If it does not, simply turn your DAX88 off and then back on again after waiting the three minutes. If your device was connected to your network using a Wi-Fi connection instead of a wired connection (NOT RECOMMENDED), it will need to be reconfigured to the Wi-Fi network (instructions can be found within this document.
-
Page 40: Dax88 Specifications
DAX88 Specifications RMS Power (All Channels Driven) @ 8 Ohms 75 Watts / Channel RMS Power (All Channels Driven) @ 4 Ohms 80 Watts / Channel RMS Power (All Channels Driven) @ 8 Ohms Bridge Mode 180 Watts / Channel S/N Ratio >87 dB... -
Page 41: Rs232 Serial Control
RS232 Serial Control The DAX88 can be controlled by many home and commercial automation systems through its RS-232 serial port. The RS-232 command list, command structure, and transmission specifications are detailed below. Baud Rate: 9600 Data Bits: 8 Stop Bits: 1... - Page 42 RS232 Serial Control VO:Volume control VO(00-38):Volume control TR:Treble control TR(00-24): Ranges from -12 to +12 Example: <01TR00 sets zone 1 treble to -12 <03TR12 sets zone 3 treble to 0 <05TR24 sets zone 5 treble to +12 BS:Bass control BS(00-24):Bass control. Ranges from -12 to +12 Example: <01BS00 sets zone 1 bass to -12 <03BS12 sets zone 3 bass to 0 <05BS24 sets zone 5 bass to +12...
- Page 43 RS232 Serial Control Ask Status command structure ?xx'CR' xx: Indicates the control object code 01 : Zone1 02 : Zone2 03 : Zone3 04 : Zone4 05 : Zone5 06 : Zone6 07 : Zone7 08 : Zone8 ....Reply command: >xxaabbccddeeffgghhiijj'CR' aa:PA Control Status bb:Power Control Status cc:Mute Control Status...
-
Page 44: Troubleshooting
5) Try using the Matrio app on a different mobile device to see if your current mobile device is causing the issue. 6) Reset the DAX88 by turning the device off and then on again after a few moments. The Matrio app frequently says it cannot find my DAX88 unit on my network, but sometimes it connects and works fine. - Page 45 Troubleshooting 3) If you have multiple DAX88 units, make sure they are ALL hardwired to your network. 4) Your mobile device has issues with its Wi-Fi antenna. You can test this by trying a different mobile device with the Matrio app in the same location.
- Page 46 My DAX88’s Wi-Fi is password protected, but it is not configured to my network. The easiest way to solve this issue is to move the DAX88 to a location where it can be directly connected to your network with an ethernet cable. Once this connection is made, the DAX88 unit can be factory reset through the Matrio app.
- Page 47 1) Apple AirPlay is only supported on Apple devices; AirPlay will not work on an Android or Windows device. 2) Your iPhone, iPad, or Mac is not connected to the same network as your DAX88, or Wi-Fi on your Apple device needs turned on.
- Page 48 Troubleshooting I need to make changes to the settings of my DAX88, but I do not have a wireless network. It is possible to control your DAX88 unit with the Matrio app without a wireless network, which can be useful if internet connection is lost or not enabled yet. Simply...
- Page 49 Your DAX88 will protect itself. It will appear to be working properly in this scenario, but you will not get any sound from the amplifier. To fix this, simply turn off the DAX88, disconnect power from the DAX88, and change the DAX88 to 115V voltage mode. After restoring power and switching the DAX88 back on, it will work normally.
- Page 50 Troubleshooting Noise / Hum 1) Cables routed near AC line cables and/or transformers can have noise induced into them. 2) Speaker wires run next to AC wires for long distances can have noise induced into them. 3) Electronically noisy devices (motors, etc.) are operating on same circuit or nearby. 4) Poor equipment ground.
- Page 51 DAX88 Manual v1.3 Last Revised: 9/10/2020...
Need help?
Do you have a question about the DAX88 and is the answer not in the manual?
Questions and answers