YESWELDER MIG-205DS - MULTI-PROCESS WELDER Manual
- Operator's manual (28 pages)
Advertisement
- 1 SAFETY
- 2 INSTALLATION
- 3 ACCESSORIES
- 4 DESCRIPTION
-
5
OPERATION
- 5.1 Performance Data Plate And Duty Cycle
- 5.2 Internal Thermal Protection
- 5.3 Welding Preparation
- 5.4 Welding Wire Selection
- 5.5 Gas Selection
- 5.6 Setup for MIG (GMAW) & Flux-Cored Wire (FCAW) Welding
- 5.7 Setup for Aluminum Welding with Spool Gun
- 5.8 Setup For Aluminum Welding With MIG Gun With Graphene Liner
- 5.9 Setup for Stick Welding (SMAW)
- 5.10 Setup for TIG Welding (GTAW) with Lift Arc
- 6 MAINTENANCE & SERVICING
- 7 TROUBLESHOOTING
- 8 WIRING DIAGRAM
- 9 Documents / Resources
SAFETY
PLEASE EXAMINE THE PACKING BOX AND EQUIPMENT FOR DAMAGE IMMEDIATELY
When this equipment is shipped, the title passes to the purchaser upon receipt by the carrier. Consequently, claims for material damaged in shipment must be filed by the purchaser against the transportation company when the shipment is received.
SAFETY DEPENDS ON YOU
YESWELDER arc welding and cutting equipment are designed and built with safety. However, your overall safety can be increased by proper installation and thoughtful operation on your part. DO NOT INSTALL, OPERATE OR REPAIR THIS EQUIPMENT WITHOUT READING THIS MANUAL AND THE SAFETY PRECAUTIONS CONTAINED THROUGHOUT. And most importantly, think before you act and be careful.

This statement appears where the information must be followed precisely to avoid serious personal injury or loss of life.

This statement appears where the information must be followed to avoid minor personal injury or damage to this equipment.
KEEP YOUR HEAD OUT OF THE FUMES.
DON'T get too close to the arc. Use corrective lenses if necessary to stay a reasonable distance from the arc.
READ and obey the Safety Data Sheet (SDS) and the warning label on all welding materials containers.
USE ENOUGH VENTILATION or exhaust at the arc, or both, to keep the fumes and gases from your breathing zone and the general area.
IN A LARGE ROOM OR OUTDOORS, natural ventilation may be adequate if you keep your head out of the fumes (See below).
USE NATURAL DRAFTS or fans to keep the fumes away from your face.

If you develop unusual symptoms, see your supervisor. Perhaps the welding atmosphere and ventilation system should be checked.
WEAR CORRECT EYE, EAR & BODY PROTECTION
PROTECT your eyes and face with welding helmet properly fitted and with proper grade of filter plate (See ANSI Z49.1).
PROTECT your body from welding spatter and arc flash with protective clothing including woolen clothing, flame-proof apron and gloves, leather leggings, and high boots.
PROTECT others from spatter, flash, and glare with protective screens or barriers.
IN SOME AREAS, protection from noise may be appropriate.

BE SURE protective equipment is in good condition. Also, wear safety glasses in work area AT ALL TIMES.

SPECIAL SITUATIONS
DO NOT WELD OR CUT containers or materials which previously had been in contact with hazardous substances unless they are properly cleaned.
DO NOT WELD OR CUT painted or plated parts unless special precautions with ventilation have been taken. They can release highly toxic fumes or gases.
Additional precautionary measures:
PROTECT compressed gas cylinders from excessive heat, mechanical shocks, and arcs; fasten cylinders so they cannot fall.
BE SURE cylinders are never grounded or part of an electrical circuit.
REMOVE all potential fire hazards from welding area.
ALWAYS HAVE FIRE FIGHTING EQUIPMENT READY FOR IMMEDIATE USE AND KNOW HOW TO USE IT.
![]()
CALIFORNIA PROPOSITION 65 WARNINGS
Breathing diesel engine exhaust exposes you to chemicals known to the State of California to cause cancer and birth defects, other reproductive harm.
- Always start and operate the engine in a well-ventilated area.
- If in an exposed area, vent the exhaust to the outside.
- Do not modify or tamper with the exhaust system.
- Do not idle the engine except as necessary.
For more information go to www.P65warnings.ca.gov/diesel
ARC WELDING CAN BE HAZARDOUS. PROTECT YOURSELF AND OTHERS FROM POSSIBLE SERIOUS INJURY OR DEATH. KEEP CHILDREN AWAY. PACEMAKER WEARERS SHOULD CONSULT WITH THEIR DOCTOR BEFORE OPERATING.
Read and understand the following safety highlights. For additional safety information, it is strongly recommended you download free PDF of Standard ANSI Z49.1 from the American Welding Society.
https://www.aws.org/library/doclib/AWS-Z49-2021.pdf
BE SURE THAT ALL INSTALLATION, OPERATION, MAINTENANCE AND REPAIR PROCEDURES ARE PERFORMED ONLY BY QUALIFIED INDIVIDUALS.
![warning]() FOR ENGINE POWERED EQUIPMENT
FOR ENGINE POWERED EQUIPMENT - Turn the engine off before troubleshooting and maintenance work unless the maintenance work requires it to be running.
- Operate engines in open, well-ventilated areas or vent the engine exhaust fumes outdoors.
![]()
- Do not add the fuel near an open flame welding arc or when the engine is running. Stop the engine and allow it to cool before refueling to prevent spilled fuel from vaporizing on contact with hot engine parts and igniting. Do not spill fuel when filling tank.
If fuel is spilled, wipe it up and do not start engine until fumes have been eliminated.
![]()
- Keep all equipment safety guards, covers and devices in position and in good repair. Keep hands, hair, clothing and tools away from Vbelts, gears, fans and all other moving parts when starting, operating or repairing equipment.
![]()
- In some cases it may be necessary to remove safety guards to perform required maintenance. Remove guards only when necessary and replace them when the maintenance requiring their removal is complete. Always use the greatest care when working near moving parts.
- Do not put your hands near the engine fan. Do not attempt to override the governor or idler by pushing on the throttle control rods while the engine is running.
- To prevent accidentally starting gasoline engines while turning the engine or welding generator during maintenance work, disconnect the spark plug wires, distributor cap or magneto wire as appropriate.
- To avoid scalding, do not remove the radiator pressure cap when the engine is hot.
![]()
![warning]() ELECTRIC AND MAGNETIC FIELDS MAY BE DANGEROUS
ELECTRIC AND MAGNETIC FIELDS MAY BE DANGEROUS
![]()
- Electric current flowing through any conductor causes localized Electric and Magnetic Fields (EMF). Welding current creates EMF fields around welding cables and welding machines
- EMF fields may interfere with some pacemakers, and welders having a pacemaker should consult their physician before welding.
- Exposure to EMF fields in welding may have other health effects which are now not known.
- All welders should use the following procedures in order to minimize exposure to EMF fields from the welding circuit:
- Route the electrode and work cables together - Secure them with tape when possible.
- Never coil the electrode lead around your body.
- Do not place your body between the electrode and workcables. If the electrode cable is on your right side, the work cable should also be on your right side.
- Connect the work cable to the workpiece as close as possible to the area being welded.
- Do not work next to welding power source.
![shock hazard]() ELECTRIC SHOCK CAN KILL.
ELECTRIC SHOCK CAN KILL.
![]()
- The electrode and work (or ground) circuits are electrically "hot" when the welder is on. Do not touch these "hot" parts with your bare skin or wet clothing.
Wear dry, hole-free gloves to insulate hands. - Insulate yourself from work and ground using dry insulation. Make certain the insulation is large enough to cover your full area of physical contact with work and ground.
In addition to the normal safety precautions, if welding must be performed under electrically hazardous conditions (in damp locations or while wearing wet clothing; on metal structures such as floors, gratings or scaffolds; when in cramped positions such as sitting, kneeling or lying, if there is a high risk of unavoidable or accidental contact with the workpiece or ground) use the following equipment:- Semiautomatic DC Constant Voltage (Wire) Welder.
- DC Manual (Stick) Welder.
- AC Welder with Reduced Voltage Control.
- In semiautomatic or automatic wire welding, the electrode, electrode reel, welding head, nozzle or semiautomatic welding gun are also electrically "hot".
- Always be sure the work cable makes a good electrical connection with the metal being welded. The connection should be as close as possible to the area being welded.
- Ground the work or metal to be welded to a good electrical (earth) ground.
- Maintain the electrode stinger, work clamp, welding cable and welding machine in good, safe operating condition. Replace damaged insulation.
- Never dip the electrode in water for cooling.
- Never simultaneously touch electrically "hot" parts of electrode stingers connected to two welders because voltage between the two can be the total of the open circuit voltage of both welders.
![shock hazard]() When working above floor level, use a safety belt to protect yourself from a fall should you get a shock.
When working above floor level, use a safety belt to protect yourself from a fall should you get a shock.- Also see Items 6.c. and 8.
- The electrode and work (or ground) circuits are electrically "hot" when the welder is on. Do not touch these "hot" parts with your bare skin or wet clothing.
![]()
ARC RAYS CAN BURN.
![]()
- Use a shield with the proper filter and cover plates to protect your eyes from sparks and the rays of the arc when welding or observing open arc welding. Head shield and filter lens should conform to ANSI Z87. I standards.
- Use suitable clothing made from durable flame-resistant material to protect your skin and that of your helpers from the arc rays.
- Protect other nearby personnel with suitable, nonflammable screening and/or warn them not to watch the arc nor expose themselves to the arc rays or to hot spatter or metal.
![warning]() FUMES AND GASES CAN BE DANGEROUS.
FUMES AND GASES CAN BE DANGEROUS.
![]()
- Welding may produce fumes and gases hazardous to health. Avoid breathing these fumes and gases. When welding, keep your head out of the fume. Use enough ventilation and/or exhaust at the arc to keep fumes and gases away from the breathing zone.When welding hardfacing (see instructions on container or SDS) or on lead or cadmium plated steel and other metals or coatings which produce highly toxic fumes, keep exposure as low as possible and within applicable OSHA PEL and ACGIH TLV limits using local exhaust or mechanical ventilation unless exposure assessments indicate otherwise. In confined spaces or in some circumstances, outdoors, a respirator may also be required. Additional precautions are also required when welding on galvanized steel.
- The operation of welding fume control equipment is affected by various factors including proper use and positioning of the equipment, maintenance of the equipment and the specific welding procedure and application involved. Worker exposure level should be checked upon installation and periodically thereafter to be certain it is within applicable OSHA PEL and ACGIH TLV limits.
- Do not weld in locations near chlorinated hydrocarbon vapors coming from degreasing, cleaning or spraying operations. The heat and rays of the arc can react with solvent vapors to form phosgene, a highly toxic gas, and other irritating products.
- Shielding gases used for arc welding can displace air and cause injury or death. Always use enough ventilation, especially in confined areas, to insure breathing air is safe.
- Read and understand the manufacturer's instructions for this equipment and the consumables to be used, including the Safety Data Sheet (SDS) and follow your employer's safety practices. SDS forms are available from your welding distributor or from the manufacturer.
- Also see item 1.b.
![warning]()
![burn hazard]()
WELDING AND CUTTING SPARKS CAN CAUSE FIRE OR EXPLOSION.
![]()
![burn hazard]() Remove fire hazards from the welding area. If this is not possible, cover them to prevent the welding sparks from starting a fire. Remember that welding sparks and hot materials from welding can easily go through small cracks and openings to adjacent areas. Avoid welding near hydraulic lines. Have a fire extinguisher readily available.
Remove fire hazards from the welding area. If this is not possible, cover them to prevent the welding sparks from starting a fire. Remember that welding sparks and hot materials from welding can easily go through small cracks and openings to adjacent areas. Avoid welding near hydraulic lines. Have a fire extinguisher readily available.- Where compressed gases are to be used at the job site, special precautions should be used to prevent hazardous situations. Refer to "Safety in Welding and Cutting" (ANSI Standard Z49.1) and the operating information for the equipment being used.
![]()
When not welding, make certain no part of the electrode circuit is touching the work or ground. Accidental contact can cause overheating and create a fire hazard.- Do not heat, cut or weld tanks, drums or containers until the proper steps have been taken to insure that such procedures will not cause flammable or toxic vapors from substances inside. They can cause an explosion even though they have been "cleaned". For information, purchase "Recommended Safe Practices for the Preparation for Welding and Cutting of Containers and Piping That Have Held Hazardous Substances", AWS F4.1 from the American Welding Society (see address above).
- Vent hollow castings or containers before heating, cutting or welding. They may explode.
- Sparks and spatter are thrown from the welding arc. Wear oil free protective garments such as leather gloves, heavy shirt, cuffless trousers, high shoes and a cap over your hair. Wear ear plugs when welding out of position or in confined places. Always wear safety glasses with side shields when in a welding area.
![]()
Connect the work cable to the work as close to the welding area as practical. Work cables connected to the building framework or other locations away from the welding area increase the possibility of the welding current passing through lifting chains, crane cables or other alternate circuits. This can create fire hazards or overheat lifting chains or cables until they fail.- Also see item 1.c.
- Read and follow NFPA 51B "Standard for Fire Prevention During Welding, Cutting and Other Hot Work", available from NFPA, 1 Batterymarch Park, PO box 9101, Quincy, MA 022690-9101.
- Do not use a welding power source for pipe thawing.
- CYLINDER MAY EXPLODE IF DAMAGED.
![]()
- Use only compressed gas cylinders containing the correct shielding gas for the process used and properly operating regulators designed for the gas and pressure used. All hoses, fittings, etc. should be suitable for the application and maintained in good condition.
- Always keep cylinders in an upright position securely chained to an undercarriage or fixed support.
- Cylinders should be located:
- Away from areas where they may be struck or subjected to physical damage.
- A safe distance from arc welding or cutting operations and any other source of heat, sparks, or flame.
- Never allow the electrode, electrode stinger or any other electrically "hot" parts to touch a cylinder.
- Keep your head and face away from the cylinder valve outlet when opening the cylinder valve.
- Valve protection caps should always be in place and hand tight except when the cylinder is in use or connected for use.
- Read and follow the instructions on compressed gas cylinders, associated equipment, and CGA publication P-l, "Precautions for Safe Handling of Compressed Gases in Cylinders," available from the Compressed Gas Association, 14501 George Carter Way Chantilly, VA 20151.
![warning]() FOR ELECTRICALLY POWERED EQUIPMENT.
FOR ELECTRICALLY POWERED EQUIPMENT.
![]()
- Turn off the power using the disconnect switch at the fuse box before working on the equipment.
- Install equipment in accordance with the U.S. National Electrical Code, all local codes and the manufacturer's recommendations.
- Ground the equipment following the U.S. National Electrical Code and the manufacturer's recommendations.


INSTALLATION
TECHNICAL SPECIFICATIONS
| MIG-205DS | ||||||
| INPUT-SINGLE PHASE ONLY | ||||||
| Standard Voltage/Frequency | Input Current | |||||
| 220V±10% 50/60Hz | I1 max=34A, I1 eff=26.3A | |||||
| 110V±10% 50/60Hz | I1 max=43A, I1 eff=33.2A | |||||
| RATED OUTPUT-DC ONLY | ||||||
| Voltage | Mode | Duty Cycle | Current | Volts at Rated Current | ||
| 220V | GMAW | 60% | 205A | 24.2V | ||
| 100% | 158A | 21.9V | ||||
| SMAW | 60% | 180A | 27.2V | |||
| 100% | 139A | 25.5V | ||||
| GTAW | 60% | 205A | 18.2V | |||
| 100% | 158A | 16.3V | ||||
| 110V | GMAW | 60% | 160A | 22V | ||
| 100% | 123A | 20.1V | ||||
| SMAW | 60% | 145A | 25.8V | |||
| 100% | 112A | 24.5V | ||||
| GTAW | 60% | 160A | 16.4V | |||
| 100% | 123A | 14.9V | ||||
| OUTPUT RANGE | ||||||
| Voltage | Mode | Open Circuit Voltage | Welding Current Range | Welding Voltage Range | ||
| 220V | GMAW | 65V | 30A~205A | 15.5V~24.2V 20.8V~27.2V 10.8V~18.2V | ||
| SMAW | 20A~180A | |||||
| GTAW | 20A~205A | |||||
| 110V | GMAW | 30A~160A | 15.5V~22V | |||
| SMAW | 20A~145A | 20.8V~25.8V 10.8V~16.4V | ||||
| GTAW | 20A~160A | |||||
| OTHER PARAMETERS | ||||||
| Machine | Power Factor Efficiency Protection Class Insulation Class | |||||
| MIG-205DS | 1 | ≥80% | IP21S | F | ||
| PACKING DIMENSIONS | ||||||
| Machine | Length | Width | Height | Weight | ||
| MIG-205DS | 510mm | 330mm | 395mm | 16Kg | ||
| TEMPERATURE RANGE | ||||||
| Operating Temperature Range | Storage Temperature Range | |||||
| -10°C~+40°C(14°F~104°F) | -25°C~+55°C(-13°F~131°F) | |||||
INSTALLATION

ELECTRIC SHOCK can kill.

- Only qualified personnel should perform this installation.
- Only personnel that have read and understood the MIG205DS Operator's Manual should install and operate this equipment.
- Machine muse be plugged into a receptacle which is grounded per any national, local or other applicable electrical codes.
- The MIG205DS power switch is to be in the OFF("O") position when installing work cable and gun and when connecting power cord to input power.
SELECT SUITABLE LOCATION
Locate the MIG205DS in a dry location where there is free circulation of clean air into the louvers in the back and out the front of the unit. A location that minimizes the chance of dirt accumulation that can block air passages and cause overheating.
STACKING
MIG205DS cannot be stacked.
TILTING
Each machine must be placed on a secure, level surface, directly or on recommended cart. The machine may topple over if this procedure is not followed.
ACCESSORIES

- Welder
- Work Clamp
- Electrode Stringer
- Knurl Groove
Drive Roller: .023"/.0
30" (.030" &.035" on the machine) - W Knurl Groove
Drive Roller: .030" &.035" - U Knurl Groove Drive
Roller: .035" &.045" - 220V~110V Adapter
- MIG Gun
- Graphene Feeding Liner
- MIG Gun Tips X 4
- Gas Hose
- Manual
DESCRIPTION
SAFETY PRECAUTIONS
Read entire operation section before operating the WIRE FEEDER WELDER.
 ELECTRIC SHOCK can kill.
- Do not touch electrically live parts such as output terminals or internal wiring.
![]()
- Insulate yourself from the work and ground.
- Always wear dry insulating gloves.

FUMES AND GASES can be dangerous.
- Keep your head out of fumes.
- Use ventilation or exhaust to remove fumes from breathing zone.
![]()

 WELDING SPARKS can cause fire or explosion
- Keep flammable material away.
![]()
- Do not weld on closed containers.


ARC RAYS can burn eyes and skin.
- Wear eye, ear and body protection.
![]()

Observe all safety information throughout this manual.
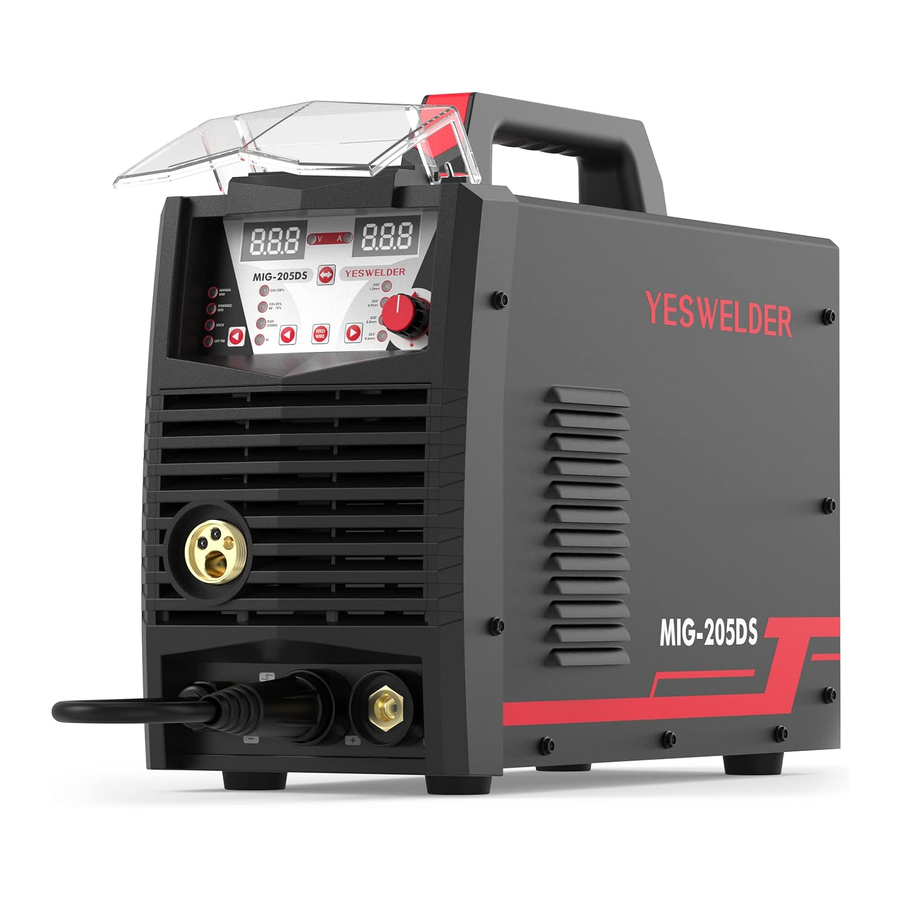
PRODUCT DESCRIPTION
(PRODUCT CAPABILITIES)
This small portable wire feed welder is capable of MIG(GMAW/ flux-cored (FCAW) welding on steel, mild steel, stainless steel. The wire feed welder is also capable of STICK welding (SMAW) and DC lift TIG welding (GTAW).
MIG welding stands for Metal Inert Gas welding and requires a shielding gas to protect the weld until it cools. Appropriate shielding gas based on the type of material you are welding can be purchased separately from your local welding gas distributor. MIG welding is ideal for welding on thinner and clean materials when a very clean excellent cosmetic looking weld is required. Anexample would be automotive body panels.
Self Shielding Flux-cored Welding does not require a separate shielding gas to protect the weld since the welding wire has special additives known as flux to protect the weld until it cools. Flux-cored welding is ideal for medium to thicker material and if welding on painted or rusty steel. Flux-cored welding is also ideal in outdoor applications where windy conditions might blow the MIG shielding gas away from the weld. Flux-cored welding produces a good looking weld but does not produce an excellent weld appearance as MIG welding does.
This machine does not have a built in Gas Solenoid so a one piece gas valve TIG Torch is required, The gas valve must be opened manually before welding and closed manually when welding is completed. The arc is activated using a lift arc technique.
COMMON WELDING ABBREVIATIONS
GMAW(MIG)
- Gas Metal Arc Welding
FCAW(INNERSHIELD OR OUTERSHIELD)
- Flux Core Arc Welding
SMAW(STICK)
- Stick Arc Welding
GTAW(TIG)
- Lift TIG Arc Welding
Controls and Settings

- Adjustment knob:
- Press and select welding parameters;
- Rotate and adjust the values.
- Process Selection Button: Allows the user to toggle between processes Synergic MIG/Manual MIG/Lift TIG/Stick.
- Material Selector: CO2 100%/CO2 25% Argon 75%/Flux Cored/AL.
- Wire Feed Button: Press the Wire Feed button to feed the wire through the gun assembly.
- Wire Diameter Selector Button: .023" 0.6mm/.030" 0.8mm/.035" 0.9mm/.045" 1.2mm.
- Selector Button: Permits selecting Output Current, Output Voltage, Welding Speed.

- Gun Connection (Euro Connect): Permits attachment of a MIG welding gun. Ensure the gun is fully seated into the brass receptacle.
- Wire Drive Polarity Lead: Permits configuring the wire drive to positive or negative polarity by inserting into the positive or negative receptacle. Ensure connector is tightly locked into place by rotating clockwise.
- Spool Gun Trigger Connector Receptacle: Plug the 2 pin gun trigger connector into this receptacle.
- Positive Output Receptacle: Permits attaching a work lead, electrode stinger or the center wire drive polarity lead to DC positive polarity. Rotate clockwise to lock into place.
- Negative Output Receptacle: Permits attaching a work lead, electrode stinger, or the center wire drive polarity lead to DC negative polarity. Rotate connector clockwise to lock into place.
- Power Switch: Turns power on and off to the machine.
- Gas Inlet: Shielding gas connects to this inlet, gas fitting: 5/8"~18 RH.
- Input Power Cable.
- Fan.

- Wire Spool Spindle and Brake: Holds a 4 inch diameter spool. Use the 2 inch I.D. spindle adapter included with the machine to use 8 inch diameter spools. The Wing Nut sets the brake friction to prevent the spool from over rotating when the trigger is released.
- Wire Drive & Components: Feeds wire from the wire spool through the drive and through the welding gun to the weld.
- Spool Gun/Standard Selector Switch: Pre-Installed switch permits either spool gun welding with the YesWelder LBT150 or standard spool guns with European connection.
Installing The MIG Gun Assembly
- Attach the standard MIG welding gun to the EURO CONNECT on the front of the welder.
Gas Cylinder And Regulator Connection
The gas cylinder (not supplied) should be located near the rear of the welder, in a well-ventilated area and securely fixed to the work bench or to the wall to ensure that it will not fall.
For safety and economy, ensure that the regulator is fully closed (turned counter-clockwise) when not welding and when fitting or removing the gas cylinder.
- Turn the regulator adjustment knob counter-clockwise to ensure the valve is fully closed.
- Screw the gas regulator down on the gas bottle valve and tighten.
- Connect the gas hose to the regulator, securing with the clip/nut provided.
- Connect the other end to the GAS Inlet (13) on the back of the machine.
- Open the cylinder valve, then set the gas flow to approximately 20~35 CFH (cubic ft. per hour) on the regulator.
- For MIG welding: Depress the gun trigger to ensure that the gas is flowing through the gun.
Cylinders are highly pressurized. Handle with care. Serious accidents can result from improper handling or misuse of compressed gas cylinders. Do not drop the cylinder, knock it over, expose it to excessive heat, flames or sparks. Do not strike it against other cylinders or strike an arc on it.
Installing The Welding Wire
 ENSURE GAS AND ELECTRICAL SUPPLIES ARE DISCONNECTED. Before proceeding, remove the nozzle and the contact tip from the gun.
ELECTRIC SHOCK CAN KILL! Always turn the ON/OFF SWITCH to the OFF position and unplug the welder's INPUT POWER CABLE from the AC power source before installing wire. When the gun trigger is depressed, the drive rolls, spool of wire, wire being fed, and electrode are all electrically live (hot).

Installing 4-Inch Spool
(See Figure For Part Identification):
- Open the access panel.
- Unscrew and remove the wire spool retention cap used for 8-inch spools (A) and store it someplace safe.
- Remove the spindle adapter for 8-inch spools (B) and store it someplace safe.
- Remove the nut (C), spring (D), and washers (E).
- Remove the outer wrapping from the included spool of wire and then find the leading end of the wire (it goes through a hole in the outer edge of the spool and is bent over the spool edge to prevent the wire from unspooling) but do not unhook it yet.
- Place the spool on the WIRE SPOOL SPINDLE in such a manner that when the wire comes off the spool. The wire should unspool from the bottom, and the spool will rotate in a counterclockwise fashion.
- Place the washer, wire spool locking bushing, spring, and nut back in place.
- Proceed to "FEEDING WIRE THROUGH THE MIG GUN" instructions below.
Installing 8-Inch Spool
(See Figure For Part Identification):
- Open the access panel.
- Unscrew and remove the wire spool retention cap (A).
NOTE: If the wire spool retention cap and the spindle adapter for 8-inch spools (B) are not present (machine was last used with a 4-inch spool) put the spindle adapter for 8-inch spools back in place. - Make sure all of the components used for a 4-inch spool are still in place. They are necessary for 8-inch spools as well (nut (C), spring (D), and washers (E)).
- Remove the outer wrapping from the spool of wire and then find the leading end of the wire (it goes through a hole in the outer edge of the spool and is bent over the spool edge to prevent the wire from unspooling) but do not unhook it yet.
- Place the spool on the spindle adapter for 8-inch spools in such a manner that when the wire comes off the spool. The wire should unspool from the bottom, and the spool will rotate in a counter-clockwise fashion.
NOTE: Be sure the alignment pin near the base of the spindle adapter for 8-inch spools is inserted in the corresponding hole on the spool. - Thread the wire spool retention cap back in place.
Feeding Wire Through The Mig Gun
- Unhook the wire and hold the wire end and the spool in one hand. With the other hand tighten the nut (C) just enough so that when the spool is released it does not spin freely and uncoil the wire. Tightening the nut too much may cause inconsistent wire feeding. Leaving it too loose will allow the wire to uncoil freely from the spool, leaving a mess of wire in the cabinet.
- While holding the wire in place, use a wire cutter to cut the bent end of the wire so that only a straight end remains.
- Continue to hold the wire end in one hand and release the drive roller pressure arm (I) by pulling the pressure arm adjustment knob (G) toward you. Hold the drive roller pressure arm up off of the drive roller and insert the leading end of the wire into the inlet guide tube (H). Push the wire across the drive roller (J) and into the gun assembly approximately six inches.
- Line the wire up in the inner groove of the drive roller and allow the drive pressure arm to drop onto the drive roller. Pull the pressure arm adjustment knob back over the pressure arm and tighten (turn clockwise) the pressure adjusting knob until the pressure roller is applying enough force on the wire to prevent it from slipping out of the drive assembly.
NOTE: Too much pressure will cause wire to feeding problems and may burn out the wire feed motor. - Let go of the wire.
- Remove the nozzle (K) and contact tip (L) from the end of the gun assembly (M).
- Plug the welder's INPUT POWER CABLE into the AC power source. Adjust the settings on the front panel per the setup chart on the inside panel door of the welding machine according to the size of the wire and workpiece.
- Pull the trigger on the MIG gun to feed the wire through the gun assembly. Check if the drive roller is slipping on the wire and increase pressure on the pressure arm adjustment knob if necessary.
- When at least an inch of wire sticks out past the end of the gun, release the trigger.
- Slide the contact tip (L) over the wire protruding from the end of the gun (M). Screw the contact tip into the end of the gun and hand tighten securely.
- Install the nozzle (K) on the gun assembly.
- Cut off the excess wire that extends past the end of the nozzle.
- Fine tune the wire drive pressure with the pressure arm adjustment knob (G).
- Turn the wire drive pressure adjustment knob clockwise, increasing the drive pressure until the wire seems to feed smoothly without slipping.
NOTE: If TOO MUCH pressure is applied you can crush the wire and create wire feeding problems. If TOO LITTLE pressure is applied, the wire will slip on the drive rolls and wire will not feed. - When the drive pressure is set correctly, there should be no slippage between the wire and the drive roller. But if an obstruc-tion occurs along the wire feed path, the wire should then slip on the drive roller. This can be checked by squeezing the wire between two fingers with moderate force as it comes out of the gun. If this stops the wire from feeding, increase pressure until the wire feeds through your fingers without issue.
- Turn the wire drive pressure adjustment knob clockwise, increasing the drive pressure until the wire seems to feed smoothly without slipping.
- Double check your spool tension: After feeding the wire and releasing the trigger, the wire coming off the spool should not remain under tension (in a straight line from the spool to the WIRE FEEDER). It should relax a little bit and take on some of the curvature the coiled wire naturally reverts to. It should also not relax so much that the wire begins to loosen on the spool.


KEEP THE GUN STRAIGHT. WHEN FEEDING A NEW WIRE THROUGH THE LINER, MAKE SURE THE WIRE IS CUT CLEANLY (NO BURRS OR ANGLES) AND THAT AT LEAST 1" FROM THE END IS STRAIGHT (NO CURVES). FAILURE TO FOLLOW THESE INSTRUCTIONS COULD CAUSE DAMAGE TO THE LINER.
WHEN CHECKING THE CORRECT EXIT OF THE WIRE FROM THE GUN DO NOT BRING YOUR FACE NEAR THE GUN. YOU MAY RUN THE RISK OF BEING WOUNDED BY THE OUTGOING WIRE. DO NOT BRING YOUR FINGERS CLOSE TO THE FEEDING MECHANISM WHEN WORKING! THE ROLLS, WHEN MOVING, MAY CRUSH FINGERS. PERIODICALLY CHECK THE ROLLS. REPLACE THEM WHEN THEY ARE WORN AND COMPROMISE THE REGULAR FEEDING OF THE WIRE.
OPERATION
Performance Data Plate And Duty Cycle
On the machine, there is a plate that includes all the operating specifications for your new unit.
The duty cycle rating of a welder defines how long the operator can weld and how long the welder must rest and be cooled. Duty cycle is expressed as a percentage of 10 minutes and represents the maximum welding time allowed. The balance of the 10-minute cycle is required for cooling.
For example, a welder has a duty cycle rating of 30% at the rated output of 90A. This means with that machine, you can weld at 90 A output for three (3) minutes out of 10 with the remaining seven (7) minutes required for cooling.
The duty cycle of your new welder can be found on the data plate affixed to the machine. It looks like the diagram below. Referring to the sample below, the "X" row lists duty cycle percentages while the "I2" row lists the amp draw corresponding to the duty cycle. Various duty cycles at other amperages are listed on your data plate.

Internal Thermal Protection
If you exceed the duty cycle of the welder, the thermal protection system will engage, shutting off all welder output. After cooling, the thermal protector will automatically reset and the welding functions can resume. This is normal and automatic behavior of the machine, and does not require any user action. However, you should wait at least ten minutes after the thermal protector engages before resuming welding. You must do this even if the thermal protector resets itself before the ten minutes is up or you may experience less than specified duty cycle performance.
DO NOT REGULARLY EXCEED THE DUTY CYCLE OR DAMAGE TO THE WELDER CAN RESULT.
Welding Preparation
An important factor in making a satisfactory weld is preparation. This includes studying the process and equipment and practicing welding before attempting to weld finished product. An organized, safe, ergonomic, comfortable, and well-lit work area should be prepared for the operator. The work area should specifically be free of all flammables with both a fire extinguisher and a bucket of sand available to smother potential fires that may occur.
To properly prepare for welding with your new welder, it is necessary to:
- Read the safety precautions at the front of this manual.
- Prepare an organized, well-lit work area.
- Provide protection for the eyes and skin of the operator and bystanders.
- Attach the work clamp to the bare metal to be welded, making sure of good contact.
- When MIG, MAG, Aluminum Welding or Flux-Cored Arc Welding, make sure that the wire-roller groove in the roller corresponds to the diameter and type of wire being used.
- Plug the machine into a suitable outlet, recommend NEMA5-50.
- Completely open the gas cylinder valve. Adjust the gas pressure regulator to the correct flow rate. (Not applicable to Stick "SMAW" process).
EXPOSURE TO A WELDING ARC IS EXTREMELY HARMFUL TO THE EYES AND SKIN. PROLONGED EXPOSURE TO A WELDING ARC CAN CAUSE BLINDNESS AND BURNS. NEVER STRIKE AN ARC OR BEGIN WELDING UNLESS YOU ARE ADEQUATELY PROTECTED. WEAR FIRE RESISTANT WELDING GLOVES, HEAVY LONG SLEEVED SHIRT, CUFFLESS PANTS; HIGH TOPPED SHOES AND A WELDING HELMET.
![]()
Welding Wire Selection
This welder can work with solid steel wire from.023"~.035" (0.6~0.9mm) diameter (MIG welding, "GMAW") and with.023"~.035" (0.6~0.9mm) diameter flux-cored wire (flux-cored wire welding, "FCAW").
Gas Selection
Select the appropriate shielding gas in accordance to material being welded and wire being used. The table below can give you some useful indications:
| METAL | GAS | NOTE |
| Carbon Steel | 100% CO2 75% Argon + 25% CO2 | Argon controls spatter |
| Stainless Steel | 98% Argon + 2% CO2 | |
| Aluminum | 100% Argon |
Setup for MIG (GMAW) & Flux-Cored Wire (FCAW) Welding
- Press the PROCESS SELECTOR BUTTON on the front panel.
- Connect the MIG gun into the EURO CONNECT SOCKET.
- Connect the Wire Drive Polarity Lead(10) to the appropriate DINSE SOCKET:
- Flux-cored wire welding (FCAW): Connected to NEGATIVE (-) DINSE SOCKET.
- MIG Welding (GMAW): Connected to POSITIVE (+) DINSE SOCKET.
- Connect the ground cable to the appropriate DINSE SOCKET:
- Flux-cored wire welding (FCAW): Ground cable to POSITIVE (+) DINSE SOCKET.
- MIG Welding (GMAW): Ground cable to NEGATIVE (-) DINSE SOCKET.
- Ensure the ground clamp has a good connection to the workpiece and is connected on clean, bare metal (not rusty or painted).
- Load the spool of wire inside the cabinet and feed it through the WIRE FEEDER into the gun (see "Installing the Welding Wire".
- Switch the unit ON with the ON/OFF SWITCH.
- Press the gun trigger or wire feed button (6) to load the wire through the gun.
- Set the welding parameters:
- Adjust the output current.
Press selector button (1) to select output current, adjust the current with adjustment knob, wire feed speed & arc voltage match automatically. - Press selector button (1) to select voltage modifying, adjust the voltage from -10~+10 with adjustment knob, modify voltage based on type of material and thickness being welded.
- Press selector button (1) to select inductance, adjust the inductance from -10~+10 with adjustment knob, The effects of the inductance can help reduce spatter, produce a "softer" arc and help wetting out. There is a wettingout/softness trade off against penetration/stiff/arc-force/dig qualities.
- Adjust the output current.
- (GMAW only) Turn on the gas cylinder, pull the trigger or press gas checking button to check for gas flow and adjust the flow rate.
- Bring the gun close to the workpiece and press the trigger.
![]()
Setup for Aluminum Welding with Spool Gun
- Install optional YesWelder LBT150 spool gun into Euro MIG torch connection socket on the front panel, and tighten it. Connect the Spool Gun control cable to the receptacle and tighten it.

When connecting the torch be sure to tighten the connection. A loose connection can result in the connector arcing and damaging the machine and gun connector. This damage is not covered under warranty.
- Plug the 2 pin gun trigger connector into the Spool Gun Trigger Connector Receptacle.
- Connect to Wire Drive Polarity Lead to the Positive (+) socket.
- Connect the Work Clamp into the Negative (-) socket.
- Connect the gas line to the regulator and connect to the gas cylinder with 100% Argon shielding Gas.
- Push the Cover Release clip on the spool gun to unlock the wire housing cover.
- Place the wire on the spool holder, taking care to put the parts back on correctly.
(Note: the tensioner part need to remove first and remember to fit back.) - Hold and snip the wire from the spool being sure to hold the wire to prevent rapid uncoiling.
- Feed the wire in the groove of the drive roller through the outlet guide tube into the torch neck. Make sure the wire being used complies with the size for the roller groove.
- Adjust spool holder tension and apply suitable pressure for the drive roller.
- Remove the gas nozzle and contact tip from the torch neck.
- Pull the trigger to drive the wire through the neck until it exits the contact tip holder.
- Fit the correct sized contact tip and feed the wire through it, screw the contact tip into the tip holder of the torch neck and nip it up tightly.
- Fit the gas nozzle to the torch head and close the wire spool cover.
- Turn the power source on and select the Manual MIG function with the Manual MIG/Synergic MIG/Lift TIG/Stick selector switch.
- Choose material Aluminum.
- Set gun selector toggle switch to Spool Gun position inside the wire feeding door.
- Turn on the gas cylinder valve and set the flow rate to between 20~30 CFH.
- Set the welding parameters and begin aluminum welding.
- Install the spool gun into Euro MIG torch connection socket and tighten it. Connect the Spool Gun trigger connector into the receptacle and tighten it.
![]()
- Push the Cover Release clip on the spool gun to unlock the wire housing cover.
![]()
- Place the wire on the spool holder, taking care to put the parts back on correctly. (Note: the tensioner part need to remove first and remember to fit back.)
![]()
- Feed the wire in the groove of the drive roller through the outlet guide tube into the torch neck. Make sure the wire used complies with the size for the roller groove.
![]()
- Adjust spool holder tension and apply suitable pressure for the drive roller.
![]()
- Remove the gas nozzle and contact tip from the torch neck.
![]()
- Fit the correct sized Aluminum contact tip and feed the wire through it, screw the contact tip into the tip holder of the torch neck and nip it up tightly.
![]()
- Turn the power source on and select the MIG function with the Manual MIG/Synergic MIG/Lift TIG/Stick selector switch.
![]()
- Set gun selector toggle switch to Spool Gun position inside the wire feeding door.
![]()


Setup For Aluminum Welding With MIG Gun With Graphene Liner
- Lay the gun straight on the ground and remove consumables on the front-end parts.
- Remove the liner retaining nut.
- Pull the steel wire feed liner out of the gun cable assembly.
- Unravel the graphene wire feed liner and feed the liner in short forward movements down the cable assembly all the way through and out the torch end. Avoid kinking the liner. Kinking the liner will damage it and require replacement.
- Place the tip holder over the end of the liner and, screw it into the torch neck, tighten it up. Reassemble the consumables with a special aluminum A+ contact tip, nozzle, and gas diffuser.
- Fit the O-ring, and liner retaining nut.
- Push the liner firmly into the torch lead and tighten the liner retaining nut.
- Disengage the drive roller.
- Use a screwdriver or other sharp object to push out outlet guide tube through the Euro connector.
- Loosen off the outlet guide tube retaining screw.
- Remove the outlet guide tube from the front-end euro connector using long nose pliers.
- Unscrew the inlet guide tube from the wire feeding mechanism.
- Feed the extended graphene liner section into the outlet guide tube hole of the machine Euro connector.
- Feed the extended graphene liner up and over the drive roller.
- Tighten the torch Euro connection to the machine Euro connector.
- Cut the extended liner with a sharp knife.
- Install the correct sized U Knurled Drive roller, and feed the correct diameter of aluminum welding wire.
- Remove the metal tube from the inlet guide tube.
- Cut a slightly longer tube based on the metal guide tube.
- Replace the inlet guide tube with the graphene liner and re-install the inlet guide to the wire feeding mechanism.
- Install the aluminum spool and feed the wire through.
- Set the welding parameters via Synergic MIG or Manual MIG.
- Remove the MIG torch consumables.
![]()
- Remove the liner retaining nut.
![]()
- Pull out the liner completely.
![]()
- Untie the new liner.
![]()
- Feed the liner in short forward movements down the cable assembly all the way through and out the torch end.
![]()
- Install a matched contact tip and other front-end accessories to the torch. It is ready for welding.
![]()
- Push the liner firmly into the torch lead and tighten retaining nut.
![]()
- Disengage the drive roller.
![]()
- Use a screwdriver or other sharp object to push out outlet guide tube through the Euro connector.
![]()
- Loosen the outlet guide tube screw.
![]()
- Remove the outlet guide tube from the front-end euro connector using long nose pliers.
![]()
- Unscrew the inlet guide tube from the wire feeding mechanism.
![]()
- Feed the extended graphene liner into the outlet guide tube hole of the machine Euro connector.
![]()
- Feed the extended graphene liner over the drive roller into the inlet guide tube part.
![]()
- Tighten the torch Euro connection to the Euro connector.
![]()
- Cut the extended liner with a sharp knife. The remaining part should be about 14ga~12ga away from the wire drive roller.
![]()
- Install the correct sized U Knurled Drive roller, and with the correct diameter knurl inside.
![]()
- Remove the metal tube from the inlet guide tube.
![]()
- Cut a slightly longer tube based on the metal guide tube.
![]()
- Replace the inlet guide tube with the graphene liner and re-install the inlet guide to the wire feeding mechanism.
![]()
- Install the aluminum spool and feed the wire through.
![]()


Setup for Stick Welding (SMAW)
Setup for Stick Welding (SMAW)
![]()
- Press the PROCESS SELECTOR BUTTON on the front panel
- Remove the Wire Drive Polarity Lead from the POSITIVE (+) and NEGATIVE (-) DINSE SOCKETS.
- Check the electrode packaging to determine the recommended polarity and connect the electrode holder and ground clamp to the POSITIVE (+) and NEGATIVE (-) DINSE SOCKETS accordingly.
- Ensure the ground clamp has a good connection to the workpiece and is connected on clean, bare metal (not rusty or painted).
- Switch the unit ON with the ON/OFF SWITCH.
- Set the amperage with the Adjustment Knob(7)
Setup for TIG Welding (GTAW) with Lift Arc
Setting up the Equipment for TIG Welding (GTAW):
Lanthanated Tungsten recommended for use.

TIG TORCH IS ALWAYS LIVE (ELECTRICALLY HOT). Use caution and ensure the TIG torch is not in contact with or near conductive or grounded materials.
- Switch the PROCESS SELECTOR BUTTON on the front panel.
- Remove the Wire Drive Polarity Lead from the POSITIVE (+) and NEGATIVE (-) DINSE SOCKETS.
- Connect the TIG torch cable to the NEGATIVE (-) DINSE SOCKET of the welder.
- Connect the ground cable connector to the POSITIVE (+) DINSE SOCKET of the welder.
- Ensure the ground clamp has a good connection to the workpiece and is connected on clean, bare metal (not rusty or painted).
- Connect the TIG torch gas line to the gas regulator (argon gas only).
USE INERT GAS (100% ARGON) ONLY.
TURN ON GAS AT THE GAS REGULATOR, CHECK FOR GAS FLOW AND ADJUST FLOW RATE AS NEEDED.
- Fix the tungsten electrode so that it protrudes approximately ¼ inch from the torch nozzle.
- Ensure the TIG torch is safely away from all conductive materials.
- Switch the unit ON with the ON/OFF SWITCH.
- Set the amperage with the Adjustment Knob(7).
- Initiate the weld arc with a lift arc technique. Simply touch the tungsten to the work piece and lift off. The machine will instantly ramp up the voltage and current to establish the arc without the use of high frequency.
![]()

REMEMBER TO CLOSE THE VALVE ON THE GAS CYLINDER IMMEDIATELY AFTER ALL WELDING IS COMPLETED.
Welding Tips:
- Always weld clean, dry and well-prepared material.
- Hold torch at a 45° angle to the workpiece with nozzle about 1/2" from the surface.
- Move the torch smoothly and steadily as you weld.
- Avoid welding in very drafty areas. A weak, pitted and porous weld will result due to drafts blowing away the protective welding gas.
- Keep wire and liner clean. Do not use rusty wire.
- Sharp bends or kinks in the welding cable should be avoided.
MAINTENANCE & SERVICING
General Maintenance
This welder has been engineered to need minimal service providing that a few very simple steps are taken to properly maintain it.
- Keep the cabinet cover closed at all times unless the wire needs to be changed or the drive pressure needs adjusting.
- Keep all consumables (contact tips, nozzles, and liner) clean and replace when necessary. See "Consumable Maintenance" (below) and "Troubleshooting" for detailed information.
- Replace INPUT POWER CABLE, ground cable, work clamp, or gun assembly when damaged or worn.
- Avoid directing grinding particles towards the welder. These conductive particles can build up inside the machine and cause severe damage.
- Periodically clean dust, dirt, grease, etc. from your welder. Every six months or as necessary, remove the side panels from the welder and use compressed air to blow out any dust and dirt that may have accumulated inside the welder. 6. If available, use compressed air to periodically clean the liner, especially when changing wire spools
DISCONNECT FROM POWER SOURCE WHEN CARRYING OUT THIS OPERATION.
- The wire feed drive roller will eventually wear during normal use. With the correct pressure, the idler roller must feed the wire without slipping. If the grooves in the wire feed drive roller are worn deep enough that the idler roller and the wire feed drive roller make contact when the wire is in place between them, the wire feed drive roller must be replaced.
- Check all cables periodically. They must be in good condition and not cracked.
ELECTRIC SHOCK CAN KILL! Be aware that the ON/OFF SWITCH, when OFF, does not remove power from all internal circuitry in the welder. To reduce the risk of electric shock, always unplug the welder from its AC power source and wait several minutes for electrical energy to discharge before removing side panels.
Consumable Maintenance
IT IS VERY IMPORTANT TO MAINTAIN THE CONSUMABLES TO AVOID THE NEED FOR PREMATURE REPLACEMENT OF THE GUN ASSEMBLY.
MAINTAINING THE CONTACT TIP:
The purpose of the CONTACT TIP is to transfer welding current to the welding wire while allowing the wire to pass through it smoothly.
Always use a contact tip stamped with the same diameter as the wire it will be used with.
- If the wire burns back into the tip, remove the tip from the gun and clean the hole running through it with an oxygen-acetylene torch tip cleaner or tip drill. If the burned-back wire cannot be removed, the tip will have to be replaced.
- With extended use over time, this hole will become worn. Increased wear on the hole causes increased resistance in the transfer of welding current from the contact tip to the wire. This will result in less stable arc characteristics and difficult arc starting.
KEEP THE NOZZLE CLEAN!
During the welding process, spatter and slag will build up inside the nozzle and must be cleaned out periodically. Failure to clean and/or replace the nozzle in a timely fashion will cause damage to the front end of the gun assembly, which is not replaceable. The results of the inaction may require the replacement of the entire gun assembly.
Failure to keep the nozzle adequately cleaned can result in the following problems:
A shorted nozzle results when spatter buildup bridges across the insulation in the nozzle allowing welding current to flow through it as well as the contact tip. When shorted, a nozzle will steal welding current from the wire whenever it contacts the grounded workpiece. This causes erratic welds and reduced penetration. In addition, a shorted nozzle overheats the end of the gun which can damage the front-end of the gun.
TESTING FOR A SHORTED NOZZLE!
Arcing between the nozzle and the workpiece always means the nozzle is shorted, but this can be hard to detect through the lens of a welding helmet. The following testing method is another way to tell if a nozzle is shorted.
With the welder unplugged from the AC power source, touch the probes of an ohmmeter or continuity tester to the end of the contact tip and the outside of the nozzle. If there is any continuity at all, the nozzle is shorted. Clean or replace as needed.
TROUBLESHOOTING
The following is a troubleshooting table provided to help you determine a possible remedy when you are having a problem with your welder.
This table does not provide all possible solutions, only those possibilities considered likely to be common faults.
| PROBLEM | POSSIBLE CAUSE | POSSIBLE SOLUTION |
| All LEDs OFF, No output power, Fan not operating. | No input power. | Connect machine to proper input power source. |
| Verify that circuit breaker has not been tripped in your main power panel. Reset if needed. Check if the power convert adapter is defective. Check if the power connection is loose connection after transportation. | ||
| POWER SWITCH is OFF. | Ensure POWER SWITCH (rear) is in the ON position. | |
| FAULT CODE ERR2 DISPLAYED. | Over Current | Check the input connection |
| FAULT CODE ERR1 DISPLAYED. | Exceeded duty cycle; thermal protector engaged. | Allow welder to cool at least 10 minutes with machine ON (observe and maintain proper duty cycle). FAULT/THERMAL OVERLOAD INDICATOR LED should turn off after the machine has cooled. |
| Insufficient air flow causing machine to overheat before reaching duty cycle. | Check for obstructions blocking air flow and ensure that there are 12 inches of clearance between any obstacles and the vents on all sides of the machine. | |
| FREQUENT CIRCUIT BREAKER TRIPS. | Machine is drawing too much amperage due to use of larger size electrode. | Use a smaller electrode. |
| Machine is not the only piece of electrical equipment on the circuit. | Make sure the welder is on a dedicated circuit or is the only thing plugged into a circuit. | |
| Circuit breaker is incorrect/insufficient for use with this machine. | Verify that the circuit breaker for the circuit is a 20A timedelay (slow-blow) breaker for 120V and a 50A for 230V. If it is not, have a qualified electrician install the proper breakers. | |
| Poor quality welds. | Insufficient gas at weld area. | Check that the gas is not being blown away by drafts and, if so, move to a more sheltered weld area. If not, check gas cylinder contents, gauge, regulator setting, and operation of gas valve. |
| Rusty, painted, oily or greasy workpiece | Ensure workpiece is clean and dry. | |
| Poor ground connection or torch/electrode connection. | Check work clamp/workpiece connection and all connections to the machine. | |
| Incorrect settings. | Check welding parameters and polarity. | |
| Wire feeds but no arc. | Bad ground or loose ground connection. | Check connection of the ground cable to the work clamp. Tighten cable connection to work clamp if needed. Ensure that the connection between the work clamp and workpiece is good and is on clean, bare (not painted or rusted) metal. |
| Trigger not pulled while wire is in contact with workpiece. | Pull the trigger while in contact with the workpiece. The machine does not arc unless the trigger is pulled. | |
| Arc works but not feeding wire. | No pressure on the drive roller; insufficient or excessive pressure on the drive roller. | Adjust the drive pressure. See "Installing The Welding Wire". |
| Wire spool is empty. | Check if wire is in place and replace if necessary. | |
| No arc or wire feed. Fan operates normally (can be heard). | Gun trigger is not being pulled or is not making contact. | Pull the trigger while in contact with the workpiece. The machine does not arc unless the trigger is pulled. Depress the trigger ALL THE WAY until the trigger stops moving into the gun. |
| Exceeded duty cycle; thermal protector engaged. | Allow welder to cool at least 10 minutes with machine ON (observe and maintain proper duty cycle). | |
| Insufficient air flow causing machine to overheat before reaching duty cycle. | Check for obstructions blocking air flow and ensure that there are 12 inches of clearance between any obstacles and the vents on all sides of the machine. | |
| No arc or wire feed. Fan does NOT operate (cannot be heard). | No voltage or incorrect voltage supplied to welder. | Make sure the machine is plugged in. Check the status of your INPUT VOLTAGE INDICATOR LED. It should be illuminated. Check the voltage of your outlet. If it is 10% more or less than optimal, call a qualified electrician. |
| ON/OFF SWITCH is in the OFF position. | Turn the ON/OFF SWITCH to the ON position. | |
| Circuit breaker has been tripped. | Make sure the circuit breaker has been reset. | |
| Low output or non-penetrating weld. | Weld parameters too low. | Adjust welding parameters. |
| Wrong type or size wire. | Use.023"(0.6mm)~.035"(0.9mm) wire. See "Welding Wire Selection". | |
| Poor ground connection or gun connection. | Reposition clamp and check cable to clamp connection. Check connection of ground cable, gun, and Wire Polarity Drive Lead. | |
| Wrong size or worn contact tip. | Use.023"(0.6mm) or.035"(0.9mm) contact tip with the corresponding wire. Replace contact tip if worn. | |
| Input power too low. | Have a qualified electrician verify the voltage at your outlet. If the voltage is appropriate, verify that the circuit wiring is sufficient for the circuit breaker size. | |
| Stick-out too long. | Decrease stick-out (the amount the wire extends past the contact tip). | |
| Work clamp, ground cable, and/or welding cable get hot. | Bad ground or loose ground connection. | Check the connection of the work clamp and gun to the machine. Check the connection of the MIG ELECTRODE POLARITY JUMPER. Check connection of the ground cable to the work clamp. Tighten cable connection to work clamp if needed. Ensure the connection between the work clamp and workpiece is good and on clean, bare (not painted or rusted) metal. Make sure cable is not damaged. |
| Gun nozzle arcs to work surface. | Spatter or Slag build-up inside nozzle or nozzle is clogged. | Clean or replace nozzle as needed. |
| Feed motor operates but wire will not feed. | Insufficient feed drive roller pressure. | Adjust drive roller pressure. |
| Burr on end of wire. | Re-cut wire so it is square with no burr. | |
| Liner blocked or damaged. | Clear with compressed air or replace liner. | |
| Despooler tension too high. | Adjust despooler tension. | |
| Wire is "bird-nesting" at the drive roller or jamming. | Too much pressure on drive roller. | Adjust the drive pressure. See "Installing The Welding Wire". |
| Contact tip is clogged or damaged. | Replace contact tip. | |
| Worn guides or drive roller alignment. | Replace parts. | |
| Wire burns back to contact tip. | Wire feed speed is set too low for voltage setting being used. | Increase wire feed speed (turn RIGHT KNOB clockwise). |
| Stick-out too short. | Increase stick-out (the amount the wire extends past the contact tip). | |
| Wrong size contact tip. | Use correct size contact tip. | |
| Contact tip is clogged or damaged. | Replace contact tip. | |
| Difficult arc start. | Amperage is too low. | Increase amperage setting. |
| Make sure base metal is clean. | Properly clean base metal. | |
| Make sure electrode is not damaged. | Replace electrode if needed. | |
| Arc is wandering (TIG). | Tungsten is too large. | Use a smaller tungsten. |
| Gas flow is too high. | Reduce gas flow. |
WIRING DIAGRAM

To help us serve you better, go to www.yeswelder.com
WE ALWAYS STAND BEHIND IT
Toll Free (855) 937-4567
Documents / Resources
References
![www.p65warnings.ca.gov]() http://www.p65warnings.ca.gov/diesel
http://www.p65warnings.ca.gov/diesel![www.yeswelder.com]() Welder, Plasma Cutter, Welding Helmet, Welding Equipment – YesWelder
Welder, Plasma Cutter, Welding Helmet, Welding Equipment – YesWelder

Download manual
Here you can download full pdf version of manual, it may contain additional safety instructions, warranty information, FCC rules, etc.
Advertisement


Need help?
Do you have a question about the MIG-205DS and is the answer not in the manual?
Questions and answers