Sign In
Upload
Download
Table of Contents
Contents
Add to my manuals
Delete from my manuals
Share
URL of this page:
HTML Link:
Bookmark this page
Add
Manual will be automatically added to "My Manuals"
Print this page
×
Bookmark added
×
Added to my manuals
Manuals
Brands
Yeswelder Manuals
Welding System
MIG PRO-200
User manual
Yeswelder MIG PRO-200 User Manual
Igbt inverter co2/mig welding machine
Hide thumbs
1
Table Of Contents
2
3
4
5
6
7
8
9
10
11
12
13
14
page
of
14
Go
/
14
Contents
Table of Contents
Bookmarks
Table of Contents
Table of Contents
Safety Tips
General Introduction
Electrical Diagrams
Main Parameter
Installation
Ⅰ. Power Input Cable
Ⅱ. Power Output Cable
Ⅲ. Installation of Wire Spool
Operation
Ⅱ. Setup of the Welding Current
Ⅲ.welding Parameter List. (for Low-Carbon Steel)
Ⅳ. Setup of Welding Speed
Ⅴ. Setup of Dry Extension Ofweldingwire
Ⅵ. Setup of CO2 Flow
Attention
Ⅰ.work Environment
Ⅱ. Safe Tips
Maintenance
Fault and Repair
Ⅰ.welding Power Supply
Ⅱ.welding Torch
Feeder
Ⅳ.power Output Cable
Advertisement
Quick Links
1
Table of Contents
2
General Introduction
3
Electrical Diagrams
4
Ⅰ. Power Input Cable
5
Main Parameter
6
Ⅱ. Setup of the Welding Current
7
Ⅲ.welding Parameter List. (for Low-Carbon Steel)
8
Ⅳ. Setup of Welding Speed
Download this manual
IGBT INVERTER CO2/MIG WELDING MACHINE
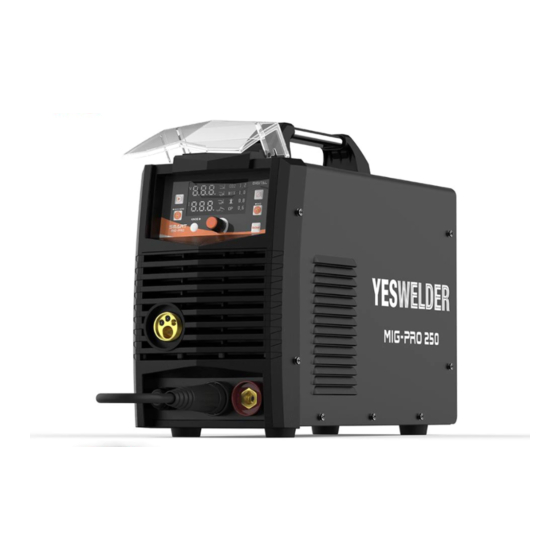
PRODUCT MODEL: MIG PRO-200,MIG PRO-250
USER MANUAL
(READ THE MANUAL CAREFULLY BEFORE INSTALLATION, USE & MAINTENANCE)
Table of
Contents
Previous
Page
Next
Page
1
2
3
4
5
Advertisement
Table of Contents
Need help?
Do you have a question about the MIG PRO-200 and is the answer not in the manual?
Ask a question
Questions and answers
Related Manuals for Yeswelder MIG PRO-200
Welding System Yeswelder MIG PRO-250 User Manual
Igbt inverter co2/mig welding machine (14 pages)
YESWELDER MIG-205DS - MULTI-PROCESS WELDER Manual
(article)
YESWELDER MIG-270K - Wide Voltage Multi-process Welder Manual
(article)
YESWELDER MIG-250 PRO - Professional Welder Manual
(article)
Welding System Yeswelder MIG-250PRO Operator's Manual
Igbt inverter multi-process welder (mig, flux-cored, stick, lift tig) (36 pages)
Welding System Yeswelder CUT-55DS User Manual
Air plasma cutter (20 pages)
YESWELDER CUT-55DS PRO - Air Plasma Cutter Manual
(article)
YESWELDER YWM-160 - Multi-process Welder Manual
(article)
YESWELDER CUT-65DS PRO - Plasma Cutter Manual
(article)
YESWELDER Flux-135PRO - Welder Manual
(article)
Welding System Yeswelder CT2050 Operator's Manual
Multi-process igbt inverter welder & cutter (56 pages)
Welding System Yeswelder TIG-205DS Operator's Manual
Tig/stick welding machine (20 pages)
YESWELDER ARC-205DS PRO - Stick Welder Manual
(article)
YESWELDER ARC-125DS PRO - Mini Portable Stick Welder Manual
(article)
Welding System Yeswelder Firstess DP200 Operator's Manual
Igbt inverter multi-process welder (dual pulse mig, flux-cored, lift tig, stick) (68 pages)
This manual is also suitable for:
Mig pro-250
Table of Contents
Save PDF
Print
Rename the bookmark
Delete bookmark?
Delete from my manuals?
Login
Sign In
OR
Sign in with Facebook
Sign in with Google
Upload manual
Upload from disk
Upload from URL


Need help?
Do you have a question about the MIG PRO-200 and is the answer not in the manual?
Questions and answers