Advertisement
Quick Links
www.nitedevil.com
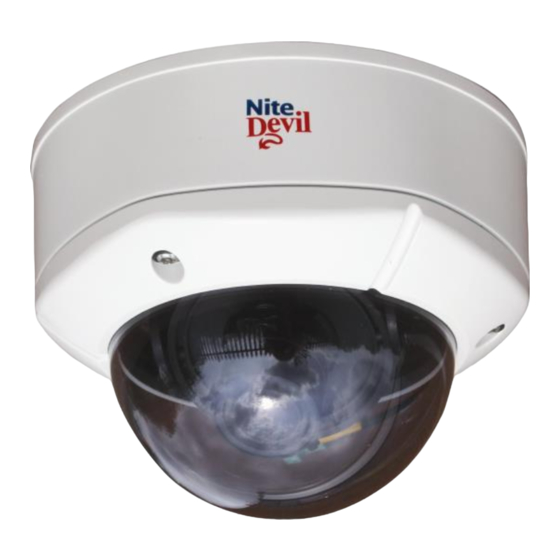
NiteDevil External 3 Axis Vandal-Proof Dome Camera
CAM666 NiteDevil
The NiteDevil Dome Camera produces high
quality images and works in extremely low
light conditions. The dome was originally
developed for bars and nightclubs but is also a
good choice for external dimly lit areas such as
car parks and compounds. The dome has many
features including a 3D axis mounting bracket
for wall mounting, vandal resistant, 550 TVL,
OSD menu with privacy masking, motion and
digital zoom to 2x and has an RS485
connection for accessing menu via a PTZ
keypad.
Precautions:
Do not operate the camera in extreme temperatures either under –10C or over 50C.
Do not use in high humidity.
Do not disassemble the camera, as there are no user serviceable parts.
Do not drop the camera or subject it to severe shocks.
Avoid installing close to strong electromagnetic fields or wireless communication devices as this
may cause interference on the video image produced.
Do not remove supplied power, video or RS485 connectors, as this will invalidate warranty.
Mounting the Camera
If mounting on a wall, do not mount with cable entry bung at the top. Ensure that the bung is
tight. It is recommended to seal cable entry with silicon.
The camera is for mounting on a wall, ceiling or outdoor facia board. Note that this camera has a 3D
gimble, allowing wall mounting as well as ceiling mounting. The camera should be fitted to a
smooth impermeable surface and sealed to avoid water ingress through the base of the casing.
Email:
support@nitedevil.com
1
Stick the guide pattern on the wall or ceiling
2
Drill four holes according to the guide patter then insert
plugs into the drilled holes
3
Fix the surface mount bracket with screws to the ceiling or
wall.
4
Draw out the power/video fly lead to connection point.
5
Connect the dome base to the surface mount bracket with
supplied screws.
6
Adjust desired focus and scene by adjusting the 3-axis
camera bracket.
7
Put the dome cover over the base
8
Fix dome cover in place using supplied star bolts.
New version with OSD menu
Last Revised: 02/11/2010
Doc XCAM666
Page 1 of 8
Advertisement

Subscribe to Our Youtube Channel
Related Manuals for System Q NiteDevil CAM666


Summary of Contents for System Q NiteDevil CAM666
- Page 1 www.nitedevil.com Doc XCAM666 NiteDevil External 3 Axis Vandal-Proof Dome Camera Page 1 of 8 CAM666 NiteDevil The NiteDevil Dome Camera produces high quality images and works in extremely low light conditions. The dome was originally developed for bars and nightclubs but is also a good choice for external dimly lit areas such as car parks and compounds.
-
Page 2: Connecting The Camera
www.nitedevil.com Doc XCAM666 NiteDevil External 3 Axis Vandal-Proof Dome Camera Page 2 of 8 Wall Mounting Knurled fitting Spare monitor connection When mounting this camera on a wall it is necessary to adjust the camera 3D Gimble. Make sure the side cable entry is always fitted underneath the camera. Turn the whole camera assembly so that the camera can be moved either from left to right or up and down dependent on the area to be viewed. -
Page 3: General Menu
www.nitedevil.com Doc XCAM666 NiteDevil External 3 Axis Vandal-Proof Dome Camera Page 3 of 8 The RS485 lead can be connected to a PTZ keypad to access the internal OSD menu. Ensure that the polarity is correct and enter CALL 95 to access the menu. Note that the RS485 does not control any camera functions like zoom or focus on this model. - Page 4 www.nitedevil.com Doc XCAM666 NiteDevil External 3 Axis Vandal-Proof Dome Camera Page 4 of 8 AWB MENU Auto White Balance WB MODE AUTO default Colour temp. 2500°K ~ 9500°K HOLD fix colour using Push Auto USER change red/blue colours COLOR GAIN set red & blue colour gain - see menu below R-Y GAIN default 135...
- Page 5 www.nitedevil.com Doc XCAM666 NiteDevil External 3 Axis Vandal-Proof Dome Camera Page 5 of 8 A E Automatic Exposure LENS SELECT DC direct drive lens default ELC electronic light control BRIGHTNESS set brightness level 0 ~ 60 default 20 BACKLIGHT Backlight Compensation OFF, LOW, MID, HIGH Default OFF FLICKERLESS OFF default - only DC lens...
- Page 6 www.nitedevil.com Doc XCAM666 NiteDevil External 3 Axis Vandal-Proof Dome Camera Page 6 of 8 MOTION Displays message on screen for set time when movement detected DETECT MODE OFF/ON MD DISPLAY OFF/ON DETECT AREA CENTRE, OUT, UPPER, WHOLE, USER The area in light grey is the detection area. You can select any of the set areas or selecting USER allows your own area to be set.
- Page 7 www.nitedevil.com Doc XCAM666 NiteDevil External 3 Axis Vandal-Proof Dome Camera Page 7 of 8 COMM This menu needs to be setup so that a keyboard can be connected to RS485 PROTOCOL Select P/D for PELCO-D DEF not operable CAMERA ID 000 ~ 255 (default 001) ID DISPLAY To display camera ID at...
- Page 8 www.nitedevil.com Doc XCAM666 NiteDevil External 3 Axis Vandal-Proof Dome Camera Page 8 of 8 Whilst this NiteDevil camera can be mounted on a wall or ceiling there is an optional mounting bracket that can be purchased. This is the CAM610 bracket. CAM666 Camera Specification Signal System Pal:625 lines...
Need help?
Do you have a question about the NiteDevil CAM666 and is the answer not in the manual?
Questions and answers