Table of Contents
Advertisement
Quick Links
Technical Support and E-Warranty Certificate
www.vevor.com/support
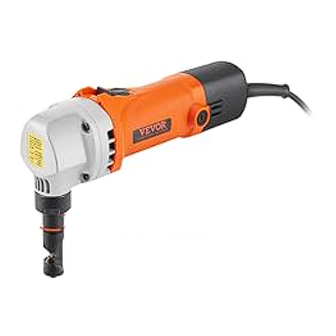
NIBBLER
USER MANUAL
We continue to be committed to offering tools at competitive prices. "Save Half", "Half Price",
or any other similar expressions used by us only represent an estimate of savings you might
benefit from buying certain tools with us compared to the major top brands and do not
necessarily mean to cover all categories of tools offered by us. You are kindly reminded to
verify carefully when placing an order with us if you are saving half in comparison with the top
major brands.
Advertisement
Table of Contents

Subscribe to Our Youtube Channel
Related Manuals for VEVOR N1-1.6


Summary of Contents for VEVOR N1-1.6
- Page 1 Technical Support and E-Warranty Certificate www.vevor.com/support NIBBLER USER MANUAL We continue to be committed to offering tools at competitive prices. "Save Half", "Half Price", or any other similar expressions used by us only represent an estimate of savings you might benefit from buying certain tools with us compared to the major top brands and do not necessarily mean to cover all categories of tools offered by us.
- Page 3 CustomerService@vevor.com This is the original instruction, please read all manual instructions carefully before operating. VEVOR reserves a clear interpretation of our user manual. The appearance of the product shall be subject to the product you received. Please forgive us that we won't inform you again if there are any technology or software...
-
Page 4: Important Safety Instructions
1. Important safety instructions Warning - To reduce the risk of injury, user must read instructions manual carefully. Alternating current This symbol, placed before a safety comment, indicates a kind of precaution, warning, or danger. Ignoring this warning may lead to an accident. To reduce the risk of injury, fire, or electrocution, please always follow the recommendation shown below. - Page 5 1. To minimize the risk of injury by means of fire or electric shock we urge that our clients take some basic safety precautions when using thisl device. Please read the operation instructions carefully and make sure you have understood its content.
-
Page 6: Electrical Safety
ELECTRICAL SAFETY 1. Power tool plugs must match the outlet. Never modify the plugs in any way. Do not use any adapter plugs with earthed power tools. Unmodified plugs and matching outlets will reduce risk of electric shock. Do not change the plug in any way. - Page 7 shoes, hard hat or hearing protection must be used for appropriate conditions. Ordinary eye or sunglasses are NOT eye protection. TOOLS USE AND CARE 1. Use clamps or other ways to secure and support the work-piece to a stable platform. Holding the work by hand or against your body is unstable and may lead to a loss of control.
-
Page 8: Specific Safety Rules
SPECIFIC SAFETY RULES DO NOT let comfort or familiarity with the product (gained from repeated use) replace strict adherence to Nibbler safety rules. lf you use this tool unsafely or incorrectly, you can suffer serious personal injury. 1. Always be sure that the tool is switched off and unplugged before carrying out any work on the tool. -
Page 9: Functional Description
2. FUNCTIONAL DESCRIPTION Assembly Installing and removing the punch and die CAUTION: Always be sure that the tool is switched off and unplugged before removing or installing the punch and die. 1.Make sure to replace the punching needle and the punching die set. When disassembling them, loosen the cap nut with the wrench and disassemble the rod out of the tool. - Page 10 2. When assembling the punching needle and the punching die, insert the punching needle into the clamp to make the hole face the fastening screw rod and then tighten it.Put the punching die into the blanking rod and tighten the fix screw cap.
- Page 11 Fig5 Change the die position (Figure 5) WARNING: Before changing the position of the die cut, make sure that the switch of the tool is turned off and the power plug is pulled out.The position of the die cut can be changed within 360°...
- Page 12 Switch ON and OFF (Figure 6) CAUTION: Before plugging the tool into an outlet, check whether the switch works properly. Press down the trigger to see whether the back switch is turned onto position OFF. To switch ON: Push the back of the switch forward and press down the front of the switch to lock it.
- Page 13 Fig8 Method of die cut (Figure 8) Hold the electric tool to make the die cut chip at right angles (90°) to the work-piece being cut and push the machine slightly according to the cut direction. Fig9 Cutouts (Figure 9) ...
- Page 14 Fig10 Fig11 Maintenance & Daily Care CAUTION: Always be sure that the tool is switched off and unplugged before you attempt to perform inspection or maintenance. 1. The tool and its air vents have to be kept clean. Regularly clean the tool's air vents or whenever the vents start to become obstructed 2.
-
Page 15: Product Specification
To maintain product SAFETY and RELIABILITY, repairs or any other maintenance should be per-formed by and an authorized BODA service partner, always using original BODA replacement parts 4. Product specification Description Nibbler Model N1-1.6 Rating(s) AC120V 60Hz 、 550W For US user Rating(s) AC220-240V 50Hz 、 550W For European User... -
Page 16: Part List
5. Part list... -
Page 17: Explosive View
6. Explosive view... - Page 20 Technical Support and E-Warranty Certificate www.vevor.com/support...
Need help?
Do you have a question about the N1-1.6 and is the answer not in the manual?
Questions and answers