Advertisement
Advertisement
Table of Contents

Related Manuals for VEVOR M1B-LS-3305


Summary of Contents for VEVOR M1B-LS-3305
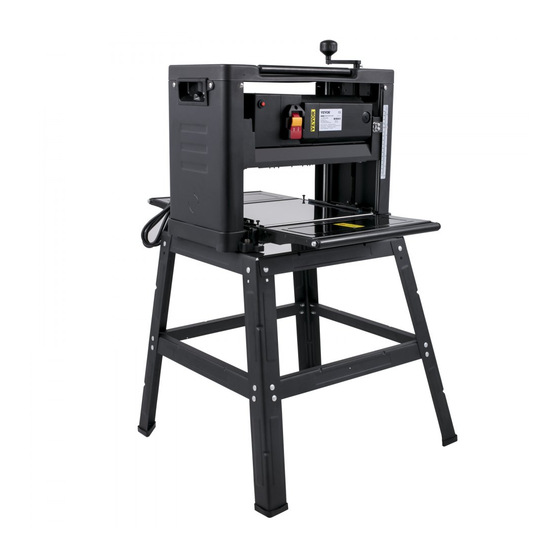
- Page 1 Thicknesser M1B-LS-3305 USER MANUAL...
- Page 3 CustomerService@vevor.com This is the original instruction, please read all manual instructions carefully before operating. VEVOR reserves clear interpretation of our user manual. The appear- ance of the product shall be subject to the product you received. Please forgive us that we won't inform you again if there is any technology or software updates on...
-
Page 4: Safety Instructions
SAFETY INSTRUCTIONS IMPORTANT: carefully read the instructions in this manual as well as the general safety instructions before using this tool. Before using the tool, read the instruction book carefully. Class ll appliance, reinforced insulation or double insulation Keep the packaging material out of the reach of children -- risk of suffocation. WARNING ! Always take basic safety precautions when using power tools to safeguard against the risk of fire、electric shock and /or personal injury. - Page 5 12. Secure the workpiece. Secure the workpiece with stand. This is safer than using your hands and means you have both hands free to operate the tool. 13. Do not overreach. Always maintain a firm footing and good balance. 14. Maintain the tool in good care. Keep cutting tools sharp an chean for better, safer work.
-
Page 6: Important Safety Instructions
IMPORTANT SAFETY INSTRUCTIONS 1. Wear safety glasses, Don’t sent wood into outfeed side. 2. Before use, check that all screws connections are properly tightened. 3. Do not force the tool. Let the feed mechanism do the work. Never insert objects or body parts in the outfeed. -
Page 7: Technical Data
TECHNICAL DATA M1B-LS-3305 Model: M1B-LS-3305 Specs: For European users For US user Rating(s): 110V~60Hz 2000W 230V~50Hz 2000W First Feed Speed: ≥4.3m/min ≥4.3m/min Second Feed Speed: ≥7.0m/min ≥7.0m/min blade: 3pcs 3pcs Max.planing width: 330mm 330mm Planing depth: 0-3mm 0-3mm Planing height:... - Page 8 DESCRIPTION 1. The tool is designed for planing wooden planks and dry wood. It is forbidden to plane other materials. such as metals、plastics、branches、tree trunks、 wet wood and very hard wood. 2. The tool is intended for household and professional use . 3.
-
Page 9: Operation Steps
OPERATION STEPS Unpacking Carefully unpack the machine. The packaging must be recycled in accordance with local regulations. WARNING! Turn off the machine and unplug the power cord before cleaning 、 performing maintenance and adjustment. Assembly Before using the machine must be in accordance with the requirements of the assembly complete. - Page 10 Adjust depth of the planer In order to be able to completely correct and safe operate this machine, User must be know how to correct adjust. Very Importent!!! Rotate the depth adjustment handle(F) a circle, the machine depth can be rised or lowered by 1.5 mm.
- Page 11 At first, user needs a ruler to measure the thickness of the wood to be planed, Then obervation depth label (H) to adjust the depth label to the thickness of the planer required by the user. Such as: the thickness of wood it’s 200mm, user wants to planer 2mm, so depth label pointer is at 198mm, In this way, the thickness required by the user can be reached during the one- time working process.
-
Page 12: Operation
OPERATION Coarse PLANING Coarse planing is used to provide a reference surface for machining. 1. Set a small removal setting for the best surface finish. 2. Process where possible along he grain. Note :the surface finish is affected by various factors. 1. -
Page 13: Maintenance
MAINTENANCE WARNING :Turn off the machine and unplug the power cord before cleaning and maintenance, Do not use water or other liquids to clean electrical parts. CHECK AND REPLACEING THE CARBON BRUSH 1. Turn off the machine, unplug the power cord and wait until all moving parts have stopped completely. - Page 14 ADJUST TABLE EXTENSION (J) Attention: this adjustment is already factory set ok ,in order to avoid to effecting the function of the machine . need to check again. 1. Put the engine body rise to a suitable height , so that it is easily assembly. 2.
- Page 15 ENGINE BODY LEVEL ADJUSTING ATTENTION:This adjustment is already factory set ok. in order to avoid to effecting the function of the machine. need to check again. Poor parallelism is usually caused by misaligned blades or A fall in transit caused the body to tilt. Always check that the blade holder and the work table parallel before attempting to adjust the paral- lelism setting.
- Page 16 Dismantling the knife blade 1. Use allen wrench (N) to remove the dust hood (V) by loosening the screws (U), see below picture. 2. Use the double open wrench (N) to loosen the blade locking plate (B) and knife blade (C) by turning the outer hexagon bolt (A) clockwise. The knife blades are spring-loaded (D) and can be remove when the blade locking plate is removed.
- Page 17 Warning! Check that total 24 screws are tightened.Turn the blade holder by hand to check that it rotates easily and smoothly. Handle the blades with caution to avoid personal injury and/or damage to property. LUBRICATION : 1. Regularly remove shavings from the depth setting chains、reduction drive and lifting screws for the blade holder.
- Page 18 This product is subject to the provision of european Directive 2012/19/EC. The symbol showing a wheelie bin crossed through indicates that the product requires separate refuse collection in the European Union. This applies to the product and all accessories marked with this symbol. Products marked as such may not be discard- ed with normal domestic waste, but must be taken to acollection point for recycling electrical and electronic devices.
- Page 20 E-mail: CustomerService@vevor.com...
Need help?
Do you have a question about the M1B-LS-3305 and is the answer not in the manual?
Questions and answers
how do change the belt