
Related Manuals for urmet domus 1722/851


Summary of Contents for urmet domus 1722/851
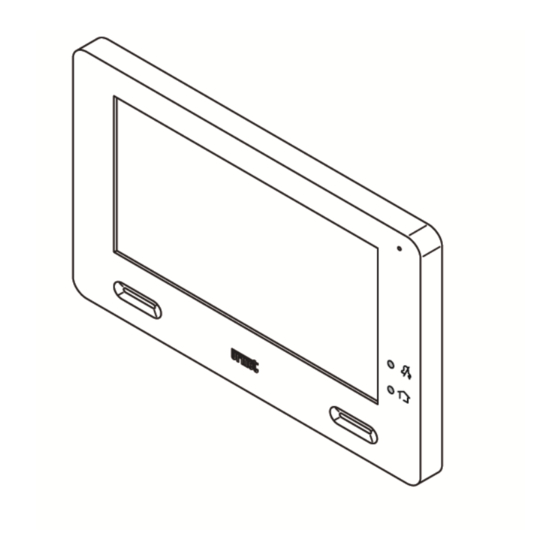
- Page 1 Mod. 1722 DS1722-124 LBT20726 MIKRA2 + CXMODO TWO-WIRE, SINGLE-FAMILY, HANDS-FREE COLOUR VIDEO DOOR PHONE KIT Ref. 1722/851 HOME AUTOMATION SECTION INSTALLATION MANUAL...
-
Page 2: Table Of Contents
Contents CONFIGURATION ........................3 Buttons Configuration ....................4 1.1.1 Yokis Buttons Direct Configuration ................. 5 1.1.2 Yokis Buttons Configuration via remote control ............ 11 1.1.3 Yokis Buttons Mixed Configuration ..............13 1.1.4 Composite Buttons Configuration ................. 13 1.1.5 Stair Lights Button Configuration ................15 1.1.6 Other Functions .................... -
Page 3: Configuration
1 CONFIGURATION The end user will be able to use up to a maximum of 12 virtual buttons to control individual outputs or scenarios: These buttons are divided in 2 groups: the first 8 (Yokis buttons) and the last 4 (Composite buttons). -
Page 4: Buttons Configuration
1.1 BUTTONS CONFIGURATION There are three possible modes. Installers can choose the one most suited to their requirements. A) Yokis Buttons Direct Configuration The (virtual) Yokis Buttons can be entirely configured directly via the video door phone. The advantage consists in a more user-friendly configuration via a wizard-type interface: the video door phone automatically manages the necessary pulses for Yokis button configuration. -
Page 5: Yokis Buttons Direct Configuration
1.1.1 Yokis Buttons Direct Configuration Each Yokis Button can be configured to control one or more activation modules (Scenario or Centralisation Scenario), either in Direct Mode or in Radio Bus Mode. Please refer to the Yokis 'Radio Quick Installation Guide’ for more information on the available options. - Page 6 Before describing the individual controls in detail, we would like to provide some general indications. First of all, by tapping in the bottom right corner of Yokis settings, a QR code is displayed: The QR code can be used to access the configuration guide for help. The buttons configuration procedure is entirely similar to that of the buttons on a Yokis 8-buttons remote control.
- Page 7 It is always possible to go back to a higher level menu by pressing the 'OK' or ‘BACK’ button. Similarly, with a Yokis Remote control, a ‘Reset’ to initial settings for a specific button (and for that button only) can always be controlled. The icon to use to control a button reset is located at the top right.
- Page 8 To do this, use the ‘Delete Unused Connections’ item, available from the higher-level menu reachable through the icon Delete Unused Connections If the button controls a single receiver, this option can be useful if that receiver is replaced. First, connect the new receiver with Connect (or disconnect) (see above). Then use this menu item to delete the connection to the old receiver.
- Page 9 By tapping it you can choose one of three options: Lights M 10 or Shutters M 11 Lighting/Shutters M 20 For more information, refer to the Yokis 'Radio Quick Installation Guide’, in section ‘F – Centralised control on Radio Bus’. NOTE: If ‘Lighting/Shutters’...
- Page 10 Reference should be made to section ‘G – Pushbutton functions’ of the Yokis 'Radio Quick Installation Guide’. This option can only be used if a Button had been 'connected' to a single receiver module. In this case, it is then possible to configure the receiver with specific sequences of pulses. Using the keypad, the number of pulses to be sent to the Receiver Module with that specific button can be defined.
-
Page 11: Yokis Buttons Configuration Via Remote Control
1.1.2 Yokis Buttons Configuration via remote control 1) Using a TLC8CP 8-Buttons remote control, configure the buttons of the remote control itself. Refer to the Yokis 'Radio Quick Installation Guide’ for more information. 2) Check that all configured buttons are working efficiently. 3) Now import the remote control to the video door phone, as described here below. - Page 12 Select ‘Import Yokis Buttons from Remote’ and tap ‘OK’. A Wizard will start to guide the installer through the importing procedure: follow the Wizard instructions. At the end of the import the following operations should be performed for each button: Define its NAME.
-
Page 13: Yokis Buttons Mixed Configuration
After resetting the Button, the icons allowing button Configuration will once again be displayed at bottom of the screen. Then refer to Section ‘Yokis Buttons Direct Configuration’. 1.1.3 Yokis Buttons Mixed Configuration Carry out the following three steps: Using a TLC8CP 8-Button remote control, 'connect' the buttons to the receivers. Refer to the Yokis 'Radio Quick Installation Guide’... - Page 14 WARNING: It is obviously no use to configure a Composite button, unless at least 2 Yokis Buttons have already been configured. From the video door phone Home Page, press the icon ‘Settings’ and then select ‘Yokis’ You will obtain access to the following page: The Composite buttons are the last bottom 4.
-
Page 15: Stair Lights Button Configuration
Having done this, tap the icon : the following screen will be displayed: BACK X Specify which Yokis Buttons are included in this Composite Button. Clearly, it is important to choose at least 2 to obtain any active effect. Confirm with ‘OK’. 1.1.5 Stair Lights Button Configuration During a door phone video call, the called user can use the button to, for example, turn... - Page 16 To do this, from the video door phone Home Page, press the icon ‘Settings’ and then select ‘Yokis’ You will obtain access to the following page: Tap the icon . You will then be directed to the page where the associated button can be defined.
-
Page 17: Other Functions
1.1.6 Other Functions 3 more functions are accessible from the same menu. From the video door phone Home Page, press the icon ‘Settings’ and then select ‘Yokis’ You will obtain access to the following page: Tap the icon , located at the bottom. A menu will open: DS1722-124 LBT20726... -
Page 18: Button Resetting
1.1.6.1 Exporting Yokis Buttons to a remote control Choose the second Menu item: ‘Export Yokis Buttons to Remote’. Tap ‘OK’. A Wizard will start to guide the installer through the exporting procedure: follow the Wizard instructions. This procedure is also useful to directly duplicate a configuration to a second video door phone. 1.1.6.2 Resetting all Radio Bus Access Points Select the third Menu item: ‘Reset Yokis Radio Bus Acces Points’... - Page 19 DS1722-124 LBT20726...
- Page 20 DS1722-124 LBT20726 Service technique URMET S.p.A. service clients +39 011.23.39.810 10154 TURIN (ITALIE) http://www.urmet.com VIA BOLOGNA 188/C e-mail: info@urmet.com Telef. +39 011.24.00.000 (RIC.AUT.) DS1722-124 LBT20726 +39 011.24.00.300 - 323...
Need help?
Do you have a question about the 1722/851 and is the answer not in the manual?
Questions and answers