urmet domus mikra2 1722/95 Quick User Manual
Video door phone
Hide thumbs
Also See for mikra2 1722/95:
- Installation handbook (132 pages) ,
- Installation manual (20 pages) ,
- User manual (16 pages)
Advertisement
Available languages
Available languages
Quick Links
Mod.
1722
DS1722-126
KIT VIDEOCITOFONICO MONO E BIFAMILIARE MININOTE+ MIKRA2
ONE- AND TWO-HOUSEHOLD VIDEO DOOR PHONE KIT MININOTE+ MIKRA2
KIT VIDÉO MONO ET BI-FAMILLE MININOTE+ MIKRA2
KIT VIDEOINTERFÓNICO MONO Y BIFAMILIAR MININOTE+ MIKRA2
VIDEOSPRECHANLAGE-KIT FÜR EIN- UND ZWEIFAMILIENHAUS
MININOTE+ MIKRA2
EEN- EN TWEEGEZINS-VIDEOKIT MININOTE+ MIKRA2
(*)
Sch./Ref. 1722/95 - 1722/96
GUIDA RAPIDA PER L'UTILIZZO DEL VIDEOCITOFONO
VIDEO DOOR PHONE QUICK USER'S GUIDE
GUIDE RAPIDE D'UTILISATION DU MONITEUR
GUÍA RÁPIDA DE USO DEL VIDEOINTERFONO
KURZANLEITUNG FÜR DIE VERWENDUNG DER VIDEOSPRECHANLAGE
SNELGIDS VOOR HET GEBRUIK VAN DE VIDEO-DEURINTERCOM
Advertisement

Related Manuals for urmet domus mikra2 1722/95


Summary of Contents for urmet domus mikra2 1722/95
- Page 1 Mod. 1722 DS1722-126 KIT VIDEOCITOFONICO MONO E BIFAMILIARE MININOTE+ MIKRA2 ONE- AND TWO-HOUSEHOLD VIDEO DOOR PHONE KIT MININOTE+ MIKRA2 KIT VIDÉO MONO ET BI-FAMILLE MININOTE+ MIKRA2 KIT VIDEOINTERFÓNICO MONO Y BIFAMILIAR MININOTE+ MIKRA2 VIDEOSPRECHANLAGE-KIT FÜR EIN- UND ZWEIFAMILIENHAUS MININOTE+ MIKRA2 EEN- EN TWEEGEZINS-VIDEOKIT MININOTE+ MIKRA2 Sch./Ref.
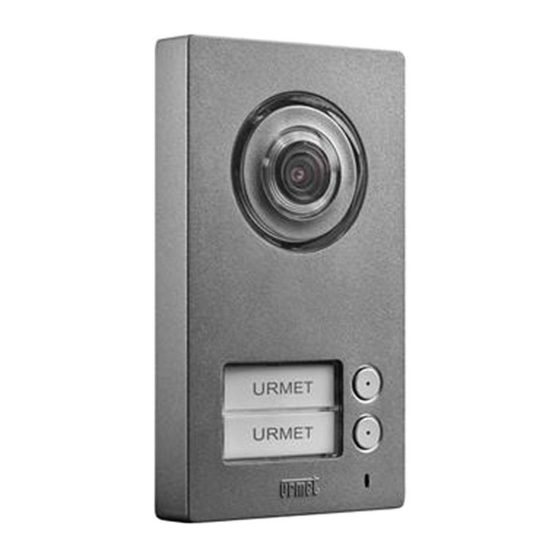
- Page 2 ITALIANO ENGLISH FRANÇAIS ESPAÑOL DEUTSCH VLAAMS DESCRIZIONE DEI COMPONENTI - DESCRIPTION OF COMPONENTS DESCRIPTION DES COMPOSANTS - DESCRIPCIÓN DE LOS COMPONENTES BESCHREIBUNG DER KOMPONENTEN - OMSCHRIJVING VAN DE ONDERDELEN 1. Display touchscreen 7” / 7” touchscreen display / Écran tactile 7” / Pantalla táctil 7" / 7"- Touchscreen-Display / 7"...
- Page 3 ITALIANO FUNZIONALITÀ COME ACCENDERE LO SCHERMO E ACCEDERE ALLE VARIE FUNZIONI Toccare lo schermo in un punto qualsiasi, oppure Premere il pulsante (5) in basso a destra del videocitofono, che farà apparire la Home Page. La Home Page è la seguente: da cui è...
- Page 4 COME SPEGNERE LO SCHERMO Per spegnere lo schermo premere il tasto (5) del videocitofono o attendere il timeout. COME RISPONDERE A UNA CHIAMATA PROVENIENTE DALL’ESTERNO Quando il videocitofono CXModo riceve una chiamata videocitofonica esterna squilla e si accende lo schermo, che è normalmente spento. Toccando le varie icone si può: Rispondere alla chiamata e iniziare la conversazione in viva voce;...
- Page 5 COME ATTIVARE UN COMANDO YOKIS Dalla Home Page premere il pulsante per accedere la Domotica Yokis: Da qui selezionare il comando o i comandi desiderati. Per schedulare un comando in una o più occorrenze settimanali, dalla Home Page del videocitofono, premere l’icona ‘Impostazioni’...
- Page 6 Selezionare il pulsante che si vuole schedulare, ad es. il primo. Comparirà: Toccare l’icona e nella videata seguente selezionare ora e giorni della schedulazione: ATTENZIONE: la schedulazione diviene attiva solo se anche il quadratino di ‘ABILITA’ è contrassegnato dal segno di spunta. Per tornare alla Home Page, premere 2 volte ‘OK’...
- Page 7 ENGLISH FUNCTIONS HOW TO TURN ON THE SCREEN AND ACCESS THE VARIOUS FUNCTIONS Tap the screen at any point, or Press the button (5) at the bottom right of the screen to bring up the Home Page. The Home Page is the following: and gives access to the following functions: View footage from the video camera.
-
Page 8: How To Turn Off The Screen
HOW TO TURN OFF THE SCREEN To turn off the screen press the Video door phone button (5) or wait for the timeout delay. HOW TO ANSWER AN EXTERNAL CALL When the CXModo Video door phone receives an outdoor door phone video call, it rings and the screen lights up from its default switched-off state. -
Page 9: How To Activate A Yokis Control
HOW TO ACTIVATE A YOKIS CONTROL From the Home Page press the button to access Yokis Home Automation: From here, select your required control(s). To schedule a control for one or more weekly occurrences, from the Home Page of the video door phone, press the icon 'Settings' and then select 'Yokis' . - Page 10 Select the button that you wish to schedule, e.g. the first one. You will display: Tap the icon and select the scheduling time and days in the following screen: NOTE THAT the scheduling only becomes active if the 'Enable' box is ticked, too. To return to the Home Page, press 'OK' twice to confirm the changes and then 'BACK' twice.
- Page 11 FRANÇAIS FONCTIONS COMMENT ALLUMER L’ÉCRAN ET ACCÉDER AUX DIFFÉRENTES FONCTIONS Toucher l’écran à n’importe quel endroit ou bien Appuyer sur le bouton (5) en bas à droite du dispositif pour afficher la page d’accueil (Home Page). La page d’accueil est la suivante : depuis cette page, il est possible d'accéder aux fonctions suivantes : Visualiser la caméra de la plaque de rue.
- Page 12 COMMENT ÉTEINDRE L’ECRAN Pour éteindre l’écran, appuyer sur la touche (5) du dispositif ou attendre le timeout. COMMENT RÉPONDRE A UN APPEL PROVENANT DE L’EXTÉRIEUR Quand le moniteur CXModo reçoit un appel vidéo externe, il sonne et l’écran (normalement éteint) s’allume. En touchant les différentes icônes, il est possible de : Répondre à...
- Page 13 COMMENT ACTIVER UNE COMMANDE YOKIS Depuis la page d’accueil, appuyer sur l’icône pour accéder à la Domotique Yokis : Ensuite, sélectionner la ou les commandes voulues. Pour programmer une commande à un ou différents moments de la semaine, depuis la page d’accueil du dispositif, appuyer sur l’icône Réglages puis sélectionner Domotique .
- Page 14 Sélectionner le bouton à programmer, par exemple le premier. Ensuite, s’affiche la page suivante : Toucher l’icône et sur la page suivante, sélectionner heure et jours de la programmation : ATTENTION: la programmation devient active uniquement quand la case ACTIF est cochée. Pour revenir à...
- Page 15 ESPAÑOL FUNCIONALIDAD CÓMO ENCENDER LA PANTALLA Y ACCEDER A LAS DIFERENTES FUNCIONES Pulse la pantalla en cualquier lugar, o Pulse el botón central (5) en la parte inferior del videointerfono, para mostrar la página de inicio. La página de inicio es la siguiente: desde la cual se pueden acceder a las siguientes funciones: Ver las imágenes que se filman desde las cámaras de vídeo.
- Page 16 CÓMO APAGAR LA PANTALLA Para apagar la pantalla pulse el botón (5) del Videointerfono o espere el tiempo de espera . CÓMO CONTESTAR UNA LLAMADA EXTERNA Cuando el Videointerfono CXModo recibe una llamada de video externa suena y se ilumina la pantalla, que está...
- Page 17 CÓMO ACTIVAR UN COMANDO YOKIS Desde la Página de inicio pulse el botón para acceder a la domótica Yokis: Desde aquí seleccione el comando o comandos deseados. Para programar un comando en uno o más eventos semanales desde la página de inicio de la pantalla, pulse el icono “Ajustes”...
- Page 18 Seleccione el botón que desea programar, por ejemplo. el primero. Aparecerá: Pulse el icono y en la siguiente pantalla, seleccione la hora y el día de la programación: ATENCIÓN: la programación se activa solo si el recuadro 'Habilitar' está marcado con una marca de verificación.
- Page 19 DEUTSCH FUNKTIONEN EINSCHALTEN DES BILDSCHIRMS UND ZUGRIFF AUF DIE VERSCHIEDENEN FUNKTIONEN Tippen Sie auf einen beliebigen Punkt im Bildschirm oder Drücken Sie die Taste (5) in der unteren rechten Ecke des Videosprechanlagen, dies wird die Homepage erscheinen lassen. Die Homepage ist folgende: Von hier aus können Sie auf folgende Funktionen zugreifen: Die von der Kamera aufgenommenen Bilder anzeigen...
- Page 20 BILDSCHIRM AUSSCHALTEN Zum Ausschalten des Bildschirms die Taste (5) des Videosprechanlagen drücken oder den Timeout abwarten. ANNAHME EINES EXTERNEN ANRUFS Wenn ein externer Anruf der Videosprechanlage am Videosprechanlagen CXModo eingeht, klingelt und schaltet sich der normalerweise ausgeschaltete Bildschirm ein. Durch Antippen der verschiedenen Symbole kann man Folgendes: Den Anruf entgegennehmen und das Gespräch über die Freisprechanlage beginnen;...
- Page 21 AKTIVIERUNG EINES YOKIS-BEFEHLS Auf der Homepage die Taste drücken, um auf Yokis Domotik zuzugreifen: Wählen Sie hier den/die gewünschten Befehl(e). Um einen Befehl mit einer oder mehrerer wöchentlicher Wiederholung(en) zu programmieren, drücken Sie auf der Homepage des Videosprechanlagen das Symbol ‘Einstellungen’ und wählen Sie dann ‘Yokis’...
- Page 22 Wählen Sie die Taste aus, die Sie programmieren wollen, z.B. die erste. Es erscheint Folgendes: Das Symbol antippen und auf der nachfolgenden Uhrzeit und Tage der Timereinstellung auswählen: ACHTUNG: Die Timereinstellung ist nur aktiv, wenn auch das Kästchen ‘Freigabe’ mit einem Häkchen markiert ist.
- Page 23 VLAAMS FUNCTIES TOEGANG TOT HET SCHERM EN TOT DE DIVERSE FUNCTIES Raak het scherm op een willekeurig punt aan, of Druk op de toets (5) onderaan rechts van de videofoon om de Home Page (startpagina) op te roepen. Dit is de Home Page: van waaruit u toegang heeft tot de volgende functies: Weergave van de beelden die door de camera worden opgenomen.
- Page 24 HET SCHERM UITSCHAKELEN Om het scherm uit te schakelen, druk op de toets (5) van de videofoon of wacht de uitschakeltijd. EEN OPROEP VAN BUITENAF BEANTWOORDEN Wanneer de videofoon CXModo een beeldoproep van buitenaf ontvangt, weerklinkt een belsignaal en licht het scherm op dat normaal gedoofd is. Door de verschillende symbolen aan te raken, kunt u: Een oproep beantwoorden en een handsfree gesprek voeren;...
- Page 25 EEN YOKIS-COMMANDO ACTIVEREN Vanaf de Home Page, druk op de knop om toegang te krijgen tot de Yokis huisautomatisering: Hier kunt u de gewenste commando of commando's kiezen. Om een commando één of meerdere keren per week te plannen, druk vanaf de Home Page van de videofoon op het pictogram ‘Instellingen’...
- Page 26 Kies de toets waarvoor u een planning wilt aanmaken, bijvoorbeeld de eerste. Het volgende scherm verschijnt: Tik op het pictogram en selecteer in het volgende scherm het tijdstip en dag van de planning: OPGELET: de planning wordt alleen doorgevoerd als de optie 'Inschakelen' is aangevinkt. Tik 2 keer op 'OK' om de wijzigingen te bevestigen en vervolgens 2 keer op 'TERUG' om terug te keren naar de Home Page.
- Page 27 DS1722-126 LBT20728...
- Page 28 DS1722-126 LBT20728 Area tecnica URMET S.p.A. servizio clienti +39 10154 TORINO (ITALY) 011.23.39.810 VIA BOLOGNA 188/C http://www.urmet.com Telef. +39 011.24.00.000 (RIC.AUT.) e-mail: info@urmet.com +39 011.24.00.300 - 323 DS1722-126 LBT20728...
Need help?
Do you have a question about the mikra2 1722/95 and is the answer not in the manual?
Questions and answers