Table of Contents
Advertisement
Quick Links
Advertisement
Table of Contents
Troubleshooting

Related Manuals for Kaysun KMF-80 DVR5


Summary of Contents for Kaysun KMF-80 DVR5
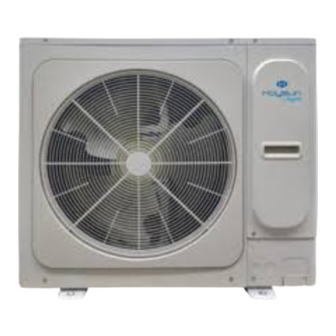
- Page 1 OWNER'S & INSTALLATION MANUAL Mini Amazon VRF (ODU) KMF-80 DVR5 KMF-120 DVR5 KMF-160 DVR5 KMF-100 DVR5 KMF-140 DVR5 IMPORTANT NOTE: Please read this manual carefully and keep it for future reference. All the pictures in this manual are for illustration purpose only.
- Page 2 Air inlet Air outlet Mounting bracket Refrigerant pipe connector NOTE ● The figures in this manual are for explanation purposes only. They may be slightly different from the air conditioner you purchased (depending on the model). The actual shape shall prevail. ● The units comply with IEC 61000-3-12. 8.00 7.00 6.00 5.00 4.00 3.00 2.00 1.00 0.00 Minimum room area Amin (m Figure 1 Curve (a) is the refrigerant charge limit for the IDU installation height h ≥ 0.6 m Curve (b) is the refrigerant charge limit for the IDU installation height 1.8 m ≤...
- Page 3 Table 1 Mmax(kg)--(a)/(b)/(c) Amin(m²) Mmax(kg)--(a)/(b)/(c) Amin(m²) Mmax(kg)--(a)/(b)/(c) Amin(m²) 0.682/2.048/2.503 2.315/6.946/7.7 3.202/7.7/7.7 0.763/2.29/2.798 2.34/7.021/7.7 3.22/7.7/7.7 0.836/2.508/3.066 2.365/7.095/7.7 3.238/7.7/7.7 0.903/2.709/3.311 2.389/7.169/7.7 3.256/7.7/7.7 0.965/2.896/3.54 2.413/7.241/7.7 3.274/7.7/7.7 1.024/3.072/3.755 2.437/7.313/7.7 3.292/7.7/7.7 1.079/3.238/3.958 2.461/7.385/7.7 3.309/7.7/7.7 1.132/3.396/4.151 2.485/7.455/7.7 3.327/7.7/7.7 1.182/3.547/4.336 2.508/7.525/7.7 3.344/7.7/7.7 1.23/3.692/4.513 2.531/7.595/7.7 3.362/7.7/7.7 1.277/3.832/4.683 2.554/7.664/7.7 3.379/7.7/7.7 1.322/3.966/4.847 2.577/7.7/7.7 3.396/7.7/7.7...
-
Page 4: Table Of Contents
CONTENTS 1 About the Documentation ....................1 2 Safety Signs ..........................1 • 2.1 Explanation of Safety Signs....................1 • 2.2 Explanation of Symbols Displayed on the Unit ..............1 • 2.3 About the Refrigerant .......................1 Operation Manaul 3 Important Information for User ..................4 4 System Information ......................8 • System Layout ........................8 5 Operating Instructions .....................9 •... - Page 5 14 Installation of Refrigerant Piping ................21 • 14.1 Selecting and Preparing the Refrigerant Piping .............21 • 14.2 Connecting Refrigerant Piping..................25 • 14.3 Checking Refrigerant Piping ...................27 15 Refrigerant Charging ....................29 • 15.1 Calculating Additional Refrigerant Charge..............30 16 Electrical Wiring .......................31 • 16.1 Safety Device Requirements ..................31 • 16.2 Communication Wiring ....................33 • 16.3 Power Cable Connection ....................36 17 Configuration ........................37 •...
-
Page 6: About The Documentation
1 About the Documentation CAUTION NOTE Indicates a hazard with a low level of risk which, if not avoided, could result in minor or moderate injury. ● Make sure that the user has the printed documentation and ask him/her to keep it for future reference. NOTE Target audience A situation that may cause damage to the Authorised installers + end users equipment or loss of property. NOTE INFORMATION ● This appliance is intended to be used by expert or trained users in shops, in light Indicates a useful hint or additional information. - Page 7 DANGER For installation of the indoor unit, refer to the corresponding installation and operation manual. These instructions are exclusively intended for If an indoor unit is installed in an unventilated area, the area shall be so constructed that should any refrigerant qualified contractors and authorized installers. leak, it will not stagnate so as to create a fire or explosion ● Work on the refrigerant circuit with flammable hazard. refrigerant in safety group A2L may only be carried out by authorized heating contractors. These heating contractors must be trained in accordance with EN 378 Part 4 or IEC WARNING 60335-2-40, Section HH. The certificate of competence from an industry accredited body...
- Page 8 2.3.2 Room Area Limitations In addition, the maximum refrigerant charge is also related to the installation height of the DHW kit and hydraulic The system uses R32 refrigerant, which is classified as module of the IDU. The correspondence of the maximum class A2 and is flammable under EN 60335-2-40. Follow refrigerant charge with the minimum room area (Amin) is the requirements below to ensure that the system shown in Figure 1 and Table 1. And different values are complies with legislation. used for different indoor installation heights: The total amount of refrigerant in the system shall be less than or equal to the maximum refrigerant charge. The CAUTION maximum refrigerant charge depends on the volume of space in the rooms being served by the system.
-
Page 9: Operation Manaul
Operation Manaul WARNING ● Never use a flammable spray, such as hair 3 Important Information for User spray or lacquerer paint, near the unit. It may cause a fire. Prior to beginning work on systems WARNING containing flammable refrigerants, safety checks are necessary to minimize the risk ● This appliance can be used by children of ignition ages 8 and above and persons with reduced... - Page 10 ● Check that cabling will not be subject – Equipment marking must remain visible to wear, corrosion, excessive pressure, and legible. Markings and signs that are vibration, sharp edges or any other illegible shall be corrected; adverse environmental effects. The check – Refrigerating pipe or components are shall also take into account the effects of installed in a position where they are unlikely aging or continual vibration from sources...
- Page 11 ● When transferring refrigerant into cylinders, ● Cylinders shall be kept upright. ensure that only appropriate refrigerant ● Ensure that the refrigeration system is recovery cylinders are used. Ensure that grounded prior to charging the system with the correct number of cylinders for holding refrigerant.
- Page 12 WARNING ● In order to avoid injury, do not remove the fan guard of the outdoor unit. ● Never touch the air outlet or the horizontal blades while the swing flap is in operation. ● Do not operate the air conditioner with wet Your fingers may become caught or the unit hands.
-
Page 13: System Information
Case 3: ODU is connected with VRF IDU and hydraulic ● The temperature of refrigerant circuit will module be high. Please keep the interconnection cable away from the copper tube. ● The sound pressure level is below 70 dB(A). ● This appliance is intended to be used by expert or trained users in shops, in light industry and on farms, or for commercial use by lay persons. -
Page 14: Operating Instructions
5.2 Operating System 5 Operating Instructions 5.2.1 System operation 5.1 Operating Range The operating program varies with different combina- Use the system at the following temperatures to ensure tions of outdoor unit and controller. safe and effective operation. The operating range for the To protect this unit, turn on the main power supply 12 air conditioner is shown in Table 5-1. hours before operation. Table 5-1 If there is a power outage while the unit is running, the unit will automatically restart its operation when the... -
Page 15: Dry Program
5.2.3 Heating operation 5.2.5 To operate the system It may take longer to reach the set temperature for Press the operation mode selector button on the user general heating operation than for cooling operation. interface and select the operation mode. The following operation is performed in order to prevent the Auto mode heating capacity from dropping or cold air from blowing Cooling mode Defrost Operation Dry mode In the heating operation, as the outdoor temperature Fan mode... -
Page 16: Maintenance And Repair
Heating Warning ● Too much dust and rubbish are stuck to the dust Do not attempt to modify, dismantle, remove, filter of the IDU. reinstall or repair this unit, as the improper ● The air outlet of IDU is blocked. dismantling or installation may result in electric shock or fire. Please contact the agent. Caution If the refrigerant accidentally leaks, make sure that there are no open flames around the unit. -
Page 17: Troubleshooting
6.2.3.2 Maintenance After Long Shutdown WARNING For example, in early summer or winter. ● When the breaker was broken, do not use any unspecified breaker or other wire to replace ● Check and remove all objects that may clog the air the original breaker. The use of electrical inlets and outlets of the indoor and outdoor units. wires or copper wires may cause the unit to ●... - Page 18 Table 7-1 Symptom Possible Cause Solution P ower failure. W ait for the power supply to be restored. ● ● P ower breaker is off. T urn on the power. ● ● The unit does not start. B atteries of the remote controller are depleted R eplace the batteries or check the ● ● or there is another problem with the controller. controller. T emperature is not set correctly. ● S et the temperature properly. Air is flowing normally but offers zero ●...
-
Page 19: Fault Symptom: Non Air Conditioning Issues
7.3 Fault Symptom: Non Air Symptom 6: The units give off odours Conditioning Issues ● This unit will absorb the odours of rooms, furniture, cigarettes and others, and then disperse the odours again. Symptom 1: The system does not operate ● During operation, the speed of the fan is controlled to optimize product performance. ● The air conditioner does not start immediately after the ON/ OFF button on the remote controller is pressed. Symptom 7: The ODU fan does not spin. If the operating indicator lights up, the system is working normally. To prevent overloading of the compressor motor, 8 Relocation the air conditioner starts 3 minutes after it is turned on. - Page 20 Warning ● If refrigerant gas has leaked during installation, ventilate the room immediately. ● Do not directly connect the appliance to the main ● If the leaked refrigerant gas comes into contact power supply. Install the main power supply with fire, noxious gas may be generated. breaker. ● After the installation, confirm that refrigerant gas ● If the supply cord is damaged, it must be replaced does not leak. by the manufacturer or its service agent or a similarly qualified person in order to avoid creating ● If refrigerant gas leaks into the room and flows a hazard.
-
Page 21: Packing Box
11. Packing Box Unpackaged ● If the packaging is damaged, the under plate shown in 11.1 Overview the following figure shall be used for protection. This chapter mainly introduces the subsequent operations after the ODU has been delivered to site and unpacked. This specifically including the following information: Under plate Please remember the following: Dismantle and dispose of the ODU. ● Remove the accessories of the ODU. ● Dismantle the transport rack. ● Please remember the following: At the time of delivery, check the unit for any ●... -
Page 22: Attached Fittings
11.4 Attached Fittings ● Case 3: ODU is connected with VRF IDU and hydraulic module Table 11-2 Installation fittings Table 12-3 Name Shape Quantity Combination Number of Capacity of Number model ratio of VRF hydraulic ODU (HP) of IDUs 1. ODU Owner’s and (kW) modules Installation Manuals 50%~100% 50%~100% 2. Water outlet pipe 50%~100% connector 50%~100%... -
Page 23: Unit Installation
13 Unit Installation Table 13-1 (Unit: mm) Model 8/10 12/14/16 13.1 Choosing and Preparing the Installation Site 13.1.1 Unit Dimensions 8/10 kW Figure 13-1 Figure 13-3 Drawing No. Figure 13-2 Figure 13-4 13.1.2 Placement Consideration Please keep away from the following places, otherwise Figure 13-1 unit malfunctions may occur: ● A place with combustible gas leakage. -
Page 24: Opening And Closing The Unit
● Split unit installation 13.1.3 Requirements for ODU Installation in Cold Regions (Wall or obstacle) Protect the ODU from direct snowfall and be careful not to let the ODU become covered in snow. Air inlet surface > 300 Maintenance > 300 cable and pipeline surface Air inlet surface Snow cover or > 600 shelter Air outlet >... -
Page 25: Odu Installation
13.2.2 Closing the ODU Caution Ensure that the tightening torque does not exceed 4.1 N·m when closing the ODU cover. Figure 13-13 8-10 kW Figure 13-11 Table 13-2 ODU model (kW) a (mm) X (mm) Y (mm) 8/10 ≥100 12/14/16 ≥100 390 13.3.2 Installing ODU Fasten the feet of this unit with 4 sets of M12 anchor 12-16 kW bolts firmly to prevent it from collapsing in the event of an Figure 13-12... -
Page 26: Installation Of Refrigerant Piping
14 Installation of Refrigerant Piping 13.3.3 Drainage 14.1 Selecting and Preparing the Caution Refrigerant Piping ● If it is not possible to install the unit completely 14.1.1 Refrigerant Piping Requirements horizontally, please make sure to tilt towards the back of the unit to ensure smooth drainage. Caution ● If the drain outlet of the ODU is covered by the installation base or floor surface, please The R32 refrigerant pipeline system must be kept raise the unit to a height of at least 150 mm to... - Page 27 Schematic diagram of the allowable length and height difference for refrigerant piping ■ Maximum equivalent piping length from the ODU to the farthest IDU is ≤ 50 m Maximum piping length from the first branch joint to the farthest IDU is ≤ 20 m First branch joint Figure 14-1 14.1.4 Allowable Length and Height Difference for Refrigerant Piping Table 14-2 Permitted value Piping...
- Page 28 When the ODU connects only one IDU (DHW kit cannot ■ Pipe diameter and branch joints between ODU and IDU be independently connected to the ODU) according to downstream IDU (DHW kit and hydraulic module need not to be included) Table 14-3 Table 14-6 Max height drop (m) Total capacity Length of Number IDU main pipe size Model of the (mm OD) refrigerant (kW) ODU at downstream Branch joint ODU on top...
- Page 29 Caution Example 2 of refrigerant piping selection: ● Material: Only seamless phosphorus-deoxidized copper piping that complies with all applicable legislation shall be used. ● Thicknesses: Temper grades and minimum thicknesses for different diameters of piping shall (28) comply with local regulations. ● Design pressure of R32 refrigerant is 4.3 MPa (43 bar). (28) (28) Example 1 of refrigerant piping selection: (28) (28) (60) (28) Figure 14-3 The example below illustrates the piping selection procedure...
-
Page 30: Connecting Refrigerant Piping
14.2 Connecting Refrigerant Piping Example 3 of refrigerant piping selection: 14.2.1 Things to Note When Connecting the Refrigerant Piping Caution (28) ● Take appropriate precautions to prevent refrigerant leakage and ventilate the area immediately if the (28) refrigerant leaks, as high concentration of R32 refrigerant in an enclosed area can cause poisoning or fire. - Page 31 Bottom out pipe connection mode Gas side stop valve Liquid side stop valve Liquid side stop valve Gas side stop valve Gas pipe Liquid pipe Figure 14-6 (Provided on site) (Provided on site) Figure 14-10 The connection method of flaring (12/14/16 kW) Back out pipe connection mode Gas pipe (Provided on site) Back out pipe Liquid pipe Side outlet...
-
Page 32: Checking Refrigerant Piping
14.2.2.2 Method of piping flaring connection CAUTION Align the center of the pipes. Only use nitrogen for flushing. Using carbon dioxide risks leaving condensation in the piping. Sufficiently tighten the flare nut with your hand, and then Oxygen, air, refrigerant, flammable gases and tighten it with a spanner and torque wrench. toxic gases must not be used for flushing. Use of such gases may result in fire or explosion. - Page 33 14.3.3 Gas Tightness Test 14.3.4 Leak Test The general methods for identifying the source of a leak To prevent faults caused by refrigerant leakage, a gas are as follows: tightness test should be performed before system commissioning. 1. Audio detection: relatively large leaks are audible. CAUTION 2. Touch detection: place your hand at joints to feel for escaping gas. ● Only dry nitrogen should be used for gas 3. Soapy water detection: small leaks can be detected tightness testing. Oxygen, air, flammable by the formation of bubbles when soapy water is applied...
-
Page 34: Refrigerant Charging
14.3.6.2 Pipe wrapping During vacuum drying, a vacuum pump is used to lower the pressure in the piping to the extent that any moisture present evaporates. At 5mm Hg (755mm Hg below To avoid condensation and water leakage, the connecting typical atmospheric pressure) the boiling point of water is pipe must be wrapped with tape to ensure isolation from 0°C. Therefore, a vacuum pump capable of maintaining a the air. pressure of -756 mm Hg or lower should be used. Using a vacuum pump with a discharge in excess of 4 L/s and Tape a precision level of 0.02mm Hg is recommended. The Insulation material vacuum drying procedure is as follows: 1. Connect the vacuum pump through a manifold with a Liquid pipe pressure gauge to the service port of all stop valves. 2. Start the vacuum pump and then open the manifold Gas pipe valves to start vacuuming the system. -
Page 35: Calculating Additional Refrigerant Charge
15.1 Calculating Additional Determine the total refrigerant charge of the system: Refrigerant Charge Total charge (Mc) = factory charge + additional charge = R0 + R. The additional refrigerant charge required depends on the The factory charge (R0) can be obtained from Table 15-5. lengths and diameters of the outdoor and indoor liquid pipes and the capacity of the IDU connected. Tables 15-1 to Table 15-5 15-3 show the additional refrigerant charge required under different conditions. Factory charge Model Refrigerant/kg Additional refrigerant charge R1 (according to liquid pipe lengths and diameters) -
Page 36: Electrical Wiring
The procedure for adding refrigerant is as follows: 16 Electrical Wiring 1. Calculate additional refrigerant charge R (kg). 16.1 Safety Device Requirements 2. Place a tank of R32 refrigerant on a weighing scale. Turn the tank upside down to ensure refrigerant is charged in a liquid state. 1. Select the minimum diameter for each unit based on the rated current, as shown in Table 16-1 and Table 16-2. 3. After vacuum drying, the blue and red pressure gauge hoses should still be connected to the pressure gauge 2. Use a circuit breaker with a spacing between polar contacts of at least 3 mm to ensure full disconnection. and to the master unit stop valves. MFA is used to select the current circuit breaker and 4. Connect the yellow hose from the pressure gauge to the residual current action circuit breaker. - Page 37 Communication wire Power cable Wire clamp Figure 16-1 Warning Caution ● ● If the power supply lacks an N phase or there is an Be careful with the risk of electric shock during installation. error in the N phase, the device will malfunction. ● All the electric wires and components must be ● Some power equipment may have an inverted installed by a qualified electrician with the proper phase or intermittent phase (such as a generator).
-
Page 38: Communication Wiring
16.2 Communication Wiring ▪ The wiring layout consists of connection cables be- tween ODUs and IDUs (including VRF IDUs, DHW kits and hydraulic modules). It includes the IDU grounding wire and shielding layer in the commu- Caution nication wiring. The ODU Wiring Diagram is shown below. ▪ The PQE electromagnetic interference of communication wires can be mitigated by using more magnetic rings. For installation, see the following figure. Magnetic rings shall be fixed with communication wires (wrapping in one or more rounds) and placed inside the unit to prevent... - Page 39 ▪ Communication Wiring Diagram (when ODU is only connected with VRF IDU) Communication wire Power cable L N GND Circuit breaker Power distribution Power distribution cabinet cabinet Fuse IDU n IDU 1 IDU 1 ··· · ··· · …… P Q E Fuse Fuse Fuse …… Resistor Figure 16-4 Caution ● L1 + L2 + Ln ≤ 1,200 m, communication wire 3 × 0.75 mm².
- Page 40 ▪ Communication Wiring Diagram (when ODU is connected with VRF IDU and hydraulic module) Communication wire Power cable L N GND Circuit breaker Power distribution Power distribution cabinet cabinet Fuse IDU n IDU 1 IDU 2 Hydraulic module …… ··· · ··· · P Q E P Q E Fuse Fuse Fuse Fuse ……...
-
Page 41: Power Cable Connection
Communication Wiring Diagram (centralized control and ammeter wiring) ● Centralized controller Digital multimeter X Y E …… IDU 3-(n-2) IDU 1 IDU n resistor IDU (n-1) Figure 16-8 Caution ● L1 ≤ 1,200 m, L2 ≤ 1,200 m, L3 + Ln + Lm ≤ 1,200 m, communication wire 3 × 0.75mm². ● All communication wires are shielded. Connect the shielding nets at both ends of the shielded cable to the sheet metal " " of the electrical control box. ● The centralized controller and digital ammeter are optional. Please contact your local distributor to purchase these parts. ● Applicable standards: EN 55014-1 and EN 55014-2. 16.3 Power Cable Connection ■ Terminal Block Description CAUTION ● You must first connect the grounding wire (note that you should use only the yellow-green wire to connect to the ground, and you must turn off the power supply when you are connecting... -
Page 42: Configuration
17 Configuration 17.4 Display Function There are buttons (8-16 kW for SW2) on the ODU check 17.1 Overview board/main control board. The digital display on the check board/main control board displays air conditioner This chapter mainly introduces the functions of the ODU parameters in the following order (press the button once check board and other related information. to display a parameter). Including the following information: Operating frequency Display "--" Button function DIP setting for priority Spot check function enabling Last 10 error codes Operating mode 17.2 Functions of SW1 and SW2 Buttons Operating fan speed... -
Page 43: Commissioning
18.3 Test Run Checklist Caution Once this unit is installed, check the following items first. After all Heat up the unit for 12 hours after turning on the power following checks have been completed, you must shut down the switch. Do not turn off the power supply if the unit is unit. This is the only way to start the unit again. designed to stop within 24 hours or less. (This is for heating up the crankshaft heating box and avoiding Table 18-1 forced starting of the compressor.) □... -
Page 44: About Test Run
18.4 About Test Run 18.6 Rectifications after Test Run Is Completed 18.4.1 Test Run Control The test run is considered complete when there is no error During the test run, the outdoor and indoor units will start code on the user interface or the outdoor unit display. at the same time. Make sure all the preparations for the When an error code is displayed, rectify the operation ODU and IDU have been completed. -
Page 45: Troubleshooting
Communication error between main control board and switch module System combination fault Communication error between IDU and ODU T3 or T4 temperature sensor error Input voltage protection DC fan protection E6 fault occurring at least 6 times in 1 hour EEPROM fault Wrong compressor parameters E.9. PFC feedback resistance fault Refrigerant radiator temperature sensor fault Cooling ambient temperature lower than -16°C DC bus voltage protection L (L0/L1) fault occurring 3 times in 1 hour Online IDU quantity decrease/increase Radiator surface temperature protection System high pressure protection System low pressure protection Overcurrent protection Discharge temperature T5 protection Outdoor condenser temperature T3 protection 4-way valve direction change fault IDU evaporator temperature T2 protection Abnormal condensation protection Condensation protection IPM protection DC bus low voltage protection DC bus high voltage protection Other drive faults MCE fault Zero speed protection Compressor phase sequence fault If the problem remains, please contact your distributor or Kaysun's air conditioner customer service center, and provide info about the product model and the fault details. -
Page 46: Precautions For Refrigerant Leak
19.2. Precautions for Refrigerant Leak Table 19-2 Factory charge Model Use combustible R32 refrigerant. Ensure the refrigerant Refrigerant/kg tons of CO2 equivalent is charged in a proper position to cover a large area so 8 kW 0.95 that its leak will never reach critical concentration. 1.22 Take necessary actions in time. 1.49 1.62 Critical concentration------the max limit concentration ● 1.62 of harmless freon Critical concentration of refrigerant: R32: 0.25 [kg/m³] ● CAUTION Confirm the critical concentration through the following steps and take necessary measures. -
Page 47: Specifications
20 Specifications 20.1 Piping Diagram: ODU ■ 8 kW Liquid stop GLQ2 valve EXVA GLQ1 12.2 12.1 Gas stop valve Legend Component name Compressor Muffler High pressure switch 4-way valve (ST1) Heat exchanger Electronic expansion valve (EXVA) Stop valve (liquid side) Stop valve (gas side) Gas-liquid separator Low pressure switch 12.1 Filter 12.2 Radiator INV1 Legend Heat exchanger piping temperature sensor Outdoor ambient temperature sensor Liquid pipe temperature sensor... - Page 48 ■ 10 kW Liquid stop GLQ2 valve EXVA GLQ1 12.2 12.1 Gas stop valve Legend Component name Compressor Muffler High pressure switch 4-way valve (ST1) Heat exchanger Electronic expansion valve (EXVA) Stop valve (liquid side) Stop valve (gas side) Gas-liquid separator Low pressure switch 12.1 Filter 12.2 Radiator INV1 Legend Heat exchanger piping temperature sensor Outdoor ambient temperature sensor Liquid pipe temperature sensor Discharge temperature sensor Figure 20-3 Figure 20-4...
- Page 49 ■ 12 kW Liquid stop GLQ2 valve EXVA GLQ1 12.2 12.1 Gas stop valve Legend Component name Compressor Muffler High pressure switch 4-way valve (ST1) Heat exchanger Electronic expansion valve (EXVA) Stop valve (liquid side) Stop valve (gas side) Gas-liquid separator Low pressure switch 12.1 Filter 12.2 Radiator INV1 Legend Heat exchanger piping temperature sensor Outdoor ambient temperature sensor Liquid pipe temperature sensor Discharge temperature sensor Figure 20-5 Figure 20-6...
- Page 50 ■ 14/16 kW Liquid stop valve GLQ2 EXVA GLQ1 12.2 12.1 Gas stop valve Legend Component name Compressor Oil separator High pressure switch 4-way valve (ST1) Heat exchanger Electronic expansion valve (EXVA) Stop valve (liquid side) Stop valve (gas side) Gas-liquid separator Low pressure switch 12.1 Filter 12.2 Radiator INV1 Legend Heat exchanger piping temperature sensor Outdoor ambient temperature sensor Liquid pipe temperature sensor Discharge temperature sensor Figure 20-7 Figure 20-8...
-
Page 51: Erp Information
21 ERP Information MDV-S80WHN8(At) Q4 Name or trademark Factory Indoor model 1x MIH28Q4N18+1x MIH45Q4N18 Outdoor model MDV-S80WHN8(At) (EU)206/2012+(EU)2016/2282; (EU)No 626/201+(EU)2C017/254; EN 14825:2016; Harmonized standards EN 14511-3:2013; EN 12102-1:2017 Specifics precautions None According to harmonized Testing conditions standards Sound power level at standard rating conditions [dB] 56/66 (indoor/outdoor) Refrigerant type [kg CO2, equivalents] SEER 5.70 Energy efficiency class in cooling Annual electricity consumption in cooling QCE [kWh/a] Design load in cooling mode (Pdesignc) [kW] 7.20 SCOP (heating average season) 4.00 Energy efficiency class in heating (average season) - Page 52 MDV-V100WHN8(At) Name or trademark Factory Indoor model 2x MIH45Q4N18 Outdoor model MDV-V100WHN8(At) (EU)206/2012+(EU)2016/2282; (EU)No 626/201+(EU)2017/254; EN 14825:2016; Harmonized standards EN 14511-3:2013; EN 12102-1:2017 Specifics precautions None According to harmonized Testing conditions standards Sound power level at standard rating conditions [dB] 60/68 (indoor/outdoor) Refrigerant type [kg CO2, equivalents] SEER 5.70 Energy efficiency class in cooling Annual electricity consumption in cooling QCE [kWh/a] Design load in cooling mode (Pdesignc) [kW] 9.00 SCOP (heating average season) 3.95 Energy efficiency class in heating (average season) Annual electricity consumption in heating QHE [kWh/a] 1984 (average season)
- Page 53 MDV-S80WHN8(At) Cooling mode: Information requirements for air-to-air conditioners Model(s): MDV-S80WHN8(At) Test matching indoor units form, no-duct: 1x MIH28Q4N18+1x MIH45Q4N18 Outdoor side heat exchanger of air conditioner: air Indoor side heat exchanger of air conditioner: air Type: compressor driven Driver of compressor: electric motor Item Symbol Value Unit Item Symbol Value Unit Seasonal space cooling Rated cooling capacity 7.20 η 225.0 rated,c energy efficiency Declared energy efficiency ratio or gas utilisation Declared cooling capacity for part load at given outdoor efficiency temperatures Tj and indoor 27/19°C (dry/wet bulb) /auxiliary energy factor for part load at given outdoor temperatures T =+35°C 7.20 =+35°C 3.23 =+30°C 5.31 =+30°C 5.30...
- Page 54 MDV-S80WHN8(At) Q4 Heating mode: Information requirements for heat pumps Model(s): MDV-S80WHN8(At) Test matching indoor units form,no-duct: 1x MIH28Q4N18+1x MIH45Q4N18 Outdoor side heat exchanger of air conditioner: air Indoor side heat exchanger of air conditioner: air If the heater is equipped with a supplementary heater: no Driver of compressor: electric motor Parameters shall be declared for the average heating season, parameters for the warmer and colder heating seasons are optional. Item Symbol Value Unit Item Symbol Value Unit Seasonal space heating Rated heating capacity 7.20 η 157.0 rated,h energy efficiency Declared coefficient of performance or gas utilisation Declared heating capacity for part load at indoor efficiency/auxiliary energy factor for part load at given temperature 20°C and outdoor temperatures T outdoor temperatures T =-7°C 4.60 =-7°C 2.60 =+2°C...
- Page 55 MDV-V100WHN8(At) Cooling mode: Information requirements for air-to-air conditioners Model(s): MDV-V100WHN8(At) Test matching indoor units form,no-duct: 2x MIH45Q4N18 Outdoor side heat exchanger of air conditioner: air Indoor side heat exchanger of air conditioner: air Type: compressor driven Driver of compressor: electric motor Item Symbol Value Unit Item Symbol Value Unit Seasonal space cooling Rated cooling capacity 9.00 η 225.0 rated,c energy efficiency Declared energy efficiency ratio or gas utilisation Declared cooling capacity for part load at given outdoor efficiency/auxiliary energy factor for part load at given temperatures T and indoor 27/19°C (dry/wet bulb) outdoor temperatures T =+35°C 9.00 =+35°C 3.06 =+30°C 6.70...
- Page 56 MDV-V100WHN8(At) Heating mode: Information requirements for heat pumps Model(s): MDV-V100WHN8(At) Test matching indoor units form,no-duct: 2x MIH45Q4N18 Outdoor side heat exchanger of air conditioner: air Indoor side heat exchanger of air conditioner: air If the heater is equipped with a supplementary heater: no Driver of compressor: electric motor Parameters shall be declared for the average heating season, parameters for the warmer and colder heating seasons are optional. Item Symbol Value Unit Item Symbol Value Unit Seasonal space heating Rated heating capacity 9.00 η 155.0 rated,h energy efficiency Declared coefficient of performance or gas utilisation Declared heating capacity for part load at indoor efficiency/auxiliary energy factor for part load at given temperature 20°C and outdoor temperatures T outdoor temperatures T =-7°C 4.95 =-7°C 2.60 =+2°C 3.02...
- Page 57 MDV-V120WHN8(At) Cooling mode: Information requirements for air-to-air conditioners Model(s): MDV-V120WHN8(At) Test matching indoor units form,no-duct: 3x MIH28Q4N18+1x MIH45Q4N18 Outdoor side heat exchanger of air conditioner: air Indoor side heat exchanger of air conditioner: air Type: compressor driven Driver of compressor: electric motor Item Symbol Value Unit Item Symbol Value Unit Seasonal space cooling Rated cooling capacity 12.30 η 297.0 rated,c energy efficiency Declared energy efficiency ratio or gas utilisation Declared cooling capacity for part load at given outdoor efficiency/auxiliary energy factor for part load at given temperatures T and indoor 27/19°C (dry/wet bulb) outdoor temperatures T =+35°C 12.30 =+35°C 3.20 =+30°C 9.00...
- Page 58 MDV-V120WHN8(At) Heating mode: Information requirements for heat pumps Model(s): MDV-V120WHN8(At) Test matching indoor units form,no-duct: 3x MIH28Q4N18+1x MIH45Q4N18 Outdoor side heat exchanger of air conditioner: air Indoor side heat exchanger of air conditioner: air If the heater is equipped with a supplementary heater: no Driver of compressor: electric motor Parameters shall be declared for the average heating season, parameters for the warmer and colder heating seasons are optional. Item Symbol Value Unit Item Symbol Value Unit Seasonal space heating Rated heating capacity 12.30 η 173.0 rated,h energy efficiency Declared coefficient of performance or gas utilisation Declared heating capacity for part load at indoor efficiency/auxiliary energy factor for part load at given temperature 20°C and outdoor temperatures T outdoor temperatures T =-7°C 6.90 =-7°C 2.60 =+2°C 4.20...
- Page 59 MDV-V140WHN8(At) Q4 Cooling mode: Information requirements for air-to-air conditioners Model(s): MDV-V140WHN8(At) Test matching indoor units form,no-duct: 2x MIH28Q4N18+2x MIH45Q4N18 Outdoor side heat exchanger of air conditioner: air Indoor side heat exchanger of air conditioner: air Type: compressor driven Driver of compressor: electric motor Item Symbol Value Unit Item Symbol Value Unit Seasonal space cooling Rated cooling capacity 14.00 η 273.0 rated,c energy efficiency Declared energy efficiency ratio or gas utilisation Declared cooling capacity for part load at given outdoor efficiency/auxiliary energy factor for part load at given temperatures Tj and indoor 27/19°C (dry/wet bulb) outdoor temperatures T =+35°C 14.00 =+35°C 3.23 =+30°C 10.30 =+30°C...
- Page 60 MDV-V140WHN8(At) Q4 Heating mode: Information requirements for heat pumps Model(s): MDV-V140WHN8(At) Test matching indoor units form,no-duct: 2x MIH28Q4N18+2x MIH45Q4N18 Outdoor side heat exchanger of air conditioner: air Indoor side heat exchanger of air conditioner: air If the heater is equipped with a supplementary heater: no Driver of compressor: electric motor Parameters shall be declared for the average heating season, parameters for the warmer and colder heating seasons are optional. Item Symbol Value Unit Item Symbol Value Unit Seasonal space heating Rated heating capacity 14.00 η 181.0 rated,h energy efficiency Declared coefficient of performance or gas utilisation Declared heating capacity for part load at indoor efficiency/auxiliary energy factor for part load at given temperature 20°C and outdoor temperatures T outdoor temperatures T =-7°C 8.85 =-7°C 2.90 =+2°C...
- Page 61 MDV-V160WHN8(At) Cooling mode: Information requirements for air-to-air conditioners Model(s): MDV-V160WHN8(At) Test matching indoor units form,no-duct: 2x MIH36Q4N18+2x MIH45Q4N18 Outdoor side heat exchanger of air conditioner: air Indoor side heat exchanger of air conditioner: air Type: compressor driven Driver of compressor: electric motor Item Symbol Value Unit Item Symbol Value Unit Seasonal space cooling Rated cooling capacity 15.50 η 261.0 rated,c energy efficiency Declared energy efficiency ratio or gas utilisation Declared cooling capacity for part load at given outdoor efficiency/auxiliary energy factor for part load at given temperatures T and indoor 27/19°C (dry/wet bulb) outdoor temperatures T =+35°C 15.50 =+35°C 3.02 =+30°C 11.40...
- Page 62 MDV-V160WHN8(At) Heating mode: Information requirements for heat pumps Model(s): MDV-V160WHN8(At) Test matching indoor units form,no-duct: 2x MIH36Q4N18+2x MIH45Q4N18 Outdoor side heat exchanger of air conditioner: air Indoor side heat exchanger of air conditioner: air If the heater is equipped with a supplementary heater: no Driver of compressor: electric motor Parameters shall be declared for the average heating season, parameters for the warmer and colder heating seasons are optional. Item Symbol Value Unit Item Symbol Value Unit Seasonal space heating Rated heating capacity 15.50 η 173.0 rated,h energy efficiency Declared coefficient of performance or gas utilisation Declared heating capacity for part load at indoor efficiency/auxiliary energy factor for part load at given temperature 20°C and outdoor temperatures T outdoor temperatures T =-7°C 9.73 =-7°C 2.90 =+2°C 5.92...
- Page 63 Fan Types Axial fan Directive (or Standard) for Regulation ErP Directive 2009/125/EC COMMISSION REGULATION (EU) No 327/2011 Model Name ZKSN-200-10-4L+ZL-580*200*12-3N Rev. Prepare by Specified Information of Fan: Information Item Comment η 29.41% target ≧η Overall efficiency (η ) = 33.44% Pass or not (Criteria: η Pass target Measurement category (A-D) Efficiency category (static or total) Static Efficiency grade at optimum energy efficiency point N =42.6 VSD is integrated within the fan Year of Manufacture Ref. to the Unit Nameplate Manufacturer’s name and place of manufacture Ref.
- Page 64 Fan Types Axial fan Directive (or Standard) for Regulation ErP Directive 2009/125/EC COMMISSION REGULATION (EU) No 327/2011 Model Name ZKSN-200-10-4L+ZL-580*200*12-3N Rev. Prepare by Specified Information of Fan: Information Item Comment η 29.23% target ≧η Overall efficiency (η ) = 36.14% Pass Pass or not (Criteria: η target Measurement category (A-D) Efficiency category (static or total) Static Efficiency grade at optimum energy efficiency point N =45.3 VSD is integrated within the fan Year of Manufacture Ref. to the Unit Nameplate Manufacturer’s name and place of manufacture Ref.
- Page 65 Fan Types Axial fan Directive (or Standard) for Regulation ErP Directive 2009/125/EC COMMISSION REGULATION (EU) No 327/2011 Model Name ZKSN-200-10-3L+ZL-580*200*12-3N Rev. Prepare by Specified Information of Fan: Information Item Comment η 30.26% target ≧η Overall efficiency (η ) = 33.39% Pass or not (Criteria: η Pass target Measurement category (A-D) Efficiency category (static or total) Static Efficiency grade at optimum energy efficiency point N =42.1 VSD is integrated within the fan Year of Manufacture Ref. to the Unit Nameplate Manufacturer’s name and place of manufacture Ref.
- Page 66 Fan Types Axial fan Directive (or Standard) for Regulation ErP Directive 2009/125/EC COMMISSION REGULATION (EU) No 327/2011 Model Name ZKSN-200-10-3L+ZL-580*200*12-3N Rev. Prepare by Specified Information of Fan: Information Item Comment η 30.32% target ≧η Overall efficiency (η ) = 35.31% Pass or not (Criteria: η Pass target Measurement category (A-D) Efficiency category (static or total) Static Efficiency grade at optimum energy efficiency point N =43.3 VSD is integrated within the fan Year of Manufacture Ref. to the Unit Nameplate Manufacturer’s name and place of manufacture Ref.
Need help?
Do you have a question about the KMF-80 DVR5 and is the answer not in the manual?
Questions and answers