Table of Contents
Advertisement
Quick Links
Advertisement
Table of Contents

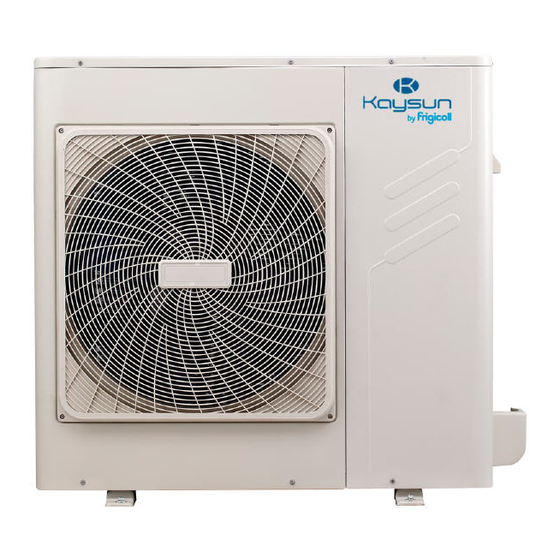
Summary of Contents for Kaysun Mini Amazon 3 KMF-80 DVN4
- Page 1 INSTALLATION MANUAL Mini Amazon III KMF-80 DVN4 KMF-120 DVN4 KMF-160 DVN4 KMF-100 DVN4 KMF-140 DVN4 Thank you very much for purchasing our air conditioner. Before using your air conditioner, please read this manual carefully and keep it for future reference.
- Page 2 CONTENTS ..............PAGE WARNING PRECAUTIONS ................ 1 If the supply cord is damaged, it must be replaced by the ATTACHED FITTINGS .............. 2 manufacturer or its service agent or a similarly qualified person OUTDOOR UNIT INSTALLATION ..........3 in order to avoid a hazard. INSTALL THE CONNECTING PIPE ..........
-
Page 3: Attached Fittings
Check if any accessory in the above figure is missing. All the accessories must be kept properly. 18) Vacuum pump (Charge hose:R410A special requirement) z All the fittings should be Kaysun fittings. 19) Torque wrench z Wired/Remote controller — purchase separately. -
Page 4: Outdoor Unit Installation
• Near a private power station or high Frequency equipment. CAUTION • Install indoor unit, outdoor unit, power cord and connecting wire at least 1m away from TV set or radio to prevent noise or picture interference. „ Install the outdoor unit at a place where discharge air is not •... -
Page 5: Moving And Installation
Single unit installation (Wall or obstacle) Air inlet surface > 300 > 300 Maintenance cable and pipeline surface Air inlet surface > 600 Fig.3-4 > 2000 14/16kW Air outlet surface Fig.3-4 Parallel connect the two units or above > 300 >... -
Page 6: Install The Connecting Pipe
CAUTION NOTE Side out pipe: please remove the L-shape metal plate, otherwise can All the pictures in this manual are for explanation purpose not wiring. only. They may be slightly different from the air conditioner you purchased(depend on model).The actual shape shall prevail. Back out pipe:please wipe off the piping support rubber blanket beside the inner outlet pipe cover of the machine while back side getting out pipes. -
Page 7: Connecting Method
Flaring NOTE 14kW Welding or Flaring Flaring z Use the special-purpose branch branches provided by Kaysun 16kW Welding or Flaring Flaring only. Failing to do so may lead to severe system malfunction. z If the distance from the first branch pipe to the last IDU exceeds 15... - Page 8 Illustration „ Pipe diameter of the connector in the outdoor unit’s body Table 4-7 Piping side Pipe diameter of outdoor unit’s Outdoor Unit(Take Model 160 for example) connector(mm) MODEL (kW) Gas Side Liquid Side (28) Φ15.9 Φ9.5 Intdoor Units Φ15.9 Φ9.5 (28) Φ15.9...
- Page 9 z Allowable length and altitude difference of refrigerant pipe table 4-11 Pimitted value Piping ≤50m(8kW) +a+b+c+d+e+f Total Pipe Length(Actual) ≤65m(10/12kW) L1+L2+L3+L4+L5 ≤100m(14/16kW) ≤35m(8kW) Actual Length ≤45m(10/12kW) ≤60m(14/16kW) L1+L2+L3+L4+L5+f(The first connect methond) Maximum Piping(L) or L1+L3+L5+f(The second connect methond) ≤40m(8kW) Equivalent Length ≤50m(10/12kW) ≤70m(14/16kW) Pipe Length(from the first line branch pipe to...
-
Page 10: Airtight Test
z The second cennect methond Pipe length(From the nearest branch Outdoor unit pipe equivalent length Maximum pipe equivalent length (From the first line branch pipe) Maximum pipe equivalent length The First Line Branch Pipe Indoor unit Fig.4-8 Remove Dirt or Water in the Piping (If the pressure cannot be decreased to lower than -100.7 kPa after two-hour vacuumizing, repeat the vacuum breaking and vacuum Make sure there is no any dirt or water before connectiong the piping... -
Page 11: Electrical Wiring
ELECTRICAL WIRING Outdoor power supply On/Off switch Fuse Power supply of centralized controller Centralized controller (optional) P Q E X Y E Please use the shielded wire, and the shield layer must be grounded. Fuse Fuse Fuse Fuse On/Off switch Indoors Power supply Distribution box... - Page 12 ODU power supply 220V~240V 50Hz Fig. 5-2 Only the dedicated meter of Kaysun can be used on the unit. For the wiring method of the meter, please consult Kaysun’s professional service personnel. No digital multimeter interface for 8kW; and reserved digital multimeter interface for 10kW ,12kW, 14kW and 16kW.
-
Page 13: Indoor Unit Wiring
5.2.2 The method of fixing the power cord and signal line: CAUTION 1. The method of fixing the power cord : z When the power cable is parallel to the signal wire, make sure 10/12kw 14/16kw that they are enclosed in respective conduits and are kept a 10/12kw 14/16kw reasonable wire spacing. -
Page 14: Test Running
TEST RUNNING NOTE Operate according to “gist for test running” on the electric control box cover. The wire diameter and continuous length is under the condition that the voltage vibration is within 2%. If the continuous length is exceed showing value, choose the wire diameter follow relevant CAUTION regulation. -
Page 15: Turn Over To Customer
NOTE Please press “constraint cool” button to carry out refrigerant recycling process. Keep the low pressure above 0.2MPa, other wise compressor may be burnt out. Important information for the used refrigerant This product has the fluorinated gas, it is forbidden to release to air. Refrigerant type: R410A;...


Need help?
Do you have a question about the Mini Amazon 3 KMF-80 DVN4 and is the answer not in the manual?
Questions and answers