Table of Contents
Advertisement
Contents
Introduction
FAQ
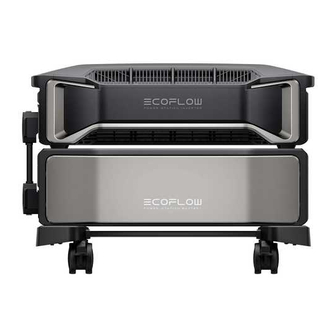
Introduction
EcoFlow DELTA Pro Ultra is a residential power backup system designed for both
extended outages and daily use. With an unrivaled capacity of 6kWh, 7.2kW output,
and 5.6kW solar input, a single unit can run your entire home. With EcoFlow Smart
Home Panel 2, get an uninterrupted power backup experience with automatic switch-
over, energy consumption monitoring, and lower electricity bills.
Home Backup
The DELTA Pro Ultra can either be used as a stand-alone unit using various recharging
options (low/high voltage solar systems, generators, EV chargers, etc.) or forms a
whole home backup system to ensure that your home can be powered 24/7 without
any influence from power outage.
Continuous Power
With EcoFlow DELTA Pro Ultra's UPS technology, you'll get impeccable, uninterrupted
power flow, EcoFlow DELTA Pro Ultra safeguards your vulnerable electronic equipment
round-the-clock. For extended outages, you don't want to hear your backup in the
background, so for low draws under 2000W*, it's completely silent. With a whisper-
quiet 0 dB, your nights remain undisturbed as it powers your devices.
Expandable Capacity
EcoFlow App
Community
After-sales
Policy
Advertisement
Table of Contents

Related Manuals for EcoFlow DELTA Pro Ultra


Summary of Contents for EcoFlow DELTA Pro Ultra
-
Page 1: Table Of Contents
App Settings Home Backup Troubleshooting The DELTA Pro Ultra can either be used as a stand-alone unit using various recharging Maintenance options (low/high voltage solar systems, generators, EV chargers, etc.) or forms a whole home backup system to ensure that your home can be powered 24/7 without What's in the Box any influence from power outage. - Page 2 (see Backup System), one can connect up to 5 batteries to an inverter or up to 15 batteries to 3 sets of inverters, which makes the total capacity add up to about 30kWh to 90kWh. Specifications EcoFlow DELTA Pro Ultra Inverter IP Rating IP54 Noise Level <30 dB...
-
Page 3: How It Works
“Specifications” for more details NOTICE Specifications and notes herein may change without notification. EcoFlow reserves the right to modify the document due to product update. The IP rating is IP54 when the product is not in use. For most scenarios, noise level of the product is less than 30 dB. - Page 4 Refer to the information below to ensure that your appliances are compatible with DELTA Pro Ultra. If you choose to proceed with incomaptible appliances, DELTA Pro Ultra may not be able to provide backup power effectively. To avoid this, please check the following specifications carefully.
- Page 5 Introduction The DELTA Pro Ultra can be used to create a whole home backup system that stores power for your appliances using several schemes. You can check daily/monthly/yearly figures or configure settings via the EcoFlow app. You will enjoy an outage-free life...
- Page 6 Transfer Switch Scheme 1 The EcoFlow 50 amp hub links up to two sets of DELTA Pro Ultra and acts as a power transfer center between DELTA Pro Ultra and the 50 amp transfer switch. A. EcoFlow DELTA Pro Ultra (×2 sets max) C.
- Page 7 Scheme 2 A. EcoFlow DELTA Pro Ultra (×1 set) C. Main Panel D. Meter 30 Amp Transfer Switch...
-
Page 8: Overview
NOTICE For any transfer switch that does not include inlet box function, please connect an inlet box to DELTA Pro Ultra and the transfer switch. Overview Ports and Buttons EcoFlow DELTA Pro Ultra Inverter... - Page 9 30V and 150V. Turns on/off the PV switch to enable/disable solar PV switch charging. Insert the EcoFlow 4G Dongle PPS (NA) into this port 4G dongle port to establish communication between the device and EcoFlow web portal. AC output socket (120V Supports 120V 20A max output and 20 ms UPS per 20A max.
- Page 10 ② Connects to an EV charger for recharging. 20 Battery port Connects the inverter to the battery. EcoFlow DELTA Pro Ultra Battery 1 Battery port Connects the inverter to the battery. ① Long press for 1 second to power on.
- Page 11 LCD Screen 4G connection Input indicator Wi-Fi connection Total input power Bluetooth Connection AC charging input Backup mode Power input Low-temp warning How-temp warning High-temp warning Low-temp warning Self-consumption mode Number of batteries Battery failure warning Remaining charging/discharging time Error report Remaining battery percentage Error code USB-C output...
-
Page 12: Installation
Status Description Power on LED 1 to 5 sequentially lights up Power off LED 5 to 1 sequentially shuts down 81%~100%: LED 1 to 5 solid 61%~80%: LED 1 to 4 solid 41%~60%: LED 1 to 3 solid Discharging 21%~40%: LED 1 to 2 solid 1%~20%: LED 1 solid 0%: LED 1 to LED 5 blinking 0~20%: LED 1 blinks... - Page 13 2. Open the protective covers and connect the battery connection cable. 3. An inverter supports up to 5 batteries. During installation, please note that battery connection cables should be installed in the right sequence as in the illustration. If you connect more than 3 batteries, lock the brakes of the mount casters after installation.
- Page 14 CAUTION To avoid accidental unplugging, we recommend that you lock the battery cable. After you mount the battery cable, you can lock the cable with a flathead screwdriver; when you need to remove the cable, remember to unlock it first. For long-time use, do not move the whole set of products if you connect the inverter to three or more batteries and lock casters by flicking the brake down, so that the product can't be moved anymore.
- Page 15 Find out more As the product is very heavy, we recommend that two people carry it to avoid potential personal injury. The portable stand needs to be installed on a hard, flat surface instead of soft surfaces (for example, dirt or sand). Do not place the portable stand on a tilted surface as it may cause the product to topple over, potentially resulting in personal injury or product damage.
- Page 16 CAUTION For this installation option, one can connect up to 2 batteries to an inverter. The EcoFlow Fixing Metal Tabs need to be fixed to the battery under the top inverter. Mounting On A Shelf If you plan to put the inverter and the battery in different places (for example on a shelf, on the ground, etc.), you can connect them with a 0.75-meter long battery...
-
Page 17: Power On/Off
Find out more Mounting On The Trolley To easily move the product, you can also mount the set on the trolley, but please note that you can only mount one inverter and one battery on the trolley. Find out more Power On/Off Long press the main power button of the inverter or the battery for 1 second to turn on the device. -
Page 18: Power Your Appliances
Status Description Power on long press for 1 second LCD screen on/off press once Power off press and hold for 2-3 seconds NOTICE If the device is turned off, it will automatically turn on when you connect the product to a wall outlet. When the device is turned on, the LCD screen will light up;... - Page 19 them. Press the DC power button to enable DC output ports, and press again to disable them. NOTICE Ensure that the product is turned on (see "Power On/Off" for more details) before enabling DC/AC output. Ensure that the total power of all loads is less than the rated power of the product.
-
Page 20: Charging Your Power Station
EcoFlow 50 Amp Hub You can connect one or two sets of DELTA Pro Ultra to the EcoFlow 50 Amp Hub for recharging your car or other NEMA 14-50 plug-based appliances. To successfully link one or two sets of DELTA Pro Ultra, follows steps below: 1. - Page 21 EV charger or contact the manufacturer for details. To enable EV charging, please follow steps as follows: 1. Connect one side of the EV adapter to the power input/output port and the other side to the EV charger. 2. Turn on main power button of DELTA Pro Ultra.
- Page 22 To avoid product damage, ensure that the solar panels are properly connected to the low-voltage PV or high-voltage PV input port. If you connect the EcoFlow DELTA Pro Ultra to PV system circuits installed on or in buildings, according to NEC regulation, the system shall include a rapid shutdown function to ensure the safety of operation and reduce shock hazard for emergency responders.
- Page 23 WARNING Keep the PV switch "OFF" when connecting solar panels to the product. Whether you connect the solar panels to the low-PV input port or high-PV input port, you need to turn on the PV switch to enable solar charging once the solar panels are connected.
- Page 24 High-PV input voltage range: 80V < total solar input < 450V Low-PV input + high-PV input Voltage range for low-PV input: 30V < total solar input < 150V Voltage range for high-PV input: 80V < total solar input < 450V Connect in parallel We do not recommend that you connect solar panels to the device in parallel because the maximum current of high-PV and low-PV input ports is 15A;...
- Page 25 How many EcoFlow solar panels can I connect? Please refer to the following Specs for EcoFlow Solar Panels for more details if you are not sure how many EcoFlow solar panels you need for low-PV or high-PV input ports. Specs for EcoFlow Solar …...
-
Page 26: Ups And X-Fusion
Solar charging + generator Connect the product to solar panels and a generator at the same time. NOTICE When both AC charging input port and power input/output port are connected to the product, the power input/output port will be preferably chosen for charging whereas AC charging will not be able to work When you connect the product to more than one option for recharging, you can either connect to low-PV or high-PV input ports only, or both low- and high-PV... -
Page 27: App Settings
DELTA Pro Ultra supports two types of UPS: online UPS and backup UPS. Connect the device to a wall outlet (see "Charging from the wall outlet") using the supplied AC charging cable and to your appliances at the same time, your appliances will receive power from the grid but not from the product. - Page 28 2. Wait for the app to scan the available device and then click the product icon. 3. Internet Setup There are few ways to connect to DELTA Pro Ultra: Bluetooth, IoT and 4G. Bluetooth: Generally, you are notified to turn on Bluetooth when you bond the app...
- Page 29 app and the device, you can check the device's operating status and control/manage the device wirelessly via the app. IoT: After connecting to Bluetooth, select the icon next to Bluetooth and enter the correct password. Once connected, the device will switch to loT mode. 4.
- Page 30 "AC Charging" in this online manual for details.) Energy strategy Automation (timer) You can set a time or a period of time to charge or discharge DELTA Pro Ultra. The following modes are currently available: AC charging, AC discharging, and DC discharging.
-
Page 31: Troubleshooting
“Error Code List” for more details Maintenance EcoFlow DELTA Pro Ultra Inverter Ask qualified personnel to check or maintain the product, and replace the original components with identical replacements. Use clean and dry cloth or paper to clean dirt or stains off the ports. Do not clean the product with chemicals or corrosive materials. -
Page 32: What's In The Box
Ensure all cables are intact and securely connected. connection months EcoFlow DELTA Pro Ultra Battery 1. The battery must remain at 45°C for at least 20 hours during two charge/discharge cycles. 2. If the charging/discharging level is not fully charged after one month or 30 cycles, it will automatically charge up to 100% for calibration (calibration). - Page 33 EcoFlow AC Charging Cable-C20 (×1) User Manual & Warranty Card NOTICE The EcoFlow DELTA Pro Ultra Inverter must be used together with at least one EcoFlow DELTA Pro Ultra Battery as a whole set. EcoFlow DELTA Pro Ultra Battery 1 EcoFlow DELTA Pro Ultra Battery...
-
Page 34: Accessory List
EcoFlow DELTA Pro Ultra is referred to as DELTA Pro Ultra, EcoFlow DELTA Pro Ultra Inverter is referred to as the inverter, and EcoFlow DELTA Pro Ultra Battery is referred to as the battery. Failure to properly operate this product could cause serious injury to yourself or others, or cause damage to this product and other property. - Page 35 EFYJ751-PCS-US and EFYJ751-BP that shall be followed during installation and maintenance. 1. Before installing, using and maintaining the product, please read carefully the safety instructions in this manual. EcoFlow is not responsible for any problems caused by improper handling of the product in installation and maintenance procedures.
- Page 36 Take anti-electric shock measures before touching the product, and put it immediately in a safe, waterproof and open area. Contact qualified personnel or EcoFlow after-sales service if necessary. Safety Requirements 1.
- Page 37 on battery recycling and disposal. 2. If the battery cannot be fully discharged due to a product failure, please do not dispose of the battery directly in the battery recycling box. In such case, you should contact a professional battery recycling company for further processing. 3.
Need help?
Do you have a question about the DELTA Pro Ultra and is the answer not in the manual?
Questions and answers
error code 122?