Advertisement
Quick Links
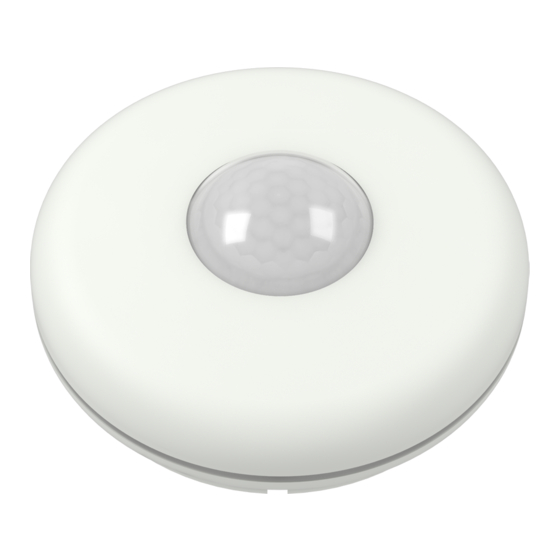
RFMD-200
Motion detector
EN
Bewegungsmelder
DE
AT
Characteristics /
Eigenschaften
• The motion detector PIR is used to detect presence persons moving inside the building interior.
• Use:
• in combination with a switching unit for automatic control of lighting or triggering an alarm.
• by means of the Smart RF gate, detection can be displayed on your smart phone in the form
of a notification; alarms are stored in the history, which is visualized in the iNELS application.
• In combination with hotel elements (HRESK) it can serve as a room occupancy sensor
• Sensitivity settings of the PIR detector for eliminating unwanted triggering.
• Option of activation/deactivation of the LED indicator on the detector cover.
• Power supply: 2x 1.5 V AA batteries, the battery life is around 1 year.
• "Low Battery" Alerts by double LED flashing or on iHC App.
• The detectors are compatible with switching components marked with the RFIO2 communica-
tion protocol and the eLAN-Wireless system components.
Assembly /
Montage
Turn the device to
1
the left and separate
from the base.
a) a)
Drehen Sie das
Gerät nach links
und trennen Sie es
von der Basis.
b) b)
4
Assembly recommendations /
Empfehlungen für die Montage
• The detector is intended for indoor use. Please thoroughly read the instructions before installa-
tion.
Place the detector in a suitable location. Take the detection characteristics into account when
installing.
• After batteries are inserted, there is a 15 second delay for the PIR detector to stabilize; the detec-
tor does not sense for this time, the motion detection function is then activated
• After batteries are inserted, 5 minutes of activation is indicated by a flashing red led and the idle
time after activation is reduced to 2 seconds (regardless of the DIP2 setting). When this time
passes, the idle time after activation is controlled by the setting of DIP2 and the LED does not
indicate this.
Replacement of a battery /
Batteriewechsel
Turn the device
1
to the left and
separate from the
base.
Drehen Sie das
a) a)
Gerät nach links
b) b)
und trennen Sie es
von der Basis.
• Der PIR-Bewegungsmelder dient dazu, Bewegungen von Personen in Innenräumen zu erken-
nen
• Anwendung:
• in Kombination mit einem Schaltelement zur automatischen Beleuchtungsregelung oder
Auslösung einer Sirene,
• über das Smart RF-Gateway kann die Erkennung in Form von einer Meldung auf Ihrem Smart-
phone angezeigt werden, die empfangenen Alarme werden in der Historie gespeichert, die
in der iNELS-Anwendung visualisiert wird.
• In Kombination mit Hotelelementen (HRESK) kann er als ein Raumbelegungssensor dienen.
• Einstellung der Empfindlichkeit des PIR-Melders, um unerwünschtes Schalten zu verhindern.
• Speisung: 2x 1,5 V Batterie AA, die Batterielebensdauer beträgt mind. 1 Jahr
• Anzeige der leeren Batterie durch doppeltes Aufblinken der LED oder in Form der iNELS-
-Anwendung
• Die Melder sind mit Schaltelementen, die mit dem RFIO2-Kommunikationsprotokoll gekennze-
ichnet sind, und mit eLAN-RF-Systemelementen kompatibel.
2
Program the
instrument - see
Programming
chapter.
Programmieren Sie
das Gerät – siehe
Kapitel Program-
mieren.
• Der Melder ist zur Verwendung im Innenbereich bestimmt. Bitte lesen Sie die Anleitung vor
der Installation sorgfältig durch.
Platzieren Sie den Melder an einem geeigneten Ort. Berücksichtigen Sie bei der Platzierung
die Erkennungsmerkmale.
• Nach dem Einlegen der Batterien hat der PIR-Melder eine Zeitverzögerung von 15 Sekunden,
um sich zu stabilisieren. Der Melder ist während dieser Zeit nicht aktiv, anschließend wird die
Funktion der Bewegungserkennung aktiviert.
• Nach dem Einlegen der Batterien wird nach 5 Minuten die Aktivierung durch das Aufblinken
der roten LED angezeigt und die Inaktivität nach der Aktivierung wird auf 2 Sekunden reduziert
(unabhängig von der DIP2-Einstellung). Nach Ablauf dieses Zeitraums wird die Inaktivitätszeit
nach der Aktivierung durch die Einstellung von DIP2 bestimmt und die LED zeigt nicht an.
2
1/4
3
a) a)
b) b)
Remove the original
3
battery and insert new
batteries into the battery
holder (never mix old and
new batteries). Beware of
the polarity.
The blue LED on the
b) b)
detector will blink.
Entfernen Sie die Origi-
nalbatterien und legen
Sie neue Batterie in den
Batteriehalter ein (niemals
alte und neue Batterie
kombinieren). Achten Sie
auf die Polarität.
Die blaue LED am Melder
blinkt kurz auf.
02-85/2023
Place the base at the desired
location and attach it with
suitable bonding material
according to the substrate.
Platzieren Sie die Basis an
der gewünschten Stelle und
befestigen Sie diese mit
einem geeigneten Verbin-
dungsmaterial je nach dem
Untergrund.
Check the correct positioning
of the batteries. Insert the
programmable device into
the base and snap into place
by turning it to the right.
Überprüfen Sie die korrekte
Platzierung der Batterien.
Setzen Sie das programmier-
te Gerät in die Basis ein und
drehen Sie es nach rechts,
sodass es einrastet.
Insert the de-
vice into the
base and snap
into place by
turning it to
a) a)
the right.
Setzen Sie das
Gerät in die
Basis ein und
drehen Sie es
nach rechts,
sodass es
einrastet.
Advertisement

Subscribe to Our Youtube Channel
Related Manuals for iNels RFMD-200


Summary of Contents for iNels RFMD-200
- Page 1 • by means of the Smart RF gate, detection can be displayed on your smart phone in the form Auslösung einer Sirene, of a notification; alarms are stored in the history, which is visualized in the iNELS application. • über das Smart RF-Gateway kann die Erkennung in Form von einer Meldung auf Ihrem Smart- •...
- Page 2 Informationen über den aktuellen Zustand ON - The detector is connected to the system (eLAN, RF Touch, iNELS headquarters) - it ON – der Melder ist mit dem System (eLAN, RF Touch, iNELS-Zentrale) verbunden – er sends information in case of a change in status and periodically after 120 minutes.
- Page 3 Melders mit den Systemele- menten dient die auf der Unterseite des system enables via the app and iNELS Cloud. Nach dem Hinzufügen des Melders können Sie Alarme address / Melders oder im oberen linken Teil des und andere Automatisierungsfunktionen einstellen, die das drahtlose Steuerungssystem über die App und die...
- Page 4 Attention: Achtung: When you instal iNELS Wireless system, you have to keep minimal distance 1 cm between each units. Bei der Installation Aktoren iNELS Wireless muss es der Mindestabstand 1 cm geachtet sein. Between the individual commands must be an interval of at least 1s.
Need help?
Do you have a question about the RFMD-200 and is the answer not in the manual?
Questions and answers