Table of Contents
Advertisement
Quick Links
We advise you to read this manual carefully, which contains all the instructions for maintaining the
appliance's aesthetic and functional qualities. For further information on the product: www.smeg.com
PRECAUTIONS
General safety instructions
Risk of personal injury
• WARNING: During use the
appliance and its accessible
parts become very hot. Keep
children well away from the
appliance.
• Protect your hands by wearing
oven gloves when moving food
inside the oven.
• Never try to put out a fire or
flames with water: Turn off the
appliance and smother the
flames with a fire blanket or
other appropriate cover.
91477A747/B
3
3
8
9
9
9
9
9
10
10
10
10
11
11
11
12
12
12
13
13
13
14
• This appliance may only be
used by children aged 8 years
and over, and by people of
reduced physical, sensory or
mental capacity, or lacking in
experience in the use of
electrical appliances, provided
that they are supervised or
have been given instructions on
the safe use of the appliance
and of the hazards associated
with it.
• Children must not play with the
appliance.
• Keep children under the age of
eight at a safe distance unless
15
15
17
19
20
21
22
22
22
22
22
24
26
27
27
30
30
34
34
PRECAUTIONS - 3
Advertisement
Table of Contents

Related Manuals for Smeg CSP9GMXA2


Summary of Contents for Smeg CSP9GMXA2
-
Page 1: Table Of Contents
Instructions for the installer Using the hob We advise you to read this manual carefully, which contains all the instructions for maintaining the appliance’s aesthetic and functional qualities. For further information on the product: www.smeg.com PRECAUTIONS General safety instructions • This appliance may only be... - Page 2 they are constantly supervised. lid or a blanket. • Keep children under the age of • The appliance becomes very 8 away from the appliance hot during use. Take care never when it is in use. to touch the heating elements •...
- Page 3 AVAILABLE) OR NEAR THE damaged, contact technical APPLIANCE. support immediately to arrange • DO NOT USE AEROSOLS IN for it to be replaced in order to THE VICINITY OF THIS avoid possible hazards. APPLIANCE WHILST IT IS IN • WARNING: A gas cooking USE.
- Page 4 into the side guides. The bottom as a support for mechanical safety locks that cooking. prevent them from being • If you wish to use greaseproof removed must face downwards paper, place it so that it will not and towards the back of the interfere with the hot air oven.
- Page 5 • Never use the oven door to socket or from the food. lever the appliance into place • Make sure that the temperature when fitting. probe or its cable do not get • Avoid exerting too much caught in the door. pressure on the door when •...
-
Page 6: Installation
• Before starting the pyrolytic of the gas) and the regulation cycle, remove any food of the appliance are residues or large spills from compatible. previous cooking from the • This appliance is not connected inside of the oven. to a system for extracting •... -
Page 7: Appliance Purpose
• At the end of the installation, • In bed and breakfast check for any leaks with a accommodation. soapy solution, never with a This user manual flame. • This user manual is an integral part of the • Have the electrical connection appliance and must therefore be kept in its entirety and within the user's reach for the performed by authorised... -
Page 8: Information For European Control Bodies
Information for European Control conventions: Bodies Warning/Caution Fan forced mode the ECO function used to define the energy efficiency class complies with the specifications Information/Advice of European standard EN 60350-1. To save energy • Only preheat the appliance if the recipe requires you to do so. -
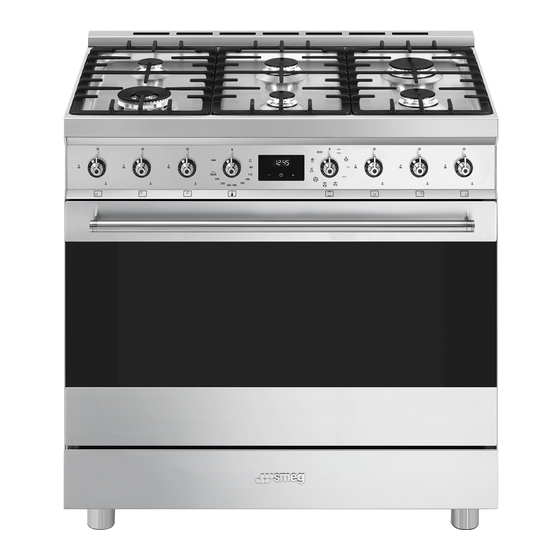
Page 9: Description
DESCRIPTION General description 1 Upstand 7 Door 2 Hob 8 Fans 3 Control panel 9 Storage compartment 4 Lateral pan supports Frame shelf 5 Inside lights 6 Seal AUX = Auxiliary Burner UR2 = Ultra Rapid Burner SR = Semi-rapid Burner R = Rapid Burner 91477A747/B DESCRIPTION - 11... -
Page 10: Control Panel
Control panel 1 Hob burner knobs Cooling fan For lighting and adjusting the hob burners. Press The fan cools the oven and comes into operation during cooking. The fan causes a and turn the knobs anti-clockwise to steady outflow of air that exits from the rear of order to light the relative burners. -
Page 11: Use
the rack above. Tray rack Oven tray Useful for supporting containers with food during cooking. Useful for collecting fat from foods placed on the rack above and for cooking pies, pizzas, Temperature probe (on some models only) baked desserts, biscuits, etc. Rack With the temperature probe, you can cook according to the temperature measured at the... -
Page 12: Using The Hob
guides until they come to a complete stop. Keep the knob pressed in longer. • The mechanical safety locks that prevent the In case of an accidental switching off, a rack from being removed accidentally must safety device will be tripped, cutting off face downwards and towards the back of the gas supply, even if the gas cock is the oven cavity. -
Page 13: Using The Oven
necessary when using the appliance. FAN WITH GRILL Allows optimal grilling, even for thick Using the oven slices of meat. Perfect for larger cuts of meat. See General safety instructions. FAN ASSISTED Intense and uniform cooking. Ideal for Switching on the oven biscuits, cakes and cooking on more To switch on the oven: than one level. - Page 14 Setting the time 6. To turn the buzzer off, simply press one of the programmer clock buttons. If the time is not set, the oven will not 7. Press the clock button to reset the switch on. programmer clock. On the first use, or after a power failure, the It is not possible to set a cooking time of digits will be flashing on the...
-
Page 15: Using The Temperature Probe (On Some Models Only)
Modifying the set data symbol turns off, the symbol flashes and 1. Press the clock key the buzzer sounds. 10. Return the function and temperature knobs to 2. Use the increase and decrease keys to set the required minutes. 11. To turn off the buzzer just press any button of Deleting the set data the programmer clock. - Page 16 touch the tray underneath and that it does 6. Use the buttons to regulate the not protrude from the food. target temperature to a value between the minimum and a maximum. • Minimum target temperature: corresponds to the instantaneous temperature measured by the probe plus 2°C.
-
Page 17: Cooking Advice
At the end of cooking • To check whether the dessert is cooked right through: At the end of the cooking time, put When the set target temperature for the a toothpick into the highest point of the temperature probe is reached, the heating dessert. -
Page 18: Cooking Information Table
Cooking information table Weight Temp. Time Food Function Shelf (Kg) (°C) (minutes) Lasagne 3 - 4 STATIC 220 - 230 45 - 50 Pasta bake 3 - 4 STATIC 220 - 230 45 - 50 Veal roast TURBO/CIRCULAIRE 180 - 190 90 - 100 Pork loin TURBO/CIRCULAIRE... -
Page 19: Temperature Probe-Cooking Information Table (On Some Models Only)
Weight Temp. Time Food Function Shelf (Kg) (°C) (minutes) Sponge CIRCULAIRE 150 - 160 55 - 60 cake Rice TURBO/CIRCULAIRE 55 - 60 pudding Brioches CIRCULAIRE 30 - 35 The times indicated in the table do not include preheating times and are provided only as a guide. Temperature probe-cooking information table (on some models only) Type and cut of meat Target temperature (°C) -
Page 20: Cleaning And Maintenance
CLEANING AND MAINTENANCE Cleaning the appliance respective burner caps. Igniters and thermocouples See General safety instructions. For correct operation the igniters and thermocouples must always be perfectly clean. Check them frequently and clean them with a Cleaning the surfaces damp cloth if necessary. Remove any dry To keep the surfaces in good condition, they residues with a wooden toothpick or a needle. - Page 21 1. Open the door completely and insert two 3. Pull the rear part of the internal glass pane pins into the holes on the hinges indicated in gently upwards, following the movement the figure. indicated by the arrows (1). 2. Grasp the door on both sides with both hands, lift it so that it forms an angle of 4.
-
Page 22: Cleaning The Oven Cavity
kitchen roll. In case of stubborn dirt, wash the sides to be cleaned more easily. with a damp sponge and neutral detergent. To remove the rack/tray support frames: • Pull the frame towards the inside of the oven cavity to unhook it from its groove A, then slide it out of the seats B at the back. - Page 23 symbol on the display comes on (steadily) to 1. Turn the function knob to 0 to exit from the indicate that the door is locked by a device that function. prevents it from being opened. symbol on the display remains lit until It is not possible to select any function the temperature inside the oven returns to a safe once the door lock device has been...
-
Page 24: Extraordinary Maintenance
lock lever might be inadvertently operated. Replacing the internal light bulb Power voltage Danger of electrocution • Unplug the appliance. • Wear protective gloves. 1. Completely remove all accessories from inside the oven. 2. Remove the rack/tray support frames. 3. Use a tool (e.g. a spoon) to remove the bulb Door lock lever activated (top view) cover. -
Page 25: Installation
6. Refit the cover. Ensure the moulded part of 7. Press the cover completely down so that it the glass (A) is facing the door. attaches perfectly to the bulb support. INSTALLATION supplied). The appliance must be installed by a This appliance must be installed by an qualified technician and according to authorised person in accordance with this... - Page 26 When the job is complete, the installer must issue a certificate of conformity. Patent 2015101170. For enquires contact Gas Approval Consulting Pty Ltd Smeg licence 037 for GSCS20265 Connection to LPG Extraction using a hood Use a pressure regulator and make the...
- Page 27 Extraction directly outdoors through wall (depending on the model) until the correct minimum flame is achieved. Refit the knob and verify that the burner flame is stable. Turn the knob rapidly from the maximum Combustion products to the minimum setting: The flame should not go out.
-
Page 28: Burner And Nozzle Characteristics Tables
4. Screw the assembled extension C to the gas 5. Apply insulating material to the thread of the connector D of the appliance, placing the assembled extension C. provided seal 2 between them. Burner and nozzle characteristics tables NG 1.0 kPA Nominal gas consumption (MJ/h) Nozzle diameter (1/100 mm) Reduced flow rate (MJ/h) - Page 29 Appliance dimensions If a hood is installed above the appliance, refer to the hood instructions manual to make sure the correct clearance is left. Appliance overall dimensions Position of gas connection 900 mm Position of electrical connection 600 mm Levelling the appliance min.
- Page 30 Assembling the upstand 3. Assemble the fastening bracket. The upstand must always be positioned and 4. Align the base of the hook on the fastening secured correctly on the appliance. bracket with the base of the slot on the wall 1.
- Page 31 7. Move the bracket onto the wall and mark 2. Attach the chain to the cooker using the the position of the holes to be drilled in the screw that was removed in the previous wall. step. 8. After drilling the holes in the wall, use wall plugs and screws to fasten the bracket to the 3.
-
Page 32: Electrical Connection
Electrical connection For the Australian/New Zealand market: The circuit breaker incorporated in the fixed connection must comply with AS/NZS 3000. See General safety instructions. Connection with plug and socket Make sure that the plug and socket are of the General information same type.
Need help?
Do you have a question about the CSP9GMXA2 and is the answer not in the manual?
Questions and answers