Table of Contents
Advertisement
Available languages
Available languages
Quick Links
Advertisement
Chapters
Table of Contents

Related Manuals for Videotec WASEX Series


Summary of Contents for Videotec WASEX Series
- Page 1 ENGLISH WASEX Explosion-proof wash system English - Instruction manual Deutsch - Bedienungsanleitung Italiano - Manuale di istruzioni Русский - Руководство по эксплуатации Français - Manuel d’instructions Português - Manual de instruções...
- Page 3 ENGLISH WASEX Explosion-proof wash system English - Instruction manual...
-
Page 5: Table Of Contents
Contents E N G L I S H 1 About this manual ........................5 1.1 Typographical conventions ..............................5 2 Notes on copyright and information on trademarks ............5 3 Safety rules ..........................5 4 Product description and type designation ................8 4.1 Product overview ................................... - Page 6 6.14 Washer installation (MAXIMUS MHX) ......................... 21 7 Maintenance ...........................22 7.1 Routine maintenance ................................22 7.1.1 Filling the tank ......................................22 7.1.2 Inspecting the cables ...................................22 8 Cleaning ..........................22 8.1 Routine cleaning ...................................22 9 Information on disposal and recycling ................22 10 Technical data ........................23 10.1 Mechanical....................................23 10.2 Electrical ....................................23 10.3 Environment ..................................23...
-
Page 7: About This Manual
1 About this manual 3 Safety rules Read all the documentation supplied carefully DANGER! before installing and using this product. Keep the Explosion hazard. manual in a convenient place for future reference. Read carefully to avoid danger of explosion. 1.1 Typographical conventions •... - Page 8 Risk of explosion due to electrostatic DANGER! discharge. High level hazard. Risk of electric shock. Disconnect the • The product is intended for fixed installation and power supply before proceeding with any the user shall not frequently touch the product in operation, unless indicated otherwise.
- Page 9 IEC/EN60079-19. for the specific purpose on hand. Use methods • Only use original VIDEOTEC spare parts. Strictly and materials capable of supporting at least 4 adhere to the maintenance instructions attached times the weight of the device.
-
Page 10: Product Description And Type Designation
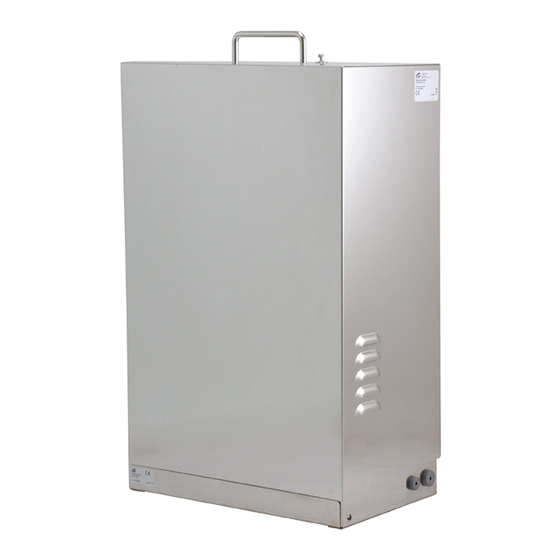
4 Product description and 4.1 Product overview type designation The main parts of the product are illustrated below: 01. Casing. The WASEX washer pump is an important element 02. Frame. for effective video surveillance in hazardous areas because it guarantees sharp images in all 03. -
Page 11: Model Identification
4.3 Model identification WASEX2T4IC: 10l tank with integrated manual pump, controlled by a certified solenoid valve (ATEX, WASEX2T4AT: 10l tank with integrated manual IECEx), delivery head up to 30m (98ft), with 20m pump, controlled by a certified solenoid valve (66ft) antistatic water delivery pipe, IN 24Vac/24Vdc (ATEX), delivery head up to 30m (98ft), with 20m WASEX2T4IN: 10l tank with integrated manual (66ft) antistatic water delivery pipe, IN 24Vac/24Vdc... -
Page 12: Preparing The Product For Use
5 Preparing the product for 6 Installation Before carrying out any type of intervention, read the "Safety rules" Any change that is not expressly approved chapter of this manual. by the manufacturer will invalidate the warranty. 6.1 Product opening 5.1 Unpacking It is possible to install or service the pump without removing the tank (Fig. -
Page 13: Frame Perforation
6.2 Frame perforation Pull the sealing ring allowing it to pass through the hole until the conical part is completely out. In the The sides and the bottom of the product have final position, the sealing ring should completely pre-drilled holes for passage of the electrical close the passage hole. -
Page 14: Fixing With Corner Adaptor Module Or Pole
6.4 Delivery pipe connection 6.3.2 Fixing with corner adaptor module or pole Connect the delivery pipe (01), passing it through the seal ring (02). Pay attention to the fixing. Tightening torque: 16.5Nm. The product can also be assembled on the pole collar or corner adaptor. -
Page 15: Ground Connection
To install electrical connections between (9AWG) section). the products, use the communication Fasten the eyelet using the screw (M5) and lock box by VIDEOTEC, MAXIMUS MBX. washer Alternatively use an explosion- Characteristics of the M5 screw: proof junction box with equivalent •... -
Page 16: Connection Of The Solenoid Valve To The Ptz (Maximus Mpx, Maximus Mpx Series2, Exsite Pro Ptz Series)
6.8.1 Connection of the solenoid valve 6.8.2 Connection of the pressure switch to the PTZ (MAXIMUS MPX, MAXIMUS to the PTZ (MAXIMUS MPX, MAXIMUS MPX SERIES2, ExSite Pro PTZ Series) MPX SERIES2, ExSite Pro PTZ Series) Use the auto-powered alarm input AL1 to connect The RL2 relay in the PTZ can withstand a the pressure switch to MPX (consult the PTZ manual). -
Page 17: Connection To The Camera (Maximus Mvx)
30Vac or 60Vdc. Turn off the products, use the communication one of the supply poles of the solenoid box by VIDEOTEC, MAXIMUS MBX. valve via the RL1 relay of the MVX. Consult Alternatively use an explosion- the camera manual. -
Page 18: Connection To The Housing (Maximus Mhx)
30Vac or 60Vdc. Turn off one the products, use the communication of the supply poles of the solenoid valve box by VIDEOTEC, MAXIMUS MBX. via the Washer relay (terminal J11) of the Alternatively use an explosion- MHX. Consult the housing manual. -
Page 19: Filling The Tank
6.11 Filling the tank If the maximum pressure (6bar) is exceeded, the safety valve activates to The operation of the pressure switch and discharge the excess pressure. the frequency of air filling depend on the amount of water in the tank. Testing is Lock the knob of the pump in the safe position, recommended to determine the amount pressing it downwards and turning anti-clockwise. -
Page 20: Product Closure
6.12 Washer installation 6.11.3 Product closure (MAXIMUS MPX, MAXIMUS MPX SERIES2) Fasten the support (01) onto the PTZ body with the metal clip (02) provided. Insert the guard and tighten the safety screw. Fig. 29 Shorten the semi-rigid washer pipe (03) as needed. Unscrew the nut (04) from the joint and slide it along the pipe. -
Page 21: Installation Options
6.12.1 Installation options Fasten the pipe to the washer support using the bracket (06), the screws and the washers (07) provided. Connect the supply pipe (08). Fig. 32 To calibrate the jet, orientate the nozzle towards the Fig. 34 window of the housing. Fig. -
Page 22: Washer Installation (Maximus Mvx)
6.13 Washer installation (MAXIMUS MVX) Fasten the bracket (01) onto the body of the camera with the metal clip (02) provided. Fasten the support for the delivery pipe (03) by means of the screws and washers provided (04). Fig. 38 Shorten the semi-rigid washer pipe (07) as needed. -
Page 23: Washer Installation (Maximus Mhx)
6.14 Washer installation (MAXIMUS MHX) Fasten the bracket (01) onto the body of the housing with the metal clip (02) provided. Fasten the support for the semi-rigid pipe (03) by means of the screws and washers provided (04). Fig. 44 Shorten the semi-rigid washer pipe (07) as needed. -
Page 24: Maintenance
7 Maintenance 9 Information on disposal and recycling Before carrying out any type of maintenance, read the "Safety rules" The European Directive 2012/19/EU on Waste chapter carefully in the product manual. Electrical and Electronic Equipment (WEEE) mandates that these devices should not be disposed Please provide the device serial number when of in the normal flow of municipal solid waste, but requesting any replacement parts. -
Page 25: Technical Data
10 Technical data 10.3 Environment WASEX2T4AT 10.1 Mechanical For indoors and outdoors installation Materials: Operating temperature of solenoid valve: from -40°C • External enclosure: stainless steel AISI 316L (-40°F) up to +70°C (158°F) • Antistatic water delivery pipe: antistatic polymer Operating temperature of device: depending on the solidification temperature of the liquid Antistatic water delivery pipe (supplied):... -
Page 26: Technical Drawings
The number of holes for cable passage depends on the model. Ø 11 Ø 11 Fig. 48 WASEX. Headquarters Italy VIDEOTEC s.r.l. Via Friuli, 6 - I-36015 Schio (VI) - Italy Tel. +39 0445 697411 - Fax +39 0445 697414 Email: info@videotec.com www.videotec.com... - Page 27 ITALIANO WASEX Sistema di lavaggio antideflagrante Italiano - Manuale di istruzioni...
- Page 29 Sommario I T A L I A N O 1 Informazioni sul presente manuale..................5 1.1 Convenzioni tipografiche ..............................5 2 Note sul copyright e informazioni sui marchi commerciali..........5 3 Norme di sicurezza ........................5 4 Descrizione e designazione del prodotto ................8 4.1 Panoramica del prodotto ..............................
- Page 30 7.1 Manutenzione ordinaria ..............................22 7.1.1 Riempimento del serbatoio................................22 7.1.2 Controllo dei cavi ....................................22 8 Pulizia ............................22 8.1 Pulizia ordinaria ..................................22 9 Informazioni sullo smaltimento e il riciclo ................22 10 Dati tecnici ..........................23 10.1 Meccanica .....................................23 10.2 Elettrico ....................................23 10.3 Ambiente ....................................23 10.4 Certificazioni - Applicazioni marine ..........................23 11 Disegni tecnici ........................24 MNVCWASEX_2404_IT...
-
Page 31: Informazioni Sul Presente Manuale
1 Informazioni sul presente 3 Norme di sicurezza manuale PERICOLO! Pericolo di esplosione. Prima di installare e utilizzare questo prodotto Leggere attentamente per evitare pericoli leggere attentamente tutta la documentazione di esplosione. fornita. Tenere il manuale a portata di mano per consultazioni successive. - Page 32 Rischio di esplosione a causa di scariche PERICOLO! elettrostatiche. Pericolosità elevata. Rischio di scosse elettriche. Prima di • Il prodotto è destinato all'installazione fissa eseguire qualsiasi operazione assicurarsi e l'utente non deve toccare frequentemente di togliere tensione al prodotto, salvo il prodotto in servizio (escluso che per la diversa indicazione.
- Page 33 • In caso di danneggiamento la sostituzione o riparazione delle parti interessate deve essere • Poiché la responsabilità della scelta della eseguita da VIDEOTEC o sotto la sua supervisione. superficie di ancoraggio dell’unità ricade sull’utente, il produttore non fornisce in dotazione •...
-
Page 34: Descrizione E Designazione Del Prodotto
4 Descrizione e 4.1 Panoramica del prodotto designazione del prodotto Di seguito vengono illustrate le componenti principali del prodotto: La pompa di lavaggio WASEX rappresenta 01. Carter. un elemento fondamentale in un impianto di 02. Telaio. videosorveglianza di aree potenzialmente esplosive perché... -
Page 35: Identificazione Del Modello
4.3 Identificazione del modello WASEX2T4IC: Tanica 10l con pompa manuale integrata controllata da elettrovalvola certificata WASEX2T4AT: Tanica 10l con pompa manuale (ATEX, IECEx), prevalenza fino a 30m, con tubo integrata controllata da elettrovalvola certificata antistatico di mandata dell’acqua lunghezza 20m, IN (ATEX), prevalenza fino a 30m, con tubo antistatico di 24Vac/24Vdc mandata dell’acqua lunghezza 20m, IN 24Vac/24Vdc... -
Page 36: Preparazione Del Prodotto Per L'utilizzo
5 Preparazione del prodotto 6 Installazione per l'utilizzo Prima di effettuare qualsiasi tipo di intervento leggere attentamente il Qualsiasi intervento non espressamente capitolo "Norme di sicurezza" del presente approvato dal costruttore fa decadere la manuale. garanzia. 6.1 Apertura del prodotto 5.1 Disimballaggio Nelle operazioni di installazione o Alla consegna del prodotto verificare che l'imballo... -
Page 37: Foratura Del Telaio
6.2 Foratura del telaio Tirare l'anello di tenuta facendolo passare attraverso il foro fino all’uscita completa della parte conica. Sui fianchi e sul fondo del prodotto sono presenti L'anello di tenuta in posizione finale dovrà chiudere dei prefori per il passaggio dei conduttori elettrici e completamente il foro di passaggio. -
Page 38: Fissaggio Con Modulo Adattatore Angolare Oppure Da Palo
6.4 Collegamento del tubo di 6.3.2 Fissaggio con modulo adattatore angolare oppure da palo mandata Prestare attenzione durante il fissaggio. Collegare il tubo di mandata (01) facendolo passare Coppia di serraggio: 16.5Nm. attraverso l'anello di tenuta (02). Il prodotto può essere montato anche su collare da palo o adattatore angolare. -
Page 39: Messa A Terra
(adatto per cavi con sezione da tra prodotti utilizzare le communication 4mm² (11AWG) fino a 6mm² (9AWG)). box di VIDEOTEC, MAXIMUS MBX. Fissare l'occhiello usando la vite (M5) e la rondella In alternativa utilizzare una scatola dentellata. -
Page 40: Collegamento Dell'elettrovalvola Al Ptz (Maximus Mpx, Maximus Mpx Series2, Exsite Pro Ptz Series)
6.8.1 Collegamento dell'elettrovalvola 6.8.2 Collegamento del pressostato al al PTZ (MAXIMUS MPX, MAXIMUS MPX PTZ (MAXIMUS MPX, MAXIMUS MPX SERIES2, ExSite Pro PTZ Series) SERIES2, ExSite Pro PTZ Series) Utilizzare l'ingresso di allarme autoalimentato AL1 Il relè RL2 presente nel PTZ è idoneo per collegare il pressostato a MPX (consultare il a tensioni fino a 30Vac oppure manuale del PTZ). -
Page 41: Collegamento Alla Telecamera (Maximus Mvx)
Per effettuare le connessioni elettriche a tensioni fino a 30Vac oppure tra prodotti utilizzare le communication 60Vdc. Interrompere uno dei poli di box di VIDEOTEC, MAXIMUS MBX. alimentazione dell'elettrovalvola In alternativa utilizzare una scatola mediante il relè RL1 presente nel MVX. -
Page 42: Collegamento Alla Custodia (Maximus Mhx)
Per effettuare le connessioni elettriche idoneo a tensioni fino a 30Vac oppure tra prodotti utilizzare le communication 60Vdc. Interrompere uno dei poli di box di VIDEOTEC, MAXIMUS MBX. alimentazione dell'elettrovalvola In alternativa utilizzare una scatola mediante il relè Washer (morsetto J11) di giunzione antideflagrante con presente nella MHX. -
Page 43: Riempimento Del Serbatoio
6.11 Riempimento del serbatoio In caso di superamento della pressione massima (6bar) si attiva la valvola di Il funzionamento del pressostato e la sicurezza che scarica la pressione in frequenza di riempimento dell'aria eccesso. dipendono dalla quantità d'acqua nel serbatoio. Si consiglia di effettuare delle Bloccare in posizione di sicurezza la manopola della prove per stabilire le quantità... -
Page 44: Chiusura Del Prodotto
6.12 Installazione del lavavetro 6.11.3 Chiusura del prodotto (MAXIMUS MPX, MAXIMUS MPX SERIES2) Fissare il supporto (01) al corpo del PTZ tramite l'apposita fascetta metallica (02) in dotazione. Inserire il carter e avvitare la vite di sicurezza. Fig. 29 Accorciare il tubo semirigido del lavavetro (03) secondo necessità. -
Page 45: Opzioni Di Installazione
6.12.1 Opzioni di installazione Fissare il tubo al sostegno lavavetro tramite la staffetta (06), le viti e le rondelle (07) in dotazione. Collegare il tubo di mandata (08). Fig. 32 Per calibrare il getto orientare l’ugello verso la Fig. 34 finestra della custodia. -
Page 46: Installazione Del Lavavetro (Maximus Mvx)
6.13 Installazione del lavavetro (MAXIMUS MVX) Fissare la staffa (01) al corpo della telecamera tramite l'apposita fascetta metallica (02) in dotazione. Fissare il sostegno per il tubo di mandata (03) tramite le viti e le rondelle in dotazione (04). Fig. 38 Accorciare il tubo semirigido del lavavetro (07) secondo necessità. -
Page 47: Installazione Del Lavavetro (Maximus Mhx)
6.14 Installazione del lavavetro (MAXIMUS MHX) Fissare la staffa (01) al corpo della custodia tramite l'apposita fascetta metallica (02) in dotazione. Fissare il sostegno per il tubo semirigido (03) tramite le viti e le rondelle in dotazione (04). Fig. 44 Accorciare il tubo semirigido del lavavetro (07) secondo necessità. -
Page 48: Manutenzione
7 Manutenzione 9 Informazioni sullo smaltimento e il riciclo Prima di effettuare qualsiasi tipo di intervento leggere attentamente il La Direttiva Europea 2012/19/UE sui Rifiuti di capitolo "Norme di sicurezza" presente nel Apparecchiature Elettriche ed Elettroniche (RAEE) manuale del prodotto. prevede che questi apparecchi non debbano essere smaltiti nel normale flusso dei rifiuti solidi urbani, ma Per poter richiedere una qualunque parte di... -
Page 49: Dati Tecnici
10 Dati tecnici 10.3 Ambiente WASEX2T4AT 10.1 Meccanica Installazione per interni ed esterni Materiali: Temperatura di esercizio dell'elettrovalvola: da -40°C • Cassetta esterna: acciaio inox AISI 316L fino a +70°C • Tubo antistatico di mandata dell’acqua: polimero Temperatura di esercizio del dispositivo: a seconda antistatico della temperatura di solidificazione del liquido impiegato... -
Page 50: Disegni Tecnici
Il numero di fori per il passaggio dei cavi dipende dal modello. Ø 11 Ø 11 Fig. 48 WASEX. Headquarters Italy VIDEOTEC s.r.l. Via Friuli, 6 - I-36015 Schio (VI) - Italy Tel. +39 0445 697411 - Fax +39 0445 697414 Email: info@videotec.com www.videotec.com... - Page 51 FRANÇAIS WASEX Système de lavage antidéflagrant Français - Manuel d’instructions...
- Page 53 Sommaire F R A N Ç A I S 1 À propos de ce mode d’emploi ....................5 1.1 Conventions typographiques ............................5 2 Notes sur le copyright et informations sur les marques de commerce ....... 5 3 Normes de securité ........................5 4 Description et désignation du produit ..................
- Page 54 7.1 Maintenance ordinaire ................................22 7.1.1 Remplissage du réservoir ..................................22 7.1.2 Contrôle des câbles ....................................22 8 Nettoyage ..........................22 8.1 Nettoyage ordinaire ................................22 9 Informations sur l'élimination et le recyclage ..............22 10 Données techniques ......................23 10.1 Mécanique ....................................23 10.2 Électrique ....................................23 10.3 Environnement ...................................23 10.4 Certifications - Applications marines .........................23 11 Dessins techniques .......................24 MNVCWASEX_2404_FR...
-
Page 55: À Propos De Ce Mode D'emploi
1 À propos de ce mode 3 Normes de securité d’emploi DANGER! Danger d’explosion. Avant d'installer et d'utiliser ce produit, lire Lire avec attention pour éviter tout risque attentivement toute la documentation fournie. d’explosion. Garder le manuel à portée de main pour des consultations successives. - Page 56 Risque d’explosion en raison de décharges DANGER! électrostatiques. Risque élevé. Risque de choc électrique. Sauf indication • Le produit est destiné à une installation fixe et contraire, sectionner l'alimentation avant l’utilisateur ne doit pas toucher fréquemment le de procéder à toute opération. produit en service (hormis pour l’entretien).
- Page 57 être production de ce manuel. effectuée par VIDEOTEC ou sous sa surveillance. • Etant donné que l'utilisateur est responsable • La réparation de ce produit doit être exécutée du choix de la surface de fixation, le fabricant par du personnel adéquatement formé...
-
Page 58: Description Et Désignation Du Produit
4 Description et désignation 4.1 Vue d’ensemble du produit du produit Les principaux composants du produit sont décrits ci-dessous: La pompe de lavage WASEX est un élément essentiel 01. Capot. dans un système de surveillance vidéo pour les 02. Châssis. zones potentiellement explosives, car il garantit des images nettes dans un environnement et réduit la 03. -
Page 59: Identification Du Modèle
4.3 Identification du modèle WASEX2T4IC: Jerrycan de 10l avec pompe manuelle intégrée commandée par électrovanne certifiée WASEX2T4AT: Jerrycan de 10l avec pompe manuelle (ATEX, IECEx), hauteur de remontée d’eau jusqu'à intégrée commandée par électrovanne certifiée 30m, avec tuyau antistatique de refoulement de (ATEX), hauteur de remontée d’eau jusqu'à... -
Page 60: Préparation Du Produit En Vue De L'utilisation
5 Préparation du produit en 6 Installation vue de l’utilisation Avant tout type d'intervention, lire avec attention le chapitre "Normes de securité" Toute modification non approuvée dans ce manuel. expressément par le fabricant entraînera l’annulation de la garantie. 6.1 Ouverture du produit 5.1 Déballage Pour les opérations d'installation ou d'entretien de la pompe il est possible... -
Page 61: Perçage Du Châssis
6.2 Perçage du châssis Tirez la bague d’étanchéité en la faisant passer dans le trou jusqu’à ce la parie conique en Les côtés et le fond du produit présentent des sorte entièrement. En position finale, la bague pré-perçages pour le passage des conducteurs d’étanchéité... -
Page 62: Fixation Avec Module Adaptateur Angulaire Ou Pour Mât
6.4 Raccordement du tube de 6.3.2 Fixation avec module adaptateur angulaire ou pour mât refoulement Faire attention pendant la fixation. Couple Raccorder le tuyau de refoulement (01) en le faisant de serrage: 16.5Nm. passer à travers l'anneau d'étanchéité (02). Le produit peut aussi être monté sur collier pour mat ou adaptateur angulaire. -
Page 63: Mise À Terre
Pour procéder aux branchements (adaptée aux câbles de section 4mm² (11AWG) à électriques entre les produits, utiliser les 6mm² (9AWG)). boîtiers de communication VIDEOTEC, Fixer l'œillet à l'aide de la vis (M5) et de la rondelle MAXIMUS MBX. Alternativement utiliser dentelée. -
Page 64: Branchement De L'électrovanne Au Ptz (Maximus Mpx, Maximus Mpx Series2, Exsite Pro Ptz Series)
6.8.1 Branchement de l’électrovanne 6.8.2 Branchement du pressostat au au PTZ (MAXIMUS MPX, MAXIMUS MPX PTZ (MAXIMUS MPX, MAXIMUS MPX SERIES2, ExSite Pro PTZ Series) SERIES2, ExSite Pro PTZ Series) Utiliser l’entrée d’alarme auto-alimentée AL1 pour Le relais RL2 présent dans le PTZ est brancher le pressostat à... -
Page 65: Branchement À La Caméra (Maximus Mvx)
Pour procéder aux branchements adapté à des tensions jusqu'à 30Vac électriques entre les produits, utiliser les ou 60Vdc. Interrompre un des pôles boîtiers de communication VIDEOTEC, d'alimentation de l’électrovanne à MAXIMUS MBX. Alternativement utiliser l'aide du relais RL1 présent dans le MVX. -
Page 66: Branchement Au Caisson (Maximus Mhx)
Pour procéder aux branchements est adapté à des tensions jusqu'à 30Vac électriques entre les produits, utiliser les ou 60Vdc. Interrompre un des pôles boîtiers de communication VIDEOTEC, d'alimentation de l’électrovanne à l'aide MAXIMUS MBX. Alternativement utiliser du relais Washer (borne J11) présent dans un boîtier de jonction anti-déflagration à... -
Page 67: Remplissage Du Réservoir
6.11 Remplissage du réservoir En cas de dépassement de la pression maximale (6bar), la soupape de sécurité Le fonctionnement du pressostat et s’active et évacue la pression en excès. la fréquence de remplissage de l'air dépendent de la quantité d'eau dans le Bloquer la poignée de la pompe en position de réservoir. -
Page 68: Fermeture Du Produit
6.12 Installation du lave-vitre 6.11.3 Fermeture du produit (MAXIMUS MPX, MAXIMUS MPX SERIES2) Fixer le support (01) au corps du PTZ à l'aide du collier métallique (02) fourni. Insérer le carter et serrer la vis de sécurité. Fig. 29 Raccourcir le tube semi-rigide du lave-vitre (03), au besoin. -
Page 69: Options D'installation
6.12.1 Options d'installation Fixer le tube au support du lave-vitre à l’aide de la bride (06), des vis et des rondelles (07) fournies. Raccorder le tuyau de refoulement (08). Fig. 32 Pour calibrer le jet, orientez le gicleur vers la fenêtre Fig. -
Page 70: Installation Du Lave-Vitre (Maximus Mvx)
6.13 Installation du lave-vitre (MAXIMUS MVX) Fixer la bride (01) au corps de la caméra à l'aide du petit collier métallique (02) fourni. Fixer le support pour le tube de refoulement (03) à l'aide des vis et des rondelles fournies ( 04). Fig. -
Page 71: Installation Du Lave-Vitre (Maximus Mhx)
6.14 Installation du lave-vitre (MAXIMUS MHX) Fixer la bride (01) au corps du caisson à l'aide du petit collier métallique (02) fourni. Fixer le support pour le tube semi-rigide (03) à l'aide des vis et des rondelles fournies (04). Fig. 44 Raccourcir le tube semi-rigide du lave-vitre (07) en fonction des nécessités. -
Page 72: Entretien
7 Entretien 9 Informations sur l'élimination et le recyclage Avant tout type d'intervention, lire avec attention le chapitre "Normes de securité" La Directive Européenne 2012/19/UE sur les déchets dans le manuel du produit. d'équipements électriques et électroniques (DEEE) exige que ces dispositifs ne doivent pas être éliminés Pour pouvoir demander une pièce détachée quelle dans le flux normal de déchets solides municipaux, qu'elle soit, il faut fournir le numéro de série du... -
Page 73: Données Techniques
10 Données techniques 10.3 Environnement WASEX2T4AT 10.1 Mécanique Installation d'intérieur et d'extérieur Matériels: Température de fonctionnement de la valve • Logement externe: acier inox AISI 316L solénoïde: de -40°C jusqu'à +70°C • Tuyau antistatique de refoulement de l'eau: Température de fonctionnement du dispositif: en polymère antistatique fonction de la température de solidification du liquide utilisé... -
Page 74: Dessins Techniques
Le nombre de perçages pour le passage des câbles dépend du modèle. Ø 11 Ø 11 Fig. 48 WASEX. Headquarters Italy VIDEOTEC s.r.l. Via Friuli, 6 - I-36015 Schio (VI) - Italy Tel. +39 0445 697411 - Fax +39 0445 697414 Email: info@videotec.com www.videotec.com... - Page 75 DEUTSCH WASEX Explosionsgeschützte Waschanlage Deutsch - Bedienungsanleitung...
- Page 77 Inhaltsverzeichnis D E U T S C H 1 Allgemeines ..........................5 1.1 Schreibweisen ..................................5 2 Anmerkungen zum Copyright und Informationen zu den Handelsmarken ...... 5 3 Sicherheitsnormen ........................5 4 Beschreibung und Bezeichnung des Produktes ..............8 4.1 Produktübersicht ..................................8 4.2 Schildchen mit Produktkennzeichnung ........................
- Page 78 6.14 Installation der Scheibenwascheinheit (MAXIMUS MHX) ................... 21 7 Wartung ..........................22 7.1 Übliche Wartung ...................................22 7.1.1 Auffüllen des Tanks ....................................22 7.1.2 Überprüfung der Kabel..................................22 8 Reinigung ..........................22 8.1 Übliche Reinigung................................22 9 Informationen bezüglich Entsorgung und Recycling ............22 10 Technische Daten .........................23 10.1 Mechanik ....................................23 10.2 Elektrik ....................................23 10.3 Umgebung ...................................23...
-
Page 79: Allgemeines
1 Allgemeines 3 Sicherheitsnormen Vor der Installation und Anwendung dieses Produkts GEFAHR! ist die gesamte mitgelieferte Dokumentation Explosionsgefahr. aufmerksam zu lesen. Zum späteren Nachschlagen Aufmerksam durchlesen, um das Handbuch in Reichweite aufbewahren. Explosionsrisiken zu vermeiden. 1.1 Schreibweisen • Die Geräteinstallation und -wartung muss von spezialisierten Technikern in Übereinstimmung GEFAHR! mit der Bezugsnorm anwendbar auf EN/IEC... - Page 80 Explosionsrisiko aufgrund von GEFAHR! elektrostatischen Entladungen. Erhöhte Gefährdung. Stromschlaggefahr. Falls nichts • Das Produkt ist für die Festinstallation anderes angegeben, unterbrechen vorgesehen. Der Nutzer darf das Produkt nicht Sie die Stromversorgung, bevor die häufig berühren, wenn es in Gebrauch ist beschriebenen Arbeiten durchgeführt (Wartung ausgenommen).
- Page 81 • Im Falle von Beschädigungen muss das die bei der Schaffung oder Produktion von diesem Auswechseln oder die Reparatur der betreffenden Handbuch miteinbezogen ist. Teile von VIDEOTEC ausgeführt werden bzw. unter ihrer Aufsicht. • Da der Benutzer für die Auswahl der Verankerungsoberfläche der Einheit •...
-
Page 82: Beschreibung Und Bezeichnung Des Produktes
4 Beschreibung und 4.1 Produktübersicht Bezeichnung des Produktes Nachfolgend werden die Hauptkomponenten des Produkts angegeben: Die WASEX Waschpumpe ist ein Schlüsselelement 01. Schutzgehäuse. in einem Videoüberwachungssystem für 02. Gestell. explosionsgefährdete Umgebungen, weil sie scharfe Bilder in allen Umgebungsbedingungen bietet und 03. -
Page 83: Identifizierung Des Modells
4.3 Identifizierung des Modells WASEX2T4IC: 10l-Kanister mit eingebauter manueller Pumpe, Steuerung über zertifiziertes WASEX2T4AT: 10l-Kanister mit eingebauter Elektroventil (ATEX, IECEx), Förderhöhe bis 30m, manueller Pumpe, Steuerung über zertifiziertes mit 20m Antistatische Wasserförderleitung, IN Elektroventil (ATEX), Förderhöhe bis 30m, mit 20m 24Vac/24Vdc Antistatische Wasserförderleitung, IN 24Vac/24Vdc WASEX2T4IN: 10l-Kanister mit eingebauter... -
Page 84: Vorbereitung Des Produktes Auf Den Gebrauch
5 Vorbereitung des 6 Installation Produktes auf den Gebrauch Bevor Arbeiten durchgeführt werden, muss das Kapitel "Sicherheitsnormen" in Jede vom Hersteller nicht ausdrücklich diesem Handbuch genau gelesen werden. genehmigte Veränderung führt zum Verfall der Gewährleistungsrechte. 6.1 Öffnen des Produkts 5.1 Entfernen der Verpackung Bei den Installations- oder Wartungsarbeiten der Pumpe kann der Bei der Lieferung des Produktes ist zu prüfen, ob die... -
Page 85: Bohrung Des Gestells
6.2 Bohrung des Gestells An dem Dichtring ziehen, indem dieser durch das Loch bis zum vollständigen Austritt des konischen An den Seiten und am Boden des Produkts sind Teils durchgeführt wird. Der Dichtring muss in Vorbohrungen für den Durchgang der elektrischen der Endposition das Durchgangsloch vollständig Leiter und der Zuflussleitung vorhanden. -
Page 86: Befestigung Mit Winkeladaptermodul Oder Stangenhalterung
6.4 Anschluss der Zuflussleitung 6.3.2 Befestigung mit Winkeladaptermodul oder Die Druckleitung (01) anschließen, sie dabei durch Stangenhalterung den Dichtungsring (02) führen. Auf die Befestigung achten. Anzugsdrehmoment: 16.5Nm. Das Produkt kann auch an einem Stellring für die Stange oder einem Winkeladapter montiert werden. Abb. -
Page 87: Erdung
Kabel mit einem Querschnitt von 4mm² (11AWG) Zum Durchführen der Elektroanschlüsse bis 6 mm² (9AWG)). unter den Produkten die Die Öse mit der Schraube (M5) und der gezahnten Kommunikationsbox von VIDEOTEC, Unterlegscheibe fixieren. MAXIMUS MBX verwenden. Alternativ Eigenschaften der Schraube M5: hierzu einen explosionsgeschützten •... -
Page 88: Anschluss Des Elektroventils An Die Ptz-Einheit (Maximus Mpx, Maximus Mpx Series2, Exsite Pro Ptz Series)
6.8.1 Anschluss des Elektroventils 6.8.2 Anschluss des Druckschalters an die PTZ-Einheit (MAXIMUS MPX, an die PTZ-Einheit (MAXIMUS MPX, MAXIMUS MPX SERIES2, ExSite Pro PTZ MAXIMUS MPX SERIES2, ExSite Pro PTZ Series) Series) Den sich selbst versorgenden Alarmeingang Das bei der PTZ-Einheit vorhandene AL1 verwenden, um den Druckschalter an MPX Relais RL2 eignet sich für Spannungen anzuschließen (das Handbuch der PTZ-Einheit... -
Page 89: Anschluss An Die Kamera (Maximus Mvx)
Zum Durchführen der Elektroanschlüsse eignet sich für Spannungen bis zu 30Vac unter den Produkten die oder 60Vdc. Einen der Versorgungspole Kommunikationsbox von VIDEOTEC, des Elektroventils über das bei MVX MAXIMUS MBX verwenden. Alternativ vorhandene Relais RL1 unterbrechen. Das hierzu einen explosionsgeschützten Handbuch der Kamera heranziehen. -
Page 90: Anschluss An Die Gehäuse (Maximus Mhx)
Zum Durchführen der Elektroanschlüsse eignet sich für Spannungen bis zu 30Vac unter den Produkten die Kommunikationsbox oder 60Vdc. Einen der Versorgungspole von VIDEOTEC, MAXIMUS MBX des Elektroventils mit dem Washer-Relais verwenden. Alternativ hierzu einen (Klemme J11), das bei MHX vorhanden explosionsgeschützten Anschlusskasten mit... -
Page 91: Auffüllen Des Tanks
6.11 Auffüllen des Tanks Sollte der Höchstdruck (6bar) überschritten werden, das Der Betrieb des Druckschalters und die Sicherheitsventil aktivieren, das den Häufigkeit der Luftbefüllung hängen von überflüssigen Druck ablässt. der Wassermenge im Tank ab. Es werden Tests empfohlen, um die für die jeweilige Den Knopf der Pumpe in der Sicherheitsposition Anwendung geeignete Wassermenge im blockieren. -
Page 92: Schließen Des Produkts
6.12 Installation der 6.11.3 Schließen des Produkts Scheibenwascheinheit (MAXIMUS MPX, MAXIMUS MPX SERIES2) Die Halterung (01) an den Korpus der PTZ-Einheit mittels der entsprechenden im Lieferumfang enthaltenen Metallschelle (02) befestigen. Das Gehäuse einsetzen und die Sicherheitsschraube anziehen. Abb. 29 Die halbstarre Scheibenwaschleitung (03) je nach Bedarf kürzen. -
Page 93: Montageoptionen
6.12.1 Montageoptionen Die Leitung an der Scheibenwaschhalterung mit dem im Lieferumfang enthaltenen Bügel (06), den Schrauben und den Unterlegscheiben (07) befestigen. Druckrohr anschließen (08). Abb. 32 Abb. 34 Zum Einstellen des Strahls die Düse Richtung Gehäusescheibe richten. Abb. 33 Zum Aktivieren der Waschanlage auf das Handbuch der PTZ-Kamera Bezug nehmen. -
Page 94: Installation Der Scheibenwascheinheit (Maximus Mvx)
6.13 Installation der Scheibenwascheinheit (MAXIMUS MVX) Den Bügel (01) an den Kamerakorpus mittels der entsprechenden im Lieferumfang enthaltenen Metallschelle (02) befestigen. Die Halterung für die Zuflussleitung (03) mittels der im Lieferumfang enthaltenen Schrauben und Unterlegscheiben (04) befestigen. Abb. 38 Die halbstarre Scheibenwaschleitung (07) je nach Bedarf kürzen. -
Page 95: Installation Der Scheibenwascheinheit (Maximus Mhx)
6.14 Installation der Scheibenwascheinheit (MAXIMUS MHX) Den Bügel (01) an den Gehäusekorpus mittels der entsprechenden im Lieferumfang enthaltenen Metallschelle (02) befestigen. Die Halterung für die halbstarre Leitung (03) mittels der im Lieferumfang enthaltenen Schrauben und Unterlegscheiben (04) befestigen. Abb. 44 Die halbstarre Scheibenwaschleitung (07) je nach Bedarf kürzen. -
Page 96: Wartung
7 Wartung 9 Informationen bezüglich Entsorgung und Recycling Bevor Arbeiten durchgeführt werden, muss das Kapitel "Sicherheitsnormen" im Die EU-Richtlinie 2012/19/ЕU über Elektro- und Handbuch des Produkts genau gelesen Elektronik-Altgeräte (WEEE) verpflichtet, dass werden. diese Geräte nicht zusammenn mit festen Haushaltsabfällen entsorgt werden sollten. Diese Für jedwede Ersatzteilanfrage ist die Angabe der besonderen Abfällen müssen separat gesammelt Seriennummer des Geräts notwendig. -
Page 97: Technische Daten
10 Technische Daten 10.3 Umgebung WASEX2T4AT 10.1 Mechanik Montage für den Innen- und Außenbereich Materialien: Betriebstemperatur des Solenoidventil: von -40°C bis • Außengehäuse: rostfreiem Stahl AISI 316L zu +70°C • Antistatische Wasserförderleitung: antistatisches Betriebstemperatur der Vorrichtung: abhängig Polymer von der Erstarrungstemperatur der verwendete Flüssigkeit Antistatische Wasserförderleitung (Lieferumfang enthalten):... -
Page 98: Technische Zeichnungen
Die Anzahl der Löcher für den Durchgang der Kabel ist vom Modell abhängig. Ø 11 Ø 11 Abb. 48 WASEX. Headquarters Italy VIDEOTEC s.r.l. Via Friuli, 6 - I-36015 Schio (VI) - Italy Tel. +39 0445 697411 - Fax +39 0445 697414 Email: info@videotec.com www.videotec.com... - Page 99 РУССКИЙ WASEX Взрывобезопасная промывочная система Русский - Руководство по эксплуатации...
- Page 101 Комплект оборудования Р У С С К И Й 1 О настоящем руководстве ....................5 1.1 Типографские условные обозначения ........................5 2 Примечания в отношении авторского права и информация о торговых марках ..5 3 Правила техники безопасности ................... 5 4 Описание...
- Page 102 7 Техническое обслуживание ....................22 7.1 Плановое техническое обслуживание ........................22 7.1.1 Заполните бак ......................................22 7.1.2 Проверка кабелей ....................................22 8 Очистка ...........................22 8.1 Плановое уборка ................................22 9 Информация об утилизации и переработке ..............22 10 Технические характеристики ..................23 10.1 Механические хар................................23 10.2 Электрические хар................................23 10.3 Окружающая...
-
Page 103: О Настоящем Руководстве
1 О настоящем 3 Правила техники руководстве безопасности Перед установкой и использованием ОПАСНОСТЬ! этого изделия внимательно прочтите всю Опасность взрыва. предоставленную документацию. Всегда держите Внимательно прочитайте указания, руководство под рукой, чтобы им можно было чтобы избежать опасности взрыва. воспользоваться в будущем. •... - Page 104 Риск взрыва из-за электростатических ОПАСНОСТЬ! разрядов. Высокий уровень опасности. Риск поражения электрическим • Изделие предназначено для стационарной током. При отсутствии иных указаний установки, и пользователь не должен часто отключите питание устройства, перед прикасаться к изделию, находящемуся в тем как приступить к выполнению эксплуатации...
- Page 105 привлеченных для составления и создания данного руководства. • При наличии повреждений каких-либо деталей их ремонт или замена должны проводиться • Поскольку пользователь самостоятельно сотрудниками компании VIDEOTEC или под их выбирает поверхность, на которой наблюдением. будет закреплено устройство, мы не предоставляем крепежные приспособления...
-
Page 106: Описание И Обозначение Типа Устройства
4 Описание и обозначение 4.1 Общий вид изделия типа устройства Ниже представлены основные компоненты устройства: Насос омывателя WASEX – это важный элемент 01. Кожух. для эффективного видеонаблюдения в опасных 02. Рама. зонах, поскольку он обеспечивает четкое изображение в любых условиях окружающей 03. -
Page 107: Идентификация Модели
4.3 Идентификация модели WASEX2T4IC: Бак на 10l со встроенным ручным насосом, управляемый электромагнитным WASEX2T4AT: Бак на 10l со встроенным ручным клапаном с сертификацией (ATEX, IECEx), обладает насосом, управляемый электромагнитным производительностью до 30m, с aнтистатическая клапаном с сертификацией (ATEX), обладает водопроводная труба длина 20m, IN 24Vac/24Vdc производительностью... -
Page 108: Подготовка Устройства К Использованию
5 Подготовка устройства к 6 Монтаж использованию Перед проведением каких-либо работ ознакомьтесь с главой руководства Любое изменение, которое под названием "Правила техники выполняется без разрешения, безопасности". явным образом предоставленного производителем, аннулирует гарантию. 6.1 Открытие изделия 5.1 Распаковка При операциях установки или техобслуживания... -
Page 109: Высверливание Отверстий В Раме
6.2 Высверливание отверстий Вытягивайте уплотнительное кольцо, протаскивая его через отверстие вплоть в раме до полного выхода конической части. Уплотнительное кольцо в конечном положении По бокам и в нижней части изделия имеются должно полностью прилегать к отверстию. предварительно проделанные отверстия для прохода... -
Page 110: Крепление С Помощью Модуля Углового Адаптера Или Мачтового Кронштейна
6.4 Подключение подающей 6.3.2 Крепление с помощью модуля углового адаптера или мачтового трубки кронштейна Подсоедините впускную трубу (01), давая ей Будьте внимательны при монтаже. пройти через уплотнительное кольцо (02). Момент затяжки: 16.5Nm. Изделие можно установить также на мачтовый кронштейн или угловой адаптер. Рис. -
Page 111: Подключение Заземления
4mm² (11AWG) до 6mm² (9AWG)). Для выполнения электрических Закрепите клемму-проушину, используя винт (M5) соединений между изделиями и зубчатую шайбу. используйте блоки связи VIDEOTEC, Характеристики винта М5: MAXIMUS MBX. Качестве альтернативы • Материал: A4 Класс 70 используйте взрывобезопасную распределительную коробку с... -
Page 112: Подключение Электромагнитного Клапана К Ptz (Maximus Mpx, Maximus Mpx Series2, Exsite Pro Ptz Series)
6.8.1 Подключение 6.8.2 Подключение реле давления электромагнитного клапана к PTZ к PTZ (MAXIMUS MPX, MAXIMUS MPX (MAXIMUS MPX, MAXIMUS MPX SERIES2, ExSite Pro PTZ Series) SERIES2, ExSite Pro PTZ Series) Используйте тревожный вход AL1 с автономным питанием для подключения реле давления к MPX Установленное... -
Page 113: Подключение К Камере (Maximus Mvx)
Установленное в MVX реле RL1 Для выполнения электрических предназначено для низкого напряжения соединений между изделиями до 30Vac или 60Vdc. Отключите один используйте блоки связи VIDEOTEC, из полюсов питания электроклапана, MAXIMUS MBX. Качестве альтернативы используя реле RL1, установленное в MVX. используйте взрывобезопасную... -
Page 114: Подключение К Кожуха (Maximus Mhx)
(MAXIMUS MHX) Для выполнения электрических соединений Установленное в MHX реле Washer между изделиями используйте блоки предназначено для низкого связи VIDEOTEC, MAXIMUS MBX. Качестве напряжения до 30Vac или 60Vdc. альтернативы используйте взрывобезо Отключите один из полюсов питания пасную распределительную коробку с... -
Page 115: Заполните Бак
6.11 Заполните бак При превышении максимального давления (6bar) срабатывает Работа реле давления и частота предохранительный клапан, который наполнения воздуха зависят от сбрасывает избыточное давление. количества воды в резервуаре. Рекомендуется проводить испытания Заблокируйте ручку насоса в безопасном для определения количества воды положении, нажав... -
Page 116: Закрытие Изделия
6.12 Установка омывателя 6.11.3 Закрытие изделия (MAXIMUS MPX, MAXIMUS MPX SERIES2) Прикрепите опору (01) к корпусу PTZ, используя специальную прилагаемую металлическую стяжку (02). Вставьте картер и завинтите винт безопасности. Рис. 29 Укоротите полужесткую трубку стеклоомывателя (03) до необходимой длины. Открутите гайку (04) муфты, переместив... -
Page 117: Варианты Установки
6.12.1 Варианты установки Прикрепите трубку к опоре стеклоомывателя с помощью кронштейна (06), винтов и шайб (07), входящих в комплектацию. Подсоединение впускной трубы (08). Рис. 32 Рис. 34 При выполнении калибровки струи поверните форсунку в сторону окна кожуха. Рис. 33 Чтобы активировать систему омывателя, обратитесь... -
Page 118: Установка Омывателя (Maximus Mvx)
6.13 Установка омывателя (MAXIMUS MVX) Закрепите кронштейн (01) на корпусе камеры, используя специальную прилагаемую металлическую стяжку (02). Закрепите опору нагнетательной трубки (03), используя прилагаемые винты и шайбы (04). Рис. 38 Укоротите полужесткую трубку стеклоомывателя (07) до необходимой длины. Открутите гайку (08), переместив... -
Page 119: Установка Омывателя (Maximus Mhx)
6.14 Установка омывателя (MAXIMUS MHX) Закрепите кронштейн (01) на корпусе кожуха, используя специальную прилагаемую металлическую стяжку (02). Закрепите опору полужесткой трубки (03), используя прилагаемые винты и шайбы (04). Рис. 44 Укоротите полужесткую трубку стеклоомывателя (07) до необходимой длины. Открутите гайку (08), переместив... - Page 120 7 Техническое 9 Информация об обслуживание утилизации и переработке Европейская директива 2012/19/ЕС Об Отходах Перед выполнением любых операций Электрического и Электронного оборудования внимательно прочитайте раздел (RAEE) предписывает, что данные устройства "Правила техники безопасности" не следует утилизировать вместе с твердыми в руководстве по эксплуатации бытовыми...
- Page 121 10 Технические 10.3 Окружающая среда характеристики WASEX2T4AT Для установки внутри помещений и наружной 10.1 Механические хар. установки Рабочая температура электромагнитного Материалы: клапана: от -40°C до +70°C • Корпус из нержавеющей: hержавеющей стали Рабочая температура устройства: в зависимости AISI 316L от температуры затвердевания жидкости •...
- Page 122 Количество отверстий для прохождения кабелей зависит от модели. Ø 11 Ø 11 Рис. 48 WASEX. Headquarters Italy VIDEOTEC s.r.l. Via Friuli, 6 - I-36015 Schio (VI) - Italy Tel. +39 0445 697411 - Fax +39 0445 697414 Email: info@videotec.com www.videotec.com...
- Page 123 PORTUGUÊS WASEX Sistema de lavagem à prova de explosões Português - Manual de instruções...
- Page 125 Sumário P O R T U G U Ê S 1 Informações neste manual ...................... 5 1.1 Convenções tipográficas ..............................5 2 Direitos autorais e informações sobre marcas registradas ..........5 3 Normas de segurança ......................5 4 Descrição e designação do produto ..................8 4.1 Panorâmica do produto ...............................
- Page 126 7.1 Manutenção ordinária.................................22 7.1.1 Enchimento do reservatório ................................22 7.1.2 Controle dos cabos ....................................22 8 Limpeza ...........................22 8.1 Limpeza ordinária ................................22 9 Informações sobre descarte e reciclagem ................22 10 Dados técnicos ........................23 10.1 Mecânica ....................................23 10.2 Elétrico ....................................23 10.3 ambiente ....................................23 10.4 Certificações - Aplicações marinhas ...........................23 11 Desenhos técnicos ........................24 MNVCWASEX_2404_PT...
-
Page 127: Informações Neste Manual
1 Informações neste manual 3 Normas de segurança Antes de instalar e utilizar este produto, leia com DANGER! atenção toda a documentação fornecida. Manter o Perigo de explosão. manual ao alcance da mão para consultas futuras. Ler com cuidado para evitar o risco de explosão. - Page 128 Risco de explosão devido a descargas DANGER! eletrostáticas. Periculosidade alta. Risco de choque elétrico. Antes de fazer • O produto é destinado a instalação fixa e o usuário qualquer operação, certificar-se de não deve tocar no produto em funcionamento desligar o produto, salvo indicação em frequentemente (exceto para manutenção).
- Page 129 • Em caso de danos, a substituição ou reparação das partes envolvidas deve ser efetuada pela • Uma vez que a responsabilidade da escolha da VIDEOTEC ou sob a supervisão da mesma. unidade de superfície de ancoragem recai sobre o usuário, o fabricante não fornece dispositivos •...
-
Page 130: Descrição E Designação Do Produto
4 Descrição e designação do 4.1 Panorâmica do produto produto São ilustrados abaixo os componentes principais do produto: A bomba de lavagem WASEX é um elemento 01. Cárter. fundamental nos equipamentos de videovigilância 02. Tela. de áreas potencialmente explosivas, porque garante imagens sempre nítidas em qualquer condição 03. -
Page 131: Identificação Do Modelo
4.3 Identificação do modelo WASEX2T4IC: Galão de 10l com bomba manual integrada controlada por eletroválvula certificada WASEX2T4AT: Galão de 10l com bomba manual (ATEX, IECEx), elevação até 30m, com tubo integrada controlada por eletroválvula certificada antiestático de alimentação de água com 20m de (ATEX), elevação até... -
Page 132: Preparação Do Produto Para O Uso
5 Preparação do produto 6 Instalação para o uso Antes de realizar qualquer tipo de intervenção leia com atenção o capítulo A realização de alterações não aprovadas "Normas de segurança" do presente expressamente pelo fabricante invalidará manual. a garantia. 6.1 Abertura do produto 5.1 Desembalagem Nas operações de instalação ou Na entrega do produto, verificar se a embalagem... -
Page 133: Furação Da Tela
6.2 Furação da tela Retire o anéis de retenção atravessando-o pelo furo até que a parte cônica saia por completo. O Nas laterais e nos fundos do produtos estão anéis de retenção na posição final deverá fechar presentes pré-furos para a passagem dos condutores completamente o furo de passagem. -
Page 134: Fixação Com Módulo Adaptador Angular Ou Em Poste
6.4 Conexão do tubo de 6.3.2 Fixação com módulo adaptador angular ou em poste alimentação Prestar atenção durante a fixação. Torque Conecte o tubo de alimentação (01) fazendo de aperto: 16.5Nm. atravessar o anel de retenção (02). O produto também pode ser montado sobre o anel para poste ou o adaptador angular. -
Page 135: Aterramento
Para fazer as conexões elétricas entre (11AWG) até 6mm² (9AWG)). os produtos use a caixa de comunicação Fixar o ilhó usando o parafuso (M5) e a arruela da VIDEOTEC, MAXIMUS MBX. Como dentada. alternativa, use uma caixa de conexões à Características do parafuso M5: prova de explosões com características... -
Page 136: Conexão Da Eletroválvula A Ptz (Maximus Mpx, Maximus Mpx Series2, Exsite Pro Ptz Series)
6.8.1 Conexão da eletroválvula a 6.8.2 Conexão do pressostato a PTZ PTZ (MAXIMUS MPX, MAXIMUS MPX (MAXIMUS MPX, MAXIMUS MPX SERIES2, ExSite Pro PTZ Series) SERIES2, ExSite Pro PTZ Series) Use a entrada de alarme autoalimentado AL1 para O relé RL2 presente na PTZ é adequado conectar o pressostato a MPX (consulte o manual do sob tensões de até... -
Page 137: Conexão A La Câmera (Maximus Mvx)
30Vac ou 60Vdc. os produtos use a caixa de comunicação Interrompa um dos polos de alimentação da VIDEOTEC, MAXIMUS MBX. Como da eletroválvula mediante o relé RL1 alternativa, use uma caixa de conexões à presente no MVX. Consulte o manual da prova de explosões com características... -
Page 138: Conexão A La Caixa (Maximus Mhx)
30Vac os produtos use a caixa de comunicação ou 60Vdc. Interrompa um dos polos de da VIDEOTEC, MAXIMUS MBX. Como alimentação da eletroválvula mediante o alternativa, use uma caixa de conexões à relé Washer (borne J11) no MHX. Consulte prova de explosões com características... -
Page 139: Enchimento Do Reservatório
6.11 Enchimento do reservatório Caso a pressão máxima (6bar) seja ultrapassada, é ativada a válvula de O funcionamento do interruptor de segurança que descarrega a pressão pressão e a freqüência do enchimento excedente. de ar dependem da quantidade de água no tanque. -
Page 140: Fechamento Do Produto
6.12 Instalação do lava-vidros 6.11.3 Fechamento do produto (MAXIMUS MPX, MAXIMUS MPX SERIES2) Fixe o suporte (01) no corpo do PTZ por meio da abraçadeira metálica dedicada (02) que acompanha o produto. Insira o cárter e aperte os parafusos de segurança. Fig. -
Page 141: Opções De Instalação
6.12.1 Opções de instalação Fixe o tubo de sustentação do lava-vidros por meio da placa de fixação (06), os parafusos e as arruelas (07) que acompanham o produto. Conectar o tubo de alimentação (08). Fig. 32 Fig. 34 Para calibrar o jato, oriente a ponta na direção da janela da caixa. -
Page 142: Instalação Do Lava-Vidros (Maximus Mvx)
6.13 Instalação do lava-vidros (MAXIMUS MVX) Fixe o apoio (01) no corpo da câmera de vídeo por meio da abraçadeira metálica dedicada (02) que acompanha o produto. Fixe a sustentação do tubo de alimentação (03) usando os parafusos e as arruelas que acompanham o produto (04). - Page 143 6.14 Instalação do lava-vidros (MAXIMUS MHX) Fixe o apoio (01) no corpo da caixa por meio da abraçadeira metálica dedicada (02) que acompanha o produto. Fixe a sustentação do tubo semirrígido (03) usando os parafusos e as arruelas que acompanham o produto (04).
-
Page 144: Manutenção
7 Manutenção 9 Informações sobre descarte e reciclagem Antes de realizar qualquer tipo de intervenção leia com atenção o capítulo A Diretiva Europeia 2012/19/UE sobre Resíduos de "Normas de segurança" constante do equipamentos elétricos e eletrônicos (REEE) prevê presente manual do produto. que esses equipamentos não sejam descartados no fluxo normal dos resíduos sólidos urbanos, Para poder solicitar qualquer peça de reposição é... -
Page 145: Dados Técnicos
10 Dados técnicos 10.3 ambiente WASEX2T4AT 10.1 Mecânica Instalação para ambientes internos e externos Materiais: Temperatura de operação da eletroválvula: de -40°C • Caixa externa: Aço inoxidável AISI 316L até +70°C • Mangueira antiestática de distribuição de água: Temperatura de operação do dispositivo: conforme a polímero antiestático temperatura de solidificação do líquido usado Mangueira antiestática de distribuição de água... -
Page 146: Desenhos Técnicos
O número de furos para a passagem de cabos depende do modelo. Ø 11 Ø 11 Fig. 48 WASEX. Headquarters Italy VIDEOTEC s.r.l. Via Friuli, 6 - I-36015 Schio (VI) - Italy Tel. +39 0445 697411 - Fax +39 0445 697414 Email: info@videotec.com www.videotec.com... - Page 148 Headquarters Italy VIDEOTEC s.r.l. ÌMNVCWASEX_Ç8$)Î Via Friuli, 6 - I-36015 Schio (VI) - Italy Tel. +39 0445 697411 - Fax +39 0445 697414 Email: info@videotec.com www.videotec.com MNVCWASEX_2404...
Need help?
Do you have a question about the WASEX Series and is the answer not in the manual?
Questions and answers