Table of Contents
Advertisement
Quick Links
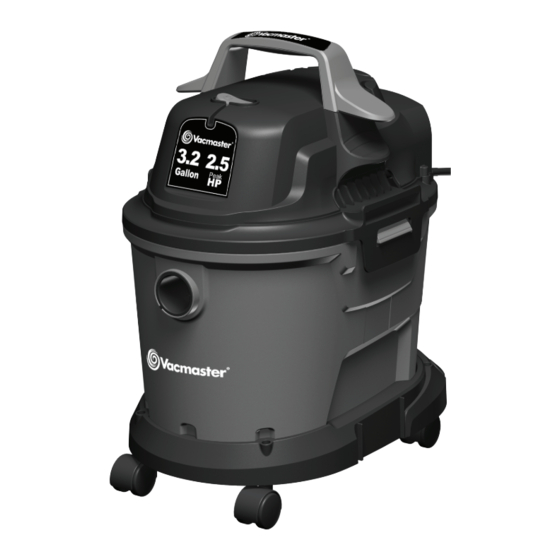
Wet/Dry Vacuums
Operator's Manual
3.2Gal/12L
Model No.
VHB305M 1101
FOR YOUR SAFETY
Read and understand this manual before use.
Keep this manual for future reference.
www.vacmaster.com
Replacement Filters &
Suzhou Cleva Electric Appliance Co., Ltd.
Accessories available at:
NO.8 Ting Rong Street 215122 Suzhou, China
Vacmaster.com
Advertisement
Table of Contents

Summary of Contents for Vacmaster VHB305M 1101
- Page 1 Wet/Dry Vacuums Operator’s Manual 3.2Gal/12L Model No. VHB305M 1101 FOR YOUR SAFETY Read and understand this manual before use. Keep this manual for future reference. www.vacmaster.com Replacement Filters & Suzhou Cleva Electric Appliance Co., Ltd. Accessories available at: NO.8 Ting Rong Street 215122 Suzhou, China...
-
Page 2: Table Of Contents
Thank you for purchasing this Vacmaster wet/dry vacuum cleaner. Feel confident that with Vacmaster® you are obtaining a high quality product engineered for optimal performance. This vacuum is capable of picking up liquids and dry materials. FOR YOUR SAFETY: CAREFULLY READ AND UNDERSTAND ALL INSTRUCTIONS. -
Page 3: Important Safety Instructions
IMPORTANT SAFETY INSTRUCTIONS READ AND UNDERSTAND ALL INSTRUCTIONS BEFORE USING THIS VACUUM. Read and understand this operator’s manual and all labels on the Wet/Dry Vacuum cleaner before operating. Safety is a combination of common sense, staying alert and knowing how your vacuum works. - Page 4 IMPORTANT SAFETY INSTRUCTIONS • Use safety goggles. CAUTION: To reduce the risk of electric shock - Unplug before cleaning or servicing. WARNING: To reduce the risk of electric shock - Unplug before cleaning or servicing. SAVE THESE INSTRUCTIONS DOUBLE INSULATION INSTRUCTIONS This Wet/Dry Vac is double-insulated, eliminating the need for a separate grounding system.
-
Page 5: Extension Cords
• To reduce the risk of electric shock-unplug before cleaning or servicing. • DO NOTusewithout filters in place. CAUTION: TO REDUCE THE RISK OF INJURY FROM MOVING PARTS- UNPLUG BEFORE SERVICING. EXTENSION CORDS When using an extension cord with your Wet/Dry Vac refer to the following table to determine the required A.W.G. -
Page 6: Unpacking And Checking Carton Contents
UNPACKING AND CHECKING CARTON CONTENTS Remove entire contents of carton. Check each item against the carton contents. Carton Contents List Description........Qty. Vac Assembly........1 Hose ...........1 Base ..........1 Casters ..........4 Utility Nozzle........1 Crevice Tool ........1 Floor Brush/Squeegee Nozzle .....1 Round Dust Brush ......1 6 Screws (Bag) ........1 Extension Wands........3 Foam Wet Filter......1... -
Page 7: General Assembly Instructions
GENERAL ASSEMBLY INSTRUCTIONS A Philips head screwdriver is required. WARNING: DO NOT PLUG IN POWER CORD TO POWER OUTLET. MAKE SURE PLUG IS DISCONNECTED BEFORE ASSEMBLING THE WET/DRY VAC. UNPACKING YOUR DRY VACUUM & GENERAL ASSEMBLY 1. Verify that the power cord is disconnected from the outlet. (fig.1) 2. -
Page 8: Dry Vacuuming Operation
12. Align the two screw holes so that they are over a stud and secure the mounting support to the wall stud, as shown, with the two screws provided. (fig. 13) 13. Place the wet and dry vacuum cleaner into the support. (fig. 14) POLARIZED PLUG To reduce the risk of electrical shock, this appliance has a double polarized plug (one with the blade wider than the other). - Page 9 OPERATING INSTRUCTIONS: DRY VACUUMING 3. Fit the desired nozzle to the vacuum hose. (fig. 5) 4. Verify that the switch is inthe ‘O’ OFF position before plugging the power cord into the outlet. (fig. 5. Turn the motor on by flipping the switch to the ‘I’ ON position. (fig.7) 6.
-
Page 10: Blowing Operation
BLOWING OPERATION This Wet/Dry Vac has blowing capabilities only when the hose is inserted into the blowing port. To use the blower feature follow the instructions listed. WARNING: ALWAYS WEAR SAFETY GOGGLES COMPLYING WITH ANSI Z87.1 (OR IN CANADA, CSAZ94.3) BEFORE USING BLOWER. WARNING: KEEP BYSTANDERS CLEAR FROM BLOWING DEBRIS. -
Page 11: Maintenance
MAINTENANCE 1. Verify that the power cord is disconnected from the outlet. (fig.1) 2. Disconnect the hose from the vacuum. (fig.2) 3. Undo the latches and remove the power head from the collection tank. (fig. 3) 4. Clear all dirt or debris from the collection tank and hose. (fig.4) 5. -
Page 12: Installing &Cleaning Reusable Cloth Filter
INSTALLING & CLEANING REUSABLE CLOTH FILTER Installing Reusable Cloth Filter 1. Verify that the power cord is disconnected from the outlet. (fig.1) 2. Remove power head and place in upside down position. 3. Slide reusable cloth filter down over the filter cage making sure the whole cage is covered. (fig.2 &... -
Page 13: Installing &Cleaning Foam Sleeve Filter
INSTALLING & CLEANING REUSABLE CLOTH FILTER Installing Foam Sleeve Filter 1. Verify that the power cord is disconnected from the outlet. (fig.1) 2. Remove power head and place in upside down position. Follow instructions to remove cloth filter. 3. Carefully slide foam sleeve filter down over the filter cage making sure the whole cage is covered.(fig. -
Page 14: Troubleshooting
TROUBLESHOOTING WARNING: TO REDUCE THE RISK OF ELECTRIC SHOCK-UNPLUG BEFORE TROUBLESHOOTING. Symptom Possible Causes Corrective Action 1) Check power supply – cord, 1) No power supply. breakers, fuses. 2) Unplug and check the power 2) Faulty power cord. cord. If damaged, have it repaired Vacuum will not operate. - Page 15 EXPLODED VIEW...
- Page 16 PARTS LIST Part Drawing Number Description Quantity 551624101 Handle Assy. Power Head Assy. 551012115 Float 551012116 Filter Cage 551098106 Mounting Rack Assy. Collection Tank 551012104 Vacuum Port 541013114 Base 551017125 Screw ST3.9*16 551091105 Caster 551098111 Rack Holder Assy. 551004113 1-1/4" Utility Nozzle 551012109 1-1/4"...


Need help?
Do you have a question about the VHB305M 1101 and is the answer not in the manual?
Questions and answers