Table of Contents
Advertisement
Available languages
Available languages
Quick Links
Read and understand this manual before use. Keep this manual for future reference.
Lea y comprenda este manual antes de usar el producto. Conserve este manual para futura referencia.
Distributed by/ Distribuido por:
Cleva North America, Inc.
601 Regent Park Court, Greenville, SC 29607
Operator's Manual
Manual del usuario
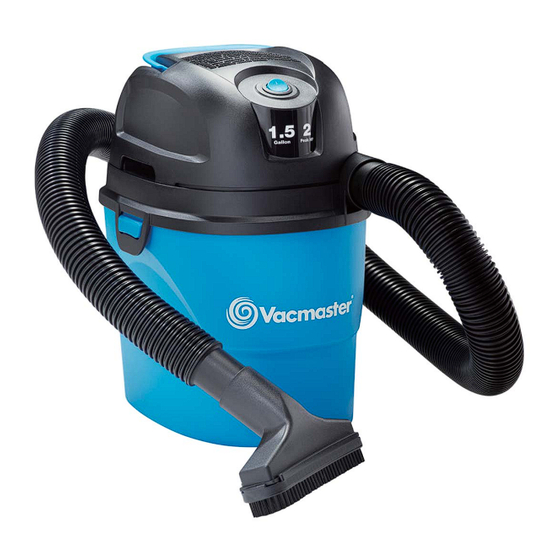
1.5 Gallon / 1.5 Galones
Model No. • N° de modelo
VH105 0101
FOR YOUR SAFETY
POR SU SEGURIDAD
Aspiradora en Mojado/Seco
Replacement Filters &
Accessories available at:
Vacmaster.com
Filtros de repuesto y
accesorios disponibles en:
Vacmaster.com
Wet/Dry Vacuum
Advertisement
Chapters
Table of Contents

Subscribe to Our Youtube Channel
Related Manuals for Vacmaster VH105 0101


Summary of Contents for Vacmaster VH105 0101
- Page 1 Operator’s Manual Manual del usuario 1.5 Gallon / 1.5 Galones Model No. • N° de modelo VH105 0101 FOR YOUR SAFETY Read and understand this manual before use. Keep this manual for future reference. POR SU SEGURIDAD Lea y comprenda este manual antes de usar el producto. Conserve este manual para futura referencia.
-
Page 2: Table Of Contents
Installing & Cleaning Foam Wet Filter…………………………………………………………………. Troubleshooting………………………………………………………………….…………...…………. Exploded View………………………………………………………………….…………...…………… Parts List………………………………………………………………………………………………….. ® Thank you for purchasing this Vacmaster ® Vacmaster you are obtaining a high quality product engineered for optimal performance. This vacuum is capable of picking up liquids and dry materials. -
Page 3: Warranty
WARRANTY We take pride in producing a high quality, durable product. This Vacmaster® product carries a limited two (2) year warranty against defects in workmanship and materials from date of purchase under normal household use. If product is to be used for commercial, industrial, or rental use, a 90 day limited warranty will apply. -
Page 4: Important Safety Instructions
IMPORTANT SAFETY INSTRUCTIONS READ AND UNDERSTAND ALL INSTRUCTIONS BEFORE USING THIS VACUUM.Read and understand this operator’s manual and all labels on the Wet/Dry Vacuum cleaner before operating. Safety is a combination of common sense, staying alert and knowing how your vacuum works. Use this Wet/Dry Vacuum only as described in this manual. -
Page 5: Double Insulation Instructions
When using as blower: • Direct air discharge only at work area. • Do not use Wet/Dry Vacuum as a sprayer. • Do not direct air at bystanders. • Keep children away when blowing. • Wear safety goggles. SAVE THESE INSTRUCTIONS DOUBLE INSULATION INSTRUCTIONS This Wet/Dry Vacuum is double-insulated, eliminating the need for a separate grounding system. -
Page 6: Extension Cords
EXTENSION CORDS When using an extension cord with your Wet/Dry Vacuum refer to the following table to determine the required A.W.G. wire size. Before using the cleaner make sure the power cord and extension cord are in good working condition. Make repairs or replacements before using the vacuum cleaner. -
Page 7: Unpacking & Checking Carton Contents
UNPACKING & CHECKING CARTON CONTENTS Remove all contents from the box. Remove the power head and take out any contents inside the collection tank. Check each item against the carton contents list. Carton Contents List: Description ......Q t y. Vacuum Assembly ....1 Hose ........1 Crevice Tool ......1... -
Page 8: General Assembly Instructions
GENERAL ASSEMBLY INSTRUCTIONS Estimated Assembly Time: 25 minutes Tools Required for Assembly: Drill, Screwdriver Helpful Tools: Level WARNING: DO NOT PLUG THE POWER CORD INTO A POWER OUTLET. MAKE SURE THE PLUG IS DISCONNECTED BEFORE ASSEMBLING THE WET/DRY VACUUM. TO REDUCE THE RISK OF ELECTRIC SHOCK, DO NOT EXPOSE TO RAIN. 9 10 UNPACKING YOUR WET/DRY VACUUM &... - Page 9 For your convenience this vacuum comes with a wall mount bracket for storage. IMPORTANT! • Do not screw the wall mount bracket to drywall only. Secure the screws to a stud. • Do not hang from or sit on the vacuum when on wall mount bracket. •...
-
Page 10: Dry Vacuum Operation
DRY VACUUM OPERATION DRY VACUUMING WARNING: BE SURE TO READ, UNDERSTAND, AND APPLY INFORMATION ENTITLED “IMPORTANT SAFETY INSTRUCTIONS”. DO NOT VACUUM IN AREAS WITH FLAMMABLE GASES, VAPORS, OR EXPLOSIVE DUSTS IN THE AIR. FLAMMABLE GASES OR VAPORS INCLUDE BUT ARE NOT LIMITED TO: LIGHTER FLUID, SOLVENT TYPE CLEANERS, OIL-BASED PAINTS, GASOLINE, ALCOHOL, OR AEROSOL SPRAYS. -
Page 11: Liquid Vacuum Operation
LIQUID VACUUM OPERATION LIQUID VACUUMING WARNING: BE SURE TO READ, UNDERSTAND, AND APPLY INFORMATION ENTITLED “IMPORTANT SAFETY INSTRUCTIONS”. DO NOT VACUUM IN AREAS WITH FLAMMABLE GASES, VAPORS, OR EXPLOSIVE DUSTS IN THE AIR. FLAMMABLE GASES OR VAPORS INCLUDE BUT ARE NOT LIMITED TO: LIGHTER FLUID, SOLVENT TYPE CLEANERS, OIL-BASED PAINTS, GASOLINE, ALCOHOL, OR AEROSOL SPRAYS. -
Page 12: Blower Operation
BLOWER OPERATION This Wet/Dry Vacuum has blowing capabilities. To use the blower feature follow the instructions listed. WARNING: ALWAYS WEAR SAFETY GOGGLES COMPLYING WITH ANSI Z87.1 (OR IN CANADA, CSAZ94.3) BEFORE USING BLOWER. WARNING: KEEP BYSTANDERS CLEAR FROM BLOWING DEBRIS. WARNING: WEAR A DUST MASK IF BLOWING CREATES DUST THAT MIGHT BE INHALED. -
Page 13: Maintenance
MAINTENANCE EMPTYING THE COLLECTION TANK WARNING: ALWAYS DISCONNECT THE PLUG FROM THE POWER OUTLET BEFORE REMOVING THE POWER HEAD FROM COLLECTION TANK. 1. Verify that the power cord is disconnected from the outlet (Fig. 1). 2. Disconnect the hose from the vacuum (Fig. 2). 3. -
Page 14: Installing & Cleaning Reusable Cloth Filter
INSTALLING & CLEANING REUSABLE CLOTH FILTER INSTALLING REUSABLE CLOTH FILTER 1. Verify that the power cord is disconnected from the outlet (Fig.1). 2. Remove the power head and place in an upside down position. (Fig. 2 & 3). 4. Place the power head back onto the collection tank. REMOVING &... -
Page 15: Troubleshooting
TROUBLESHOOTING WARNING: TO REDUCE THE RISK OF ELECTRIC SHOCK, UNPLUG BEFORE TROUBLESHOOTING. PROBLEM POSSIBLE CAUSE SOLUTION Check the power supply, cord, No power supply. breakers, and fuses. Unplug and check the power cord. The wet/dry Faulty power cord. If damaged, have it repaired by a vacuum will not professional. -
Page 16: Exploded View
EXPLODED VIEW... -
Page 17: Parts List
PARTS LIST Part Part Number Description Quantity 551386101 Handle Power Head Assembly 551012115 Float Collection Tank 551092104 Wall Mount Bracket 551012109 Crevice Tool 551004113 Utility Nozzle 551081106 Hose 551012110 Reusable Cloth Filter 551081109 Foam Wet Filter... - Page 18 Resolución de problemas......................Vista expandida..........................Lista de partes..........................® Gracias por comprar esta aspiradora en mojado/seco Vacmaster ® que con Vacmaster usted obtiene un producto de alta calidad, diseñado para ofrecer un desempeño óptimo. Esta aspiradora es capaz de recoger materiales líquidos y secos.
-
Page 19: Garantía
Nos sentimos orgullosos de ofrecer a usted un producto de alta calidad y durabilidad. Este producto de Vacmaster® tiene una garantía limitada de dos (2) años contra defectos de mano de obra y materiales a partir de la fecha de compra en uso doméstico normal. Si el producto se llegase a utilizar de manera comercial, industrial o para su alquiler, se aplicará... -
Page 20: Instrucciones De Seguridad Importantes
INSTRUCCIONES DE SEGURIDAD IMPORTANTES ANTES DE USAR ESTA ASPIRADORA, LEA Y COMPRENDA TODAS LAS INSTRUCCIONES. Lea y comprenda tanto este manual del usuario como todas las etiquetas de la aspiradora en alerta y saber cómo funciona su aspiradora. Use la aspiradora en mojado/seco solo como se indica en este manual. -
Page 21: Instrucciones Sobre El Aislamiento Doble
• Tenga precaución adicional al limpiar en escaleras. • Utilice el producto solo como se describe en este manual. Utilice solo los accesorios recomendados por el fabricante. • Esta aspiradora está provista de un aislamiento doble. Utilice solo piezas de repuesto idénticas. Consulte INSTRUCCIONES SOBRE EL AISLAMIENTO DOBLE. -
Page 22: Cables De Extensión
ADVERTENCIA: REPARACIÓN DE ASPIRADORAS EN SECO/MOJADO CON AISLAMIENTO DOBLE UNAA ASPIRADORA EN SECO/MOJADO CON AISLAMIENTO DOBLE POSEE DOS SISTEMAS DE AISLACIÓN EN LUGAR DE UNA CONEXIÓN A TIERRA. NO SE INCLUYEN CONEXIONES A TIERRA PARA LOS APARATOS CON DOBLE AISLAMIENTO, POR LO QUE TAMPOCO DEBE AGREGARSE UNA CONEXIÓN A TIERRA A DICHOS APARATOS. -
Page 23: Símbolos
SÍMBOLOS Las siguientes palabras y significados están diseñados para explicar los niveles de riesgo asociados a este producto. SÍMBOLO SEÑAL SIGNIFICADO Indica una situación peligrosa inminente la cual, de no PELIGRO evitarse, podría causar la muerte o lesiones severas. Indica una situación peligrosa potencial la cual, de no ADVERTENCIA evitarse, podría causar la muerte o lesiones severas. -
Page 24: Desempaque Y Revisión Del Contenido De La Caja
DESEMPAQUE Y REVISIÓN DEL CONTENIDO DE LA CAJA Elimine todo el contenido de la caja. Retire el cabezal motriz y extraiga el contenido del tanque recolector. Revise cada artículo en contraste con la lista de contenidos de la caja. Lista de contenidos de la caja: Llave Descripción………………..Cant Cuerpo Principal De La Aspiradora…... -
Page 25: Instrucciones Generales De Ensamblaje
INSTRUCCIONES GENERALES DE ENSAMBLAJE Tiempo estimado de ensamblaje: 25 minutos Herramientas necesarias para el ensamblaje: Taladro, destornillador ADVERTENCIA: NO CONECTE EL CABLE DE ALIMENTACIÓN A UNA TOMA DE ALIMENTACIÓN. ASEGÚRESE DE QUE EL ENCHUFE ESTÉ DESCONECTADO ANTES DE ENSAMBLAR LA ASPIRADORA EN MOJADO/SECO. PARA REDUCIR EL RIESGO DE DESCARGA ELÉCTRICA, NO EXPONGA EL PRODUCTO A LA LLUVIA. - Page 26 11. Coloque la aspiradora en seco/mojado en el soporte de montaje de pared (Fig. 13). Para su conveniencia, esta aspiradora incluye un soporte de montaje de pared para almacenarlo. ¡IMPORTANTE! • No instale el soporte sobre 5 pies / 1.5 m del piso. •...
-
Page 27: Operación De Aspirado En Seco
OPERACIÓN DE ASPIRADO EN SECO ASPIRADO EN SECO ADVERTENCIA: ASEGÚRESE DE LEER, COMPRENDER Y APLICAR LA INFORMACIÓN DE “INSTRUCCIONES DE SEGURIDAD IMPORTANTES”. NO ASPIRE EN ZONAS CON GASES, VAPORES O POLVOS INFLAMABLES EN EL AIRE. ENTRE LOS GASES O VAPORES INFLAMABLES SE INCLUYEN, SIN LIMITACIÓN A, LOS SIGUIENTES: FLUIDO DE ENCENDEDOR, LIMPIADORES TIPO SOLVENTES, PINTURAS EN BASE A ÓLEO, BENCINA, ALCOHOL O SPRAYS DE AEROSOLES. -
Page 28: Operación De Aspirado En Mojado
OPERACIÓN DE ASPIRADO EN MOJADO ASPIRADO EN MOJADO ADVERTENCIA: ASEGÚRESE DE LEER, COMPRENDER Y APLICAR LA INFORMACIÓN TITULADA “INSTRUCCIONES DE SEGURIDAD IMPORTANTES”. NO ASPIRE EN ZONAS CON GASES, VAPORES O POLVOS INFLAMABLES EN EL AIRE. ENTRE LOS GASES O VAPORES INFLAMABLES SE INCLUYEN, SIN LIMITACIÓN A, LOS SIGUIENTES: FLUIDO DE ENCENDEDOR, LIMPIADORES TIPO SOLVENTES, PINTURAS EN BASE A ÓLEO, BENCINA, ALCOHOL O SPRAYS DE AEROSOLES. -
Page 29: Operación De Soplado
¡IMPORTANTE! Al aspirar grandes cantidades de líquido, no sumerja la boquilla completamente en el líquido; deje una brecha en la punta de la abertura de la boquilla para permitir el ingreso de alcanza su capacidad máxima. Sentirá un incremento en la velocidad del motor. Cuando esto suceda, apague la máquina, desconéctela de la energía y drene el líquido en un receptáculo apto o drenaje. -
Page 30: Mantenimiento
MANTENIMIENTO VACIADO DEL TANQUE RECOLECTOR ADVERTENCIA: DESCONECTE SIEMPRE LA CLAVIJAA DE LA TOMA DE CORRIENTE ANTES DE SACAR EL CABEZAL MOTRIZ DEL TANQUE RECOLECTOR. 1. Compruebe que el cable de alimentación esté desconectado de la toma de corriente (Fig. 1). 2. - Page 31 INSTALACIÓN Y LIMPIEZA DEL FILTRO DE CARTUCHO INSTALACIÓN DEL FILTRO DE CARTUCHO 1. Compruebe que el cable de alimentación esté desconectado de la toma de corriente (Fig. 1). 2. Quite el cabezal motriz y colóquelo boca abajo. habitáculo quede completamente cubierto (Fig. 2 & 3). 4.
-
Page 32: Resolución De Problemas
RESOLUCIÓN DE PROBLEMAS ADVERTENCIA: PARA EVITAR EL RIESGO DE SUFRIR DESCARGAS ELÉCTRICAS, DESCONECTE EL APARATO ANTES DE INTENTAR SOLUCIONAR CUALQUIER PROBLEMA. PROBLEMA CAUSA PROBABLE SOLUCIÓN No hay energía. el cable, los interruptores y los fusibles. Desconecte y revise el cable de La aspiradora alimentación. -
Page 33: Vista Expandida
VISTA EXPANDIDA... -
Page 34: Lista De Partes
LISTA DE PARTES Pieza Description Cantidad 551386101 Empuñadura Armado del cabezal de potencia 551012115 Flotador Tanque recolector 551092104 Soporte de montaje de pared 551012109 Herramienta para grietas 551004113 Boquilla utilitaria 551081106 Manguera 551012110 Filtro de tela reutilizable 551081109 Filtro de espuma para aspirar en mojado...
Need help?
Do you have a question about the VH105 0101 and is the answer not in the manual?
Questions and answers