Table of Contents
Advertisement
Available languages
Available languages
Quick Links
®
Wet/Dry Vacuums
Operator's
Manual
Intertek
3084514
CONFORMS
TO UL
STD. No. 1017
Certified to CSA STD.
C22.2 No.243-10
3.2Gal
/ 12 L
Model No.
VHB307WM
FOR YOUR SAFETY
Read and understand
this manual before use.
Keep this manual for future reference.
www.vacmaster.com
Cleva North America
601 Regent Park Court
Greenville,
SC 29607
Part No.VH57BZ.20.60.02
Advertisement
Table of Contents

Related Manuals for Vacmaster VHB307WM


Summary of Contents for Vacmaster VHB307WM
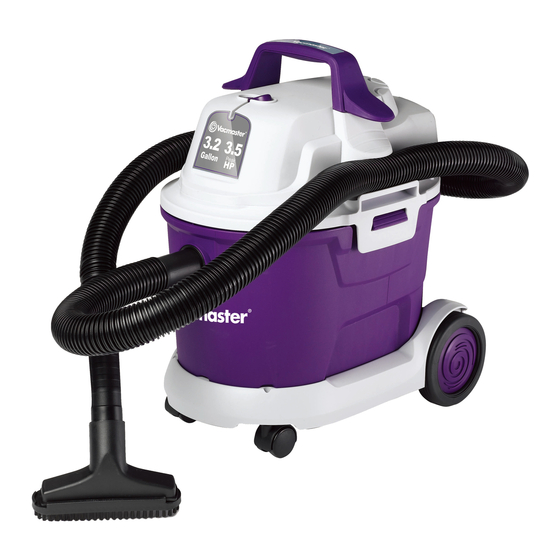
- Page 1 ® Wet/Dry Vacuums Operator's Manual 3.2Gal / 12 L Model No. VHB307WM FOR YOUR SAFETY Read and understand this manual before use. Keep this manual for future reference. Intertek 3084514 www.vacmaster.com CONFORMS TO UL Cleva North America STD. No. 1017 601 Regent Park Court Certified to CSA STD.
-
Page 2: For Your Safety
Reusable Cloth Filter ..............Installing &Cleaning Foam Sleeve Filter ................ Troubleshooting ...................... Exploded View and Parts List ..................Thank you for purchasing this Vacmaster ® wet/dry vacuum cleaner. Feel confident that with ® Vacmaster you are obtaining a high quality product engineered for optimal performance. - Page 3 TY INSTRUCTIONS Read and understand all instructions before using this vacuum Read and understand this owner's manual and all labels on the Wet/Dry Vacuum cleaner before operating. Safety is a combination of common sense, staying alert and knowing how your vacuum works. Use this Wet/Dry Vac only as described in this manual.
- Page 4 This Wet/Dry Vac is double-insulated, eliminating the need for a separate grounding system. Use only identical replacements parts. Read the instructions for Servicing Double-Insulated Wet/Dry Vacs before servicing. Use this Wet/Dry Vac as described in this manual. Observe the following warnings that appear on the motor housing of your Wet/Dry Vac. OUBLE INSULATED - GROUNDING...
- Page 5 Remove entire contents of carton. Check each item against the carton contents. Carton Contents List Description ....... Vac Assembly ......... Hose ..........Base ..........Wheels ........... Casters ..........Utility Nozzle ........Crevice Tool ........Dust Bag ........Multi-Surface Floor Nozzle ..... Round Dust Brush ......
- Page 6 A Phili 3s head screwdriver is required. WARNING:DO NOT PLUG IN POWER CORD TO POWER OUTLET. MAKE SURE PLUG IS DISCONNECTED BEFORE ASSEMBLING THE WET/DRY VAC. UNPACKING YOUR WET/DRY VACUUM & GENERAL ASSEMBLY 1. Verify that the power cord is disconnected from the outlet.
- Page 7 • Do not hang from or sit on the vacuum when on mounting rack. 13. Align the two screw holes so that they are over a stud and secure the mounting support to the wall stud, as shown, with the two screws provided. (fig.14) 14.
- Page 8 LIQUID VACUUMING WARNING: BE SURE TO READ, UNDERSTAND, AND APPLY INFORMATION, ENTITLED 'SAFETY INSTRUCTIONS & WARNINGS'. DO NOT VACUUM IN AREAS WITH FLAMMABLE GASES, VAPORS, OR EXPLOSIVE DUSTS IN THE AIR. FLAMMABLE GASES OR VAPORS INCLUDE BUT ARE NOT LIMITED TO; LIGHTER FLUID, SOLVENT TYPE CLEANERS, OIL-BASE PAINTS, GASOLINE,...
- Page 9 To use the This Wet/Dry Vac has blowing capabilities only when the hose is inserted into the blowing port. blower feature follow the instructions listed. CSAZ94.3) ARNING: BEFORE ALWAYS WEAR SAFETY GOGGLES USING BLOWER. COMPLYING WITH ANSI Z87.1 (OR IN CANADA, I WARNING: KEEP BYSTANDERS CLEAR FROM BLOWING...
- Page 10 NOTICE! The filter included is made of high quality material designed to stop small dust particles. The filter should be used for dry pick-up only. A dry filter is necessary to pick up dust. If the dust filter is wet, it will clog quickly and be very difficult to clean.
-
Page 11: Before Troubleshooting
IWARNING:TO REDUCE THE RISK OF ELECTRIC SHOCK-UNPLUG BEFORE TROUBLESHOOTING. Symptom Possible Causes Corrective Action Vacuum will not operate 1) No power supply. 1) Check power supply - cord, breakers, fuses. 2) Faulty power cord. 2) Unplug and check the power cord. - Page 12 VHB307WM Parts List Key Number Drawing . Description . Quantity Key Number. Drawing Description Quantity VH57PF.A0.01 Handle FV9502o07.00 Foam Sleeve Filter VH57PF,10.00 Power Head Assembly FV7723,0t,00 Multi-Surface Floor Nozzle TVQTZS.05.YZ Float FV7774.01,00 Utility Nozzle TVQTZS.05.YZ Filter Cage FV7773.01.00 Round Dust Brush VH57PF,20.01...
-
Page 13: Manual Del Usuario
Aspiradoras Mojado/Seco MANUAL DEL USUARIO ,,_,_i;_'!"!_:_'_'i_!_!_!"!_!_i_i!_!_!!'! i _ _ii_ _ !_ _/_ii _ _i_i_i II _!_ 3.2Gall Modelo VHB307WM PARA SU SEGURIDAD, Lea y entienda este manual antes de usar. Guarde este manual para futura referencia. Intertek 3084514 www.vacmaster.com CONFORMS... -
Page 14: Para Su Seguridad
Instalaci6n y limpieza del filtro de esponja ..............Diagnostico ......................Partes de repuesto y diagrama ................. Gracias por comprar esta aspiradora mojado/seco de Vacmaster ®. Sientase confidente que con Vacmaster ® esta obteniendo un producto de alta calidad dirigido a el funcionamiento optimo, Esta... -
Page 15: Este Manual
|NSTRUCC|ONES DE SEGUR|DAD |MPORTANTES LEA Y ENTIENDA TODAS LAS INSTRUCCIONES ANTES DE USAR ESTA ASPIRADORA. Lea y entienda el manual del usuario y todas las etiquetas en la aspiradora mojado/seco antes de utilizar. La seguridad es una combinaci6n de sentido comQn, hay que permanecer alerta y saber como su aspiradora trabaja. - Page 16 • Mantenga a losnifiosalejados delarea. • Utiliceanteojosde seguridad. Estaaspiradora mojado/seco t ieneaislamiento doble,eliminando la necesidad de unsistemade conexi6n a tierraseparado.Utilicesolamente piezasde repuesto identicas.Lealas instrucciones p aramantenimiento desu aspiradora mojado/seco c ondoble-aislamiento antesde realizarajustesy reparaciones. U tiliceesta aspiradora segQn Iodescrito en estemanual.Observelassiguientes advertencias q ueaparecen en la cubierta delmotorde su aspiradora.
- Page 17 Sacar el contenido del carton. Compruebe cada articulo contra la lista de contenido. Clave Descripci6n ......... Cant. Ensamblaje de la aspiradora ....Manguera ..........Base ........... Rueda trasera ........Ruedecitta ..........Boquitta de utitidad concepillo ....Herramienta para ranuras ........
- Page 18 Serequiereundestornillador de estrella(Philips)paraensamblar. QUE EL ENCHUFE ESTE DESCONECTADO ANTES DE ENSAMBLAR SU ASPIRADORA DVERTENCIA: NO ENCHUFE EL CABLE ELI_CTRICO AL TOMACORRIENTE, ASEGURESE DESEMPAQUE DE SU ASPIRADORA Y ENSAMBLAJE 1. Verifique que el cord6n electrico este desconectado del enchufe. (fig. 1) 2.
- Page 19 • No monte el bastidor a mas de 5 pies del piso. • No sujete los tornillos alas paredes de tablero de yeso solamente. Sujete los tornillos al montante detras de los tableros de yeso. • No se cuelgue del bastidor ni se siente en el. •...
- Page 20 4. Pongalatapaenel envase, y asegQrela e n su lugarusandolasasas. (fig.5) INSTRUCClONES D EFUNClONAMIENTO: ASPIRARMATERIALES ENSECO 5. Inserte el extremogruesode la manguera en el cabezal y asegQrela e n su lugar. Empuje el accesorio requerido sobreel finallibrede la manguera o de la extensi6n.(fig.6) 6.
- Page 21 6. Despues de cada uso, vacie y limpie el envase antes de guardar. ilMPORTANTE! AI aspirar grandes cantidades de liquidos con la aspiradora, no sumerja la apertura de la manguera totalmente en el liquido; deje un boquete en la extremidad de la manguera para permitir afluencia del aire.
- Page 22 1. Verifique que el enchufe este desconectado del tomacorriente. (fig. 1) 2. Desconecte la manguera del envase. (fig. 2) 3. Suelte las asas y quite la tapa del envase. (fig. 3) 4. Limpie todo el sucio o particulas del envase y manguera. (fig.
- Page 23 Instalacion del filtro de esponja 1. Verifique que el enchufe este desconectado del tomacorriente. (fig. 1) 2. Quite la tapa del envase y col6quela hacia arriba. Siga las instrucciones para quitar el filtro de polvo. 3. Cuidadosamente resbale el filtro hacia abajo, sobre la jaula del filtro y empuje el filtro hacia adentro hasta que cubra la jaula completamente.
- Page 24 V ........VHB307WM Lista De Repuestos Cantidad Key Numero Numero Del Dibujo Descripcibn Cantidad Key Numerc Numero Del Dibujo Descripcibn FV9502.07.00 VH57PF.A0.01 Manija Filtro De Esponja VH57PF,10.00 Ensamblaje De Motor FV7723.01.00 B_uilla ParaSuperficies Mtiltip_s TVQTZS.05.YZ Jaula FV7774.01.00 B0quillaDe UtilidadC0ncepilk TVQTZS.05.YZ...
Need help?
Do you have a question about the VHB307WM and is the answer not in the manual?
Questions and answers