Advertisement
Table of Contents
- 1 Table of Contents
- 2 Warranty
- 3 Important Safety Instructions
- 4 Safety Instructions and Warnings
- 5 Unpacking and Checking Carton Contents
- 6 General Assembly Instructions
- 7 Switching ON/OFF
- 8 Dry Vacuum Operation
- 9 Liquid Vacuum Operation
- 10 Blowing Operation
- 11 Maintenance
- 12 Installing & Cleaning Cartridge
- 13 Installing & Cleaning Foam Filter
- 14 Troubleshooting
- Download this manual
Advertisement
Table of Contents

Subscribe to Our Youtube Channel
Summary of Contents for Vacmaster VQ1530SFDC
- Page 1 VQ1530SFDC/1500W / 30L WET AND DRY VACUUM CLEANER 02 - 13 Operator’s manual (G1) IPX4...
-
Page 2: Table Of Contents
Installing & Cleaning Foam Filter………………....………..….……….…....... Troubleshooting………………………………………………..…….………......Thank you for purchasing this Vacmaster® wet and dry vacuum cleaner. With Vacmaster® you are obtaining a high quality product that is engineered for optimal performance. This vacuum cleaner is capable of picking up liquids and dry materials. -
Page 3: Safety Instructions And Warnings
Use this wet and dry vacuum cleaner as described in this manual. To reduce the risk of personal injury or damage to your wet and dry vacuum cleaner, use only Vacmaster® recommended accessories. SAVE THIS MANUAL FOR FUTURE REFERENCE. - Page 4 • Do not store the appliance directly beside a hot oven or radiator. • Use insulating gloves, an earth connector connected to the steel container, or any other protective equipment when using the vacuum cleaner in some special places such as carpet or •...
- Page 5 SPECIFICATIONS Motor: 220-240V~50Hz Power input: 1500 watts Max. power consumption of the automatic socket outlet: 1400 watts Container: 30ltr...
-
Page 6: Unpacking And Checking Carton Contents
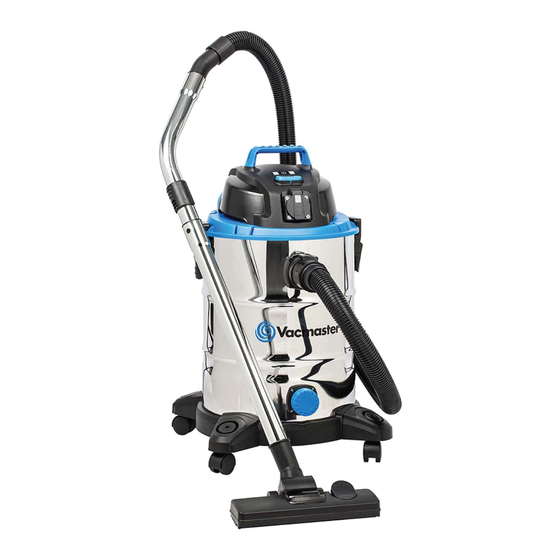
UNPACKING AND CHECKING CARTON CONTENTS 1.Overview of the Appliance Components Vacuum Cleaner…………….…..Hose…………….………...……... Caster ………….…………...…... Extension wands….……....Crevice tool…………………….... Hose adaptor for power tools…..Round dust brush...……………..Floor nozzle......…..Filter retainer....……... Dust bag....…….………... Handle…….………......6 Screws (Bag)........Handle On/Off Switch Power Head Accessory Storage Socket... -
Page 7: General Assembly Instructions
GENERAL ASSEMBLY INSTRUCTIONS 3.4. Remove the contents from inside the container; make sure you have all contents as listed. 3.5. With the power head removed, turn the container upside down. Insert the feet with casters into the slots and apply pressure into place and secure them with supplied screw. Do not 3.9. -
Page 8: Switching On/Off
SWITCHING ON/OFF Connect the mains plug. Switching on the vacuum cleaner: Position I switches the vacuum cleaner on: Position II switches the vacuum cleaner to stand by so that it switches on and off automatically with a power tool that is plugged into the on-board socket. Once the electrical appliance has been switched off, the vacuum cleaner switches off following a time lapse to allow the suction tube to be emptied. -
Page 9: Dry Vacuum Operation
DRY VACUUM OPERATION WARNING! Ensure you read, understand and apply Section 1 ‘Safety Instructions’. Reminder: DO NOT vacuum hazardous substances. Use of an incorrect dust bag will invalidate your warranty. securely mounted. With power head removed and in the upside down position, make sure the 12 for installation instructions.) 4.5. -
Page 10: Liquid Vacuum Operation
LIQUID VACUUM OPERATION WARNING: BE SURE TO READ, UNDERSTAND, AND APPLY INFORMATION, ENTITLED ‘SAFETY INSTRUCTIONS & WARNINGS’. DO NOT VACUUM IN AREAS WITH FLAMMABLE GASES, VAPORS, OR EXPLOSIVE DUSTS IN THE AIR. FLAMMABLE GASES OR VAPORS INCLUDE BUT ARE NOT LIMITED TO; LIGHTER FLUID, SOLVENT TYPE CLEANERS, OIL-BASE PAINTS, GASOLINE, ALCOHOL OR AEROSOL SPRAYS. -
Page 11: Blowing Operation
BLOWING OPERATION This wet and dry vacuum cleaner has blowing capabilities. To use the blower feature follow the instructions listed. WARNING: KEEP BY STANDERS CLEAR FROM BLOWING DEBRIS. WARNING: WEAR A DUST MASK IF BLOWING CREATES DUST THAT MIGHT BE INHALED. 6.2. -
Page 12: Installing & Cleaning Cartridge
INSTALLING & CLEANING CARTRIDGE Installing Cartridge Filter 2. Remove power head and place in an upside down position. Removing and Cleaning Cartridge Filter Cartridge Filter. cage. INSTALLING & CLEANING FOAM FILTER Installing Foam Filter 9.1. Verify that the power cord is disconnected from the power socket. 9.2. -
Page 13: Troubleshooting
TROUBLESHOOTING WARNING: TO REDUCE THE RISK OF ELECTRIC SHOCK-UNPLUG BEFORE TROUBLESHOOTING. The appliance No power Check the power doesn’t work. Functional fault in the supply. power cord, switch, Have the damaged or motor part checked by Tank is full of liquid or replace it. - Page 14 D U S T B A G S , F I L T E R S & A C C E S S O R I E S a l w a y s a v a i l a b l e f r o m : c l e v a - u k .


Need help?
Do you have a question about the VQ1530SFDC and is the answer not in the manual?
Questions and answers