Table of Contents
Advertisement
Quick Links
ELECTRIC INFRARED HEATERS
The manufacturer's instructions, the layout drawing, national and local codes and ordinances, and all applicable
standards which apply to electrical wiring comprise the basic information needed to complete the installation. These
criteria must be thoroughly understood before proceeding.
Only personnel who have been trained and understand all applicable codes should undertake the installation.
Manufacturer representatives are Factory Certified in the service and application of this equipment, and can be
called on for helpful suggestions about installation.
Series eWAVE
Installation, Operation and Service Instructions
WARNING
Canada:
563 Barton Street, Stoney Creek, Ontario L8E 5S1
USA:
315 N Madison Street, Fortville, IN 46040
www.superiorradiant.com
Page 1
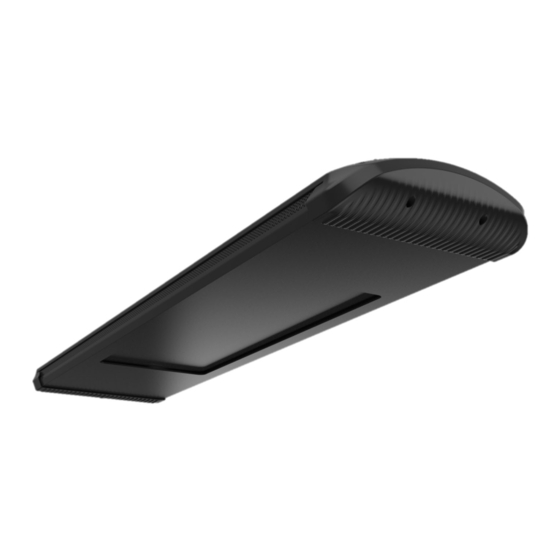
SERIES eWAVE ™
Medium Wave Infrared Heater
MODELS
EW18M12
EW18M12V
EW18M24
EW18M24V
EW24M24
EW24M24V
LT287 Dec 19, 2022
Advertisement
Table of Contents

Subscribe to Our Youtube Channel
Related Manuals for Superior Radiant EW24M24


Summary of Contents for Superior Radiant EW24M24
- Page 1 MODELS EW18M12 EW18M12V EW18M24 EW18M24V EW24M24 EW24M24V WARNING The manufacturer’s instructions, the layout drawing, national and local codes and ordinances, and all applicable standards which apply to electrical wiring comprise the basic information needed to complete the installation. These criteria must be thoroughly understood before proceeding.
-
Page 2: Table Of Contents
15.7 lbs (7.1 Kg) (105x25x9cm) 43x10x3“ EW18M24V 1800 W 240 V 7.5A 1Φ2W, 240Vac 16.8 lbs (7.6 Kg) (110x25x9cm) 50x10x3“ EW24M24 2400 W 240 V 1Φ2W, 240Vac 17.5 lbs (8.0 Kg) (127x25x9cm) 53,5x10x3“ EW24M24V 2400 W 240 V 1Φ2W, 240Vac 18.6... -
Page 3: Important Instructions
IMPORTANT INSTRUCTIONS When using electrical appliances, basic precautions should always be followed to reduce the risk of fire, electric shock, and injury to persons, including the following: 1. Read all instructions before installing or using this heater. 2. This heater is hot when in use. To avoid burns, do not let bare skin touch hot surfaces. Keep combustible materials, such as furniture, pillows, bedding, papers, clothes, etc. -
Page 4: Electrical And Operating Instructions
ELECTRICAL AND OPERATING INSTRUCTIONS General Requirements Turn the heater on only when you need heat and avoid any misuse. Do not use the heater if the ambient temperature exceeds 80°F (25°C). Before connecting the appliance make sure that the voltage is the same as indicated on the device and the line supply is corresponding to the relevant electrical code. -
Page 5: Remote-Controlled Model
REMOTE-CONTROLLED MODEL The models EW18M12V, EW18M24V and EW24M24V are available with dimmer to adjust the heater intensity by remote control. The remote control uses one 12V A23 battery. Powering on the heater. The heater will start at the last power mode set before switching it off. ... -
Page 6: Clearance To Combustibles
CLEARANCE TO COMBUSTIBLES 1. The minimum installation height from the floor to the heater shall be 6ft (183cm). 2. The minimum clearances from the ceiling, walls and other objects are shown in the pictures below. 3. The stated clearance to combustibles represents a surface temperature of 117°F (65°C) above room temperature. -
Page 7: Supplied Wall/Ceiling Support
SUPPLIED WALL/CEILING SUPPORT INSTALLATION INSTRUCTIONS Before being used, the heater must be fixed to the wall or to the ceiling by means of the provided supports. Ensure that the wall where you intend to install the heater is solid and that no electrical cables or water pipes pass behind it. - Page 8 3. Insert the arch-shaped support in the rail on the 4. Align the base holes of the supports and upper side of the heater. join them together using the supplied screw and bolt. 6. Tilt the heater until you can insert a screw 5.
- Page 9 9. After finishing the wiring and closing the junction box cover, tilt the heater in the desired angle and insert the bracket screws in the matching holes. Series eWAVE Page 9 LT287 Dec 19, 2022...
-
Page 10: Important Instructions For Outdoor Installations
IMPORTANT INSTRUCTIONS FOR OUTDOOR INSTALLATIONS 1. During installation, to maintain the water resistance of the junction box, it is necessary to make sure that all the components of the fitting are perfectly matched and placed in their position and sequence along the conduit hose (see pictures);... -
Page 11: Replacement Parts
REPLACEMENT PARTS eWAVE Hanging Brackets Kit (Part # ES314) Item Description Quantity Heater Bracket Wall Bracket M4x10mm Phillips Pan Scr S/S M4 Nut S/S eWAVE Junction Box Lid, Gasket Kit (Part # ES315) Item Description Quantity Gasket Screws Washers eWAVE Remote Contrl (Part # ES316) Series eWAVE Page 11 LT287 Dec 19, 2022... -
Page 12: Warranty Terms & Conditions
The customer warrants using the product in accordance with: • Any instructions provided to it by Superior Radiant Products from time to time. • All government and local regulations, including but not limited to all relevant electrical, environmental laws and regulations governing the installation, storage, use, handling and maintenance of the goods. - Page 13 THIS PAGE LEFT INTENTIONALLY BLANK Series eWAVE Page 13 LT287 Dec 19, 2022...
Need help?
Do you have a question about the EW24M24 and is the answer not in the manual?
Questions and answers