
Subscribe to Our Youtube Channel
Related Manuals for DriSteem XTR Series


Summary of Contents for DriSteem XTR Series
- Page 1 STEAM HUMIDIFICATION XTR SERIES Electrode Steam Humidifiers Installation, Operation, and Maintenance Manual Read and save these instructions...
- Page 2 Contact with energized circuits can cause property damage, severe personal injury, or death as a result of electrical shock or fire. Do not remove cabinet covers until electrical power is disconnected. Follow the shutdown procedure on Page 38 before performing service or maintenance procedures on any part of the system. XTR SERIES INSTALLATION, OPERATION, AND MAINTENANCE MANUAL...
- Page 3 To prevent such damage, make sure drain water tempering is selected, and supply water is not heated. Do not shut off supply water to the cylinder before it is drained. Excessive supply water pressure Supply water pressure greater than 80 psi (550 kPa) can cause the humidifier to overflow. XTR SERIES INSTALLATION, OPERATION, AND MAINTENANCE MANUAL...
- Page 4 XTR SERIES INSTALLATION, OPERATION, AND MAINTENANCE MANUAL...
-
Page 5: Table Of Contents
WARRANTY . . . . . . . . . . . . . . . . . . . . . . . . . . . . . . . . . . . . . . . . . . . . . . . . . . . . . . . . . . . . . . XTR SERIES INSTALLATION, OPERATION, AND MAINTENANCE MANUAL... -
Page 6: Overview
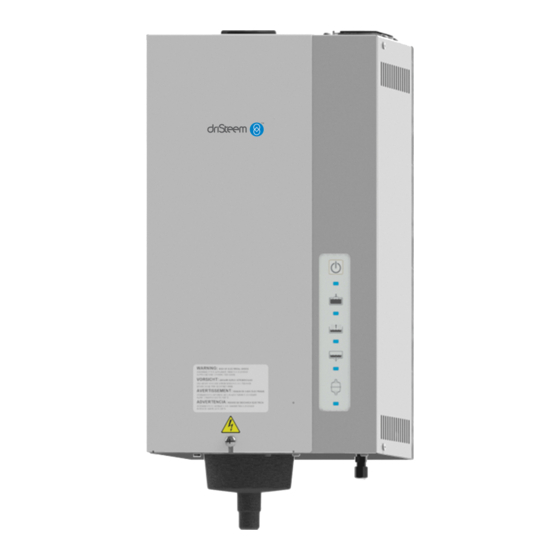
Product overview HUMIDIFIER DriSteem XTR electrode steam humidifiers use heat caused by electrical resistance in their fill water to boil the fill water into humidification steam. Steam output and water conductivity are managed via automatic draining and filling. See Figure 2-1. - Page 7 Fill CONTROL PANEL Steam The XTR humidifier controller provides push-button operation and indicator lights for operating status and troubleshooting information. See “Operation” Drain beginning on Page 32 for details. Service XTR SERIES INSTALLATION, OPERATION, AND MAINTENANCE MANUAL...
-
Page 8: Specifications
(181 mm) Mounting holes 17-1/2" (see mounting (445 mm) dimensions in 20-7/8" (530 mm) Figure 8-1) Bottom Drain 2" (51 mm) 3-3/8" (86 mm) 3-3/8" Supply water (86 mm) connection 7-7/8" (200 mm) OM-8251 XTR SERIES INSTALLATION, OPERATION, AND MAINTENANCE MANUAL... -
Page 9: Voltages, Weights, And Dimensions
2.65 kW 240V, 60 Hz 2.76 kW Table 5-2: XTR humidifier weights and dimensions Dimensions Shipping weight Maximum operating weight Width Height Depth inches inches inches 27.0 12.2 23.0 10.4 10-1/8 20-7/8 7-1/8 XTR SERIES INSTALLATION, OPERATION, AND MAINTENANCE MANUAL... -
Page 10: Installation
“Dispersion” beginning on Page 7. FIGURE 6-1: XTR HUMIDIFIER DISPERSION OPTIONS XTR dispersion tube in a duct XTR steam blower mounted on top of humidifier OM-7720 OM-7718 XTR fan pack Remote-mounted XTR steam blower OM-7719 90-2194 XTR SERIES INSTALLATION, OPERATION, AND MAINTENANCE MANUAL... -
Page 11: Selecting A Location
Side Front pack 16" (406 4" (102 mm) 16" (406 mm) mm) for for steam hose electrical clearance 30" (762 mm) for service access XTR humidifier 16" (406 mm) for drain OM-8252 90-2194 XTR SERIES INSTALLATION, OPERATION, AND MAINTENANCE MANUAL... -
Page 12: Mounting
Make sure plugs fit snugly and are fully engaged on pins. FIGURE 8-2: XTR STEAM CYLINDER INSTALLATION Front view of cabinet Front view of cabinet without cylinder with cylinder installed Cylinder guide Warning label Drain valve body Cylinder OM-7721 XTR SERIES INSTALLATION, OPERATION, AND MAINTENANCE MANUAL... -
Page 13: Piping
Thoroughly flush the supply water piping to remove pipe residue and stagnant water supply water conductivity for DriSteem electrode humidifiers is 350 to 1250 before connecting piping to the humidifier. μS/cm (roughly comparable to water hardness of 10 to 36 grains per gallon). -
Page 14: Field Piping Overview
Refer to governing codes for drain pipe size and maximum discharge water temperature. 1/4" (DN8) O.D. copper line Inlet strainer, by installer Supply valve, by installer OM-7722 Note: Dashed lines indicate provided by installer. XTR SERIES INSTALLATION, OPERATION, AND MAINTENANCE MANUAL... -
Page 15: Xtr Steam Blower And Xtr Fan Pack
(front of fan pack) Steam hose (provided with humidifier) 16" (406 mm minimum for steam hose Wall 30" (762 mm) recommended Steam hose for service access connection XTR humidifier OM-8253 XTR humidifier drain 90-2194 XTR SERIES INSTALLATION, OPERATION, AND MAINTENANCE MANUAL... -
Page 16: Field Wiring
Failure to follow these precautions can damage sensitive electronic components and void the DriSteem warranty. Fused disconnect FIELD WIRING CONNECTION INSTRUCTIONS •... - Page 17 Failure to install these CONTROL INPUT WIRING devices can result in excessive moisture XTR humidifiers accept RH signals from DriSteem control components. For in the duct, which can cause bacteria wiring connection requirements, first determine which control scenario applies.
- Page 18 SLOW BLOW FUSE (5X20mm 5A) HIGH VOLTAGE WIRING CON1 CONTROL CIRCUIT WIRING HIGH VOLTAGE FIELD WIRING LOW VOLTAGE FIELD WIRING * SEE PAGE 16 FOR MODULATING HUMIDISTAT FIELD WIRING. 90-1903d FILL DRAIN VALVE VALVE XTR SERIES INSTALLATION, OPERATION, AND MAINTENANCE MANUAL...
- Page 19 Field wiring FIGURE 15-1: XTR CONTROL BOARD OM-7802 XTR SERIES INSTALLATION, OPERATION, AND MAINTENANCE MANUAL...
- Page 20 Field wiring FIGURE 16-1: XTR EXTERNAL CONTROL CONNECTIONS XTR-2 XTR SERIES INSTALLATION, OPERATION, AND MAINTENANCE MANUAL...
- Page 21 Field wiring FIGURE 17-1: TYPICAL MODULATING CONTROL WIRING OM-7834 XTR SERIES INSTALLATION, OPERATION, AND MAINTENANCE MANUAL...
-
Page 22: Sensor Placement
F. Not acceptable. Do not place sensors near windows, door passageways, or areas of stagnant airflow. Recommended safety (airflow and high limit) sensor location: G. Best sensing location for high limit humidistat or humidity sensor and airflow proving switch. XTR SERIES INSTALLATION, OPERATION, AND MAINTENANCE MANUAL... - Page 23 Return air Relief air • • unit Vapor absorption has taken place Window Wall or partition Point of vapor absorption • Humidifier dispersion assembly • • Turning vanes • • • DC-1084 Doorway Window XTR SERIES INSTALLATION, OPERATION, AND MAINTENANCE MANUAL...
-
Page 24: Dispersion
* Developed length equals measured length plus 50% of measured length to account for fittings. • DriSteem recommends 6' (1.8 m) maximum steam hose length pitched at 2"/ft (15%) toward humidifier. Steam hose tends to sag if not supported for its full length, which leads to collecting condensate and system pressure issues. Tubing sags less and can allow for 1/8"/ft (1%) pitch with longer runs. -
Page 25: Interconnecting Piping Requirements
• Support steam hose to prevent sags or low spots. • Use DriSteem steam hose. Other manufacturers of steam hose may use unacceptable release agents or material mixes that can affect humidifier system performance adversely. Using hose from alternative manufacturers... -
Page 26: Xtr Dispersion Tube
7/8" (22 mm) 2"/ft (15%) toward humidifier 2"/ft (15%) toward None humidifier Tubing 7/8" (22 mm) 1/8"/ft (1%) toward humidifier * When piping over an obstruction, see the drip tee installation illustration in Figure 23-1. XTR SERIES INSTALLATION, OPERATION, AND MAINTENANCE MANUAL... - Page 27 1½" (DN40) hose clamp • Support steam hose so there are no sags or Steam hose low spots • Dashed lines indicate provided by installer XTR humidifier XTR-copper-pipe XTR SERIES INSTALLATION, OPERATION, AND MAINTENANCE MANUAL...
-
Page 28: Xtr Steam Blower
10.8 11.3 Rise: Minimum non-wetting height above steam outlet of steam blower Spread: Minimum non-wetting width from steam outlet of steam blower Throw: Minimum non-wetting horizontal distance from steam outlet of steam blower XTR SERIES INSTALLATION, OPERATION, AND MAINTENANCE MANUAL... - Page 29 • Always take care to avoid excess stress on blower and humidifier when performing maintenance. • To determine steam blower clearance requirements and account for minimum non-wetting distances, see Figure 26-1 and Table 26-1. Continued XTR SERIES INSTALLATION, OPERATION, AND MAINTENANCE MANUAL...
- Page 30 XTR steam blower. Table 26-1: XTR steam blower dimensions Dimension inches FIGURE 26-1: XTR STEAM BLOWER DIMENSIONS Front view Side view Back view 6-1/4 1-3/8 OM-7726 1/4" (6.4 mm) dia holes XTR SERIES INSTALLATION, OPERATION, AND MAINTENANCE MANUAL...
-
Page 31: Xtr Fan Pack
20' (6 m) with tubing as shown in Figure 28-2. Insulate the tubing with 1" (25 mm) of fiberglass to minimize loss of capacity and efficiency. XTR SERIES INSTALLATION, OPERATION, AND MAINTENANCE MANUAL... - Page 32 XTR humidifier with 5 clamps (included with fan pack or available in Kit #601383). * 6' (1.8m) of steam hose provided with XTR humidifier. Cut hose cuff from provided steam hose. To drain OM-8257 XTR SERIES INSTALLATION, OPERATION, AND MAINTENANCE MANUAL...
- Page 33 (305 mm) of space between grille and any obstruction or minimum surface. • Warmer room air temperature and RH below 30% will reduce the amount of unobstructed space required to absorb discharged steam. 90-2196 XTR SERIES INSTALLATION, OPERATION, AND MAINTENANCE MANUAL...
-
Page 34: Operation
XTR FAN PACK (212 °F [100 °C]), high-humidity environments. FIGURE 30-2: WALL OPENING DIMENSIONS Wall studs Cut-out opening in wall 7-1/4" (184 mm) 14-1/4" (362 mm) 16” (406 mm) Wall studs on center 90-1550 90-2197 XTR SERIES INSTALLATION, OPERATION, AND MAINTENANCE MANUAL... - Page 35 2. Wire humidistat to humidifier using standard 24V thermostat wire. 3. Disconnect all power to humidifier before wiring fan pack terminals to humidifier terminals labeled FAN PACK. Use standard 24V thermostat wire. FIGURE 31-1: MOUNT THE XTR FAN PACK 90-2212 XTR SERIES INSTALLATION, OPERATION, AND MAINTENANCE MANUAL...
-
Page 36: Principle Of Operation
2. Controller adjusts water level in cylinder via fill valve and drain valve to maintain constant current. Note: During operation, water level in cylinder depends on conductivity of water (which is determined by mineral content of water). XTR SERIES INSTALLATION, OPERATION, AND MAINTENANCE MANUAL... - Page 37 FIGURE 33-1: XTR HUMIDIFIER PRINCIPLE OF OPERATION Steam outlet Fill cup Overflow High water sensor Electrodes Steam cylinder Electrical resistance in fill water Fill line Fill valve Drain valve 90-1522 Drain cup Supply water Drain XTR SERIES INSTALLATION, OPERATION, AND MAINTENANCE MANUAL...
-
Page 38: Control Panel
Humidifier continues to operate, but at reduced capacity. Service Operational problem with humidifier. Humidifier shuts down. Occurs when unit detects over-current which can Solid red be caused by failure to drain or other system failures. Contact DriSteem for assistance. XTR SERIES INSTALLATION, OPERATION, AND MAINTENANCE MANUAL... - Page 39 If such condensation persists for several hours, the home or building should be ventilated to dissipate the potentially damaging excess moisture. XTR SERIES INSTALLATION, OPERATION, AND MAINTENANCE MANUAL...
-
Page 40: Start-Up
☐ Verify that humidifier is mounted level and securely supported before filling with water. See operating weights in Table 5-2. ☐ Verify that humidifier is level from front to back and side to side after it is full of water. XTR SERIES INSTALLATION, OPERATION, AND MAINTENANCE MANUAL... - Page 41 Note: If your humidifier control has a test mode, do not leave in test mode, or humidifier will not operate. 6. Monitor humidifier operation through multiple drain and fill cycles. Verify that there are no leaks in steam hose and (if using fan pack) condensate hose connections. XTR SERIES INSTALLATION, OPERATION, AND MAINTENANCE MANUAL...
-
Page 42: Maintenance
Dampen O-ring with water before inserting canister. Do not use CAUTION oil, grease, or any lubricant besides water. If cylinder plugs become loose, damage to the humidifier may occur. Obtain replacement plugs from DriSteem. XTR SERIES INSTALLATION, OPERATION, AND MAINTENANCE MANUAL... - Page 43 18. Each time cylinder is replaced, ensure fan in steam blower or fan pack is operating during a call for humidification, and ensure steam outlet is not blocked. 19. See Start-up procedure on Page 36 if necessary. FIGURE 39-1: CONNECTORS "O" shaped connector "D" shaped connector 90-2736a XTR SERIES INSTALLATION, OPERATION, AND MAINTENANCE MANUAL...
-
Page 44: Drain Valve
FIGURE 40-2: DRAIN VALVE BODY MAINTENANCE Drain valve body (G) Plunger (F) Spring (E) Drain valve coil (C) Actuator (D) Nut (B) Torque to 18 in-lb (2.0 N·m) Cap (A) Wires to quick connect OM-7631 XTR SERIES INSTALLATION, OPERATION, AND MAINTENANCE MANUAL... - Page 45 Failure to get ground plate and insert solidly connected to frame will compromise ground safety circuit. 7. Clean end of hose, and reconnect it to drain valve body with hose clamp. 8. Plug Molex plug into its mating wire harness plug. XTR SERIES INSTALLATION, OPERATION, AND MAINTENANCE MANUAL...
-
Page 46: Troubleshooting
XTR humidifier. Electric shock hazard Contact with electrical circuits can If a problem persists, call DriSteem Technical Support. See inset at left. cause property damage, personal injury or death. Service and TEST MODE... - Page 47 12. Press On-off button again. Listen for click as FAN PACK terminals are de-energized. If the terminals fail to energize (more than 1 VAC measured across terminals) replace control circuit board. Exit Test Mode by disconnecting power to humidifier or allowing five minutes to elapse. XTR SERIES INSTALLATION, OPERATION, AND MAINTENANCE MANUAL...
- Page 48 Water is flowing from fill cup Disassemble brass fitting in feed line between inlet valve and fill cup. Make sure small rubber flow overflow port orifice is in place in brass fitting. Continued XTR SERIES INSTALLATION, OPERATION, AND MAINTENANCE MANUAL...
- Page 49 Use blower activation relay, or run constant HVAC fan. Control setting is too high Adjust control to lower setting. Excess humidity. Control mounted in wrong See Installation Instructions with control for correct mounting location. location Continued XTR SERIES INSTALLATION, OPERATION, AND MAINTENANCE MANUAL...
- Page 50 See steam blower and fan pack wiring on Page 14. Motor failure Replace fan motor. Fan noise in fan pack Obstructed or damaged fan Clear and clear obstructions, or replace fan motor. or steam blower XTR SERIES INSTALLATION, OPERATION, AND MAINTENANCE MANUAL...
-
Page 51: Replacement Parts
XTR dispersion tube XTR fan pack SDU-003FP OM-8256 OM-7511 Table 47-1: Replacement parts, XTR dispersion Item Description Part No . Fan, SDU-003E steam blower and SDU-003FP fan pack 407109-004 XTR dispersion tube, with screws 162728-001 XTR SERIES INSTALLATION, OPERATION, AND MAINTENANCE MANUAL... -
Page 52: Xtr Humidifier
Replacement parts: XTR humidifier FIGURE 48-1: XTR HUMIDIFIER REPLACEMENT PARTS OM-7803 XTR SERIES INSTALLATION, OPERATION, AND MAINTENANCE MANUAL... - Page 53 Humidistat, room, on-off (DS 200) 405842-035 Standard replacement cylinder 194801-001 Humidistat, duct, modulating 600968 O-Ring, cylinder 530001-044 Humidistat, room, modulating 600965 Control board 408638-003 XTR fan pack drain tee and trap, with clamps 601383 XTR SERIES INSTALLATION, OPERATION, AND MAINTENANCE MANUAL...
- Page 54 Notes XTR SERIES INSTALLATION, OPERATION, AND MAINTENANCE MANUAL...
- Page 55 Notes XTR SERIES INSTALLATION, OPERATION, AND MAINTENANCE MANUAL...
-
Page 56: Warranty
DriSteem U.S. operations are ISO 9001:2015 breach of contract, negligence, strict liability in tort, or any other legal theory, even if DriSteem has certified notice of the possibility of such damages.
Need help?
Do you have a question about the XTR Series and is the answer not in the manual?
Questions and answers