DriSteem XT Series Installation, Operation And Maintenance Manual
Electrode steam humidifiers
Hide thumbs
Also See for XT Series:
- Installation, operation and maintenance manual (68 pages) ,
- Installation, operation and maintenance manual (80 pages)

Subscribe to Our Youtube Channel
Related Manuals for DriSteem XT Series


Summary of Contents for DriSteem XT Series
- Page 1 XT Series Elec trode Steam Humi dif ie rs Installation, Operation, and Maintenance Manual...
-
Page 2: Warnings And Cautions
War nings and cautions WARNING CAUTION Indicates a hazardous situation that could result in damage to Indicates a hazardous situation that could result in death or or destruction of property if instructions are not followed. serious injury if instructions are not followed. mc_051508_1145 WARNING Attention installer... - Page 3 CAUTION Follow steam piping recommendations Controlling condensate flow and collection in an XT Series humidifier system is critical to maximum performance. Failure to follow the steam piping recommendations in this manual can cause system pressure fluctuations and increase cylinder pressure, steam velocity, and condensate noise.
-
Page 4: Table Of Contents
Selecting a location ........9 Staging multiple XT Series humidifiers ....9 Mounting: Keyhole locations and dimensions . - Page 5 ® Rapid-sorb ......... 30 Rapid-sorb with models 025 through 042 .
-
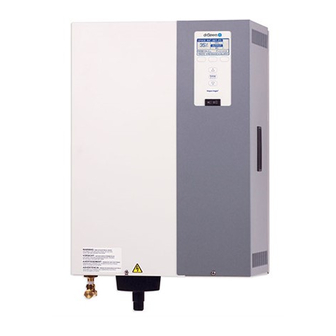
Page 6: Product Overview
Download DRI-STEEM literature DRI-STEEM XT Series electrode steam humidifiers use heat caused by electrical resistance in their fill water to boil the water into DRI-STEEM product manuals can be humidification steam. Steam output and water conductivity are downloaded, printed, and ordered from our managed via automatic draining and filling. - Page 7 The Vapor-logic4 controller in Model XTP humidifiers features menus for all humidifier functions, with a Web interface for access to all functions via Ethernet. Figure 3-1: XT Series humidifier control panels Model XTS standard controller keypad Model XTP Vapor-logic4 keypad/display Set point...
-
Page 8: Models, Capacities, And Electrical Specifications
Table 4-1: XT Series humidifier technical data Nominal current draw (amps) ** Nominal steam Input XTS / XTP capacity power Single-phase Three-phase model* (kW) lbs/hr kg/h 230V 400V 400V — — 10.0 — — 16.5 — — 25.0 — —... - Page 9 Table 5-1: Line currents and recommended fusing for XT Series humidifiers XTS / XTP Phase Volts Maximum line current (amps) Recommended fusing (amps) model 10.0 16.5 25.0 33.3 41.7 050* 50.0 2 x 43 2 x 63 067* 66.7 2 x 58...
-
Page 10: Dimensional Drawings
Fill cup extension kit is required and ships with Models 025 through 083 (ships loose). It is also required for Models 010 and 017 if maximum developed length of steam tubing is more than 20' (6 m) and duct static pressure exceeds 2" wc (498 Pa), and all XT Series humidifiers using Rapid-sorb or Ultra-sorb. -
Page 11: Dimensions And Weights
Table 7-1: Dimensions by model number XTS / XTP model Dimension Description 002, 003, 006 010, 017 025, 033, 042 050*, 067*, 083* inches inches inches inches Cabinet width 14.6 17.7 19.9 39.6 1005 Cabinet height 20.6 22.1 23.6 23.6 Cabinet depth 11.8 13.4... -
Page 12: Dispersion Options
The duct dispersion options in Figure 8-1 and the open space dispersion options in Figure 8-2 are available for XT Series humidifiers. For installation details, see “Dispersion” beginning on Page 20. Figure 8-2: Figure 8-1: XT steam blowers XT Series humidifier duct dispersion options Mounted on top of humidifier... -
Page 13: Selecting A Location
“Dispersion” beginning on Page 20. Staging multiple XT Series humidifiers The recommended installation location for the dispersion Up to four XT Series humidifiers can be staged assembly is at an elevation higher than the humidifier. However, to operate in sequence. In a sequenced... -
Page 14: Keyhole Locations And Dimensions
Installation Figure 10-1: XT Series humidifier mounting keyhole locations Models 002 through 042 Models 050 through 083 OM-7662 OM-7663 Table 10-1: XT Series humidifier mounting keyhole dimensions XTS / XTP model Dimension 002, 003, 006 010, 017 025, 033, 042... -
Page 15: Removing Steam Cylinder
Installation Unpack the humidifier from the shipping carton, and remove the WARNING cabinet doors and steam cylinder. Mounting hazard Removing steam cylinder Mount humidifier per the instructions Make sure the cylinder is empty and cooled before removing it. in this manual and to a structurally 1. -
Page 16: Fill Cup Extension Kit
Installation A fill cup extension (Figure 12-1) is required for any of the following: Figure 12-1: Fill cup extension kit Fill cup if maximum developed length of steam (see inset below) tubing is more than 20' (6 m), and duct static pressure exceeds 2"... -
Page 17: Steam Cylinder
Installation Installing steam cylinder Figure 13-1: Steam cylinder installation 1. Make sure strainer is pressed into steam cylinder drain outlet and strainer flange is flush with bottom of cylinder outlet. See Figure 13-1. 2. Use water to lubricate drain outlet on bottom of cylinder and High water o-ring in drain valve body. -
Page 18: Supply Water And Drain
Observe following precautions when selecting and installing drain piping to ensure personal safety and material integrity: drain piping to the earth ground lug in the XT Series humidifier. The earth ground lug is shown in Figures 54-1 and 56-1. 1" (25 mm) -
Page 19: Field Piping Overview
Installation Figure 15-1: XT Series humidifier field piping overview Two-cylinder model shown Steam hose, tubing, or pipe. DRI-STEEM recommends tubing or pipe for runs longer than 10’ (3 m). See Table 24-2 for maximum piping lengths. Tubing or pipe must be grounded. -
Page 20: Xt Steam Blowers
Installation Figure 16-1: Piping from XT Series humidifier to XT steam blower Remote-mounted XT steam blower Maximum recommended distance between humidifier and XT steam blower is 10’ (3 m). Hose clamp (provided) Plastic tie Steam hose (purchased separately from DRI-STEEM) -
Page 21: Humidifier Wiring
fire. Conduit knockouts Conduit and control wiring knockouts are provided on the XT Series humidifier cabinet. See Figure 6-1. Figure 17-1: Field wiring requirements Control component placement... - Page 22 Installation Connection instructions WARNING Before connecting power, refer to the wiring diagram or the data plate on the outside of the cabinet for wire sizing amperage. Excessive moisture hazard For control signal wiring from a humidistat, transmitter, or signal DRI-STEEM strongly recommends by others, see the wiring diagrams shipped inside the humidifier.
-
Page 23: Sensor Placement
Installation Sensor location is critical Other factors affecting humidity control Sensor location has a significant impact on humidifier performance. Humidity control involves more than the See the recommendations below and Figure 19-1. controller’s ability to control the system. Other factors that play an important role in overall Note: DRI-STEEM recommends that you do not interchange room system control are: and duct humidity devices. -
Page 24: Selecting The Dispersion Assembly Location
Find more information about can cause severe personal injury. absorption non-wetting distances at www.dristeem.com. mc_060110_1555 air can absorb the moisture being added without causing condensation at or after the unit. This normally will be after the heating coil or where the air temperature is highest. -
Page 25: Returning Condensate To Steam Cylinder
Installation Condensate return guidelines XT Series humidifier steam outlet The steam outlet on the humidifier is sized To prevent overfilling the steam cylinder, follow the guidelines to the output of the humidifier. DO NOT use below when returning condensate to the cylinder:... -
Page 26: Steam Outlet Connections
CAUTION Connector kit location Install the connector kit for increasing from 1” to 1½” (DN25 to DN40) hose or tube immediately above the XT Series humidifier as shown above. Failure to install the connector kit immediately above the humidifier will cause system pressure fluctuations and increase cylinder pressure, steam velocity, and condensate noise. -
Page 27: Models 033 Through 083
Installation Figure 23-1: Steam outlet connections for Models 033 through 083 within 10' (3 m) of dispersion assembly Note: For horizontal runs longer than 5' (1.5 m), hard pipe or tubing is required (see Figure 33-1). Do not use steam hose. Steam hose* attached directly Models 033 and 042 Model 050... -
Page 28: Condensate Control And Collection
2" wc (498 Pa), a fill cup extension kit (Figure 12-1) is required. mc_021511_1715 Table 24-2: Maximum steam carrying capacity and length of interconnecting steam hose, tubing, and pipe for XT Series humidifiers Copper or stainless steel tubing and Schedule 40 steel pipe DRI-STEEM steam hose* (Insulate tubing or piping to minimize loss of capacity and efficiency.) -
Page 29: Connecting To Humidifier With Steam Hose
Installation Connecting to humidifier with steam hose For hard pipe connections, see “Connecting to humidifier with tubing or pipe” on Page 29. spots: – For single dispersion tube without condensate drain, maintain a minimum pitch of 2"/ft (15%) toward the steam cylinder. –... -
Page 30: Single Dispersion Tube
Dispersion tube without condensate drain, from 1” to 1½” (DN25 to DN40) hose XT Models 002, 003, and 006 or tube immediately above the XT Series humidifier as shown above. Failure to install the connector kit condensate drain is 28.4 lbs/hr (13 kg/h). -
Page 31: Dispersion Tube With Condensate Drain, Xt Models 002 Through 017
1½" (DN40) with drain 56.8 25.8 device. For XT Series humidifiers with capacities more than 20 These capacities require multiple lbs/hr (9.1 kg/h), do not drain condensate back to the cylinder. tube assemblies and cannot use >... -
Page 32: Drip Tee Installation
90° long sweep or two 45° elbows Pitch Obstruction Insulate tubing and hard pipe to reduce steam loss XT Series humidifier To dispersion assembly Tubing or pipe drip tee, by installer (see Part No. in Table 59-1) 6" (150 mm) recommended 8"... -
Page 33: Connecting To Humidifier With Tubing Or Pipe
Grounding steam pipes adapters convert a tubing outlet on the humidifier to threaded The XT Series humidifier has built-in functionality pipe, allowing a pipe connection. for detecting and eliminating foaming in the steam cylinder. However, because brief periods 90°... - Page 34 Installation ® Read all dispersion instructions in this manual, and follow the WARNING installation instructions below: Hot surface and steam hazard with packing list. Report any shortages to DRI-STEEM Dispersion tube, steam hose, tubing, or immediately. The components typically include the following: hard pipe can contain steam, and surfaces –...
- Page 35 Installation Pitch requirements Table 31-2: Rapid-sorb dispersion tube capacities (horizontal tubes) horizontal-airflow duct, consider the following: Tube capacity Tube diameter length to accommodate the 1/8"/ft (1%) pitch requirements Insulated Uninsulated toward the ¾" pipe thread (DN20) header drain fitting. inches lbs/hr kg/h lbs/hr...
-
Page 36: Rapid-Sorb
Locate air gap only in spaces with adequate temperature and air movement to absorb flash steam; otherwise, condensation may form on nearby surfaces. Refer to governing codes for XT Series humidifier drain pipe size and maximum discharge water temperature. Notes: 1. -
Page 37: Rapid-Sorb With Models 050 Through 083
Figure 33-1: Dual-cylinder XT Series humidifier connected to Rapid-sorb or Ultra-sorb with riser drips in steam supply lines See installation notes in Figure 32-1. Rapid-sorb steam dispersion panel... -
Page 38: With Header Outside Of Duct For Horizontal Airflow
Installation With header inside of duct for horizontal airflow CAUTION Note: See the instructions at left for installing Rapid-sorb with the Operate Rapid-sorb within rated header outside the duct for horizontal airflow. steam capacity 1. Mark and cut holes in ductwork or air handler for steam header Excessive steam flow to the Rapid-sorb penetration, condensate drain piping, and header support steam dispersion assembly can cause... - Page 39 Installation Note: 7. Rotate the assembly up until the L-bracket aligns with the mounting holes in the duct or air handler. See Page 36 for steam supply and condensate drain line connection instructions. – Header pitch is duplicated in the L-bracket. –...
-
Page 40: Steam Supply Connections To Rapid-Sorb Header
Installation Steam supply connections to Rapid-sorb header Figure 36-1: Ultra-sorb with the High-efficiency Tube Connect the steam supply interconnecting piping from the option humidifier to the Rapid-sorb. The steam supply piping requires a minimum of 1/8"/ft (1%) pitch toward the header. If multiple humidifiers are supplying one Rapid-sorb, a multiple steam supply connector is needed. -
Page 41: Xt Steam Blowers
To avoid steam impingement on surrounding areas, observe the minimum non-wetting distances in the table. XT steam blowers are field wired to the XT Series humidifier blower terminals. A wiring diagram is included with the XT steam blower. Table 37-1:... - Page 42 Installation The XT steam blower can be mounted on top of Figure 38-1: an XT Series humidifier cabinet, or wall-mounted XT steam blower dimensions remotely from the humidifier. See Figure 39-2. SDU-006E2 shown SDU-006E2, for capacities up to 20 lbs/hr (9.1...
-
Page 43: Mounting Xt Steam Blower On Top Of Humidifier
5/8" fill hose Figure 39-2: Top- and remote-mounted XT steam blower Mounted on top of humidifier Mounted remotely from humidifier One XT Series humidifier with two XT steam blowers Condensate returned to steam Condensate returned cylinder fill hose to open drain... -
Page 44: Remote Mounting Xt Steam Blower
Installation Remote mounting XT steam blower WARNING The XT steam blower is constructed with a pitch toward the drain; however, it must be installed level and plumb for proper drainage. Standing water in XT steam blower See the Warning at left. Make sure the XT steam blower is Follow the instructions below for your wall type: installed plumb. -
Page 45: Wiring Xt Steam Blowers
Refer to the external connections diagram shipped with the XT steam blower. Piping condensate to humidifier fill cup 1. Remove fill cup cap from XT Series humidifier, and drill a 1/2" (13 mm) hole in fill cup cap for SDU-006E2 and SDU-017E2 condensate hose as shown in Figure 41-1. -
Page 46: Operation
Operation Water conductivity 1. Controller receives a call for humidity In electrode humidifiers, steam output is directly When the RH level in the humidified space drops below set related to the resistance of the water in the point, the humidifier controller receives a call for humidity and steam cylinder and, therefore, the conductivity of calculates a corresponding electrical current. -
Page 47: Principle Of Operation
Operation Figure 43-1: XT Series humidifier principle of operation Overflow (supply water (drain) connection) OM-7661X... -
Page 48: Start-Up Checklist
☐ Confirm that all wiring is correct per the wiring diagram. humidifiers and is available at our website: ☐ Confirm that proper grounding and an approved earth ground www.dristeem.com are provided. ☐ Confirm that the water fill line was thoroughly flushed before it was connected to the humidifier. -
Page 49: Control Panel, Model Xts
Operation Table 45-1: Model XTS control panel Symbol Function On-off / function selection button. Press to turn humidifier on and off. Resets timer for start-up water conditioning. Note: Disconnect power to humidifier to reset internal timers. Humidifier is preparing to turn on. Occurs if power to humidifier was turned off when humidifier was on. Humidifier Flashing green turns on after LED flashes for one minute. -
Page 50: Start-Up Procedure, Model Xts
Operation After the Model XTP humidifier is installed and connected WARNING properly: 1. Verify that the humidifier, controls, piping, electrical Electric shock hazard connections, steam supply, and dispersion units(s) are installed Only qualified electrical personnel should according to the following: perform start-up procedure. -
Page 51: Start-Up Procedure, Model Xtp
Operation After the Model XTP humidifier is installed and connected WARNING properly: 1. Verify that the humidifier, controls, piping, electrical Electric shock hazard connections, steam supply, and dispersion units(s) are installed Only qualified electrical personnel should according to the following: perform start-up procedure. -
Page 52: Maintenance
Maintenance Scheduled maintenance WARNING At 1000-hour intervals or when “Service interval reached” appears in the Messages Log, inspect the steam cylinder, fill and drain Shutdown procedure valves, steam hose, condensate piping, water supply piping, drain To prevent severe bodily injury or piping, drain, and all other parts for proper operation and cleaning death from electrical shock, follow this requirements. -
Page 53: Replacing Steam Cylinder
Maintenance Note: Replacing steam cylinder It is advisable to keep a spare steam cylinder 1. When steam cylinder is completely empty, turn humidifier off. in stock during the humidification season. See Place all power disconnects in OFF position, and lock in OFF “Replacement parts"... -
Page 54: Drain Valve
Maintenance Drain valve Figure 50-2: Drain valve assembly maintenance If either of the following issues occur after several months of runtime, follow the drain valve maintenance procedures below. See Figure 50-1. Drain valve body O-ring 1. When steam cylinder is empty, turn humidifier off. Place all Drain valve coil power disconnects in OFF position, and lock in OFF position. -
Page 55: Model Xts
+3211823595: call us with the following information available: Humidifier model number The product name and serial number are on the nameplate on the left side of the XT Series humidifier and XT steam _________________________________ blower. Humidifier serial number Example: water leaking, low humidity, high humidity, etc. - Page 56 Maintenance Table 52-1: Model XTS humidifier troubleshooting guide Problem Possible cause Action Check L1, N/L2 and Ground connections. Field-wired terminal Check wiring connections and settings on accessory items such as high limit switch and airflow connections proving switch. Follow the shutdown procedure on Page 48, then make sure electrode and high water probe connections on top of cylinder are securely connected.
- Page 57 Maintenance Table 52-1: Model XTS humidifier troubleshooting guide (continued) Problem Possible cause Action Field-installed supply water Open valve. shut-off valve not open Humidifier will not fill. Malfunctioning fill valve Check valve function using Test mode. Debris in drain valve blocking Remove cylinder and clean debris from drain valve.
-
Page 58: Xts/Xtp Models 002 Through 042
Maintenance Figure 54-1: XTS/XTP Models 002 through 042 replacement parts OM-7702 Subpanel Earth ground lug OM-7703... - Page 59 Drain valve assembly (see parts in Figure 50-2) 194610-001 Fill valve assembly Models 002 and 003 194622-001 Fill valve assembly Models 006, 010, and 017 194622-002 Fill valve assembly Models 025, 033, and 042 194622-003 194605-100 See steam cylinder Part No. on your XT Series humidifier.
-
Page 60: Xtp Models 050 Through 083
Maintenance Figure 56-1: XTP Models 050 through 083 replacement parts Subpanel OM-7704 Earth ground lug OM-7705... - Page 61 (plugs with wires: 1 red, 1 black, 1 white) 194601-023 194601-025 194601-026 194601-028 Strainer, cylinder 531006 Drain valve assembly (see parts in Figure 50-2) 194610-001 Fill valve assembly Models 050, 0673, and 083 194622-003 194605-100 See steam cylinder Part No. on your XT Series humidifier.
-
Page 62: Steam Blowers
Maintenance Figure 58-1: Replacement parts, SDU-006E2 and SDU-017E2 steam blowers OM-7700 Table 58-1: Replacement parts, SDU-006E2 and SDU-017E2 steam blowers Item Description Part No. Fan, SDU-006E2 407109-002 Fan, SDU-017E2 306377... - Page 63 Maintenance Table 59-1: Accessories Description Part No. Steam hose, 1" (DN25) x 10' (3 m), for remote XT steam blower 305400-100 Steam hose, 1 " (DN40) x 10' (3 m), wire-reinforced 305400-010 Steam hose, 2" (DN50) x 10' (3 m), wire-reinforced 305400-010 Condensate hose, 1/4"...
-
Page 64: Warranty
Our focus on quality DRI-STEEM ships such product, whichever date is the earlier. is evident in the construction of the XT Series humidifier. DRI-STEEM leads the industry with If any DRI-STEEM product is found to be defective in material or workmanship a Two-year Limited Warranty and optional extended warranty.
Need help?
Do you have a question about the XT Series and is the answer not in the manual?
Questions and answers