
Related Manuals for Dyness Orion ESS


Summary of Contents for Dyness Orion ESS
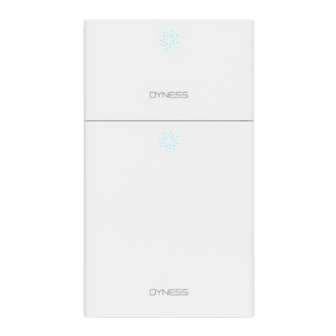
- Page 1 Orion ESS HV Battery System USER MANUAL Orion-9.9/14.9/19.9/24.9/29.9 192-576V File version-20230801-V1-EN Information might be subject to change without notice during product improving.
-
Page 2: Table Of Contents
Orion ESS Unit User Manual contents Statement of Law ......................... 1 Revision History ............................... 1 1 Introduction ..........................2 Brief Introduction ............................2 Product Properties ............................2 Product identity definition ..........................2 2 Product Specification ......................4 System Performance Parameter .......................4 Battery Module ..............................5 Battery Controller ............................ -
Page 3: Statement Of Law
(Taizhou) Co., Ltd. when the product or technology is updated. Web URL:http://www.dyness-tech.com/ Please note that the product can be modified without prior notification. Revision History Revision NO. Revision Date Revision Reason 2023.07.27 First Published 产 © Dyness reserves the copyright of this document. -
Page 4: Introduction
Dyness. it can be used to support reliable power for various types of equipments and systems. Orion is especially suitable for application scene of high power, limited installation space, restricted load-bearing and long cycle life. - Page 5 After the battery life is terminated, the battery can continue to be used after it recycled by the professional recycling organization and do not discard it at will. © Dyness reserves the copyright of this document.
-
Page 6: Product Specification
Battery System Discharge Current [A] (Normal) Battery System Discharge Current [A] (Max) Battery System Max. Charge& Discharge Current [A] (when used in communication with the inverter) Discharge condition 14~122 14~122 14~122 14~122 14~122 © Dyness reserves the copyright of this document. -
Page 7: Battery Module
Battery Module Capacity (Ah) Battery Module Cell Quantity (pcs) Battery Cell Capacity (Wh) 166.4 Battery Cell Voltage (Vdc) Battery Cell Capacity (Ah) Battery Module Cell Quantity in Series (pcs) Battery Module Charge Voltage (Vdc) 109.5 © Dyness reserves the copyright of this document. - Page 8 Battery Module Discharge Current (Max.) [A] Dimension (W*H*D, in) 21.3*24.3*6.5 Communication mode Pollution Degree (PD) Ambient Temperature(℉) 32~122 Enclosure Protection NEMA 4X Weight (Ibs) 127.9 Right interface Left interface Figure 2-2 Interface Definition © Dyness reserves the copyright of this document.
- Page 9 When the system is used in parallel: COM out This CAN communication socket is connected to the COM IN interface of the next battery through communication cable. (Factory default CAN communication mode) DC breaker Circuit protection © Dyness reserves the copyright of this document.
-
Page 10: Battery Controller
Figure 2-3 BDU interface Table 2-4 Interface Definition Item Name Definition External Positive Connect battery system with Inverter positive terminal socket EXT-CAN RJ45 communication port between the battery system and Communication inverter Port © Dyness reserves the copyright of this document. - Page 11 DO NOT turn off the “Power On Switch” during normal running condition, only in emergency case it could be turned off directly. Otherwise will cause this battery string current surge by another battery strings. Figure 2-4 “EXT-CAN” port pin © Dyness reserves the copyright of this document.
- Page 12 Orion ESS Unit User Manual Table 2-5 Definition of “EXT-CAN” port pin Color Definition PIN1 Orange/White Reserved PIN2 Orange XGND PIN3 Green/White Reserved PIN4 Blue CANH PIN5 Blue/White CANL PIN6 Green © Dyness reserves the copyright of this document.
-
Page 13: Installation And Configuration
It is necessary to open the heating system at first. Out of the working temperature range will cause the battery system over / low temperature alarm or protection which may lead to the cycle life reduction. © Dyness reserves the copyright of this document. -
Page 14: Installation Clearance Requirements
Please note that the battery should be installed with a minimum safe clearance from the surrounding equipment or battery. Please refer to the minimum clearance diagram below. 11.81in 39.37in 11.81in Installation location precautions © Dyness reserves the copyright of this document. -
Page 15: Tools
If insulated tools are not available, cover the entire exposed metal surfaces with available insulated alternatives, except their tip, with electrical tape. Safety Gear It is recommended to wear the following safety gear when dealing with the battery pack © Dyness reserves the copyright of this document. -
Page 16: Unpacking Inspection
Orion BDU 21.3*12.4*6.5in 1 PCS Side cover 11.8*4.3in Standard, Black Communication /L6.6ft /RJ45 plug 1 PCS cable to inverter at both sides Communication Black /L8in cable to battery Module cable- Red /8AWG/L8in positive © Dyness reserves the copyright of this document. - Page 17 Power cable 8AWG, red, 6.6ft Negative cable Power cable 8AWG, black, 6.6ft Anchor bolts M8*60 Bracket TP304 21.6*11.2in Packing list (Battery) Item Specification Quantity Figure Battery Module 96V/52Ah HV9652 21.3*24.3*6.5in Side cover 23.6*4.3in © Dyness reserves the copyright of this document.
-
Page 18: Installation
Orion ESS Unit User Manual Communication Black /L8.2ft cable Orange Serial cable /8AWG/L8.2ft Terminal OT4-6 Anchor bolts M8*60 TP304 Bracket 21.6*24.4in Installation Figure 3-2 Wall mounting layout © Dyness reserves the copyright of this document. - Page 19 Step 5 Install the second bracket.Place the second bracket on the side of the installed bracket to keep the same height. Then repeat steps 3 and 4. © Dyness reserves the copyright of this document.
- Page 20 Place the fourth bracket above the first bracket, keeping the vertical direction consistent. Then repeat steps 3 and 4. Step 8 Install the BDU bracket. Place the BDU bracket according to the selected layout.Then repeat steps 3 and 4. Step 9 © Dyness reserves the copyright of this document.
-
Page 21: Cable Connection And Self-Test
2.4in to the left or right The negative pole of 2 # battery is connected to the positive pole of 3 # battery. battery CAN OUT is connected to 3# battery CAN IN. © Dyness reserves the copyright of this document. - Page 22 One is connected to the BDU negative pole socket, and the other is connected to the 4# battery negative pole socket. Select an appropriate location as the docking point © Dyness reserves the copyright of this document.
- Page 23 All cables must not be exposed. Use cable conduit for exposed cables DANGER The battery system is high voltage DC system. Must make sure the grounding surface of the battery is stable and reliable. © Dyness reserves the copyright of this document.
- Page 24 The output voltage should conform to the voltage range in the table “P3 Table 2-1 The parameter of Tower system”. Switch off the “POWER ON” switch. Turn the switch to the “OFF” position © Dyness reserves the copyright of this document.
- Page 25 9.8ft.) Connect the EXT-CAN communication cable to the inverter RJ45 CAN port. Connect to inverter DC- Connect to terminal inverter DC+ Connect to inverter terminal RJ45 CAN communication port © Dyness reserves the copyright of this document.
- Page 26 Switch on the inverter, to make sure all the power equipments can work normally. • Start the battery system. Side cover installation Press the clip, place the side cover and release the clip. © Dyness reserves the copyright of this document.
-
Page 27: Maintenance
Communication failure The wrong battery model Select correct battery between battery and type is selected on the model type on the inverter inverter inverter Replacement of Battery Controller (BDU) © Dyness reserves the copyright of this document. -
Page 28: Battery Maintenance
Output Relay Inspection: [Periodical Maintenance] Under low load condition (low current), control the output relay OFF and ON to hear the relay has click voice, that’s mean this relay can off and on normally. © Dyness reserves the copyright of this document. -
Page 29: Storage Recommendations
6 months. CAUTION The cycle life of the battery will have relative heavily reduction if not follow the above instructions to store the battery for a long term. © Dyness reserves the copyright of this document. -
Page 30: Shipment
In particular, special rules for the carriage of goods on the road and the current dangerous goods law, specifically ADR (European Convention on the International Carriage of Dangerous Goods by Road), as amended, must be observed. © Dyness reserves the copyright of this document. - Page 31 Address: No. 511 Chenzhuang West Road, Sanshui Street, Jiangyan District, Taizhou City Email: service@dyness-tech.com Tel: +86 400 666 0655 Web: www.dyness-tech.com Official Website Digital version access...
Need help?
Do you have a question about the Orion ESS and is the answer not in the manual?
Questions and answers