CAMPAGNOLO SUPER RECORD WIRELESS Technical Manual
Hide thumbs
Also See for SUPER RECORD WIRELESS:
- Quick start manual (2 pages) ,
- User manual (204 pages)

Related Manuals for CAMPAGNOLO SUPER RECORD WIRELESS


Summary of Contents for CAMPAGNOLO SUPER RECORD WIRELESS
- Page 1 TECHNICAL MANUAL SUPER RECORD WIRELESS BLUETOOTH COUPLING WITH THE COMPONENTS FITTING ADJUSTMENTS DIAGNOSTICS...
- Page 2 The actual product may differ from what is illustrated, as the specific purpose of these instructions is to explain the procedures for using the component Rev. 01/ 08-2023 CAMPAGNOLO COMPONENTS - TECHNICAL MANUAL...
- Page 3 LEDS ON REAR DERAILLEUR ERGOPOWER AND FRONT DERAILLEUR CONTINUOUS PRESSURE FAST PRESSURE HIGH FREQUENCY LOW FREQUENCY FLASHING FLASHING FIXED LED LED OFF TIME LIMIT / ACTIVATION TIME BLUETOOTH PAIRING WITH THE COMPONENTS - Rev. 01/ 08-2023 CAMPAGNOLO COMPONENTS - TECHNICAL MANUAL...
-
Page 4: Preliminary Operations
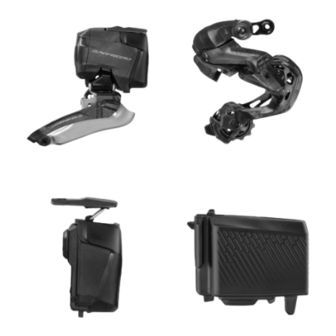
• Use only 5 V battery chargers certified according to IEC 62368-1. • The approximate time required for a full battery charge is 1 hour. Fig.1 Fig. 2 BLUETOOTH PAIRING WITH THE COMPONENTS - Rev. 01/ 08-2023 CAMPAGNOLO COMPONENTS - TECHNICAL MANUAL... - Page 5 90 sec in the search status. Fig.3 INSERTING THE BATTERY AND SWITCHING ON THE FRONT DERAILLEUR • Use only the Campagnolo battery designed for this component, identified by PU23-SR12FD. • Insert the lower battery tab into the front derailleur, then close the locking lever.
- Page 6 The front derailleur LED flashes at low The control LEDs are off and turn frequency. frequency. on only when activating a lever or pressing the MODE button. BLUETOOTH PAIRING WITH THE COMPONENTS - Rev. 01/ 08-2023 CAMPAGNOLO COMPONENTS - TECHNICAL MANUAL...
- Page 7 2s, with the following colour sequence, starting with blue, for 45s. • With the BLUE LED on, quickly press the MODE button. The following colour sequence will switch BLUETOOTH PAIRING WITH THE COMPONENTS - Rev. 01/ 08-2023 CAMPAGNOLO COMPONENTS - TECHNICAL MANUAL...
- Page 8 In this case, simply remove the rear derailleur battery and refit it: the rear derailleur will reattempt connection with all the components. BLUETOOTH PAIRING WITH THE COMPONENTS - Rev. 01/ 08-2023 CAMPAGNOLO COMPONENTS - TECHNICAL MANUAL...
- Page 9 • The controls must be correctly oriented in order not to negatively affect the bike's aerodynamics • Fix the control to the handlebar, tightening the screw to 8 Nm (71 in.lbs), using a Torx T25 bit. INSTALLATION - Rev. 01/ 08-2023 CAMPAGNOLO COMPONENTS - TECHNICAL MANUAL...
-
Page 10: Hydraulic System
This adapter is produced by the frame manufacturer. Unlike the standard front 160 calliper, the 140 caliper must be installed on the Campagnolo adapter. To connect the adapter with the 140 calliper, the CAMPAGNOLO EC- DB013 fastening screws must be used. EC-DB013... -
Page 11: Rear Derailleur
Install the front derailleur as specified in the “12s front derailleur – mechanical groupsets” technical manual. 6 - REAR DERAILLEUR Install the rear derailleur following the procedure given in the “12s rear derailleur – mechanical groupsets” technical manual. INSTALLATION - Rev. 01/ 08-2023 CAMPAGNOLO COMPONENTS - TECHNICAL MANUAL... - Page 12 For the AM version, the configuration is the STD one with the chain-drop prevention teeth. 10 -29 OEM CONFIGURATION Chain guard/catcher INSTALLATION - Rev. 01/ 08-2023 CAMPAGNOLO COMPONENTS - TECHNICAL MANUAL...
-
Page 13: Adjustment Of The Rear Derailleur
The LEDs will turn on BLUE as follows: • A pulse on the control • Low frequency flashing on the rear derailleur ADJUSTMENTS - Rev. 01/ 08-2023 CAMPAGNOLO COMPONENTS - TECHNICAL MANUAL... - Page 14 3) Adjust the position of the rear derailleur until the chain is aligned with the sprocket. 4) Press the rear derailleur MODE button to confirm the position. The LED lights up blue flashing at a low frequency. ADJUSTMENTS - Rev. 01/ 08-2023 CAMPAGNOLO COMPONENTS - TECHNICAL MANUAL...
- Page 15 3) Position the external semi-cage 0.5-0.7 mm from the chain. 4) Press the front derailleur MODE button to confirm the position. The front derailleur LED turns on flashing BLUE at a low frequency. 0.5-0.7 mm ADJUSTMENTS - Rev. 01/ 08-2023 CAMPAGNOLO COMPONENTS - TECHNICAL MANUAL...
- Page 16 ERROR MESSAGES ON THE REAR / FRONT DERAILLEUR BATTERIES PROBLEM SOLUTION Try to charge the battery. • Internal battery error ALL battery LEDs are FLASHING If the LEDs continue to flash, replace the battery. DIAGNOSTICS - Rev. 01/ 08-2023 CAMPAGNOLO COMPONENTS - TECHNICAL MANUAL...
- Page 17 Remove and refit the battery to switch the pressing the activation levers) system no longer detects that the component off and back on again. lever is pressed, the LED turns off) DIAGNOSTICS - Rev. 01/ 08-2023 CAMPAGNOLO COMPONENTS - TECHNICAL MANUAL...
Need help?
Do you have a question about the SUPER RECORD WIRELESS and is the answer not in the manual?
Questions and answers