
Related Manuals for Klarstein CONTEMPO


Summary of Contents for Klarstein CONTEMPO
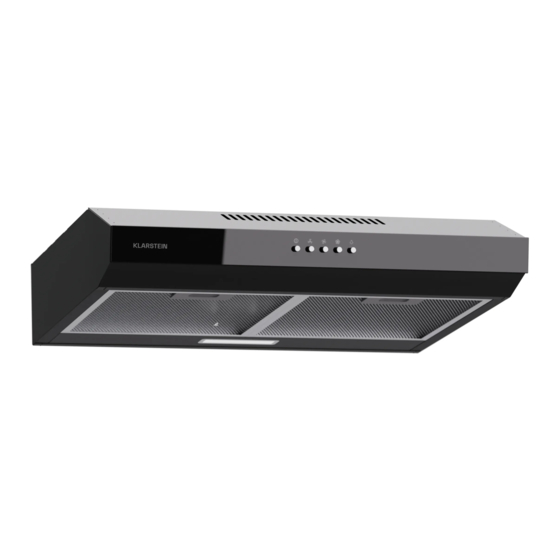
- Page 1 CONTEMPO Dunstabzugshaube Cooker hood Campana extractora Hotte aspirante Cappa aspirante 10045590 10045591 10045592 10045593 10045594 10045595 www.klarstein.com...
-
Page 3: Table Of Contents
Hersteller & Importeur (UK) 21 TECHNISCHE DATEN 10045590, 10045591, 10045592, Artikelnummer 10045593, 10045594, 10045595 Stromversorgung 220-240 V ~ 50/60 Hz Hinweis: Zu dieser Dunstabzugshaube können Sie unter der Artikelnummer XXXXXXXX zusätzlich einen Aktivkohlefilter erwerben. Besuchen Sie dafür unsere Webseite: www.klarstein.de... -
Page 4: Sicherheitshinweise
SICHERHEITSHINWEISE • Lesen Sie sich alle Hinweise vor der Benutzung sorgfältig durch und bewahren Sie die Bedienungsanleitung zum späteren Nachschlagen gut auf. • Die Montagearbeiten dürfen nur von einer Elektrofachkraft oder einer qualifizierten Person durchgeführt werden. Bevor Sie die Dunstabzugshaube verwenden, stellen Sie sicher, dass die Spannung (V) und die auf der Dunstabzugshaube angegebene Frequenz (Hz) der Spannung und Frequenz der Stromversorgung in Ihrem Haushalt entsprechen. - Page 5 Wichtige Hinweise zum Abluftbetrieb WARNUNG Vergiftungsgefahr durch zurückgesaugte Abgase! Betreiben Sie das Gerät nicht im Abluftbetrieb, wenn es zusammen mit einer raumluftabhängigen Feuerstätte betrieben wird und keine ausreichende Luftzirkulation garantiert wird. Raumluftabhängige Feuerstätten wie Gas-, Öl-, Holz- oder Kohleheizungen, Boiler oder Durchlauferhitzer beziehen die Luft aus dem Raum und führen sie durch ein Abluftrohr oder einen Kamin ins Freie.
-
Page 6: Geräteübersicht Und Teile
GERÄTEÜBERSICHT UND TEILE Bezeichnung Menge Hauptgehäuse Entlüftungsknopf Filtereinheit (optional 2 oder 3) Aktivkohlefilter (optional) Rückschlagventil Luftauslasskappe Schrauben 5*49 mm Kunststoff-Dübel... -
Page 7: Abmessungen
ABMESSUNGEN... -
Page 8: Installation
INSTALLATION Wandbohrung und Halterungsbefestigung • Packen Sie die Haube aus und prüfen Sie, ob alle Teile in Ordnung sind. Vergewissern Sie sich, dass die auf dem Typenschild angegebene Spannung (V) und Frequenz (Hz) mit der Spannung und Frequenz am Installationsort übereinstimmen. - Page 9 Wichtige Hinweise zum Ventilationsmodus • Für eine ordnungsgemäße Verbrennung und den Abzug der Gase durch den Schornstein von Brennstoffverbrennungsanlagen ist eine ausreichende Luftmenge erforderlich, um Rückstau zu vermeiden. Kanallose Ventilatoren müssen immer ins Freie entlüftet werden. • Bei der Beurteilung des Luftdrucks muss das gesamte Lüftungssystem des Hauses / der Wohnung berücksichtigt werden.
- Page 10 • Die Installationsarbeiten und die elektrische Verdrahtung müssen von qualifizierten Personen in Übereinstimmung mit allen anwendbaren Vorschriften und Normen durchgeführt werden, einschließlich der Bauart der Geräte. • Führen Sie die Abluft nicht in einen Abzug von anderen Geräten, die Gas oder andere Brennstoffe verbrennen.
- Page 11 4 Schrauben ST5*49 Wandmontage • Für die Wandmontage bohren Sie zwei Löcher mit einem Durchmesser von 10 mm (538 mm), wobei sich das Entlüftungsloch auf der Oberseite der Abzugshaube in der Mitte befindet (siehe Abbildung auf der nächsten Seite). Achten Sie darauf, dass die Abzugshaube direkt über dem Kochfeld ausgerichtet ist.
-
Page 12: Bedienfeld Und Tastenfunktionen
4 Schrauben ST5*49 Hinweis: Die Luft darf nicht in einen Abzug geleitet werden, der andere Geräte verwendet wird, die Gas oder andere Brennstoffe verbrennen. BEDIENFELD UND TASTENFUNKTIONEN Drücken Sie auf diesen Schalter, um den Motorbetrieb zu stoppen. Drücken Sie diesen Schalter, der Motor läuft mit niedriger Geschwindigkeit. -
Page 13: Lampe Austauschen
LAMPE AUSTAUSCHEN Schalten Sie den Strom durch Ziehen des Netzsteckers oder Ausschalten der Sicherung aus. Entfernen Sie den Fettfilter. Entfernen Sie die Lampe, indem Sie ihre Halterung aus der Abzugshaube hebeln (dies kann Druck erfordern). Ziehen Sie den Stecker der Leuchte ab. Ersetzen Sie die Leuchte durch eine neue Leuchte desselben Typs und achten Sie darauf, dass Sie die Leuchte korrekt mit dem Lichtkabel verbinden. -
Page 14: Installation Des Rückschalgventils
Reinigung des Metallfilters Es wird empfohlen, den Metallfilter alle drei Monate wie folgt zu reinigen: • Entfernen Sie den Metallfilter aus der Abzugshaube und waschen Sie ihn in einer Lösung aus Wasser und neutralem Flüssigwaschmittel, lassen Sie ihn einweichen. • Gründlich mit warmem Wasser ausspülen und trocknen lassen. -
Page 15: Installation Des Akivkohlefilters
INSTALLATION DES AKTIVKOHLEFILTERS • Entfernen Sie den Fettfilter, und entfernen Sie den Eisendraht. • Die Filterwatte befindet sich auf dem Metallgitter und ist durch den Eisendraht befestigt. • Tauschen Sie die Filterwatte aus und setzen Sie sie in umgekehrter Reihenfolge wieder ein. •... -
Page 16: Fehlerbehebung
FEHLERBEHEBUNG Fehler Mögliche Ursache Lösung Das Licht ist an, aber der Die Lüftung ist blockiert. Entfernen Sie die Motor läuft nicht. Blockade. Der Kondensator ist Lassen Sie den kaputt. Kondensator ersetzen. Der Motor ist kaputt. Lassen Sie den Motor ersetzen. Der Motor riecht Lassen Sie den Motor merkwürdig. -
Page 17: Produktdatenblatt
PRODUKTDATENBLATT Angaben nach Verordnung (EU) Nr. 65/2014 Mess- und Berechnungsmethoden nach EN 61591:1997+A1:2006+A2:2011+A11:20 14+A12:2015 Artikelnummer 10045590 10045592, 1004559 Bezeichnung Symbol Wert Einheit Jährlicher Energieverbrauch AEC hood 33,6 kWh/Jahr Energieeffizienzklasse Fluiddynamische Effizienz FDE hood Klasse für die fluiddynamische Effizienz Beleuchtungseffizienz LE hood Lux/W Beleuchtungseffizienzklasse Fettabscheidegrad... - Page 18 Angaben nach Verordnung (EU) Nr. 65/2014 Mess- und Berechnungsmethoden nach EN 61591:1997+A1:2006+A2:2011+A11:20 14+A12:2015 Artikelnummer 10045591 10045593, 10045595 Bezeichnung Symbol Wert Einheit Jährlicher Energieverbrauch AEC hood 39,0 kWh/Jahr Energieeffizienzklasse Fluiddynamische Effizienz FDE hood Klasse für die fluiddynamische Effizienz Beleuchtungseffizienz LE hood Lux/W Beleuchtungseffizienzklasse Fettabscheidegrad...
-
Page 19: Spezielle Entsorgungshinweise Für Verbraucher In Deutschland
SPEZIELLE ENTSORGUNGSHINWEISE FÜR VERBRAUCHER IN DEUTSCHLAND Entsorgen Sie Ihre Altgeräte fachgerecht. Dadurch wird gewährleistet, dass die Altgeräte umweltgerecht verwertet und negative Auswirkungen auf die Umwelt und menschliche Gesundheit vermieden werden. Bei der Entsorgung sind folgende Regeln zu beachten: • Jeder Verbraucher ist gesetzlich verpflichtet, Elektro- und Elek- tronikaltgeräte (Altgeräte) sowie Batterien und Akkus getrennt vom Hausmüll zu entsorgen. - Page 20 • Bei einem Vertrieb unter Verwendung von Fernkommunikationsmitteln ist die unentgeltliche Abholung am Ort der Abgabe auf Elektro- und Elektronikgeräte der Kategorien 1, 2 und 4 gemäß § 2 Abs. 1 ElektroG, nämlich „Wärmeüberträger“, „Bildschirmgeräte“ (Oberfläche von mehr als 100 cm²) oder „Großgeräte“...
-
Page 21: Hinweise Zum Umweltschutz
HINWEISE ZUM UMWELTSCHUTZ • Achten Sie während des Kochens auf eine ausreichende Luftzufuhr, damit die Dunstabzugshaube effizient und mit einem geringen Betriebsgeräusch arbeiten kann. • Passen Sie die Gebläsedrehzahl an die beim Kochen entstehende Dampfmenge an. Verwenden Sie den Intensivmodus nur bei Bedarf. Je niedriger die Gebläsedrehzahl ist, desto weniger Energie wird verbraucht. - Page 23 TECHNICAL DATA 10045590, 10045591, 10045592, Article number 10045593, 10045594, 10045595 Power supply 220-240 V ~ 50/60 Hz Note: You can also purchase an activated carbon filter for this cooker hood under item number XXXXXXXX. To do so, visit our website: www.klarstein.de...
-
Page 24: Safety Instructions
SAFETY INSTRUCTIONS • Read all instructions carefully before use and keep this user manual in a safe place for future reference. • The installation work may only be carried out by an electrician or a qualified person. Before using the cooker hood, make sure that the voltage (V) and frequency (Hz) indicated on the cooker hood correspond to the voltage and frequency of the power supply in your household. - Page 25 Important notes on exhaust air operation WARNING Danger of poisoning from recirculated exhaust gases! Do not operate the appliance in extract air mode if it is operated together with a room air-dependent fireplace and sufficient air circulation is not guaranteed. Room air-dependent fireplaces such as gas, oil, wood or coal heaters, boilers or instantaneous water heaters draw the air from the room and lead it outdoors through an exhaust pipe or chimney.
-
Page 26: Device Overview And Parts
DEVICE OVERVIEW AND PARTS Designation Quantity Main housing Vent button Filter unit (optional 2 or 3) Activated carbon filter (optional) One-way valve Air outlet cap Screws 5*49 mm Plastic dowels... -
Page 27: Dimensions
DIMENSIONS:... -
Page 28: Installation
INSTALLATION Wall drilling and bracket attachment • Unpack the hood and check to see that all parts are in order. Make sure that the voltage (V) and frequency (Hz) indicated on the nameplate match the voltage and frequency at the installation location. •... - Page 29 Important information about ventilation mode • For proper combustion and the exhaust of gases through the chimney of fuel combustion systems, a sufficient amount of air is required to avoid backflow. Ductless fans must always be vented to the outside. •...
- Page 30 • Installation work and electrical wiring must be carried out by qualified persons in accordance with all applicable regulations and standards, including the design of the equipment. • Do not exhaust air into a flue from other appliances that burn gas or other fuels.
- Page 31 4 screws ST5*49 Wall mounting • For wall mounting, drill two 10 mm (538 mm) diameter holes with the vent hole on the top of the hood in the centre (see illustration on next page). Make sure the extractor hood is aligned directly over the hob. •...
-
Page 32: Control Panel And Button Functions
4 screws ST5*49 Note: The air should not be ducted into a fume hood containing other appliances that burn gas or other fuels. CONTROL PANEL AND BUTTON FUNCTIONS Press this switch to stop motor operation. Press this switch, the motor will run at low speed. Press this switch, the motor will run at middle speed. -
Page 33: Replacing The Lamp
REPLACING THE LAMP Turn off the power by unplugging the power cord or turning off the fuse. Remove the grease filter. Remove the lamp by prying its holder out of the hood (this may require pressure). Unplug the light. Replace the light with a new light of the same type, making sure to connect the light to the light cable correctly. -
Page 34: Installing The Non-Return Valve
Cleaning the metal filter It is recommended to clean the metal filter every three months as follows: • Remove the metal filter from the hood and wash it in a solution of water and neutral liquid detergent, then allow it to soak. •... -
Page 35: Installing The Activated Carbon Filter
INSTALLING THE ACTIVATED CARBON FILTER • Remove the grease filter and remove the iron wire. • The filter cotton is on the metal grid and is attached by the iron wire. • Replace the filter floss and reinsert it in the reverse order. •... -
Page 36: Troubleshooting
TROUBLESHOOTING Problem Potential cause Solution The light turns on but The ventilation is Remove the blockage. the motor does not run. blocked. The capacitor is broken. Have the capacitor replaced. The motor is broken. Have the motor replaced. The motor smells Have the motor strange. -
Page 37: Product Data Sheet
PRODUCT DATA SHEET Information according to Regulation (EU) No 65/2014 Measurement and calculation methods according to EN 61591:1997+A1:2006+A2:2 011+A11:2014+A12:2015 Article number 10045590 10045592, 1004559 Designation Symbol Value Unit Annual energy consumption AEC hood 33.6 kWh/year Energy efficiency class Fluid-dynamic efficiency FDE hood Fluid dynamic efficiency class Lighting efficiency... - Page 38 Information according to Regulation (EU) No 65/2014 Measurement and calculation methods according to EN 61591:1997+A1:2006+A2:2 011+A11:2014+A12:2015 Article number 10045591 10045593, 10045595 Designation Symbol Value Unit Annual energy consumption AEC hood 39.0 kWh/year Energy efficiency class Fluid-dynamic efficiency FDE hood Fluid dynamic efficiency class Lighting efficiency LE hood Lux/W...
-
Page 39: Notes On Environmental Protection
NOTES ON ENVIRONMENTAL PROTECTION • Make sure there is sufficient air supply during cooking so that the cooker hood can work efficiently and with low operating noise. • Adjust the fan speed to the amount of steam produced while cooking. Use the intensive mode only when necessary. - Page 41 Numéro d'article 10045593, 10045594, 10045595 Alimentation 220-240 V ~ 50/60 Hz Remarque : Vous pouvez également acheter un filtre à charbon actif pour cette hotte aspirante sous le numéro d'article XXXXXXXX. Pour ce faire, rendez-vous sur notre site Web : www.klarstein.fr...
-
Page 42: Consignes De Sécurité
CONSIGNES DE SÉCURITÉ • Lisez attentivement toutes les consignes avant d'utiliser l'appareil et conservez le mode d'emploi pour vous y référer ultérieurement. • Les travaux de montage ne doivent être effectués que par un électricien ou une personne qualifiée. Avant d'utiliser la hotte, assurez-vous que la tension (V) et la fréquence (Hz) indiquées sur la hotte correspondent à... - Page 43 Remarques importantes pour l'utilisation en extraction d'air MISE EN GARDE Risque d‘intoxication par ré-aspiration de gaz de combustion Ne jamais utiliser la fonction d’extraction de l’appareil en même temps qu’un foyer dépendant de l’air ambiant si un apport suffisant en air frais n'est pas garanti. Les foyers dépendants de l’air ambiant tels que les systèmes de chauffage au gaz, au fuel, au bois ou au charbon, les chauffe-eaux électriques, les chaudières, extraient l’air de la pièce et le rejette à...
-
Page 44: Aperçu De L'appareil Et Pièces
APERÇU DE L'APPAREIL ET PIÈCES Description Quantité Boîtier principal Bouton de ventilation Unité de filtrage (2 ou 3 en option) Filtre à charbon actif (facultatif) Clapet anti-retour Clapet de sortie d'air Vis 5*49 mm Cheville en plastique... -
Page 45: Dimensions
DIMENSIONS... -
Page 46: Installation
INSTALLATION Perçage du mur et fixation des supports • Déballez la hotte et vérifiez si toutes les pièces sont en ordre. Assurez- vous que la tension (V) et la fréquence (Hz) de l'alimentation électrique correspondent à celles indiquées sur la plaque signalétique. •... - Page 47 Informations importantes sur le mode de ventilation • Pour une combustion correcte et l'évacuation des gaz par la cheminée des systèmes de combustion, une quantité d'air suffisante est nécessaire pour éviter le retour des gaz. Les ventilateurs sans conduit doivent toujours ventiler vers l’extérieur.
- Page 48 • Les travaux d'installation et de câblage électrique doivent être effectués par des personnes qualifiées conformément à toutes les réglementations et normes applicables, y compris la conception de l'équipement. • N'évacuez pas l'air dans un conduit de fumée provenant d'autres appareils brûlant du gaz ou d'autres combustibles.
- Page 49 4 vis ST5*49 Montage mural • Pour le montage mural, percez deux trous de 10 mm (538 mm) de diamètre avec le trou d'aération sur le dessus de la hotte au centre (voir l'illustration à la page suivante). Assurez-vous que la hotte aspirante est bien au-dessus de la table de cuisson.
-
Page 50: Panneau De Commande Et Fonctions Des Touches
4 vis ST5*49 Remarque : L’air ne doit pas être acheminé vers un conduit contenant d’autres appareils brûlant du gaz ou d’autres combustibles. PANNEAU DE COMMANDE ET FONCTIONS DES TOUCHES Appuyez sur cet interrupteur pour arrêter le moteur. Appuyez sur cet interrupteur, le moteur tourne à basse vitesse. Appuyez sur cet interrupteur, le moteur tourne à... -
Page 51: Remplacement De La Lampe
REMPLACEMENT DE LA LAMPE Coupez l'alimentation en débranchant le cordon d'alimentation ou en éteignant le fusible. Démontez le filtre à graisse. Retirez la lampe en soulevant son support hors de la hotte (cela peut nécessiter une pression). Débranchez la fiche de la lampe. Remplacez la lampe par une nouvelle du même type, en veillant à... -
Page 52: Installation Du Clapet Anti-Retour
Nettoyage du filtre métallique Il est recommandé de nettoyer le filtre métallique tous les trois mois comme suit : • Retirez le filtre métallique de la hotte et lavez-le dans une solution d'eau et de détergent liquide neutre, laissez-le tremper. •... -
Page 53: Installation Du Filtre À Charbon Actif
INSTALLATION DU FILTRE À CHARBON ACTIF • Retirez le filtre à graisse et retirez le fil de fer. • Le filtre en coton est sur la grille métallique et est fixé par le fil de fer. • Remplacez le filtre en coton et remettez-le en place dans l'ordre inverse. •... -
Page 54: Résolution Des Problèmes
RÉSOLUTION DES PROBLÈMES Problème Cause possible Solution L'éclairage est allumé La ventilation est Remédiez au blocage. mais le moteur ne bloquée. fonctionne pas. Le condensateur est Faites remplacer le cassé. condensateur. Le moteur est cassé. Faites remplacer le moteur. Le moteur dégage une Faites remplacer le odeur bizarre. -
Page 55: Fiche De Données Produit
FICHE DE DONNÉES PRODUIT Informations selon le règlement (UE) n ° 65/2014 Méthodes de mesure et de calcul selon EN 61591 : 1997 + A1 : 2006 + A2 : 2011 + A11 : 2014 + A12 : 2015 Numéro d'article 10045590 10045592, 1004559 Description Symbole... - Page 56 Informations selon le règlement (UE) n ° 65/2014 Méthodes de mesure et de calcul selon EN 61591: 1997 + A1: 2006 + A2: 2011 + A11: 2014 + A12: 2015 Numéro d'article 10045591 10045593, 10045595 Description Symbole Valeur Unité Consommation annuelle AEC de la hotte 39,0 kWh/an...
-
Page 57: Remarques Sur La Protection De L'environnement
REMARQUES SUR LA PROTECTION DE L'ENVIRONNEMENT • Assurez-vous qu'il y a une ventilation suffisante pendant la cuisson pour que la hotte aspirante puisse fonctionner efficacement et avec un faible niveau sonore. • Ajustez la vitesse du ventilateur à la quantité de vapeur produite pendant la cuisson. - Page 59 Produttore e importatore (UK) 75 DATI TECNICI 10045590, 10045591, 10045592, Numero articolo 10045593, 10045594, 10045595 Alimentazione 220-240 V ~ 50/60 Hz Nota: con il codice articolo XXXXXXXX è possibile acquistare un filtro a carboni attivi per questa cappa aspirante. Visitare il sito: www.klarstein.it...
-
Page 60: Avvertenze Di Sicurezza
AVVERTENZE DI SICUREZZA • Leggere attentamente tutte le istruzioni prima dell'uso e conservare il manuale per consultazioni future. • Il montaggio può essere eseguito solo da un tecnico qualificato. Prima di utilizzare la cappa aspirante, accertarsi che la tensione (V) e la frequenza (Hz) indicate corrispondano alla tensione (V) e alla frequenza (Hz) domestiche. - Page 61 Note importanti sulla modalità di scarico dell'aria AVVERTENZA pericolo di intossicazione da gas di scarico riaspirati! Non accendere il dispositivo in funzione di scarico mentre è attivo un impianto di riscaldamento che sfrutta l'aria dell'ambiente e se non è presente una ventilazione sufficiente. Gli impianti di riscaldamento che sfruttano l'aria dell'ambiente (ad es.
-
Page 62: Descrizione Del Dispositivo E Componenti
DESCRIZIONE DEL DISPOSITIVO E COMPONENTI Denominazione Quantità Alloggiamento principale Manopola della ventilazione Unità filtrante (opzionalmente 2 o 3) Filtro ai carboni attivi (opzionale) Valvola di non ritorno Tappo dell'uscita dell'aria Viti 5 x 49 mm Tassello di plastica... -
Page 63: Dimensioni
DIMENSIONI... -
Page 64: Installazione
INSTALLAZIONE Realizzare i fori nella parete e fissare il supporto • Togliere la cappa dall'imballaggio e assicurarsi che tutti i componenti siano presenti e intatti. Assicurarsi che la tensione (V) e la frequenza (Hz) indicate sulla targhetta corrispondano ai valori del luogo di installazione. •... - Page 65 Indicazioni importanti sulla modalità di ventilazione • Per una combustione corretta e l'aspirazione dei gas dalla canna dell'impianto di combustione è necessaria una quantità d'aria sufficiente per evitare rientramenti. Le ventole senza condotti devono essere sfiatate sempre all'esterno. • Quando si valuta la pressione dell'aria è necessario considerare l'intero impianto di ventilazione della casa/dell'appartamento.
- Page 66 • Le opere d'installazione e il cablaggio elettrico devono essere realizzati da persone qualificate nel rispetto delle normative e dei regolamenti vigenti, incluso il tipo di costruzione dei dispositivi. • Non convogliare l'aria di scarico nel condotto di altri dispositivi che bruciano gas o altri combustibili.
- Page 67 4 viti ST 5 x 49 Montaggio a parete • Per il montaggio a parete, realizzare due fori con un diametro di 10 mm (538 mm). Il foro per lo sfiato deve trovarsi al centro nella parte alta della cappa (v.
-
Page 68: Pannello Di Controllo E Funzione Dei Tasti
4 viti ST 5 x 49 Nota: l' aria non deve essere convogliata in un condotto utilizzato da altri dispositivi che bruciano gas o altri combustibili. PANNELLO DI CONTROLLO E FUNZIONE DEI TASTI Premere questo interruttore per arrestare il funzionamento del motore. Premere questo interruttore per impostare il motore sulla velocità... -
Page 69: Sostituire La Lampada
SOSTITUIRE LA LAMPADA Spegnere la corrente staccando la spina o disattivando il fusibile. Rimuovere il filtro antigrasso. Rimuovere la lampada togliendola dal supporto della cappa (può essere necessaria una certa pressione). Staccare la spina della lampada. Sostituire la lampada con una dello stesso tipo e assicurarsi di collegarla correttamente con il cavo. -
Page 70: Installazione Della Valvola Di Non Ritorno
Pulizia del filtro in metallo Si consiglia di pulire il filtro in metallo ogni tre mesi in questo modo: • Rimuovere il filtro in metallo dalla cappa e lavarlo in una soluzione di acqua e sapone liquido neutro, lasciandolo in ammollo. •... -
Page 71: Installazione Del Filtro Ai Carboni Attivi
INSTALLAZIONE DEL FILTRO AI CARBONI ATTIVI • Rimuovere il filtro antigrasso e il cavo di ferro. • L'ovatta del filtro si trova sulla griglia metallica ed è fissata dal cavo di ferro. • Sostituire l'ovatta del filtro e riposizionarla seguendo i passaggi precedenti in ordine inverso. -
Page 72: Risoluzione Dei Problemi
RISOLUZIONE DEI PROBLEMI Errore Possibile causa Soluzione La luce è accesa ma il La ventilazione è Rimuovere il blocco. motore non funziona. ostruita. Il condensatore è rotto. Sostituire il condensatore. Il motore è rotto. Sostituire il motore. Il motore emette uno Sostituire il motore. -
Page 73: Scheda Informativa Del Prodotto
SCHEDA INFORMATIVA DEL PRODOTTO Indicazioni secondo il regolamento (UE) n. 65/2014 Metodi di misurazione e di calcolo secondo EN 61591:1997+A1:2006+A2:2011+A11: 2014+A12:2015 Numero articolo 10045590 10045592, 1004559 Denominazione Simbolo Valore Unità Consumo energetico annuale AEC hood 33,6 kWh/anno Classe di efficienza energetica Efficienza fluidodinamica FDE hood Classe per l'efficienza... - Page 74 Indicazioni secondo il regolamento (UE) n. 65/2014 Metodi di misurazione e di calcolo secondo EN 61591:1997+A1:2006+A2:2011+A11: 2014+A12:2015 Numero articolo 10045591 10045593, 10045595 Denominazione Simbolo Valore Unità Consumo energetico annuale AEC hood 39,0 kWh/anno Classe di efficienza energetica Efficienza fluidodinamica FDE hood Classe per l'efficienza fluidodinamica Efficienza luminosa...
-
Page 75: Note Per La Tutela Dell'ambiente
NOTE PER LA TUTELA DELL'AMBIENTE • Quando si cucina, assicurarsi che ci sia una circolazione dell'aria sufficiente, in modo che la cappa possa funzionare in modo efficiente e silenzioso. • Regolare la velocità della ventola in base alla quantità di vapore prodotto durante la cottura. - Page 77 Número del artículo 10045593, 10045594, 10045595 Suministro eléctrico 220-240 V ~ 50/60 Hz Nota: puede adquirir por separado un filtro de carbón activo para esta campana extractora con el número de artículo XXXXXXX. Para ello, visite nuestro sitio web: www.klarstein.es...
-
Page 78: Indicaciones De Seguridad
INDICACIONES DE SEGURIDAD • Lea atentamente todas las indicaciones antes de utilizar el aparato y conserve este manual de instrucciones para consultas posteriores. • Los trabajos de instalación sólo pueden ser realizados por un electricista cualificado o una persona cualificada. Antes de utilizar la campana extractora, asegúrese de que la tensión (V) y la frecuencia (Hz) indicadas en la campana extractora se corresponden con la tensión y la frecuencia de la red eléctrica de su hogar. - Page 79 Indicaciones importantes sobre la función de extracción de aire ADVERTENCIA ¡Peligro de intoxicación por la recirculación de gases! No utilice el aparato en modo de extracción de aire si lo emplea junto con una chimenea que depende del aire ambiente, ya que no se garantiza una circulación suficiente del aire.
-
Page 80: Vista General De La Unidad Y Sus Componentes
VISTA GENERAL DE LA UNIDAD Y SUS COMPONENTES Descripción Cantidad Cuerpo principal Botón de ventilación Unidad filtrante (opcional 2 ó 3) Instalación del filtro de carbón activado (opcional) Válvula de retención Tapa de salida de aire Tornillos 5*49 mm Tacos de plástico... -
Page 81: Dimensiones
DIMENSIONES... -
Page 82: Instalación
INSTALACIÓN Orificio de pared y fijación del soporte • Desembale la campana y compruebe que estén todos los componentes. Asegúrese de que la tensión (V) y la frecuencia (Hz) indicadas en la placa de características coinciden con la tensión y la frecuencia del lugar de instalación. •... - Page 83 Notas importantes sobre el modo de ventilación • Para una combustión correcta y la extracción de gases a través de la chimenea de los sistemas de combustión de combustible, se requiere una cantidad de aire suficiente para evitar la contrapresión. Los ventiladores sin conductos deben ventilarse siempre al aire libre.
- Page 84 • Los trabajos de instalación y cableado eléctrico deben ser realizados por personal cualificado de conformidad con todas las normas y reglamentos aplicables, incluido el diseño del equipo. • No dirija el aire de escape hacia un conducto utilizado por otros aparatos que quemen gas u otros combustibles.
- Page 85 4 tornillos ST5*49 Montaje en pared • Para el montaje en la pared, taladre dos orificios de 10 mm (538 mm) de diámetro con el orificio de ventilación de la parte superior de la campana extractora en el centro (consulte la ilustración de la página siguiente). Asegúrese de que la campana extractora esté...
-
Page 86: Panel De Control Y Funciones De Los Botones
4 tornillos ST5*49 Nota: E l aire no debe dirigirse a un conducto utilizado para otros aparatos que quemen gas u otros combustibles. PANEL DE CONTROL Y FUNCIONES DE LOS BOTONES Pulse este interruptor para detener el funcionamiento del motor. Pulse este interruptor para que el motor funcione a baja velocidad. -
Page 87: Sustituir La Bombilla
SUSTITUIR LA BOMBILLA Apague la alimentación desenchufando el cable de alimentación o apagando el fusible. Retire el filtro de grasa. Extraiga la bombilla haciendo palanca para sacar su soporte de la campana extractora (puede ser necesario ejercer presión). Desenchufe el cable de la luz. Sustituya la bombilla por una nueva del mismo tipo, asegurándose de conectarla correctamente al cable de la luz. -
Page 88: Instalación De La Válvula Antirretorno
Limpieza del filtro de metal Se recomienda limpiar el filtro metálico cada tres meses de la siguiente manera: • Retire el filtro metálico de la campana extractora y lávelo en una solución de agua y detergente líquido neutro, déjelo en remojo. •... -
Page 89: Instalación Del Filtro De Carbón Activado
INSTALACIÓN DEL FILTRO DE CARBÓN ACTIVADO • Retire el filtro de grasa y retire el alambre de hierro. • El filtro de algodón está sobre la rejilla metálica y está sujeto mediante alambre de hierro. • Reemplace el filtro de algodón y vuelva a insertarlo en orden inverso. •... -
Page 90: Reparación De Anomalías
REPARACIÓN DE ANOMALÍAS Error Posible causa Solución La luz está encendida, El conducto de Elimine aquello que lo pero el motor no ventilación está obstruye. funciona. obstruido. El condensador está Sustituya el averiado. condensador. El motor está averiado. Sustituya el motor. El motor emite un olor Sustituya el motor. -
Page 91: Ficha Del Producto
FICHA DEL PRODUCTO Información según el Reglamento (UE) n.º 65/2014 Métodos de medición y cálculo según EN 61591:1997+A1:2006+A2:2011+A11:2014 +A12:2015 Número del artículo 10045590 10045592, 1004559 Denominación Símbolo Valor Unidad Consumo energético anual AEC hood 33,6 kWh/año Clase de eficiencia energética Eficiencia fluidodinámica FDE hood Clase de eficiencia fluidodinámica... - Page 92 Información según el Reglamento (UE) n.º 65/2014 Métodos de medición y cálculo según EN 61591:1997+A1:2006+A2:2011+A11:2014 +A12:2015 Número del artículo 10045591 10045593, 10045595 Denominación Símbolo Valor Unidad Consumo energético anual AEC hood 39,0 kWh/año Clase de eficiencia energética Eficiencia fluidodinámica FDE hood Clase de eficiencia fluidodinámica Eficiencia luminosa LE hood...
-
Page 93: Notas Sobre La Protección Del Medioambiente
NOTAS SOBRE LA PROTECCIÓN DEL MEDIOAMBIENTE • Cuando cocine, asegúrese de que exista suficiente suministro de aire para que la campana extractora pueda trabajar de forma eficiente y con un bajo nivel de ruido. • Ajuste la velocidad del ventilador a la cantidad de vapor producida durante la cocción.
Need help?
Do you have a question about the CONTEMPO and is the answer not in the manual?
Questions and answers