Table of Contents
Advertisement
Available languages
Available languages
Quick Links
H-4602, H-4603, H-4604
H-10905, H-10906, H-10907
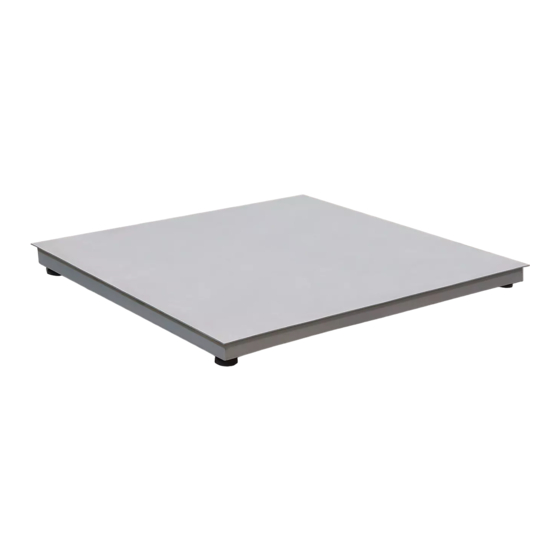
STAINLESS STEEL
LOW PROFILE
FLOOR SCALE
TOOL NEEDED
Pry Bar
SITE SELECTION
Select a site for the floor scale where it is least likely to
be damaged by forklifts and other material handling
devices. Floor scale load cell weighing elements are
prone to overload damage caused by side impacts,
falling objects and weight loads that exceed the rated
capacity of the scale.
Site should be:
• Level within 1/4".
• Free from vibration.
• Clean of debris.
• Out of the way of vehicle traffic patterns, unless
installed in a pit while having a rated capacity
that exceeds all loaded vehicle weights that could
possibly drive onto or contact the scale.
The cable from the floor scale to the digital weight
indicator should be run through a conduit to protect it
against possible damage. Running the instrument cable
through a conduit is the best method of protection.
UNPACKING
1. Inspect your shipment for damage. If you see visible
signs of damage, notify carrier at once.
2. Remove floor scale from the shipping pallet. Digital
indicator and power cord should be attached.
PAGE 1 OF 18
1-800-295-5510
uline.com
INTRODUCTION
INTRODUCTION
3. Remove feet from package.
FEET INSTALLATION AND LEVEL ADJUSTMENTS
NOTE: Scale is shipped without feet installed to
protect against damage in transit.
1. Using a pry bar, lift scale up and thread feet into
the cells counterclockwise.
2. Screw feet until top of the threaded stem is flush with
top of the cell.
NOTE: Do not screw feet more than ten turns.
3. Place the scale on the ground to check if scale is
level and that all four feet are solid on the ground.
4. Make adjustments as needed if scale is not level.
5. Once level, tighten locknuts on feet to lock into
place.
RAMP INSTALLATION (OPTIONAL)
1. Set floor scale in a desired location.
2. Position the scale feet inside the mounting tabs.
(See Figure 1)
3. Anchor the ramp to the floor using two 1/2 x 3"
anchors.
Figure 1
Ramp
Para Español, vea páginas 7-12.
Pour le français, consulter les pages 13-18.
Mounting Tabs
Scale
Anchor goes here
Load Cell Foot
0623 IH-4602
Advertisement
Table of Contents

Related Manuals for U-Line H-10905


Summary of Contents for U-Line H-10905
- Page 1 Para Español, vea páginas 7-12. Pour le français, consulter les pages 13-18. H-4602, H-4603, H-4604 1-800-295-5510 H-10905, H-10906, H-10907 uline.com STAINLESS STEEL LOW PROFILE FLOOR SCALE TOOL NEEDED Pry Bar INTRODUCTION INTRODUCTION SITE SELECTION 3. Remove feet from package. FEET INSTALLATION AND LEVEL ADJUSTMENTS...
-
Page 2: Parts Diagram
PARTS DIAGRAM ON/OFF Total Count lb/kg Gross Tare Zero Print DESCRIPTION QTY. Junction Box Instrument Cable LP7510SS Access Plate Access Plate Screw Load Cell – 5,000 lb. Capacity (H-4602) Load Cell – 10,000 lb. Capacity (H-4603) Load Cell Bolt Stainless Steel Self-Leveling Foot LP-7510 Stainless Steel Digital Indicator PAGE 2 OF 18 0623 IH-4602... -
Page 3: Setup Instructions
ASSEMBLY SETUP INSTRUCTIONS MODEL/SERIAL NUMBER LOCATIONS The model identification label is located on the side of NOTE: Floor scale is shipped without the four the frame, next to the junction box access plate. Include threaded leveling feet installed to protect both model number and serial number when making against damage. -
Page 4: Led Functions
DISPLAY INDICATOR AND FUNCTION KEYS The display indicator utilizes an LED (Light Emitting Diode) display. LEDs are used indoors where brightness is needed. ON/OFF Total Count lb/kg Gross Tare Zero Print The tables below summarize the LED and key functions. LED FUNCTIONS INSTRUCTION Weighing data... -
Page 5: Operation
OPERATION POWER ON/OFF NOTE: There are eight digits total. The display shows the first four digits, then the last four Press the ON/OFF key for two seconds to turn the digits. For example, when the first four digits scale on or off. displayed are "0012"... -
Page 6: Troubleshooting
TROUBLESHOOTING POSSIBLE TARE OPERATION CODES ERROR REASON SOLUTION UUUUUUUU Weight overload. Reduce the weight. Bad connection with load cell. Check load cell connection. Load cell has quality problem. Inspect load cell. Check input and output. nnnnnnn Calibration error. Check that scale is level. Bad connection. -
Page 7: Selección De La Ubicación
H-4602, H-4603, H-4604 800-295-5510 H-10905, H-10906, H-10907 uline.mx BÁSCULA DE ACERO INOXIDABLE DE PERFIL BAJO PARA PISO HERRAMIENTA NECESARIA Barreta INTRODUCCIÓN SELECCIÓN DE LA UBICACIÓN COLOCACIÓN DE LAS PATAS Y AJUSTES DE NIVELACIÓN Seleccione la ubicación para su nueva báscula para piso en la que sea menos probable que la dañen... -
Page 8: Diagrama De Partes
DIAGRAMA DE PARTES ON/OFF Total Count lb/kg Gross Tare Zero Print DESCRIPCIÓN CANT. Caja de Conexiones Cable del Instrumento LP-7510SS Placa de Acceso Tornillo de la Placa de Acceso Unidad de Carga – Capacidad de 2,268 kg (5,000 lbs.) (H-4602) Unidad de Carga –... -
Page 9: Instrucciones De Instalación
ENSAMBLE INSTRUCCIONES DE INSTALACIÓN UBICACIÓN DE LOS NÚMEROS DE MODELO/SERIE La etiqueta de identificación del modelo está ubicada NOTA: La báscula para piso se envía sin las en el lado del marco, junto a la placa de acceso a la cuatro patas niveladoras con rosca para caja de conexiones. -
Page 10: Funciones De Las Teclas
PANTALLA INDICADORA Y TECLAS DE FUNCIÓN La pantalla indicadora utiliza una pantalla de LED (Diodo Emisor de Luz). Los LED se utilizan en interiores cuando se necesita una luz brillante. Las tablas a ON/OFF Total Count lb/kg Gross Tare Zero Print continuación resumen los LED y funciones de las teclas. - Page 11 FUNCIONAMIENTO ON/OFF (ENCENDIDO Y APAGADO) NOTA: Hay un total de ocho dígitos. La pantalla muestra los primeros cuatro dígitos, y después los Presione la tecla ON/OFF durante dos segundos últimos cuatro dígitos. Por ejemplo, cuando los para encender o apagar la báscula. primeros cuatro dígitos mostrados son "0012"...
-
Page 12: Solución De Problemas
SOLUCIÓN DE PROBLEMAS POSIBLES CÓDIGOS DE OPERACIÓN DE TARA ERROR MOTIVO SOLUCIÓN UUUUUUUU Sobrecarga de peso. Reduzca el peso. Mala conexión con la unidad de Revise la conexión de la unidad de carga. carga. La unidad de carga tiene un Inspeccione la unidad de carga. - Page 13 H-4602, H-4603, H-4604 1-800-295-5510 H-10905, H-10906, H-10907 uline.ca BALANCE DE PLANCHER À PROFIL BAS EN ACIER INOXYDABLE OUTIL REQUIS Levier INTRODUCTION CHOIX DE L'EMPLACEMENT INSTALLATION DES PIEDS ET RÉGLAGES À NIVEAU Choisissez un emplacement où votre nouvelle balance de REMARQUE : La balance est livrée sans les pieds installés plancher sera le mieux protégée des dommages éventuels...
-
Page 14: Schéma Des Pièces
SCHÉMA DES PIÈCES ON/OFF Total Count lb/kg Gross Tare Zero Print DESCRIPTION QTÉ Boîte de jonction Câble d'appareil LP-7510SS Plaque d'accès Vis de la plaque d'accès Cellule de charge – Capacité de 2 268 kg (5 000 lb) (H-4602) Cellule de charge – Capacité de 4 536 kg (10 000 lb) (H-4603) Boulon de cellule de charge Pied autonivelant en acier inoxydable... -
Page 15: Instructions Pour L'installation
ASSEMBLAGE INSTRUCTIONS POUR L'INSTALLATION EMPLACEMENT DES NUMÉROS DE MODÈLE ET DE SÉRIE REMARQUE : Votre balance de plancher est livrée sans les quatres pieds de nivellement L'étiquette d'identification du modèle se trouve sur le filetés pour protéger contre les dommages. Voir côté... -
Page 16: Fonctions Des Touches
INDICATEUR D'AFFICHAGE ET TOUCHES DE FONCTION Il s'agit d'un indicateur d'affichage à DEL (diodes électroluminescentes). Les DEL sont utilisées à l'intérieur, où plus de luminosité est nécessaire. Les tableaux ON/OFF Total Count lb/kg Gross Tare Zero Print ci-dessous résument les fonctions des voyants DEL et des touches. -
Page 17: Mise À Zéro
UTILISATION MISE SOUS/HORS TENSION REMARQUE : Il y a huit chiffres au total. L'écran affiche d'abord les quatre premiers chiffres, puis 1. Appuyez sur la touche ON/OFF pendant deux les quatre derniers. Par exemple, lorsque les quatre secondes pour allumer ou éteindre la balance. premiers chiffres affichés sont « 0012 »... -
Page 18: Dépannage
DÉPANNAGE CODES DE FONCTION TARE POSSIBLES ERREUR MOTIF SOLUTION UUUUUUUU Surcharge. Réduisez la charge. Mauvaise connexion à la cellule Vérifiez la connexion de la cellule de de charge. charge. Problème de qualité de la cellule Inspectez la cellule de charge. Vérifiez de charge.
Need help?
Do you have a question about the H-10905 and is the answer not in the manual?
Questions and answers