Table of Contents
Advertisement
Quick Links
Advertisement
Table of Contents

Related Manuals for Grundig GEBD19401DXPH


Summary of Contents for Grundig GEBD19401DXPH
- Page 1 Built-In Oven GEBD19401DXPH...
- Page 2 Dear Customer, Please read this manual before using the product. Grundig thank you for choosing the product. We want your product, manufactured with high quality and technology, to offer you the best efficiency. To do this, carefully read this manual and any other documentation provided before using the product and keep it as a reference.
-
Page 3: Table Of Contents
TABLE OF CONTENTS First cleaning ..........22 Safety instructions How to operate the oven Purpose of usage ........... 4 General information on oven usage ..24 Child, vulnerable person and pet safety ..4 Operation of the oven control unit ..... 24 Electrical safety .......... -
Page 4: Safety Instructions
Safety instructions This section contains safety • Purpose of usage instructions that will help This product is designed for prevent any risks of personal • home use. It is not suitable injuries or material damage. for commercial use. If the product is transferred •... -
Page 5: Electrical Safety
older, and people who are children away from the underdeveloped in physical, product. sensory or mental skills, or Keep the packaging • lack of experience and materials out of the reach of knowledge, as long as they children. There is a hazard of are supervised or trained injury and suffocation. - Page 6 will not be affected by the hot. Power cords must not flame of the stove). If this is touch the back surface, not possible, there should be connections may be a mechanism (fuse, switch, damaged. switch, etc.) on the electrical Do not jam the electric •...
-
Page 7: Transportation Safety
water contact (for example, and the product from water that may leak from the damage. counter). Check the overall • Never touch the plug with appearance of the product • wet hands! To unplug, do not for any damage that may hold the cord, always hold have occurred during the plug. -
Page 8: Temperature Warnings
Do not use the product with product, as the edges will be • the front door glass removed hot while it is operating. or broken. As steam may be exhaled, • Do not climb on the product keep away while opening the •... -
Page 9: Steam System
fire when exposed to hot directly on the bottom of the surfaces, causing a fire. oven. The accumulated heat Food waste, oil, etc. in the can damage the base of the • cooking area may catch fire. oven. Before cooking, remove such Close the oven door during •... -
Page 10: Maintenance And Cleaning Safety
Do not use accessories that glass surfaces to be • may corrode from steam scratched and broken. while cooking. Always keep the control • Be careful not to spill water panel clean and dry. A damp • on the oven surface or and dirty surface may cause unwanted surfaces when problems in operating the... -
Page 11: High Temperature Self-Cleaning (Pyrolysis)
product base shall be product. Wait at least 30 damaged. minutes before removing the Depending on the frequency residue. • of steam assisted cooking- During self-cleaning, smoke • steam cleaning operations will be released due to the and the hardness of the burning of food residues. -
Page 12: Environmental Instructions
Environmental Instructions the domestic or other wastes. Take them Waste regulation to the packaging material collection Compliance with the WEEE Directive and points designated by the local authorities. Disposing of the Waste Product Recommendations for energy This product complies with EU saving WEEE Directive (2012/19/EU). -
Page 13: Your Product
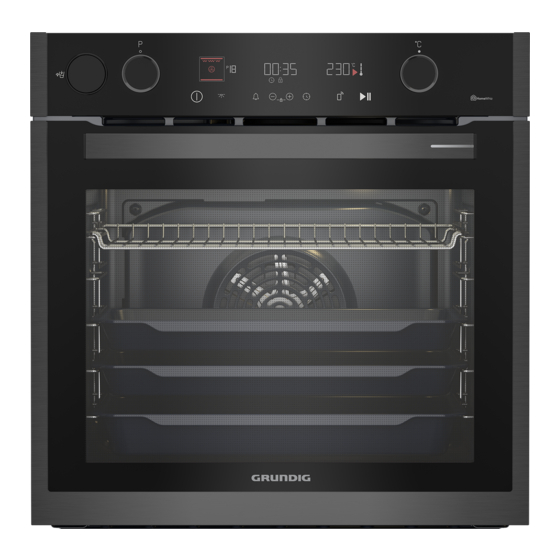
Your product Product introduction Control panel 10 Ventilation holes Lamp* 11 Water tank Wire shelves** It depends on the model. Your product may not have a lamp, or the type and location of Fan motor (behind steel plate) the lamp may differ from the illustration. Door ** It depends on the model. -
Page 14: Product Control Panel Introduction And Usage
Product control panel introduction and usage In this section, you can find the overview and basic uses of the product's control panel. There may be differences in images and some features depending on the type of product. Oven control Water tank Function selection knob Control unit Temperature knob... - Page 15 Control unit Keys: : Oven inner temperature symbol : Quick heating (booster) symbol On/Off key : Settings symbol Steam level adjustment key : Key lock symbol Alarm key : Volume symbol Decrease and progress key : Brightness symbol Increase and progress key : Function number Time and settings key : Defrost symbol...
-
Page 16: Oven Operating Functions
Oven operating functions On the function table; the operating functions you can use in your oven and the highest and lowest temperatures that can be set for these functions are shown. The order of the operating modes shown here may differ from the arrangement on your product. Function Function Temperature... - Page 17 Function Function Temperature Description and use symbol description range (°C) The hot air heated by the large grill is Fan assisted quickly distributed into the oven with the 40 - 280 full grill fan. It is suitable for grilling in large amounts.
-
Page 18: Product Accessories
Product accessories There are various accessories in your product. In this section, the description of the accessories and the descriptions of the correct usage are available. Depending on the product model, the supplied accessory varies. All accessories described in the user guide may not be available in your product. -
Page 19: Use Of Product Accessories
Use of product accessories Cooking shelves There are 5 levels of shelf position in the cooking area. You can also see the order of the shelves in the numbers on the front frame of the oven. Models with wire shelves Models without wire shelves: It is crucial to place the wire grill on the side shelves properly. - Page 20 direction when placing it on the shelf. While rear lock and pull it towards yourself until it placing the tray on the desired shelf, its side reaches the stopper. You must pass over designed for holding must be on the front. the stopper to remove it completely.
-
Page 21: Technical Specifications
Technical specifications General specifications Product external dimensions 595 mm/594 mm/567 mm (height/width/depth) Oven installation dimensions 590 or 600 mm/560 mm/min. 550 mm (height/width/depth) Voltage / frequency 220-240 V ~ 50 Hz Cable type and cross section used / suitable min. H05VV-FG 3 x 1,5 mm for use in the product Total power consumption 3.4 kW... -
Page 22: First Use
First use Before you start using your product, it is recommended to do the following in the following sections. First time setting Always set the time of day before » The time of day is set and the symbol using your oven. If you do not set it, appears on the display always on. - Page 23 NOTICE Smoke and smell may emit for a couple of hours during the initial operation. This is quite normal. Ensure that the room is well ventilated to remove the smoke and smell. Avoid directly inhaling the smoke and the smell that emits.
-
Page 24: How To Operate The Oven
How to operate the oven General information on oven usage In some operating functions, the lamp does not light due to energy Cooling fan (It may not exist on your savings. product.) Operation of the oven control unit Your product has a cooling fan. The cooling fan is activated automatically when General warnings for the oven control unit necessary and cools both the front of the... - Page 25 Keys: Turning off the oven On/Off key Turn off the oven by touching the key. Steam level adjustment key The time of day appears on the display. Alarm key Manual cooking to select temperature Decrease and progress key and oven operating function Increase and progress key You can cook by making a manual control Time and settings key...
- Page 26 Each stage of the symbol lights up as the After setting the operation function oven interior temperature reaches the set and temperature, you can set the temperature. The oven does not turn off cooking time for 30 minutes by automatically since manual cooking is done touching the key directly for quick without setting the cooking time.
- Page 27 3. The predefined temperature for the » The symbol appears on the display and operating function you selected appears the hour field flash. on the display. To change this temperature, Set the temperature you want to cook using the temperature knob. After setting the cooking time, the key must be touched within 5 seconds to set the cooking end time.
-
Page 28: Steam Assisted Cooking
as the oven interior temperature reaches the Condensation formed on the oven set temperature. After the set cooking time door after steam assisted cooking is completed, "End" appears on the display, may drip around when the oven door an audio warning sounds and cooking stops. is opened. - Page 29 cooking is complete, touch the key to Do not use distilled or filtered water. end cooking or touch the key to turn off Use bottled water only. Do not add the oven completely. solutions that are inflammable, » If the cooking time is set: Your oven will contain alcohol or solid particles into start operating immediately at the selected the water tank.
-
Page 30: Settings
The alarm clock has no effect on the oven After steam assisted cooking: operating functions. Used for warning • Some time after steam-assisted cooking is complete, the oven draws the water purposes. For example, you can use the remaining in the generator back into the alarm clock when you want to turn the food tank. - Page 31 Setting the volume 4. Use keys to change the “OFF” setting displayed on the display to the You may set the volume of the control unit. “ON” setting. Your oven shall be off to perform this » Selected quick pre-heating setting is operation.
- Page 32 The stock number of your appliance is the number starting with “77...” located under the front cover of the manual. 3. Complete the introduction of your oven to » Selected time of the day is confirmed the application by following the immediately.
-
Page 33: How To Use The Meat Probe
2014/53/EU. A detailed RED Declaration of above 250 °C, its sensor will become Conformity can be found online at damaged. support.grundig.com among the additional The operating function temperature documents on the product page for your can be at least 30 °C higher than the appliance. - Page 34 *For food safety, the core When the operating function is temperature of the coldest point of selected which the meat probe is not the poultry meat should be minimum active , the "00:00" and symbol 74°C, and the core temperature flashes on the display.
-
Page 35: General Information About Cooking
General information about cooking This section describes tips on preparing and Pastries and oven food cooking your food. General Information In addition, you can also find some of the • We recommend using the accessories of foods tested as producers and the most the product for a good cooking appropriate settings for these foods. - Page 36 the amount of sauce you will use for the Tips for cooking pastries pastry is not too much at the bottom of • If the pastry is too dry, increase the the pastry. For an even browning, try to temperature by 10 ° C and shorten the spread the sauce evenly between the cooking time.
-
Page 37: Meat, Fish And Poultry
Suggestions for cooking with two trays Cooking time Operating Shelf Temperature Food Accessory to be used (min) function position (°C) (approx.) 2 –Standard tray* Small cakes Fan Heating 2 – 4 25 … 35 4 –Pastry tray* 2 –Standard tray* Cookie Fan Heating 2 –... -
Page 38: Grill
Cooking time Operating Shelf Temperature Food Accessory to be used (min) function position (°C) (approx.) Wire grill* Fan assisted 15 mins. Place one tray on a lower bottom/top 250/max, then 60 ... 80 Roasted shelf heating chicken (1.8-2 Wire grill* 15 mins. -
Page 39: Steam Assisted Cooking
Accessory to be Shelf Temperature Cooking time Food used position (°C) (min) (approx.) It is recommended to preheat for 5 minutes for all grilled food. Turn pieces of food after 1/2 of the total grilling time. at the time of watering indicate the time Steam assisted cooking elapsed after preheating. -
Page 40: Test Foods
Shelf Amount of Cooking position / water to be Steaming Approx. Operating Temperature time Food Accessory used (ml) / time weight function (°C) (min) to be Steam (mins.)** (in g) (approx.) used level Salmon after "3D" with Standard preheating 15 ... 25 100 / function vegetables... - Page 41 Grill Accessory to be Temperature Cooking time Food Shelf position used (°C) (min) (approx.) Toast bread Wire grill 1 ... 3 Meatball (beef) - 12 Wire grill 20 ... 30 pieces Turn the food after 1/2 of the total grilling time. It is recommended to preheat for 5 minutes for all grilled food.
-
Page 42: Maintenance And Care
Maintenance and care Stains may rust under long periods of General cleaning information time. General warnings Enamelled surfaces • Wait for the product to cool before • After each use, clean the enamel surfaces cleaning the product. Hot surfaces may using dishwashing detergent, warm water cause burns! and a soft cloth or sponge and dry them... -
Page 43: Cleaning The Accessories
cleaned off with serrated knives, wire wool Cleaning the inside of the oven or similar scratching tools. (cooking area) • You can remove the calcium stains Follow the cleaning steps described in the (yellow stains) on the glass surface with "General cleaning information"... -
Page 44: Pyrolytic Self-Cleaning
General warnings During the steam cleaning mode, • Steam cleaning function’s time, water that is in the pool at the base temperature and steam setting cannot be of the oven to soften lightly formed changed. residues/dirt within the oven cavity •... -
Page 45: Cleaning The Oven Door
5. When the oven reaches a certain If your product is equipped with a temperature after the self-cleaning pyro proof accessory (Resilient process starts, the lock symbol against self-cleaning at high appears on the time display and oven temperatures), you do not need to door cannot be opened. - Page 46 Hinge lock - open position Hinge lock - closed position 3. Get the oven door to a half-open position. 46/EN...
-
Page 47: Removing The Inner Glass Of The Oven Door
4. Pull the removed door upwards to release it from the right and left hinges and remove it. To reattach the door, the procedures applied when removing it must be repeated from the end to the beginning, respectively. When installing the door, be sure to close the clips on the hinge socket. -
Page 48: Cleaning The Oven Lamp
The attachment order of the second and 2. Remove the glass cover by turning it third inner glasses is not important, as they counterclockwise. are interchangeable. While attaching the innermost glass (1), pay attention to place the printed side of the glass on the second inner glass. - Page 49 as shown in the figure and replace it with a new one. 5. Refit the glass cover and wire shelves. 49/EN...
-
Page 50: Troubleshooting
Troubleshooting Consult the Authorised Service Agent or technician with license or the dealer where you have purchased the product if you cannot remedy the trouble although you have implemented the instructions in this section. Never attempt to repair a defective product yourself. Oven emits steam when it is in use. - Page 51 After defining your product to Homewhiz application, in the application, “An error occurred while associating your device with your home and the room you specified. This device belongs to another house.” error is appear or you forgot which Homewhiz account the product is in.
Need help?
Do you have a question about the GEBD19401DXPH and is the answer not in the manual?
Questions and answers