
Subscribe to Our Youtube Channel
Related Manuals for Xantech BXAUDIO4X4


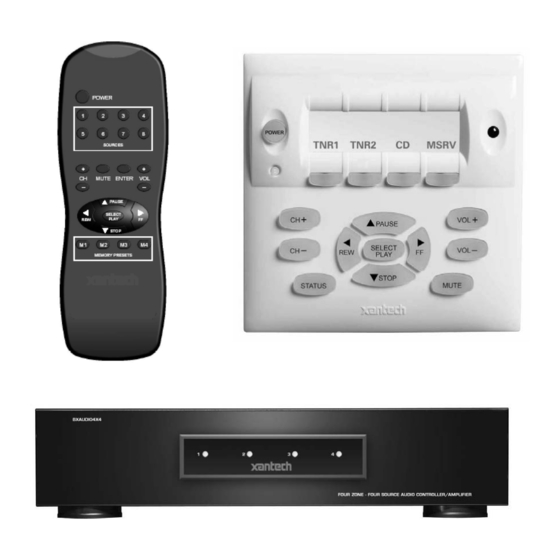
Summary of Contents for Xantech BXAUDIO4X4
- Page 1 INSTALLATION INSTRUCTIONS MODEL BXAUDIO4X4 FOUR ZONE – FOUR SOURCE COMPLETE AUDIO CONTROLLER/AMPLIFIER SYSTEM...
-
Page 2: Safety Instructions - Read Before Operating Equipment
18. Servicing – The user should not attempt to service the appliance beyond that described in the operating instructions. All other servicing should be referred to qualified service personnel. DO NOT REMOVE COVER (OR BACK) NO USER-SERVICEABLE PARTS INSIDE © 2005 Xantech Corporation Model BXAUDIO4X4... -
Page 3: Table Of Contents
TABLE OF CONTENTS... 3 SECTION 1.0: GENERAL INFORMATION ... 4 CONTROLLER/AMPLIFIER FEATURES ... 5 KEYPAD FEATURES... 5 SECTION 2.0: BXAUDIO4X4 CONTROLLER/AMPLIFIER FEATURE DESCRIPTIONS ... 6 SECTION 3.0: BXAUDIO4X4 LC4KP KEYPAD FEATURE DESCRIPTIONS... 10 SECTION 4.0: INSTALLATION... 13 OPERATION – OUT-OF-THE-BOX ... 13 BXAUDIO4X4 CONTROLLER/AMPLIFIER PHYSICAL LOCATION AND MOUNTING... -
Page 4: Section 1.0: General Information
IR controlled audio source components (CD, Xantech XDT Dual Tuner, Music Server, etc.), using the BXAUDIO4X4 System is as easy as pushing a button whether your standing in the Kitchen or relaxing on the couch in the Living Room. -
Page 5: Controller/Amplifier Features
Also available in 230 VAC / 50 Hz. (Part No. BXAUDIO4X4-77SYS) Zone Features/Specifications • Each zone has 1 RJ45 connector for BXAUDIO4X4 keypad, 1 speaker-pair terminal and a 12VDC status output. • Party Mode: Multiple zones can be linked to behave as one zone. -
Page 6: Section 2.0: Bxaudio4X4 Controller/Amplifier Feature Descriptions
4. Expansion Mode (Master/Slave Select) Button. Enables/Disables Expansion Mode and also sets BXAudio Controller to either a MASTER or SLAVE. 5. IR Learning Eye. Allows for XPS™ (Xantech Point and Shoot) teaching of IR Codes directly to the BXAudio System when Program Mode is active. - Page 7 Flash Red to indicate that Zone is in the Power-Up Mode, is not muted, is within 5 dB of MAX-V and is being Ramped Up or Down. g) Off to indicate that Zone is in the Power-Down Mode. © 2005 Xantech Corporation Page: 7...
- Page 8 23. Source Audio Inputs. Gold-plated RCA Jacks for line level audio input from source components. 24. IR Out (1-4). 3.5mm Mono Mini Phone Jacks. These mini jacks are for the connection of Xantech IR emitters (283M Emitters Included) and are ‘Auto-Routed’ for controlling the corresponding numbered Audio Source Component.
- Page 9 Plasma Montior lifts and lighting systems. 26. Sense Inputs. 3.5mm Stereo Mini Phone Jacks for use with the Xantech Model CSM1 Current Sense Module (sold separately). Required for Intelligent Power Management feature. (Tip = 12VDC Out, Ring = Control Sense Input, Sleeve = GND) 27.
-
Page 10: Section 3.0: Bxaudio4X4 Lc4Kp Keypad Feature Descriptions
BXAUDIO4X4 system. A Programmable Learning Remote such as the Xantech URC2 is recommended for integrating the IR commands of the BXAUDIO4X4 and source components into a single controller. Compatible with most brands of remote controls, though some may not be programmable and will therefore only control the source components. - Page 11 Figure 5 – The Model BXAUDIO4X4 Keypad – Rear Panel Features and Functions 46. Controller Terminal. RJ45 Jack. Connects Keypad to zone keypad input on BXAUDIO4X4 Controller via CAT5 cable. 47. Expansion Terminal. RJ45 Jack. Allows a second Keypad or external IR receiver for each zone.
- Page 12 52. LCD Backlight Adjustment. Adjusts brightness of LCD backlight. This adjustment does not affect the backlight level for the buttons. Slowly turn counter-clockwise to reduce brightness. 53. Snap-in Pins. These pins snap into the BXAUDIO4X4 Keypad wall bracket for mounting. © 2005 Xantech Corporation...
-
Page 13: Section 4.0: Installation
Be sure to allow enough room for the leads and dress them in such a manner so as not to block airflow. 7. The BXAUDIO4X4 is designed for mounting on flat horizontal surfaces. When mounting into a 19" rack, use a rack shelf or drawer. -
Page 14: Lc4Kp Keypad Installation Instructions
Plug the supplied 283M IR emitters into the appropriate IR out jacks. Be careful to match the source audio and video connection number on the BXAUDIO4X4 to the IR emitter jack number. This will ensure that the IR control signal will be routed to the correct source component. Find the IR sensor window on the source Figure 6: LCKP Keypad Mounting Diagram ©... - Page 15 Xantech CSM1 Current Sense Module. Plug the 3.5mm miniplug from the CSM1 into the appropriate sense jack. Be careful to match the source audio and video connection number on the BXAUDIO4X4 to the sense jack number. The CSM1 plugs into an AC power source. The component power cord plugs into the CSM1.
-
Page 16: Connections At The Zone Location
ON/OFF condition. ON = +12VDC, OFF = 0VDC. Using a 3.5mm mono mini phone connector, this control can be used to close a relay, such as a Xantech CC12, to raise a TV lift or drop a projection screen automatically when a zone is turned ON. -
Page 17: Multiple Keypad Connections
1. For a second keypad in the same zone, terminate the CAT5 cable in the same way as shown in Figure 10. 2. Connect the CAT5 coming from the BXAUDIO4X4 Controller to the “CONTROLLER” jack on the Primary Keypad. Plug a CAT5 cable into the “EXPANSION” jack on the Primary Keypad and connect it to the “CONTROLLER”... - Page 18 POWER POWER Figure 8 – BXAUDIO4X4/LC4KP Keypad CAT5 Cable Lengths The maximum cable length for CAT5 connections to a single keypad is 400 feet (see Figure 11-A). For two keypads in a zone, the distance to the last keypad is 200 feet (see Figure 11-B).
-
Page 19: Speaker Connections
1. If the "+" (positive) and "–" (negative) terminals on your speakers are correctly marked, and visible, and you have wired the system with the positive speaker connector on the rear of the BXAUDIO4X4 Controller/Amplifier connected to the positive connector on the speaker and the negative speaker connector on the rear of the BXAUDIO4X4 Controller/Amplifier connected to the negative connector on the speaker, then the system will be "in phase". - Page 20 Page: 20 Model BXAUDIO4X4 Figure 10 –Typical BXAUDIO4X4 System © 2005 Xantech Corporation...
-
Page 21: Section 5.0: Programming Using Xps™ Point And Shoot Ir Learning
To Enable Program mode: 1. Plug in a single LC4KP Keypad into the Zone 1 Keypad port on the rear of the BXAUDIO4X4 Controller 2. Power the BXAUDIO4X4 ‘ON’ via the Power Switch located on the rear of the BXAUDIO4X4 Controller and allow to boot completely. -
Page 22: Programming Keypad Buttons (Single Commands)
Confirm the STATUS LED [14] is illuminated GREEN 6. Aim the Manufactures Source Remote at the IR Learning eye on the front of the BXAUDIO4X4 [5]. 7. Press and Release the corresponding button on the devices remote (make sure to use a short, quick press of the devices remote when learning commands). -
Page 23: Programming Timed Delays
1. Make sure the PROGRAM KEYPAD LED is GREEN and the STATUS LED is OFF. 2. Press the DELAY [8] Button on the front of the BXAUDIO4X4 to enter a 1 Second Delay. 3. The STATUS LED [14] will blink GREEN 4. -
Page 24: Programming Source Power Management
PROGRAMMING SOURCE POWER MANAGEMENT With the ability to turn the system ON and OFF from more than one location, the BXAUDIO4X4 Controller needs to know when the different sources are ON or OFF and be able to know when to send or not send power commands to keep the sources in sync with the system. -
Page 25: Deleting A Power Management Macro
1 thru 4. a. The STATUS LED [14] will turn GREEN. 10. Aim the Manufactures Source Remote at the IR Learning eye on the front of the BXAUDIO4X4 [5]. 11. Press and Release the corresponding POWER button on the devices remote. - Page 26 36=Zone 2, 37=Zone 3, & 38=Zone 4]. 3. Press the ZONE Button to be Un-Linked. a. The ZONE Button will turn ORANGE. 4. Wait for the Keypads STATUS LED to stop flashing. Programming Button Layout © 2005 Xantech Corporation Model BXAUDIO4X4...
-
Page 27: Section 6.0: Expanding The System (Combining 2 Bxaudio Controllers)
Model BXAUDIO4X4 SECTION 6.0: EXPANDING THE SYSTEM (Combining 2 BXAUDIO Controllers) The BXAUDIO4X4 System can be expanded to up to eight-zones by linking two Controllers together with the included Expansion ‘Null-Modem’ Cable (Xantech PN#05913560). Expansion Procedure: When expanded the system the following steps must be taken in the following order: 1. -
Page 28: Enabling Expansion Mode
2. Press the PROGRAM KEYPAD button on the front of the BXAUDIO4X4. a. Confirm the PROGRAM KEYPAD LED is illuminated GREEN. 3. Continuously press the EXPANSION button located on the front of the BXAUDIO4X4 until the Expansion LED turns RED. -
Page 29: Disabling Expansion Mode
2. Press the PROGRAM KEYPAD button on the front of the BXAUDIO4X4. a. Confirm the PROGRAM KEYPAD LED is illuminated GREEN. 3. Continuously press the EXPANSION button located on the front of the BXAUDIO4X4 until the Expansion LED turns ORANGE. -
Page 30: Section 7.0: Initializing The System (Clearing All Macro's)
The unit will be restored to Factory Defaults. To Initialize the System: 1. Power the BXAUDIO4X4 ‘OFF’ via the Power Switch on the rear of the Controller. 2. Place the “Mode” switch on the front panel into the “PGM” up position. -
Page 31: Section 8.0: Operating Instructions
To Control the Zone with the LC4KP Keypad and/or the MRCREM Remote, follow the steps below: 1. Press the ”POWER” button on any keypad or MRCREM remote [5]. The BXAUDIO4X4 Controller will turn ON. If Power Management has been enabled, source components will turn on also. - Page 32 For Zone 5 thru 8 (EXPANDED systems only) Press the STATUS button [8] i. Now Source Buttons 1 thru 4 represent Zones 5 thru 8. 6. Repeat for all Zones to be linked to. © 2005 Xantech Corporation Model BXAUDIO4X4...
-
Page 33: Section 9.0: Specifications
Dimensions (Keypad):... 5.0” W x 5.0” H x 1.5” D (127mm x 127mm x 38mm) Weight (Controller): ...22.75 lbs (10.3 kg) Weight (Keypad):...0.6 lbs (0.3 kg) TMRA 30° Celsius - If this temperature is exceeded, you will need to provide additional ventilation to insure proper operation. © 2005 Xantech Corporation Page: 33... -
Page 34: Section 10.0: Warranty
Any products returned freight prepaid to Xantech and found to be defective by Xantech within the warranty period will be repaired or replaced, at Xantech's option, at no charge. Xantech will not be responsible for the actual cost of installation or removal of the product, nor for any incidental or consequential damages. -
Page 35: Model Bxaudio4X4 Page
Model BXAUDIO4X4 Page: 35 NOTES: © 2005 Xantech Corporation... - Page 36 Page: 36 Model BXAUDIO4X4 XANTECH CORPORATION 13100 Telfair Avenue, Sylmar CA 91342 phone 818.362.0353 • fax 818.362.9506 www.xantech.com Part No. 08901665 Rev X1 05-25-2005 © 2005 Xantech Corporation...
Need help?
Do you have a question about the BXAUDIO4X4 and is the answer not in the manual?
Questions and answers