Oki ES9466 MFP Quick Start Manual
Multifunctional digital color systems
Hide thumbs
Also See for ES9466 MFP:
- Copying manual (132 pages) ,
- Scanning manual (66 pages) ,
- Manual (30 pages)
Table of Contents
Advertisement
Quick Links
Advertisement
Table of Contents
Troubleshooting

Subscribe to Our Youtube Channel
Related Manuals for Oki ES9466 MFP


Summary of Contents for Oki ES9466 MFP
- Page 1 MULTIFUNCTIONAL DIGITAL COLOR SYSTEMS Quick Start Guide ES9466 MFP/ES9476 MFP...
-
Page 2: Available Manuals
Available Manuals Some manuals are printouts and others are PDF files recorded in the Software DVD-ROM. Printouts describe precautions and basic operations. Read “Safety Information” before using the equipment. PDF files describe detailed copying functions and other settings. Printouts Safety Information Describes the necessary precautions for use. - Page 3 PDF files Copying Guide Software Installation Guide Describes how to use the Copy function. Describes how to install client software such as the printer driver. Scanning Guide Printing Guide Describes how to use the Scan function. Describes how to use the Print function. e-Filing Guide TopAccess Guide Describes how to use the e-Filing function.
-
Page 4: Reading This Manual
Reading This Manual Symbols in this manual Important items are described with the symbols shown below. Read these items before using this equipment. Indicates a potentially hazardous situation which, if not avoided, could result in death, serious injury, serious damage, or fire in the equipment or surrounding objects. Indicates a potentially hazardous situation which, if not avoided, may result in minor or moderate injury, partial damage to the equipment or surrounding objects, or loss of data. -
Page 5: Table Of Contents
CONTENTS Available Manuals ................2 Reading This Manual . -
Page 6: Recommended Toner Cartridges
Trademarks For trademarks, refer to the Safety Information. © 2016 Oki Data Corporation All rights reserved Under the copyright laws, this manual cannot be reproduced in any form without prior written permission of Oki Data... - Page 7 Chapter PREPARATIONS Description of Components .....8 Turning ON/OFF ......17 Placing Paper and Originals .
-
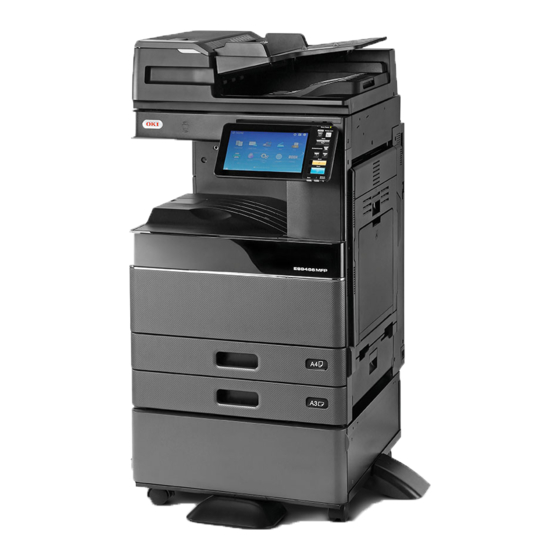
Page 8: Chapter Preparations
Chapter 1 PREPARATIONS Description of Components This section describes the names and operations of the equipment. Front / Right side 15, 16 Back side Reversing Automatic Document Feeder or Paper holding lever Dual Scan Document Feeder Places paper on the MPT. Scans both sides of the original one sheet at a Paper feed cover (on equipment) time. - Page 9 Description of Components ATTENTION lamp (Orange) Document lamp (Blue) Lights when a paper jam has occurred in the Lights when originals are placed in the Reversing Reversing Automatic Document Feeder or Dual Automatic Document Feeder or Dual Scan Scan Document Feeder. Document Feeder.
- Page 10 Chapter 1 PREPARATIONS Finisher / Job Separator MJ-1042 Upper cover Front cover Hole Punch Unit MJ-6011 Series Sub-stacker Receiving stacker MJ-1109 Upper receiving stacker Stapling control section Hole Punch Unit MJ-6105 Series Front cover Sub-stacker Lower receiving stacker Stacker holder...
- Page 11 Description of Components MJ-1110 Upper receiving stacker Stapling control section Hole Punch Unit MJ-6105 Series Front cover Stopper Saddle stitch stacker Sub-stacker Lower receiving stacker Stacker holder • Open the stacker holder when an attempt to output paper, which has a length longer than that of A3, is made or if the paper on the Upper receiving stacker does not align itself neatly.
- Page 12 Chapter 1 PREPARATIONS Control panel Make for various operations and settings. [HOME] button DATA IN MEMORY lamp Displays the home screen. Turns on when receiving fax data and fax & P.14 “Names and Functions on the Home communications. Screen” ATTENTION lamp [POWER] button Turns on when an error occurs and action needs Turns the power on or off.
- Page 13 Description of Components Adjusting the angle of the control panel You can adjust the angle of the control panel between 7 and 90 degrees from the horizontal position. Be careful not to catch your hands in the gap between the equipment and the control panel. This could cause an injury.
- Page 14 Chapter 1 PREPARATIONS Names and Functions on the Home Screen Displayed when you turn the equipment on or press the [HOME] button. Displays buttons for various functions. Recall button [?] (Help) button Register functions, templates, URLs, etc. and Display information on each function. recall them.
- Page 15 Description of Components Using the Touch Panel The touch panel supports swipe and pinch operations. Press (Tap) Lightly press buttons on the screen with your finger and lift it immediately. Swipe Press the screen with your finger and slide it in one direction. Turns pages on the home screen and scrolls up and down in a list.
- Page 16 Chapter 1 PREPARATIONS Drag & Drop You can replace the RECALL button on the home screen. Press the button with your finger, drag it to another place, and lift your finger. Pinch (pinch and spread) Press the screen with two fingers, pinch them together or spread them apart on the screen. You can use this operation in previews of Easy Scan, Scan, and Fax functions.
-
Page 17: Turning On/Off
Turning ON/OFF Turning ON/OFF This section explains how to turn the power ON and OFF as well as the power saving mode. This operation differs between when the MAIN POWER lamp (green) on the control panel is lit and when it is not. Turning ON When the MAIN POWER lamp (green) on the control panel is off: Turn ON there. - Page 18 Chapter 1 PREPARATIONS Turning OFF Follow the steps below. Check the following items before turning off the equipment. • No jobs should be left in the print job list. • The DATA lamp (blue) or the DATA IN MEMORY lamp (green) should not be flashing. (If the equipment is shut down while any of the above lamps are flashing, jobs in progress such as FAX reception will be aborted.) •...
- Page 19 Turning ON/OFF Saving power when not in use – power saving modes – The following modes are available; Automatic Power Save mode, Sleep mode, and Deep Sleep mode. The table below shows the procedures to switch modes manually and conditions under which it enters into or recovers from each mode.
-
Page 20: Placing Paper And Originals
Chapter 1 PREPARATIONS Placing Paper and Originals This section explains how to set paper and originals. Incorrect setting causes image skews or paper jams. Follow the procedure below. Placing paper Pull out the tray. Set the end guide to match the paper size. Set the side guide to match the paper width. - Page 21 Placing Paper and Originals Placing originals Original glass Reversing Automatic Document Feeder / Dual Scan Document Feeder Raise the Original Cover, the Reversing Automatic Document Feeder, or Dual Place the originals face up on the original Scan Document Feeder. feeder tray. Place the original face down on the Align the side guides to the original length.
-
Page 22: Installing Client Software
Chapter 1 PREPARATIONS Installing Client Software How to install the client software such as the printer driver from the Software DVD-ROM co-packed with the equipment is described as follows. Installing the printer drivers by using Software Installer • Please refer to the following guides to connect with a USB cable: &... - Page 23 Installing Client Software Read the license agreement and then click [I Agree]. Read the “Environmental advice for Users” and click [Next]. Select the checkbox for the printer driver you want to install, and click the “Multi-Install” button. By factory default, [PCL driver] is selected.
- Page 24 Chapter 1 PREPARATIONS If the [Windows Security] dialog box is displayed, click [Install this driver software anyway]. Click the [Network] button. The device search starts. • If the machine is detected, it is automatically installed. Proceed to step 11. • If the machine is not detected, the [Review your installation settings.] screen is displayed. Proceed to step 10.
- Page 25 Installing Client Software After the machine is displayed, select the machine and click [Next]. If the machine is not displayed by clicking [Restart search], select [Printer name/IP Address] and enter the IP address assigned to your machine, and then click [Next]. If the [Windows Security] dialog box is displayed, click [Install this driver software anyway].
- Page 26 Before using the printer driver, you must configure the options installed. Select the [Start] menu > [Settings] > [Devices] > [Devices and printers]. Right-click on OKI PCL Driver, and then click [Printer properties]. Obtain configuration data of the options automatically by opening the [Device Settings] tab menu.
- Page 27 Chapter BASIC OPERATIONS Home Screen Operations ..... 28 Copying Operations ......32 Fax Operations .
-
Page 28: Chapter Basic Operations
Chapter 2 BASIC OPERATIONS Home Screen Operations You can recall functions and register functions on the home screen. Recalling functions Press the [HOME] button. Press the function you want. The following functions can be recalled as the default. • Simple Copy •... - Page 29 Home Screen Operations Registering functions Press the Home Setting button. Select the function you want, and then press [Confirm]. Press [X] at the top right corner of the button registration menu screen. Example Enter the Administrator Password, and then press [OK]. Press [Button Contents].
- Page 30 Chapter 2 BASIC OPERATIONS Using Simple Copy Simple Copy Settings Sets Press [Simple Copy]. Specify the number of copies. Load the original document. Color Mode & P.21 “Placing originals” Specify the color mode and density. Specify the number of copies Paper/Zoom color mode, and press Specify the size of the copy paper and zoom.
- Page 31 Home Screen Operations Using Simple Scan Simple Scan Settings Press [Simple Scan]. Color Mode Specify the color mode. Load the original document. File Format & P.21 “Placing originals” Specify the file format. Press [Address Book] and specify Resolution the recipient E-mail address. Specify the resolution.
-
Page 32: Copying Operations
Chapter 2 BASIC OPERATIONS Copying Operations This section explains procedures such as enlarging/reducing, duplex copying, and copying from MPT. Making copies Press [Copy] on the home screen. Place the original. & P.21 “Placing originals” Specify the number of copies, orientation, and mode as necessary. - Page 33 Copying Operations Enlarging/Reducing Selecting finishing mode (sorting) Press [Zoom]. Press [Finishing]. Select the paper size, When using the Reversing Automatic press [AMS], and then [OK]. Document Feeder or the Dual Scan Document Feeder, the sorting mode is automatically set. Press [Sort] and then [OK].
- Page 34 Chapter 2 BASIC OPERATIONS Setting duplex copy Setting original mode Press [2-Sided]. Press [Original Mode]. Select the duplex mode and Select the original mode and then press [OK]. then press [OK]. Specify the [Copy] and [Original Direction] as necessary. Available modes differ depending on the color mode.
- Page 35 Copying Operations Density adjustment Copying from MPT Move the paper holding lever Press to adjust the density to the outside, and then manually. place paper face down on the MPT. Align the side guides to the paper length and then move the paper To lighten, press , to darken, press holding lever toward the...
-
Page 36: Fax Operations
Chapter 2 BASIC OPERATIONS Fax Operations This section explains procedures for sending a fax, such as specifying fax numbers in the address book or setting the transmission conditions. Sending a fax Press [Fax] on the home screen. Place the original. &... - Page 37 Fax Operations Specifying recipients in Confirming recipients the address book Specifying recipients one by one Select the recipient address you want to check from the address list. Press ( ) and then select the recipient. Check the recipient address on the displayed screen.
- Page 38 Chapter 2 BASIC OPERATIONS Setting the transmission Canceling reserved conditions transmissions Press [Option]. Press [Job Status]. The transmission condition Press [Fax], select the setting screen is displayed. reserved transmission you want to delete, and then press [Delete]. After each item is set, press [Close].
- Page 39 Fax Operations Checking communication Registering recipients status (log) Press [Job Status]. Press [Setting -User-] on the home screen and then [Address]. Select the [Log] tab and then press [Send]. Press an open button to create a new recipient and then [Entry].
-
Page 40: Scanning Operations
Chapter 2 BASIC OPERATIONS Scanning Operations This section explains procedures for the scanning function, such as how to store scanned data in a shared folder and store data in a Windows computer. Storing the scanned data in a shared folder Set [File Name], File Press [Scan] on the home screen. - Page 41 Scanning Operations Storing scanned data of a shared folder in a Windows computer Start Windows Explorer. Enter the name of the shared folder in which the IP address of the equipment and the scanned data are stored in the address bar using the following format, and then press the [Enter] button.
-
Page 42: E-Filing Operations
Chapter 2 BASIC OPERATIONS e-Filing Operations This function allows you to store documents in the hard disk of the equipment and then print as required. Storing documents Originals are stored as e-Filing documents. Press [Copy] on the home screen. Specify the box to be stored and the document name, and then press [OK]. - Page 43 e-Filing Operations Printing Documents The following explains how to print documents stored in e-Filing. Press [e-Filing] on the home screen. Select the box that contains the document you want to print. Select the document you want to print, and then press [Print].
-
Page 44: Printing Operations
Chapter 2 BASIC OPERATIONS Printing Operations The following explains basic operations of the printing function. This is for printing from a Windows computer with a PCL Printer driver which needs to be installed in advance. Select [Print] in the [File] menu of the application. Select the printer driver of the equipment, and then click [Preferences] ([Properties]). - Page 45 Printing Operations Setting PCL Printer driver To specify paper size or number of copy sets Click the [Basic] tab. To specify 2-sided printing or N-up printing Click the [Finishing] tab. If the Finisher is installed, “Staple” or “Hole Punch” is available. 2IN1 4IN1 Select “Number of pages per...
- Page 46 MEMO...
- Page 47 Chapter MAINTENANCE Replacing Toner Cartridge ....48 Replacing Waste Toner Box ....49 Replacing Staple Cartridge .
-
Page 48: Chapter Maintenance
Chapter 3 MAINTENANCE Replacing Toner Cartridge If a message is displayed informing you that the toner cartridge needs replacing, follow the procedures below. Open the front cover. Pull off the seal. Remove the color toner cartridge. Align the new toner cartridge to the guide. Insert it up to the black line. -
Page 49: Replacing Waste Toner Box
Replacing Waste Toner Box Replacing Waste Toner Box If a message is displayed on the touch panel for the ES9466 MFP/9476 MFP informing you that the waste toner box needs replacing, follow the procedures below. Open the front cover and put your fingers in the... -
Page 50: Replacing Staple Cartridge
Chapter 3 MAINTENANCE Replacing Staple Cartridge If a message is displayed informing you that the staple cartridge needs replacing, follow the procedures below. Stapler Unit of Finisher Open the front cover of the Finisher. Install a new staple case into the staple cartridge. - Page 51 Replacing Staple Cartridge Stapler Unit of Saddle Stitch Finisher Open the front cover of the Finisher. Install a new staple case into the staple cartridge. Remove the staple cartridge. Install the staple cartridge. Take the empty staple case out of the Close the front cover of the Finisher.
- Page 52 Chapter 3 MAINTENANCE Saddle Stitch Unit of Saddle Stitch Finisher Open the front cover of the Finisher, and Install a new staple case into the staple then pull out the saddle stitch unit. cartridge and remove the seal bundling the staples. Install two new staple cartridges.
- Page 53 Replacing Staple Cartridge Stapler Unit of Inner Finisher Lift up the control panel, and open the Remove the staple cartridge. front cover of the Finisher. Holding the lever, move the finisher to Push the buttons on both sides of the the left until it comes to a stop.
- Page 54 Chapter 3 MAINTENANCE Install the staple cartridge. Carefully return the finisher to its original position. Return the Hole Punch Unit to its original Close the front cover of the Finisher. position. Do not put your hand or fingers on the top of the finisher when closing it. This could cause an injury.
-
Page 55: Regular Cleaning
Regular Cleaning Regular Cleaning Poor quality printing such as uneven and soiled images can be improved by simple cleaning. This section describes the cleaning methods. Cleaning for the scanning area, original glass, guides, and platen sheet We recommend cleaning the following items weekly, so that the originals can be scanned cleanly. Be careful not to scratch the parts. - Page 56 Chapter 3 MAINTENANCE Cleaning the main chargers and LED print heads or slit glass If the inside of the main chargers and the print heads of the LED or slit glass are dirty, the dirt will be transferred to the copied image. Clean them following the procedure below. Open the front cover.
-
Page 57: Troubleshooting
Chapter TROUBLESHOOTING Troubleshooting ......58 FAQs ........62... -
Page 58: Troubleshooting
Chapter 4 TROUBLESHOOTING Troubleshooting When problems such as paper jams occur, see the following explanations or the guides (PDFs) on &P.60 “About the Troubleshooting Guides” . Symbols and messages appear on the touch panel Symbols for paper jams or messages etc. occasionally appear on the touch panel. - Page 59 Troubleshooting Covers of the Finisher, the Hole Punch Unit and the Bridge Unit The covers of the Finisher, Hole Punch Unit and Bridge Unit to be opened when paper jams occur are indicated by the arrows in the following illustrations. The Finisher, the Hole Punch Unit and the Bridge Unit The Saddle Stitch Finisher, the Hole Punch Unit and the Bridge Unit The Inner Finisher and the Hole Punch Unit...
- Page 60 Chapter 4 TROUBLESHOOTING About the Troubleshooting Guides The Hardware Troubleshooting Guide and the Software Troubleshooting Guide (PDFs) describe the causes and solutions for problems that may occur. References to the Hardware Troubleshooting Guide Chapter Title Section When This Screen Is Displayed Messages Displayed on the Touch Panel Clearing a Paper Jam Clearing a Staple Jam...
- Page 61 Troubleshooting Error codes Press Job Status button on the home screen and then the [LOG] tab on the touch panel. The job history and error codes are displayed in the Log menu. & Software Troubleshooting Guide(PDF) : “Chapter 8: CHECKING THE EQUIPMENT STATUS WITH TopAccess”...
-
Page 62: Faqs
Chapter 4 TROUBLESHOOTING FAQs This section introduces FAQs from our customers. If you have a problem, read this section first. Copying Can I copy an A5 original with the Reversing Automatic Document Feeder or Can I copy originals in different sizes the Dual Scan Document Feeder? in one go? Yes. - Page 63 To forward a fax, you need the previous settings. application. See the following guide: 2. Select [OKI MFP Fax], and then click [Preferences] ([Properties]). & GD-1370 Fax Guide : “Chapter 3: USING THE FAX UNIT (USEFUL FUNCTIONS)” - “Using the Mailbox 3.
- Page 64 Folder” or “Sending Data to an E-mail Address” or menu. “Saving Data to a USB Storage Device” 2. Right-click [OKI PCL Printer], and then click [Printer properties]. 3. Select the port of this equipment in the [Print Where is the scanned file stored? to the following port(s)] list on the [Ports] tab of the printer driver.
- Page 65 FAQs Client software I cannot print from my computer. Check the following: “Devices are not discovered in your network.” appears while installing • Is the power turned ON? the printer driver. • Is the power cable plugged in? If it is not, turn the Main Power switch OFF, and then plug the If this equipment is not discovered on the network power cable into an outlet.
- Page 66 Chapter 4 TROUBLESHOOTING Other questions The paper jam symbol does not disappear even after the paper How can I confirm or change the IP address jam in the Reversing Automatic Document of this equipment? Feeder or the Dual Scan Document Feeder has been cleared.
- Page 67 Chapter INFORMATION ABOUT EQUIPMENT Items Included with this Equipment ... . 68 Software DVD-ROM ......69 Client Software .
-
Page 68: Information About Equipment
Chapter 5 INFORMATION ABOUT EQUIPMENT Items Included with this Equipment The following items are included with the equipment. Check that you have them all. Contact your service technician or representative if any are missing or damaged. Items included with this equipment Safety Information Describes the necessary precautions for use. -
Page 69: Software Dvd-Rom
Software DVD-ROM Software DVD-ROM Contains pdf files of the Operator’s Manuals and the following client software such as the printer drivers and the utility software. Client software For Windows Client Software Installer PCL printer driver PS printer driver Printer driver TWAIN driver File downloader Fax driver... -
Page 70: Client Software
Chapter 5 INFORMATION ABOUT EQUIPMENT Client Software Outlines the client software of the equipment. You need to install software except for e-Filing Web utility and TopAccess before use. Client software for printing functions PCL Printer driver Installed during the Recommended Installation. &... - Page 71 Client Software Client software for e-Filing functions TWAIN driver Allows you to obtain documents stored in e-Filing as an image in TWAIN applications on Windows computers. & Software Installation Guide (PDF) : “Chapter 4: INSTALLING SCAN DRIVER AND UTILITIES (Windows)” File downloader Allows you to obtain documents stored in e-Filing as an image on Windows computers.
-
Page 72: Options
Chapter 5 INFORMATION ABOUT EQUIPMENT Options The following are sold separately, and upgrade the performance of the equipment. For details, contact your service technician or representative. Original Cover (KA-5005PC) Additional Drawer Module (MY-1048) Holds an original. This can be added to the Paper Feed Pedestal. Reversing Automatic Document Feeder Finisher (MJ-1109) (MR-3031) - Page 73 Options Other options available are as follows. Contact your service technician or representative for details. Work Table (KK-5005) Data Overwrite Enabler (GP-1070) A small table for placing originals while the equipment Erases data stored temporarily when copying or is being operated. executing other operation.
- Page 74 Chapter 5 INFORMATION ABOUT EQUIPMENT Using the Accessible Arm A user in a wheelchair can close the Reversing Automatic Document Feeder, Dual Scan Document Feeder, or Original Cover using the Accessible Arm. Hold the Accessible Arm. Hook the Accessible Arm over the top of the Reversing Automatic Document Feeder, Dual Scan Document Feeder, or Original Cover to close them.
-
Page 75: Logging In
Logging in Logging in When the equipment is controlled under department or user management, you can perform copying and other functions by following the procedure below to log in. Department management Restricts users or manage copy volumes made by an individual group or department in your company. When the equipment is controlled under the department code, turn the power ON and enter the code. - Page 76 Chapter 5 INFORMATION ABOUT EQUIPMENT User management Restricts users or manage available functions and past records for each user. When the equipment is managed under this function, turn the power ON and enter the information required (e.g. user name, password). Follow the procedure below. If you enter an invalid password several times, you cannot log in for a certain period as this is regarded as an unauthorized access.
- Page 77 Logging in The menu for user The equipment is available for authentication appears. use. MFP local authentication Windows Domain authentication, LDAP authentication The domain name is displayed in [Domain]. For LDAP authentication, the LDAP server name is displayed in [LDAP] instead of [Domain].
- Page 78 MEMO...
-
Page 79: How To Back Up The Data
How to back up the data The data shown below are stored in the HDD in the equipment. It is recommended periodically to back up the data by yourself by referring to the following manuals or Help as security against possible contingencies just in case. -
Page 80: Index
INDEX A, B O, P Additional Drawer Module ......8 Operator’s Manual Pocket ......8 Adjusting the angle of the control panel . - Page 81 Website: www.oki.ua E-mail: tech.support@oki.ie vak), s.r.o. OKI Sistem ve Yazıcı Çözümleri Tel:+48 22 448 65 00 OKI Systems (Polska) Sp. z o.o Tic. Ltd. Şti. OKI Sistem ve Yazıcı Çözümler IBC – Pobřežní 3 Fax:+48 22 448 65 01 OKI Systems (Czech and Slo- Platinium Business Park II, 3rd Tic.
- Page 82 Oki Systems (Thailand) Ltd. Email: LASatisfaction@okidata.com Tevlingveien 23 1168/81-82 Lumpini Tower, N-1081 Oslo Oki Data de Mexico, S.A. de C.V. 27th Floor Rama IV Road Tel: +47 (0) 63 89 36 00 Tungmahamek, Sathorn Mariano Escobedo #748, Piso 8 Telefax: +47 (0) 63 89 36 01 Bangkok 10120 Col.
- Page 83 Printed in China 6LK46115000 ES9466 MFP/ES9476 MFP...
- Page 84 Oki Data Corporation 4-11-22 Shibaura, Minato-ku,Tokyo 108-8551, Japan www.oki.com/printing/ 46568611EE Ver00 F Issued in Nov. 2016...
Need help?
Do you have a question about the ES9466 MFP and is the answer not in the manual?
Questions and answers