
Related Manuals for Oki ES9466


Summary of Contents for Oki ES9466
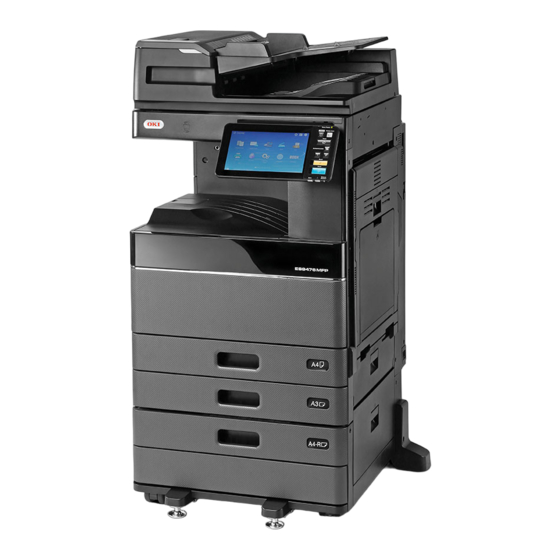
- Page 1 MULTIFUNCTIONAL DIGITAL COLOR SYSTEMS Paper Preparation Guide ES9466 MFP/ES9476 MFP...
- Page 2 ©2016 Oki Data Corporation All rights reserved Under the copyright laws, this manual cannot be reproduced in any form without prior written permission of Oki Data.
-
Page 3: Preface
Preface Thank you for purchasing OKI Multifunctional Digital Systems or Multifunctional Digital Color Systems. This manual describes how to load paper and place originals to use the copying functions of this equipment. Read this manual before using this equipment. How to read this manual ... - Page 4 Abbreviations in this manual In this manual, “Dual Scan Document Feeder” (DSDF) and “Reversing Automatic Document Feeder” (RADF) are collectively referred to as “Automatic Document Feeder” (ADF). In this manual, “Dual Scan Document Feeder” is referred to as “DSDF” and “Reversing Automatic Document Feeder” as “RADF”.
-
Page 5: Table Of Contents
CONTENTS Preface..............................3 How to read this manual ............................3 Chapter 1 LOADING PAPER Precautions for Paper ..........................8 Acceptable paper ................................. 8 Unacceptable copy paper ............................8 Precautions for storing copy paper .......................... 10 Loading Paper in Trays ........................11 Paper Feed Unit for this equipment.......................... - Page 6 6 CONTENTS...
- Page 7 LOADING PAPER This chapter explains how to set paper for this equipment. Precautions for Paper ......................8 Acceptable paper ..............................8 Unacceptable copy paper .............................8 Precautions for storing copy paper ........................10 Loading Paper in Trays .....................11 Paper Feed Unit for this equipment........................11 Envelope Drawer..............................15 Large Capacity Feeder ............................19 Doing Paper Settings ......................21...
-
Page 8: Precautions For Paper
Precautions for Paper Acceptable paper The paper that is acceptable differs depending on your model or the tray to be used. To learn more about accepted paper and recommended paper, refer to the Specifications Guide. Do not place paper with mixed sizes or types in the same tray. ... - Page 9 1.LOADING PAPER Notes for using envelopes Do not use the following envelopes as they may cause paper jamming or damage to the equipment. Badly curled, wrinkled, folded or twisted envelopes Extremely thick or thin envelopes Wet or damp envelopes Torn envelopes Envelopes which include the contents Envelopes with a special shape...
-
Page 10: Precautions For Storing Copy Paper
1.LOADING PAPER Precautions for storing copy paper Make sure of the following when storing copy paper: Wrap the paper in its wrapping to keep it free from dust. Avoid direct sunlight. Store in a damp-free space. ... -
Page 11: Loading Paper In Trays
Loading Paper in Trays Follow the procedure below to place paper in the tray, Paper Feed Unit, Paper Feed Pedestal, or Additional Drawer Module. For acceptable paper, refer to the Specifications Guide. Be careful not to let your fingers be caught when pushing the tray into this equipment. This could injure you. - Page 12 1.LOADING PAPER Place paper in the tray. The maximum number of sheets that can be loaded in a tray differs depending on your model. Be sure that the height of the stacked paper does not exceed the line indicated inside of the side guides. For the maximum number of sheets that can be loaded, refer to the Specifications Guide.
- Page 13 1.LOADING PAPER Move the end guide to the trailing edge of the paper while pushing its lower part in the direction of the arrows. Check that there is no gap between the paper and the side guides, as well as the paper and the end guide.
- Page 14 1.LOADING PAPER The confirmation screen appears. If the status is correct, press [Yes]. The menu above may not appear depending on the setting of this equipment. If it is not, check that the correct paper size appears in the equipment status indication area on the menu screen. ...
-
Page 15: Envelope Drawer
1.LOADING PAPER Envelope Drawer In the envelope drawer, you can load envelopes as well as standard size paper such as A4. To learn more about accepted paper, refer to the Specifications Guide. For how to handle envelopes to load, see the following page: ... - Page 16 1.LOADING PAPER Load paper in the tray. Load paper with its face up. Load an envelope with its bottom side at the rear and its flap side at the front. If the flap of the envelope touches the side guide, fold the flap and load the envelope. ...
- Page 17 1.LOADING PAPER Check that there is no gap between the paper and the side guides, as well as the paper and the end guide. If the gap is too wide, it could cause paper jamming, or the paper size could not be correctly detected. Between the paper and side guides (“A”...
- Page 18 1.LOADING PAPER Select the desired tray and change the paper size. The acceptable standard envelope sizes are as follows: DL (110 mm x 220 mm), COM10 (4 1/8" x 9 1/2"), Monarch (3 7/8" x 7 1/2"), CHO-3 (120 mm x 235 mm), and YOU-4 (105 mm x 235 mm). ...
-
Page 19: Large Capacity Feeder
1.LOADING PAPER Large Capacity Feeder Pull out the tray of the Large Capacity Feeder carefully until it comes to a stop. Do not touch the slide rail (“A” in the figure on the right). This could injure you. Place 2 stacks of paper in the right and left trays correspondingly. Fan and jog the paper well before placing it. - Page 20 1.LOADING PAPER Adding paper in the Large Capacity Feeder during printing When the paper on the left tray of the Large Capacity Feeder has run out during printing or copying, “Paper for left tray can be added.” appears. You can pull out the Large Capacity Feeder and add paper to the left tray without stopping printing.
-
Page 21: Doing Paper Settings
Doing Paper Settings Setting paper size The paper size is automatically detected when the paper is loaded in a tray. To automatically detect the size of paper placed in a tray: Press [Setting -User-] on the Home screen > [Tray] and select the desired tray on the displayed screen. Select [Auto (mm)] when A/B format paper is loaded and [Auto (inch)] when LT format paper is loaded. - Page 22 1.LOADING PAPER Setting paper with non-standard sizes Press [Setting -User-] on the Home screen. Press the [User] tab > [Tray]. Select the desired tray and press [Custom]. Enter the size and press [OK]. Press [Length] or [Width] and enter the values. 22 Doing Paper Settings...
-
Page 23: Setting Paper Type
1.LOADING PAPER Setting paper type When you place any special paper other than plain paper or that not used for normal copying, you need to set the thickness and attribute into this equipment. For acceptable paper type, refer to the Specifications Guide. The set paper type appears on the equipment status indication area with an icon. - Page 24 1.LOADING PAPER Attribute Icon Thickness Description — None No attribute specified Insert Sheets used in the sheet insertion mode To learn how to use the sheet insertion mode, refer to the Copying Guide. Up to 2 types of sheets (Insertion sheets 1 and 2) can be set. To set Insertion sheet 1 and 2, select the tray for Insertion sheet 1 and press [Insert], and then select a tray for Insertion sheet 2 and press [Insert].
- Page 25 1.LOADING PAPER Press [Setting -User-] on the Home screen. Press the [User] tab > [Tray]. Press [Paper Type]. Select the desired tray and paper type and press [OK]. Doing Paper Settings 25...
-
Page 26: Clearing The Set Paper Type
1.LOADING PAPER Press [OK]. There is no affect on the printing quality though noise may occur during paper feeding depending on the paper type. Clearing the set paper type Press the tray button on the menu in step 4 of “Setting paper type”, and then press the paper type whose setting you want to clear. -
Page 27: Loading Paper On The Mpt
Loading Paper on the MPT When you make copies on OHP film, sticker labels, envelopes, Thick 4 paper, or non-standard size paper, load the copy paper on the MPT. Using the MPT is also recommended for copying or printing on standard size paper which is not set in any of the trays. - Page 28 1.LOADING PAPER When placing or removing copy paper, move the paper holding lever toward the outside. After loading paper, move the paper holding lever back toward the equipment. If paper cannot be fed, printing takes a long time after feeding or the quality is poor, turn over the paper and place it again as shown in the figure or place fewer sheets.
-
Page 29: Standard Size Paper On The Mpt
1.LOADING PAPER Standard size paper on the MPT Automatic 2-sided printing cannot be applied to some kind of paper in the MPT. For the paper which Automatic 2- sided printing cannot be applied to, refer to the Specifications Guide. ... -
Page 30: Envelopes On The Mpt
1.LOADING PAPER Select the MPT during the operation for copying or printing and specify the paper size and thickness. For details for the operation for copying or printing, refer to the Copying Guide or Printing Guide. Envelopes on the MPT For acceptable envelope, refer to the Specifications Guide. - Page 31 1.LOADING PAPER Align the side guides to the length of the envelope. Move the paper holding lever toward the equipment. Check that there is no gap between the paper and the side guides. If the gap is too wide, it could cause paper jamming, or the paper size could not be correctly detected. Between the paper and side guides (“A”...
-
Page 32: Tab Paper On The Mpt
1.LOADING PAPER Tab paper on the MPT You can print on the tab extension of tab paper. For acceptable tab paper, refer to the Specifications Guide. Move the paper holding lever toward the outside. Place paper with its print side down on the MPT. -
Page 33: Non-Standard Paper On The Mpt
1.LOADING PAPER Non-standard paper on the MPT You can also copy or print non-standard size paper. For paper size which can be set, refer to the Specifications Guide. To learn how to set the paper size, refer to the Copying Guide or Printing Guide. Move the paper holding lever toward the outside. -
Page 34: Long Custom Size Paper On The Mpt
1.LOADING PAPER Long custom size paper on the MPT In the printing function, you can also print the paper longer than the maximum standard paper size by setting it as a custom size. For paper size which can be set, refer to the Specifications Guide. To learn how to set the custom size, refer to the Printing Guide. - Page 35 1.LOADING PAPER When the paper is being fed into the equipment from the MPT Be careful not to cut your fingers on the edge of paper when you hold it. This could injure you. Do not mix different sizes of paper. ...
- Page 36 1.LOADING PAPER 36 Loading Paper on the MPT...
- Page 37 PLACING ORIGINALS This chapter explains how to place originals on this equipment. Precautions for Originals ....................38 Acceptable originals ............................38 Unacceptable originals............................39 Placing Originals ......................40 Placing originals on the original glass ........................40 Book-type originals..............................41 Using the ADF ...............................42...
-
Page 38: Precautions For Originals
Precautions for Originals Acceptable originals When the ADF (RADF or DSDF) is used, 2-sided originals can be automatically scanned one sheet after another. When the original glass is used, originals such as OHP films, tracing paper, booklet or 3-dimensional objects, that cannot be placed on the ADF can be scanned, as well as plain paper. -
Page 39: Unacceptable Originals
2.PLACING ORIGINALS Unacceptable originals Notes for using the ADF Do not load the types of originals shown below (1 to 10) in the ADF because such originals may cause jamming or damage to the equipment. Badly wrinkled, folded or curled originals Originals with carbon paper Taped, pasted or cut-out originals Originals with multiple perforations such as loose leaf paper... -
Page 40: Placing Originals
Placing Originals Placing originals on the original glass The original glass can be used for originals such as OHP films or tracing paper, as well as plain paper, which cannot be loaded in the ADF. Do not place any heavy objects (4 kg (9 lb.) or over) on the original glass and do not press on it with force. Breaking the glass could injure you. -
Page 41: Book-Type Originals
2.PLACING ORIGINALS Book-type originals You can place book-type originals on the original glass. Do not place any heavy objects (4 kg (9 lb.) or over) on the original glass and do not press on it with force. Breaking the glass could injure you. Raise the Original Cover or the ADF. -
Page 42: Using The Adf
2.PLACING ORIGINALS Using the ADF Precautions for using the ADF Do not load unacceptable originals in the ADF. P.39 “Unacceptable originals” If you scan mixed-size originals at a time or scan some types of paper of originals using the ADF, a distortion may occur on your scan result. - Page 43 2.PLACING ORIGINALS Scanning originals with the ADF at copying Place originals at the ADF. Align all the originals. Collate the originals in the order that you want them to be copied. The top sheet of the originals will be copied first.
- Page 44 2.PLACING ORIGINALS When there are too many originals to be scanned at one time, divide the originals into several sets before copying. Place the first set of the originals and then press [Continue] on the touch panel while the data of this set are being scanned.
- Page 45 2.PLACING ORIGINALS If there is another original, insert it in the same way. After all the originals are pulled in, press [Job Finish]. If you want to stop copying, press [Job Cancel]. Scanning mixed-size originals in one operation You can copy or scan a set of originals whose sizes are individually different, using the ADF with the mixed size function.
- Page 46 2.PLACING ORIGINALS 46 Placing Originals...
-
Page 47: Operating Stapling Manually
OPERATING STAPLING MANUALLY This chapter explains how to operate manual stapling using the Finisher or the Saddle Stitch Finisher. Stapling Using the Finisher....................48... -
Page 48: Stapling Using The Finisher
Stapling Using the Finisher You can staple copied paper manually without any copying operation. This is useful when you have forgotten to set the staple sort mode before starting copying, or when you want to staple originals. For models supporting the manual staple mode and the maximum sheets that can be stapled for each model, refer to the Specifications Guide. -
Page 49: Index
INDEX A/B format ................. 3 Paper ADF (Automatic Document Feeder) ......... 4 paper size setting ............21 precautions ..............42 paper type setting............23 placing ..............11, 19 unacceptable originals..........39 using the ADF ............... 42 precautions for storing copy paper......10 Automatic Document Feeder (ADF) registering paper size .......... - Page 50 50 INDEX...
- Page 51 ES9466 MFP/ES9476 MFP...
- Page 52 Oki Data Corporation 4-11-22 Shibaura, Minato-ku,Tokyo 108-8551, Japan www.oki.com/printing/ 46568606EE Ver00 F Issued in Nov. 2016...
Need help?
Do you have a question about the ES9466 and is the answer not in the manual?
Questions and answers