OPTICLIMATE PRO3 Series Installation And User Manual
Optimal climate control, inverter
Hide thumbs
Also See for PRO3 Series:
- Instructions manual (26 pages) ,
- Installation and user manual (14 pages) ,
- User manual (14 pages)

Related Manuals for OPTICLIMATE PRO3 Series


Summary of Contents for OPTICLIMATE PRO3 Series
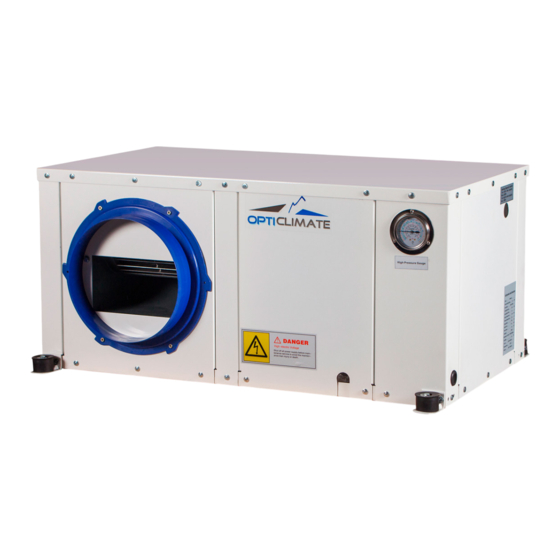
- Page 1 OPTIMAL CLIMATE CONTROL OPTICLIMATE PRO 3 Y PRO4 (INVERTER) INSTALLATION AND USER GUIDE All manuals at: www.theclimatefactory.com Any other information: info@theclimatefactory.com...
-
Page 2: Installation
THE CLIMATE FACTORY/MANUALS/OPTICLIMATE (INVERTER) INSTALLATION Fan installation (front / side) If the unit is placed in a narrow room or in the ridge of a gable roof, the fan outlet side can be installed at the short side of the unit. This can be done simply by reversing the dark panels so that the fan panel is moved around to the short side of the unit. - Page 3 Installation of insulating springs The rubber feet with which the OptiClimate is placed on the pallet are use to suspend the unit by means of thread ends. A thread end, a large washer and a nut must be fitted. (not supplied) ©...
-
Page 4: Electrical Connections
THE CLIMATE FACTORY/MANUALS/OPTICLIMATE (INVERTER) ELECTRICAL CONNECTIONS Automatic moisture meter, Re- mote Control, Solenoid Valve, Temperature Safeguard, tem- perature sensors in the area Power cord First, the panel at the left side near the manometer should be removed to make the various electrical connec- tions. -
Page 5: Electrical Connection
The remote control contained in the compartment can be hung in the room but can also be hung elsewhere. This way the OptiClimate can also be controlled from outside the room. The four-core cable is already connected and should be led to the outside through the opening in the panel. - Page 6 ELECTRICAL CONNECTION Power cables and circuit breakers Six different OptiClimate models are available. For your safety and the safety of the OptiClimate, the fo- llowing specifications should be observed when connecting the power supply: use the circuit breakers (MCB) and cable thickness specified.
- Page 7 THE CLIMATE FACTORY/MANUALS/OPTICLIMATE (INVERTER) ELECTRICAL CONNECTION Inverter models Connecting to the terminal strips left Connecting to the terminal strips right corner corner INVERTER 1 PHASE 230VOLT (COM) yellow green blue blue Temperature safeguard The automatic 2 loops with 230V 1 phase...
- Page 8 High temperature safeguard Using this safeguard, the OptiClimate can switch off the heat sources (e.g. lamps) when the temperature in a room becomes too high. The unit has a terminal that can be connected to the timer of a control panel, for example.
- Page 9 THE CLIMATE FACTORY/MANUALS/OPTICLIMATE (INVERTER) WATER-SIDED CONNECTIONS Supply and drain connections of the cooling water The unit has a water inlet and outlet. The inlet should be installed at a draw-off point with a solenoid valve installed between the draw-off point and the inlet (always check the flow direction arrow on the valve!). The solenoid valve should be installed as close as possible to the draw-off point, as this is the water seal.
- Page 10 A normal 22mm tap water connection has sufficient capacity to continuously cool three or four These are 3 or 4 OptiClimate 15000 units. We also have suitable solutions for larger installations when there are problems with the water supply and discharge. In such cases, please contact the Technical Service department.
-
Page 11: Putting Into Operation
THE CLIMATE FACTORY/MANUALS/OPTICLIMATE (INVERTER) PUTTING INTO OPERATION Remote Control Temp up / scroll Temp down / scroll Press and release to set the time / press and hold to set the timer FN = FN = Fan speed Press and release to read Sensors / press and hold to bring up the Menu Press and release to confirm / press and hold to delete error codes Press and release to switch between day and night mode. - Page 12 Automatic Light Cell setting (Day /Night programme) The automatic moisture meter in the pro3 series has a light cell, which switches to the day mode when it sees the light is on and to the night mode when the light is off. Only the Day/Night temperatures have to be set, the rest is done automatically.
- Page 13 THE CLIMATE FACTORY/MANUALS/OPTICLIMATE (INVERTER) PUTTING INTO OPERATION Example: The unit must cool between 8:00 AM and 8:00 PM. The ON time should then be set to 8:00 AM and the OFF time to 8:00 PM AM = after midnight (from 0:00 to 12:00 hours)
- Page 14 THE CLIMATE FACTORY/MANUALS/OPTICLIMATE (INVERTER) PUTTING INTO OPERATION © The Climate Factory www.theclimatefactory.com info@theclimatefactory.com...
-
Page 15: Settings (Setup)
THE CLIMATE FACTORY/MANUALS/OPTICLIMATE (INVERTER) SETTINGS (SETUP) © The Climate Factory www.theclimatefactory.com info@theclimatefactory.com... - Page 16 THE CLIMATE FACTORY/MANUALS/OPTICLIMATE (INVERTER) SETTINGS (SETUP) © The Climate Factory www.theclimatefactory.com info@theclimatefactory.com...
- Page 17 THE CLIMATE FACTORY/MANUALS/OPTICLIMATE (INVERTER) SETTINGS (SETUP) © The Climate Factory www.theclimatefactory.com info@theclimatefactory.com...
- Page 18 THE CLIMATE FACTORY/MANUALS/OPTICLIMATE (INVERTER) SETTINGS (SETUP) © The Climate Factory www.theclimatefactory.com info@theclimatefactory.com...
- Page 19 THE CLIMATE FACTORY/MANUALS/OPTICLIMATE (INVERTER) FAULT ANALYSIS AND ERROR MESSAGES © The Climate Factory www.theclimatefactory.com info@theclimatefactory.com...
- Page 20 THE CLIMATE FACTORY/MANUALS/OPTICLIMATE (INVERTER) FAULT ANALYSIS AND ERROR MESSAGES © The Climate Factory www.theclimatefactory.com info@theclimatefactory.com...
- Page 21 THE CLIMATE FACTORY/MANUALS/OPTICLIMATE (INVERTER) FAULT ANALYSIS AND ERROR MESSAGES © The Climate Factory www.theclimatefactory.com info@theclimatefactory.com...
- Page 22 THE CLIMATE FACTORY/MANUALS/OPTICLIMATE (INVERTER) OPTIONALLY AVAILABLE / INFORMATION LEAFLET PRO4 © The Climate Factory www.theclimatefactory.com info@theclimatefactory.com...
-
Page 23: Fault Code Overview
THE CLIMATE FACTORY/MANUALS/OPTICLIMATE (INVERTER) FAULT CODE OVERVIEW © The Climate Factory www.theclimatefactory.com info@theclimatefactory.com... - Page 24 All manuals at: www.theclimatefactory.com Any other information: info@theclimatefactory.com © Airsupplies...
Need help?
Do you have a question about the PRO3 Series and is the answer not in the manual?
Questions and answers