OPTICLIMATE SPLIT PRO3 Series Instructions Manual
Hide thumbs
Also See for SPLIT PRO3 Series:
- Installation and user manual (24 pages) ,
- User manual (14 pages) ,
- Installation and user manual (14 pages)
Advertisement
Table of Contents
- 1 Table of Contents
- 2 Technical Data / Specifications
- 3 Installation
- 4 Electrical Connections
- 5 Connecting the Outdoor Unit
- 6 Commissioning
- 7 Settings
- 8 Inspection / Maintenance
- 9 Failure Analysis and Error Messages
- 10 Error Code List
- 11 Options, to be Delivered with
- 12 Appendix: Error Code List
- Download this manual
Advertisement
Table of Contents

Related Manuals for OPTICLIMATE SPLIT PRO3 Series


Summary of Contents for OPTICLIMATE SPLIT PRO3 Series
- Page 1 INSTRUCTIONS OPTICLIMATE PRO3 SPLIT Please take note of: - High temperature protection on page 9 - Clear alarm history on page 15...
-
Page 2: Table Of Contents
Content - Technical data / Specifications - Installation - Electrical connections - Connecting the outdoor unit - Commissioning - Settings - Inspection / Maintenance - Failure analysis and error messages - Error Code List - Options, to be delivered with - Appendix: Error code list... -
Page 3: Technical Data / Specifications
Weight (mm) 230V 1 of 3 3500W 15kW 3 x 2700W 1230x810x545 150kg The opticlimate 15000 Pro 3 Split is a Phase 1 Machine Dimensions outdoor unit (mm); -3500 Pro: 540x450x310 -6000 Pro: 640x550x320 -10000 Pro: 960x510x350 -15000 Pro: 1080x700x330... -
Page 4: Installation
Installation Fan mount (front / side) If the unit is placed in a narrow space or in the ridge of a gable, place the fan outlet on the short side of the unit. This is done simply by rotating the purple panels shown in the picture so the fan panel is on to the short side of the unit. - Page 5 The use of a spirit level is hereby advisable. To avoid noises caused by vibration whilst in use, the OptiClimate comes with rubber mounts which are suitable for pendant mounting.
-
Page 6: Electrical Connections
The humidistat supplied with built-in light sensor is already connected. The cable must to be guided through the opening in the panel only, The unit should be suspended in space and The light cell in the humidistat must not be covered. OptiClimate automatically switches from day to night mode. - Page 7 * (depending on the type of 5-core cable included) Power cables There are five different OptiClimate models. For your safety and the safety of the OptiClimate serve to connect the power supply, the following specifications are to be observed; Use the specified...
- Page 8 The cables for the power supply must be guided through the grommet on the side to be connected to the left side of the terminal strip as described in the figure. The earth can be connected to terminal PE or on the screw on the metal casing directly below the terminal block. D3500pro, D6000pro &...
- Page 9 High temperature protection If the temperature in a room is too high OptiClimate switches the heat sources (eg lamps) off. In the unit there is a connection that can be connected to the timer on the switchboard. The power wire runs to the switch on the switchboard should this be interrupted. In one example, this is Grasslin clock terminal 1 and at a LeGrand switch this connection 4 is scheduled for D15000 pro 400v 3 phase only.
-
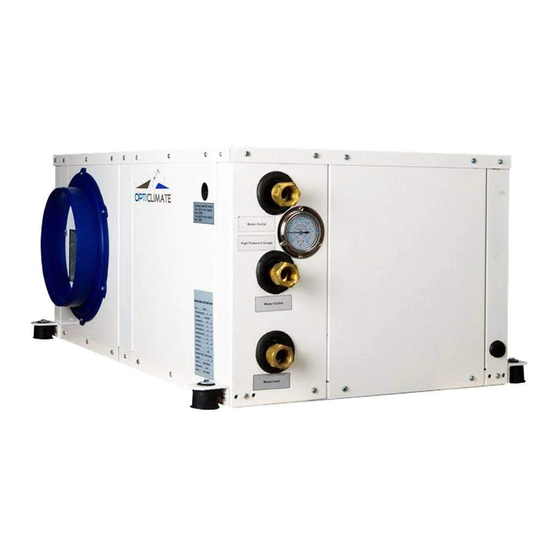
Page 10: Connecting The Outdoor Unit
Connecting the Outdoor Unit Placing the outdoor unit The outdoor unit should preferably be placed outdoors in a cool place (Shadow) to which the unit can suck dirt. When mounted, enough space should be left around the unit to ensure proper supply of air. - Page 11 The condensate drain must not have loops and should be placed into a barrel but not go under the water level. When the unit is placed equal or lower than the drain or sewer, water can be picked up by a condensation delivery pump.
-
Page 12: Commissioning
Commissioning Operation ↑ Temp up / scroll ↓ Temp down / scroll Press to set time / Press and hold to confirm Fan speed Press to read Sensors / Press and hold is Menu Press to confirm / Press and hold to erase / delete error codes Pressing M switches between day and night mode manually. - Page 13 3) Fan speed button 【Fn】 This is used for the selection of the air speed of the fan, the sequence is: Automatic Medium High The speed changes each time the Fn key is pressed. If the automatic ventilation mode is selected in the cooling mode, the unit will go up or down depending on the ventilation cooling requirements.
- Page 14 7) Timer setting (DAY / NIGHT program) By default, we recommend to use the timer, automatic light sensor mode So only set if you want it to work without light cell. This function can be used for the DAY / NIGHT program. This program restarts, every day no matter what day it is.
- Page 15 8) Using of the humidistat to dehumidify at night The humidistat can be set to the desired maximum humidity for night time. When the night mode is active and the humidistat indicates that the unit must dehumidify the drop symbol will flash. During dehumidification it will also need to use water.
- Page 16 12) Alarm output On the PCB is an alarm output which makes contact with an alarm when an error has occurred, at this contact a detector can be connected to alert an alarm system or SMS (GSM). 13) Compressor operating mode If the compressor is running, the compressor symbol will be displayed right below on the display, in turn this will disappear.
-
Page 17: Settings
40 ° C. If the temperature drops below the set temperature, the cooling mode will disable security again. The security has no influence on the operation of the OptiClimate. However, there will be an error message given, ie E: 15. (See also the error code list) - Page 18 D: 04 Night cooling (Cool at Night) on / off. In this parameter, the night cooling can be changed. D: 04 = 0 means cool at night is out. This is the default setting. D: 04 = 1 means cool at night is on. If the timer off mode is on, and the minimum temperature is set to e.g.
- Page 19 D: 09. Not applicable D: 10 Timer output At D: 10 = 0 will output 15 and 16, the interruption of the high temp alarm. At D: 10 = 1 high temp alarm will not go through these contacts. At D: 10 = 1 will be 16 common, and 16 & 17 each changeover contacts. The clock of the OC shall now operate changeover contact and the clock on the switchboard can be substituted for the clock / timer in the OC.
- Page 20 D: 21 Heat sink too hot This option can be determined at which temperature the heatsink too warm alarm is activated. The settings in D: 21, default = 24 ℃, max = 30 ℃, min = 15 ℃. The temperature must be too high at a certain amount of time to activate the alarm. Time D 22 is defined by:.
-
Page 21: Inspection / Maintenance
Inspection / Maintenance Check regularly that all links from the coolant hose are tight. Also check the links, or oil is palpable, if so please contact the supplier, this signals a leak. The dust on the back of the unit is to be controlled at least every 10-12 weeks to remove dust deposits. -
Page 22: Failure Analysis And Error Messages
Fault Analysis and Error Messages If the unit does not turn on (and the display of the remote control and the LEDs on the PCB are also off) there is probably no power. It may also be that the internal fuse is blown, it sits next to the circuit board in a plastic housing. If the unit does not turn on and there is power on (LED on the board flashes and the display of the remote control unit provides E: 01) it is most likely to be 2 of the 3 phases which are to be changed together, which of the three does not matter. -
Page 23: Error Code List
Error 03 = Not applicable Error 04 = Ambient temperature too low. The unit is in a cold environment to which the risk of freezing occurs. The space in which OptiClimate will need is to be warmer than 4 ℃. -
Page 24: Options, To Be Delivered With
Plenum This box can be placed on the back of the unit so OptiClimate outer space can be placed. The plenum 1 to 3 hoses can be connected to suck the warm air from the room. Dimension suction hoses are always greater where possible. - Page 25 Long refrigerant hoses By default, coolant hoses are supplied with a length of 8 meters. On request hoses can also be made to a length of 15 meter. EX indoor unit If the distance between the indoor and outdoor unit is more than 15 meters, there must be a PRO3/split EX (extended range) indoor unit used.
-
Page 26: Appendix: Error Code List
Fault code list Keep this list in error near OptiClimate. E: 01 Phase monitor (15000pro3 only) E: 02 Condensate drain E: 03 N.A. E: 04 Ambient temperature is too low (<4 °) E: 05 Room temp sensor not connected E: 06 Heat sink temp sensor not connected...
Need help?
Do you have a question about the SPLIT PRO3 Series and is the answer not in the manual?
Questions and answers