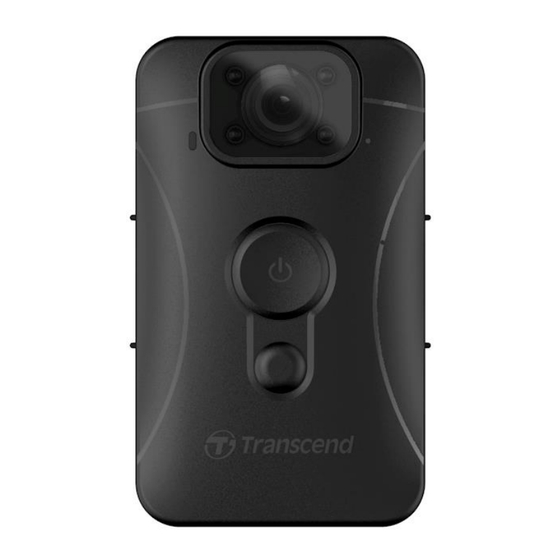
Transcend DrivePro Body 10 User Manual
Hide thumbs
Also See for DrivePro Body 10:
- User manual (19 pages) ,
- User manual (44 pages) ,
- User manual (42 pages)
Table of Contents
Advertisement
Quick Links
Advertisement
Table of Contents

Subscribe to Our Youtube Channel
Related Manuals for Transcend DrivePro Body 10


Summary of Contents for Transcend DrivePro Body 10
- Page 1 User’s Manual Body Camera DrivePro Body 10 2023/12 (v2.0)
-
Page 2: Table Of Contents
Table of Contents Package Contents ................3 Getting Started ................5 2-1 Function Buttons ......................5 2-2 Charging the DrivePro Body 10 ..................5 2-3 Changing the microSD memory card ................6 2-4 LED Indicator ........................7 2-5 Setting the Video/Photo Stamp ..................7 Recording Videos ................8 3-1 Normal Recording ......................8... - Page 3 15. Warranty Policy ................28 16. GNU General Public License (GPL) Disclosure ......28 17. End-User License Agreement (EULA) ........28 18. Federal Communications Commission (FCC) Statement ..28 19. Eurasian Conformity Mark (EAC) ..........29...
-
Page 4: Package Contents
1. Package Contents DrivePro Body 10 Adapter USB cable microSD memory card (Pre-inserted in the DrivePro Body) Velcro 360° rotating clip & Velcro holder... - Page 5 Note When removing the DrivePro Body from the holder, gently pull it from the left to the right side. When reassembling, ensure the DrivePro Body is securely attached to the holder. Quick Start Guide...
-
Page 6: Getting Started
2-2 Charging the DrivePro Body 10 Before use, please ensure that the battery is fully charged. Charge the DrivePro Body 10 via the adapter or by connecting the USB cable to the computer. A solid orange light of the warning indicator is visible while charging and will turn off when fully charged. -
Page 7: Changing The Microsd Memory Card
2-3 Changing the microSD memory card A Transcend microSD memory card is pre-inserted in the DrivePro Body. If you wish to change the memory card, please use a microSD card with 64GB, 128GB, 256GB, or 512GB capacity (Class 10 or above). -
Page 8: Led Indicator
2-5 Setting the Video/Photo Stamp Before use, it is recommended to connect the DrivePro Body 10 to your computer using the DrivePro Body Toolbox. This will enable you to set the date, time, and video/photo user label. By doing so, the date, time, and user name will be displayed on the recorded videos and photos. -
Page 9: Recording Videos
To stop recording, press and hold the Power button again; you will hear a beep, and the red light will turn off. DrivePro Body 10 automatically saves video files every 3 minutes during recording. -
Page 10: Taking Photos
4. Taking Photos To take photos during recording, simply press the Snapshot button. Note Photos taken with Infrared LED will be in grayscale. 5. Audio Recording To utilize this feature, configure it through the DrivePro Body Toolbox. Adjust the settings for long-pressing the Snapshot button to activate the audio recording function instead of enabling the infrared LEDs. -
Page 11: Playing, Transferring & Deleting Videos / Photos
6. Playing, Transferring & Deleting Videos / Photos To play recorded videos or view photos, connect the DrivePro Body 10 to your desktop or laptop: Option 1: Remove the microSD memory card from the DrivePro Body 10 and insert it into a compatible card reader to transfer files to your computer. - Page 12 To prevent data loss, always follow the proper removal procedures when disconnecting the DrivePro Body 10 from your computer. When the DrivePro Body 10 is connected to a computer, it can only be used for file transfers. None of the DrivePro Body’s features can be accessed during this time. Please disconnect...
-
Page 13: Using The Drivepro Body App
7-2 Connecting to the DrivePro Body App Connect your DrivePro Body 10 to the app using the USB-C to C cable provided with your Android device. With this setup, you can check remaining battery and recording time, view recorded videos, and perform other useful functions directly from your Android device. - Page 14 3. In the pop-up window, click OK to allow the app access to this device. 4. The mobile device screen will show the following display. Press the Menu button and select TRANSCEND.
- Page 15 5. Tap Use this folder and allow DrivePro Body to access files within TRANSCEND. 6. The app will pop up. Click on DPB10C to complete the connection. Note 1. Please fully charge your DPB10C and use the USB-C cable provided with your Android device for connection.
-
Page 16: Drivepro Body App Homepage
7-3 DrivePro Body App Homepage Device List Menu Battery Status Storage Status Recording Length Microphone Resolution Browser Settings 7-4 Playing Videos and Browsing Photos 1. To play videos and browse photos, tap “Browser” on the Homepage or the Menu button on the top left corner first, then tap Tap the icons at the top to watch videos, browse pictures, or listen to audio recordings. -
Page 17: Settings
7-5 Settings Tap the Menu button on the top left corner first, then tap the Settings button. In Settings, you can adjust the video, device, and system settings. Menu Options VIDEO Icon Function Description / Options Set the quality for video recording. Resolution 1080P/60FPS/1080P/30FPS/720P/60FPS/720P/30FPS Set the recording length of each recorded video. -
Page 18: Drivepro Body Toolbox Software
Please wait until the firmware upgrade is complete before manually restarting the DrivePro Body. If the DrivePro Body cannot be turned on due to firmware upgrade failure, please contact Transcend customer service for technical support. 8. DrivePro Body Toolbox Software DrivePro Body Toolbox is a video file management software which simplifies the settings of the camera. -
Page 19: System Requirements
8-1 System Requirements System requirements for connecting the DrivePro Body 10 to a computer and for using the DrivePro Body Toolbox software: A desktop or a laptop with a working USB port: Windows ® 10 or later macOS ®... -
Page 20: Settings
8-3 Settings On the Settings page, you can adjust the Device, Video, and Video Stamp settings. Device Settings Function Description / Options Click the Set button to sync the time of the device with the PC. Sync time with PC Activate/Deactivate LEDs during recording. - Page 21 To format and reset the device, press the Power and Snapshot Reset buttons simultaneously for over 5 seconds while the power is on. Using Function Afterward, the camera will turn off. Buttons ON / OFF (default) Video Settings Function Description / Options Set the quality for video recording.
- Page 22 ON / OFF Set the date format. Date Format Y/M/D / M/D/Y / D/M/Y Select the 24-hour clock or the 12-hour clock. Time Format 24HR / AM/PM Display the Transcend logo watermark on photos or videos. Watermark ON / OFF...
-
Page 23: Tools
8-4 Tools On the Tools page, you can upgrade firmware to the latest version, format disk or reset DrivePro Body to its default status. Tools Function Description / Options Upgrade your firmware to the latest version available. Firmware Upgrade Format Disk Format your disk. -
Page 24: File Manager
8-5 File Manager Once the data is backed up, you can search and manage your videos and photos on the File Manager page. Click on the right side of the page to add, Click to classify the Owner delete, or edit the Owner and Category. and Category of the selected file. -
Page 25: Preference
To prevent mold, periodically clean the lens. Cleaning Clean the surface of the DrivePro Body 10 by using a soft cloth that has been slightly moistened with water. Afterward, wipe the surface with a dry cloth. Do not clean the camera with chemical products (e.g., thinner, benzine, alcohol, insect repellent, sunscreen or insecticide, etc.) and disposable cloths, as they may damage the finish or the... -
Page 26: Ipx4 Water Resistant
Do not use the DrivePro Body 10 in high temperatures and humidity, such as saunas, steams, and shower rooms. Do not use the DrivePro Body 10 for long in heavy rains to prevent moisture from penetrating. WARNING 1. An IPX4 water resistance rating does not mean fully waterproof. -
Page 27: Specifications
Specifications DrivePro Body 10 DrivePro Body 10 DrivePro Body 10 (Models produced (Models produced (Models produced before 2019.09) after 2019.09) after 2023.12) Connection Micro-B Micro-B Type-C Interface microSD (Class 10 or above) Memory Card 8GB / 16GB / 32GB /... -
Page 28: Frequently Asked Questions
Can I use the DrivePro Body 10 to record at nighttime? Yes, the DrivePro Body 10 will activate the Infrared LED automatically at night or in low light conditions. However, please note that photos taken and videos recorded with Infrared LED will be in grayscale. -
Page 29: Recycling And Environmental Protection
Recycling and Environmental Protection For more information on recycling the product (WEEE) and battery disposal, please refer to the following link: https://www.transcend-info.com/about/green. Warranty Policy Please find the warranty period of this product on its package. For details of Warranty Terms and... - Page 30 Eurasian Conformity Mark (EAC)
Need help?
Do you have a question about the DrivePro Body 10 and is the answer not in the manual?
Questions and answers