Advertisement
Quick Links
Appliances India Pvt Ltd
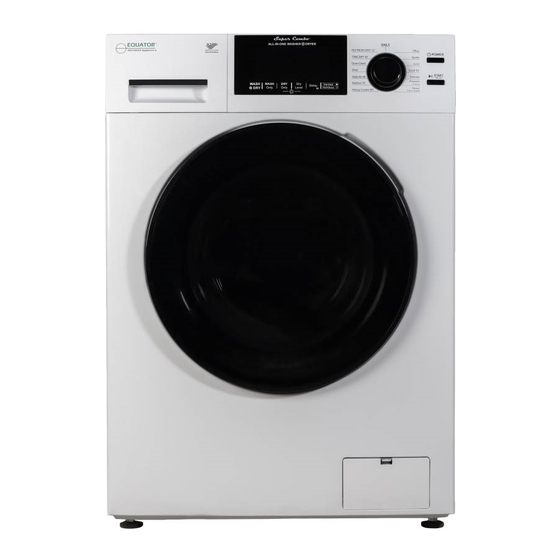
Super Combo
ALL-IN-ONE COMBO WASHER
+
DRYER
Model - EZ 5000 CV
For any Questions Contact:
WhatsApp / Text: 848 403 8646
Ph: 1800 212 8646
Email: mail.india@equatorappliances.com
SERVICE MANUAL
Read this manual carefully to diagnose problems correctly before servicing the unit.
Advertisement

Subscribe to Our Youtube Channel
Summary of Contents for Equator Super Combo EZ 5000 CV
- Page 1 Appliances India Pvt Ltd Super Combo ALL-IN-ONE COMBO WASHER DRYER Model - EZ 5000 CV For any Questions Contact: WhatsApp / Text: 848 403 8646 Ph: 1800 212 8646 Email: mail.india@equatorappliances.com SERVICE MANUAL Read this manual carefully to diagnose problems correctly before servicing the unit.
-
Page 2: Exploded Views And Parts List
EXPLODED VIEWS AND PARTS LIST TUB & DRUM ASSEMBLY DOOR, DISPENSER AND CONTROL ASSEMBLY ~ 1 ~... -
Page 3: Drain Pump
DRAIN PUMP CONSUMPTION ~ 2 ~... - Page 4 sheets When power fails and power plug is removed during operation. when ~ 3 ~...
- Page 5 ~ 4 ~...
- Page 6 Before providing service, ask the customer what the trouble is. Service the unit servicing ~ 5 ~...
- Page 7 ~ 6 ~...
- Page 8 If service is needed during check, remove the remaining water by pulling out cap. ~ 7 ~...
- Page 9 starting any other cycle to reset, ~ 8 ~...
- Page 10 ~ 9 ~...
- Page 11 Before performing the service be careful of electric shock when disconnecting parts while troubleshooting. ~ 10 ~...
- Page 12 Electronic Module. Electronic Module. Electronic Module. Electronic Module. Electronic Module. Electronic Module. Electronic Module. Electronic Module. Electronic Module. Communication error Motor module - Electronic Module ~ 11 ~...
-
Page 13: Electronic Module
Electronic Module Is the supplied voltage 110 V AC? Check the plug, switch and fuse or reset the circuit Is the power plug connected firmly to 110 V AC breaker outlet? Electronic Module Replace the MAIN ELECTRONIC MODULE broken? Electronic Module ELECTRONIC MODULE ~ 12 ~... - Page 14 Load 4.5 to 6.5 lbs (2 to 3 kg) of clothing into the drum. Press power, Rinse+Spin and the start/pause button in sequence. ~ 13 ~...
- Page 15 DOOR ERROR - E1 Check if door is closed firmly. Close door firmly Check if any of the connectors are disconnected Reconnect all connectors or disassembled. Check the motor connector. Is the resistance of terminal the same as the figure? Replace door lock Resistance of terminal about 100-200Ω? Replace ELECTRONIC MODULE...
- Page 16 NO WATER SUPPLY - E3 ELECTRONIC MODULE ~ 15 ~...
- Page 17 - E2, E10 Is the impeller or filter of the drain pump clogged? ELECTRONIC MODULE ~ 16 ~...
- Page 18 WASH HEATING TROUBLE - E7 , is ELECTRONIC MODULE ~ 17 ~...
- Page 19 - E8, E9, E11 ELECTRONIC MODULE. = Dry E9 = Fan E11 = Water E8 ~ 18 ~...
- Page 20 DRY HEATING TROUBLE - E13 Electronic module ~ 19 ~...
- Page 21 OVERFLOW TROUBLE - E14 The water still comes in even when power is off The water still comes in PAUSE function Electronic Module function, ~ 20 ~...
- Page 22 Child Lock is activated Press Dry only and Dry level buttons to cancel Electronic Module from the Electronic Module Check if any connectors are disconnected or disassembled. (but if fan is not functioning) with the (Electronic module box cover.) ELECTRONIC MODULE. ~ 21 ~...
- Page 23 FAN MOTOR TROUBLE - E12 Is the blade of the fan motor blocked? Reinstall the fan motor Is the voltage 110 V AC between the terminals as Replace the fan motor in figure? Replace the Is the voltage 110V AC between the terminals as Electronic Module in figure? 110 V AC...
- Page 24 MOTOR TROUBLE - E5 Check all the connectors disconnected or Reconnect all connectors disassembled. Check the motor connector resistance of terminal. Replace the motor Blue-White/Blue-Black/White-Blue: Resistance of terminal about 4-10Ω? Replace Electronic Module If the module is integrated with the motor, please remove the cover of plastic box to check the resistance between wires.
-
Page 25: Control Panel
9. DISASSEMBLY INSTRUCTIONS CONTROL PANEL Pull out the detergent drawer. Unscrew and remove 2 screws from behind the detergent drawer cavity. Unscrew and remove 2 screws from the Control Panel Assembly, attached at the top of the machine. Lift the side of the Control Panel Assembly and pull it out. - Page 26 DOOR ASSEMBLY that assembly assembly CAUTION: THE DOOR ASSEMBLY IS HEAVY. ~ 25 ~...
- Page 27 gently out of the drum. Pull the heater(s) up gently from the housing. ~ 26 ~...
-
Page 28: Shock Absorbers
SHOCK ABSORBERS ~ 27 ~... - Page 29 Remove the pump from the cabinet. Remove the motor. ~ 28 ~...
-
Page 30: Cabinet Assembly
10-1. CABINET ASSEMBLY ~ 29 ~... -
Page 31: Cabinet Parts
CABINET PARTS ~ 30 ~... - Page 32 10-2. TUB AND DRUM ASSEMBLY ~ 31 ~...
- Page 33 TUB AND DRUM PARTS ~ 32 ~...
- Page 34 TUB AND DRUM PARTS Continued ~ 33 ~...
- Page 35 10-3. DOOR, DISPENSER AND CONTROL ASSEMBLY ~ 34 ~...
- Page 36 DOOR, DISPENSER AND CONTROL PARTS ELECTRONIC MODULE ~ 35 ~...


Need help?
Do you have a question about the Super Combo EZ 5000 CV and is the answer not in the manual?
Questions and answers