Table of Contents
Advertisement
Advertisement
Table of Contents

Related Manuals for Equator Super Combo EZ 4400N


Summary of Contents for Equator Super Combo EZ 4400N
- Page 1 Super Combo Automatic Washer + Sensor Dryer Model: 4400N...
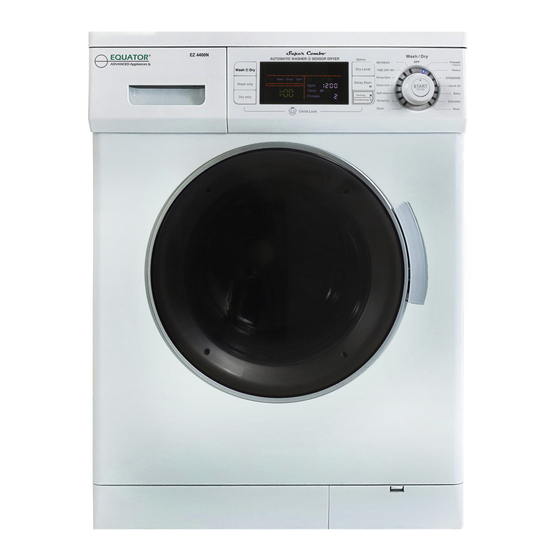
- Page 2 Helpful Hints Pre-installation Unpacking leveling Ventilation Recessed, Closet, Alcove Control Panel Display Panel Diagnostics Menu...
- Page 3 WARRANTY INFORMATION Your appliance is protected by this warranty under normal, personal, family or household use (1Year), and limited commercial use (90 days), in USA and Canada. WARRANTY Consolidated Brands undertakes to the consumer-owner to repair or, at our option, to replace any part of this product which proves to be defective in workmanship or material under normal personal, family or household use, in the USA and Canada, for a period of one year from the date of original purchase.
- Page 4 EXCLUSIONS In no event shall Consolidated Brands be liable for incidental or consequential damages or for damages resulting from external causes such as abuse, operation misuse, neglect, alterations, normal wear and tear, incorrect voltage or acts of God. This warranty does not cover service calls which involve defective workmanship, damage due to other products while combined use with this product or materials covered by this warranty.
- Page 5 / 6 kg 7.25-145 (psi) / 0.05-1(Mpa) 33.5x23.6x22 (in) / 85x60x55.8 (cms) 161 lbs / 73 kg Note: All rights reserved. Designs, Specifications and Manual subject to change without notice...
- Page 6 Lint Free Maintenance Portability Kit (Accessory Part# 1070 sold separately) where needed.
- Page 7 To reduce the risk of fire due to contaminated loads, the final part of a tumble dryer cycle occurs without heat (cool down period). Avoid stopping a tumble dryer before the end of the drying cycle unless all items are quickly removed and spread out so that the heat is dissipated.
- Page 8 The unit must be installed on a strong leveled surface in a protected, dry and well-ventilated area, with a power and water supply of sufficient capacity and a sufficient outlet in close proximity.
- Page 9 Factory supplied accessories Blanking Caps Vent Adapter...
- Page 10 Installation area Handling Please handle the machine carefully and use appropriate means while lifting and moving the machine so that it does not get damaged. Do not drag the machine to your floor and, or, to the machine. Do not hold on to protruding parts when Appliance stability is very important otherwise lifting washing machine could “wander”...
- Page 11 The power cord can be accessed by removing the shipping rods (Fig. 2 & 3). with the caps provided (Fig. 4). The screws also need to be reinstalled (Fig. 4). (Fig. 5). Fig. 1 Fig. 2 Fig. 3 Fig. 4 Fig.
- Page 13 Height difference between the installation location of the washing machine and the drainage point: Minimum 24", and Maximum 40". Attach water drain hose to U-Connector. Hook the U-Connector over the side or stand pipe (Fig 7.) When the water is being drained, check that the water flow out of the hose is adequate.
- Page 14 CONDENSING DRY To use dryer in Condensing Mode: 1. Ensure metal vent cap (1) is installed on exhaust fan. 2. Press "Dry Only" button to set the machine on drying cycle. 3. Hold venting/condensing button for 5 seconds symbol will appear on the screen which confirms that the machine is in condensing mode.
- Page 17 BUILT-IN, RECESSED, CLOSET AND ALCOVE INSTALLATION n a built-in, recessed area, closet or alcove.
- Page 18 1. WASH & DRY, WASH ONLY, DRY ONLY Wash features Water temp/Spin rpm/ Duration Hot / 1200 / 1.23 hours Hot / 1200 / 1.08 hours Warm / 1200 / 55 minutes Cold / 1200 / 20 minutes Warm / 500 / 40 minutes Cold / 500 / 40 minutes Cold / 500 / 40 minutes Cold / 500 / 35 minutes...
- Page 19 For small items such as socks, children’s garments and small towels please use a Washing Net Bag. Add detergent in Dispenser C, only for Pre-Wash cycle.
- Page 20 Vented Ventless Vented Ventless selection button...
- Page 21 How to Run a Wash Cycle and Dry Cycle How to Run a Wash Cycle only How to Run a Dry Cycle only...
- Page 22 How to stop the wash cycle - The wash program can be stopped at any time. - Press pause for 5 seconds - Turn knob to OFF position - To drain water turn knob to DRAIN ONLY on left side. How to stop the cycle - Turn knob to OFF position...
- Page 23 Pour 2 cups of RV type Antifreeze in soap dispenser. on knob Shut off water at both faucets and disconnect water inlet hoses from faucets and drain - Switch off the Washer - Open the service flap. (bottom right corner)(Fig.11) - Carefully unscrew the coin-trap cover.
- Page 26 enough Is the dryer knob in the correct position for the drying cycle ? Is drying cycle selected (Time Dry/Sensor Dry) ?
- Page 27 Condensation at soap dispenser Slight condensation can occur at soap dispenser and will evaporate. This is normal...
Need help?
Do you have a question about the Super Combo EZ 4400N and is the answer not in the manual?
Questions and answers
Where is the Lint Filter!!!!!!??????