
Related Manuals for Equator EZ3720CEE


Summary of Contents for Equator EZ3720CEE
-
Page 1: Service Manual
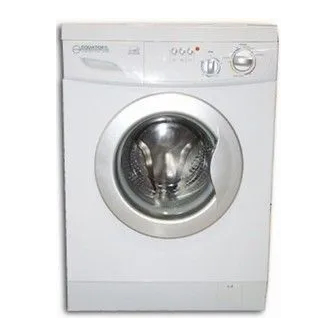
BRAND: EQUATOR SERVICE MANUAL LAUNDRY PRODUCTS Combo Washer Dryer MODELS EZ3720CEE (WHITE / PLATINUM) - VENTLESS... -
Page 2: Table Of Contents
TABLE OF CONTENTS • Warranty Information………………………….……….………………….. • Safe Servicing Practices……………………………………………………… • Installation ………………………………………………..……………………….. • Important Pre Service Instructions……………………..…………….. • Diagnosis & Technical Troubleshooting…………………………….. • Replacement Procedure, Wiring & Testing of parts………….. • Quick Check………………………………………………..……………………….. • Contact Information…………………………………..……………………….. -
Page 3: Warranty Information
EXCLUSIONS In no event shall Equator Advanced Appliances be liable for incidental or consequential damages or for defective damages resulting from external causes such as abuse, misuse, incorrect voltage or acts of God. -
Page 4: Safe Servicing Practices
SAFE SERVICING PRACTICES To avoid the possibility of personal injury and/or property damage, it is important that safe servicing practices be observed. The following are examples, but without limitation, of such practices: 1. Do not attempt a product repair if you have any doubts as to your ability to complete it in a safe and satisfactory manner. -
Page 5: Installation
INSTALLATION (EZ 3720 CEE ) Inlet Hoses The inlet hoses must be fitted with the special rubber washers. These rubber washers ensure a water tight seal between the hoses and the water inlet valves to prevent water leaks. Water should flow freely into the machine, be sure that the inlet hoses are not bent or kinked. Please read the following steps carefully (Fig.1, Fig.2) Connect the gray end of the hot-water hose to the hot-water faucet (Fig.1). -
Page 6: Important Preservice Instructions
IMPORTANT PRESERVICE INSTRUCTIONS ► It is advisable for anyone to go through the following points before one actually works on the unit. • Shipping bolts: The unit is shipped with 3 shipping bolts and spacers to avoid any damage to the unit during shipping. Make sure that all the shipping bolts and the spacers have been removed from the unit. -
Page 7: Diagnosis & Technical Troubleshooting
Door not closed tightly: Close door firmly, so that it latches. Door Switch/ door lock: Set the washer knob to Towels / Sheets position. Switch On the power. Test for 115V AC across Pin#11 of the pressure switch and terminal#2 on the control module. - Page 8 Motor Bolts: Check if the motor is bolted properly. Pressure Switch: Set the washer knob to Towels / Sheets position. Switch on the unit. The unit should fill in water and stop to fill. After the unit stops filling, test for 115V AC across Pin#14 of the pressure switch and terminal#2 on the control module.
- Page 9 Unstable floor: Remove carpeting, move to another location, or install underlayment. c) Unit not leveled properly: d) Drum not leveled: If vibration persists then open the top cover and see if the drum is leveled up. If not the position of the springs holding the drum may have to be adjusted or else replace the springs.
- Page 10 Heating element: Check resistance: 25 ohms maximum. Fan Motor / Dry Timer: Set a 30 minutes cycle on the dryer knob keeping the washer knob on off position. Check for 115V AC across the two terminals of the fan motor, if present and the fan motor is not operating, the fan motor is bad or else the dryer timer is bad provided no part on the heater housing is receiving 115V AC.
- Page 11 Clothes stiff & wrinkled Over-drying: Set dryer timer for a shorter cycle. b) High suds detergent: Use Equator detergent, or other low-suds brand. Excessive detergent: Measure detergent, using 1 tablespoon.*...
-
Page 12: Replacement Procedure, Wiring & Testing Of Parts
Unplug the unit. ▪ Remove the top panel (Two screws behind and slide back) ▪ Pull out the soap dispenser, plastic washer knob and dryer knob. ▪ Remove the control panel. (3 Screws) ▪ Pull out the plastic switch cover for the power switch. - Page 13 2) Door Switch / Door Lock (00750) Replacement Procedure: ▪ Unplug the unit. ▪ Open the door remove the clamp to the door gasket in the front to access the door switch. ▪ Unscrew the two screws to the door switch. ▪...
- Page 14 3) Pressure Switch (50774) Replacement Procedure: ▪ Unplug the unit. ▪ Remove the top panel (Two screws behind and slide back) ▪ Unfix the screw to the pressure switch and replace the same. ▪ Fix all the parts back by following the reverse procedure. Wiring: Pressure Switch –...
- Page 15 3) Set the washer knob to the off position and the dryer knob to 60 and switch on the unit. 4) You should get 115V AC across the terminals EVA & EVAX.
- Page 16 ▪ Hot Test: 1) Set the washer knob to the Towels / Sheets position and switch on the unit. 2) You should get 115V AC between the terminals EVCX & EVC and the unit should start filling in with water, it the unit does not start filling the valve is bad.
- Page 17 2) The timer cam should be installed making sure that it is holding the cam follower properly. 3) The washer knob has 2 grooves (one wider than the other) and there are two projections on the timer cam (one thicker than the other) and so matching the wider groove to the thicker projection is very important or else there will be mismatch of cycles.
- Page 18 Unplug the unit. ▪ Remove the top panel (Two screws behind and slide back) ▪ Pull out the soap dispenser, plastic washer knob and dryer knob. ▪ Remove the control panel. (3 Screws) ▪ Unfix the two screws that hold the dry timer and take out the timer.
- Page 19 Unplug the unit. ▪ Remove the top panel (Two screws behind and slide back) ▪ Pull out the soap dispenser, plastic washer knob and dryer knob. ▪ Remove the control panel. (3 Screws) ▪ Pull out the plastic switch cover for the half load switch.
- Page 20 Unplug the unit. ▪ Remove the top panel (Two screws behind and slide back) ▪ Pull out the soap dispenser, plastic washer knob and dryer knob. ▪ Remove the control panel. (3 Screws) ▪ Pull out the plastic switch cover for the half heat switch.
- Page 21 10) Fusible Link / Wire with fuse (00807) Replacement Procedure: ▪ Unplug the unit. ▪ Remove the top panel (Two screws behind and slide back) ▪ The fusible link is located on the heater housing as shown in the figure. ▪...
- Page 22 11) Thermostat (00808) Replacement Procedure: ▪ Unplug the unit. ▪ Remove the top panel (Two screws behind and slide back) ▪ The fusible link is located on the heater housing as shown in the figure. ▪ There is a small fuse inside the covering held by the clamp crewed on the housing. ▪...
- Page 23 12) Fan Motor (50732) Replacement Procedure: ▪ Unplug the unit. ▪ Remove the top panel (Two screws behind and slide back) ▪ The fan motor is mounted on the heater housing. ▪ Unfix the support to the hater housing. (4 bolts on the top) ▪...
- Page 24 13) Blower / Fan / Impeller Assembly (51733) Replacement Procedure: ▪ Unplug the unit. ▪ Remove the top panel (Two screws behind and slide back) ▪ Unfix the support to the hater housing. (4 bolts on the top) ▪ Unfix the upper heater housing. (3 screws and a few clamps) ▪...
- Page 25 ▪ Hot Test: 1) Set the washer knob on off position and the dryer knob on 30. 2) You should get 115V AC across the terminals of the heating element. 3) Check if the unit is heating up, if so the heating element is good.
- Page 26 15) Speed Regulator (00791) Replacement Procedure: ▪ Unplug the unit. ▪ Remove the top panel (Two screws behind and slide back) ▪ The speed regulator is located on the right hand side at the back of the unit. ▪ Unfix the housing of the speed regulator. (2 screws at the back) ▪...
- Page 27 Testing Procedure: ▪ Hot Test: 1) Set the washer knob to a position one click away from the off position and switch on the unit. 2) The drain pump should receive 115V AC supply and should start working. 3) If the drain pump is working it is fine or else the drain pump is bad.
- Page 28 17) Main Motor (50751) Replacement Procedure: ▪ Unplug the unit. ▪ Make sure that there is no water in the unit. ▪ Remove the back panel (3 screws at the back) ▪ Remove the belt. ▪ Tilt the unit towards the left and carefully lay down the unit on the side. ▪...
-
Page 29: Quick Check
• Checking Dry cycle – Set the washer knob to the off position (End of the green marking) and set a drying cycle for 30’. The unit will start heating up and you can sense hot air in the drum. -
Page 30: Contact Information
COMPANY INFORMATION APPLIANCE DESK BRAND: EQUATOR CONTACT NUMBERS SERVICE, PARTS, ACCESSORIES & DETERGENT ORDERING: (800) 490 - 8018 TECHNICAL SUPPORT: (713) 933 - 1464...
Need help?
Do you have a question about the EZ3720CEE and is the answer not in the manual?
Questions and answers