
Related Manuals for GPX Scene+


Summary of Contents for GPX Scene+
- Page 1 Scene+ Micro Projector User’s Guide for Model PJ913B v3076-01 For the most up-to-date version of this User’s Guide, go to www.gpx.com...
- Page 2 Safety Instructions & Warnings Important Safety off and on, the user is encouraged to try to correct the interference by one or more of the following measures: Instructions • Reorient or relocate the receiving antenna. • Increase the separation between the equipment •...
- Page 3 it to melt or catch fire. • See projector enclosure for related safety markings. • When powering off the projector, allow the cooling • No user serviceable parts inside, do not attempt cycle to finish before handling or disconnecting the to open the unit or perform any repair.
-
Page 4: Table Of Contents
Table of Contents Overview Features - 5 Includes - 5 Projector Controls & Inputs - 6 Projector Setup Power - 8 Use as a Power Bank - 8 Projector Placement - 8 Tripod Mount - 9 Image Adjustment - 9 Screen Mirroring Screen Mirroring with Android (Samsung/Miracast) - 10–11 Screen Mirroring with Apple AirPlay- 12–13... -
Page 5: Features
Overview Features Includes • Supports up to 1080p • Tripod • Native Resolution: 640 x 360 • HDMI cable • DLP display technology • AC/DC power adapter with USB-C • Aspect Ratio: 16:9 jack • Brightness: 45 ANSI lumens • User's Guide •... -
Page 6: Projector
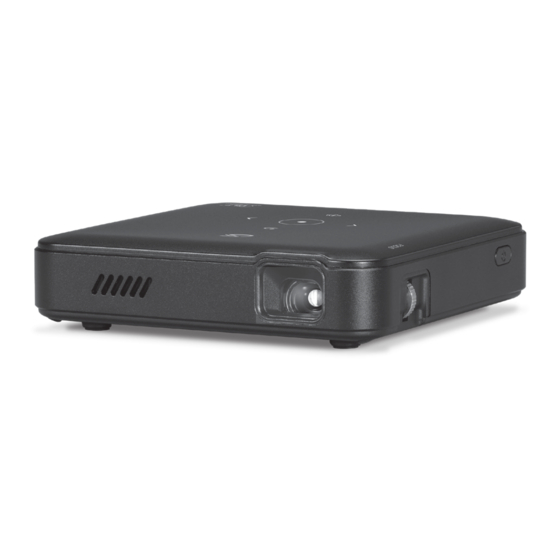
Projector Controls & Inputs Projector Lens Audio jack - Connect to an external speaker or Speaker headphones. USB port - Video/image input MicroSD Slot and power source for HDMI Air vent - To prevent streaming stick. overheating, do not block. USB-C power input Focus wheel - Roll to fine tune 10. - Page 7 Projector Controls 12. LED Power Indicator - 15. Tripod Mount - Hole to attach Indicates current power status. M6 sized tripod screw. All LEDs will light up when unit 16. Rubber foot pads - Provide is fully charged. LEDs will flash when battery power is low.
-
Page 8: Projector Setup
Projector Setup Power Plug the AC/DC power adapter with USB-C jack (included) into a powered-on computer or wall outlet adapter and the USB-C power input on the rear of the unit. To charge unit: Charging time to full power is approximately 2 hours. Use as a Power Bank To charge mobile devices: Plug the unit into a wall outlet or other power source outlined in the steps above. -
Page 9: Tripod Mount
Projector Setup Tripod Mount You can use the projector by placing it on a flat surface with proper ventilation or by mounting it to a tripod. Tripod use is recommended with USB, MicroSD, and Screen Mirroring. Placing the projector on a flat surface is recommended for HDMI connections. -
Page 10: Screen Mirroring
Screen Mirroring Screen Mirroring with Android (Samsung/Miracast) This projector supports screen mirroring on Android devices using Miracast. Note: Check that your Android device supports video out. Some streaming apps do not allow video output or screen mirroring, such as Netflix. To use these streaming services, use an HDMI streaming stick (page 13). - Page 11 Screen Mirroring 3. Select the projector name that appears on the upper left corner of the Screen Mirroring screen. After connecting, the projector will automatically display the images on the screen of your phone. Smart View Phone Other device Select a device below to mirror your phone’s screen or play content.
-
Page 12: Screen Mirroring With Apple Airplay
Screen Mirroring Screen Mirroring with Apple AirPlay This projector supports screen mirroring on iPhones using Apple AirPlay. Note: This method involves connecting your phone to the projector using a Wi-Fi connection. After connecting, your phone will automatically switch over to a network- based data connection. - Page 13 Screen Mirroring 3. When prompted, enter the password that appears next to the projector name on the upper left corner of the Screen Mirroring screen. 4. Exit the Wi-Fi menu and open the Control Center menu by swiping down from the top-right edge or using the Assistive Touch home button.
-
Page 14: Screen Mirroring Using A Shared Network Connection
Screen Mirroring Screen Mirroring using a Shared Network This projector supports screen mirroring on Android devices and iOS devices through a shared network connection. Note: Check that the app you intend to stream from supports screen casting. 1. Turn on the projector. From the home menu select "Wireless" to bring up the Screen Mirroring screen using the touch buttons on the top of the projector. - Page 15 Screen Mirroring 4. Scan for available networks and select your desired Wi-Fi network from the list. Then, enter your network password to connect. 5. The wireless screen on the projector will now show a router connection in the upper right corner. Your mobile device will also show a wireless connection instead of a data connection.
-
Page 16: Connecting To Other Devices
Connecting to Other Devices HDMI to Laptop/Macbook HDMI offers superior sound and picture quality and is the easiest way to play media from a computer. 1. For a PC laptop: Connect the device directly using the included HDMI cable 2. For a Macbook: If your Macbook version does not have an HDMI port, you will need a USB-C digital AV multiport adapter (not included). -
Page 17: Hdmi To Phone/Tablet
Connecting to Other Devices HDMI to Phone/Tablet Requires an HDMI cable (included) and an HDMI adapter suited for your device (not included). 1. Android devices: Connect the HDMI cable to the projector. Then, connect the other end of the HDMI cable to a USB-C to HDMI adapter. Connect the adapter to your device. -
Page 18: Microsd & Usb Storage Devices
Connecting to Other Devices MicroSD & USB Storage Devices Supports MicroSD cards and USB drives up to 1TB. Supports file formats: • Image: JPEG, PNG, BMP, MPO • Video: MP4, AVI, MOV, MKV, RM, RMVB, MPG, MPEG, ASF, 3GP, 3GPP, FLV, VOB, DAT •... -
Page 19: Customer Support
Para descargar este Manual del Usuario en inglés, español y francés, o para obtener respuestas a preguntas frecuentes, visite la sección de apoyo en: www.gpx.com Pour télécharger ce guide de l’utilisateur en anglais, espagnol ou français, ou pour obtenir des réponses à...
Need help?
Do you have a question about the Scene+ and is the answer not in the manual?
Questions and answers