Qimarox Prorunner mk5 Washdown User Manual
Hide thumbs
Also See for Prorunner mk5 Washdown:
- User manual (202 pages) ,
- User manual (124 pages) ,
- User manual (90 pages)
Table of Contents
Advertisement
Quick Links
Advertisement
Table of Contents

Related Manuals for Qimarox Prorunner mk5 Washdown


Summary of Contents for Qimarox Prorunner mk5 Washdown
- Page 1 User Manual Prorunner mk5 Washdown Version 1.0 - 06/11/2023...
- Page 2 All rights reserved. No part of this publication may be reproduced, stored in a computer database or published in any form or in any way electronically, mechanically, by means of photocopying, recordings or in any manner without prior written permission from Qimarox B.V.
-
Page 3: Table Of Contents
About this manual Table of contents About this manual Introduction ......................5 Machine documentation ..................6 Source language .....................6 Symbols used in the manual ...................6 Terminology list .......................7 Further support and information ................7 General Machine identification ....................8 Machine layout drawing and specifications .............9 CE Installation instructions ................... - Page 4 About this manual Possible installations .................... 32 Unpacking ......................32 Location ........................ 33 On-site transport ....................34 Preparations for a Qimarox installation (optional) ..........36 Installing the machine ..................36 Installing conveyors ....................40 Maintenance General ......................... 41 Specific safety regulations ................... 41 Preventive maintenance schedule ...............
-
Page 5: About This Manual
About this manual About this manual 1.1 Introduction This manual provides information about the Prorunner mk5 Washdown (WD). From here on, the Prorunner mk5 WD is referred to as the 'machine'. Note Make sure this manual is always available with the machine. -
Page 6: Machine Documentation
About this manual 1.2 Machine documentation Document Reference Machine manual (this document) UM Prorunner mk5 WD 1.0 EN Machine layout drawing Layout drawing [serial number] Specification sheet Specifications [serial number] 1 or 2 Electrical drawings Electrical drawing [serial number] Machine test manual Test manual prorunner mk5 v2.1 EN Generic information Machine specific information... -
Page 7: Terminology List
The outfeed conveyor moves products out of the machine. Outfeed conveyor The outfeed conveyor is part of the machine. 1.6 Further support and information Qimarox can supply additional expertise and support services, for: • Training • Global support •... -
Page 8: General
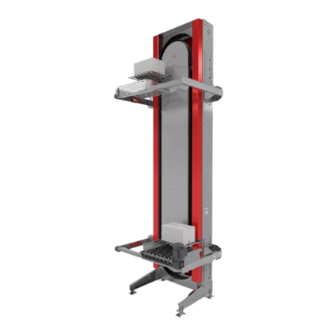
General General 2.1 Machine identification The machine identification is given on the type plate. The type plate is located at the back of the machine. Refer to the specification sheet of this serial number, for specifications of this machine. UM Prorunner mk5 WD 1.0 EN... -
Page 9: Machine Layout Drawing And Specifications
If you want to use the machine outside these specifications, you must contact Qimarox to check if this is possible. Inappropriate and/or modified use of the machine can result in dangerous safety issues and/or damage. -
Page 10: Ce Installation Instructions
Qimarox. 2.5 Liability Qimarox believes to the best of its knowledge that the information in this user manual is accurate. In the event that technical or typographical errors exist, Qimarox reserves the right to make changes to subsequent editions of this user manual without prior notice to holders of this edition. -
Page 11: Ukca
2.8 Patents Patent protection applies to parts of the machine. Consequently, other parties are not permitted to build this machine in this form, unless Qimarox B.V. has explicitly given permission for this. For more information, refer to WDpatents.qimarox.com. -
Page 12: Safety
Safety Safety 3.1 Intended use of the machine The machine is exclusively intended for the vertical transportation of goods, as described in this manual. Refer to chapter 4 for a detailed description of the specifications of use. The machine is always set up within a larger transport system in which products are automatically loaded on and off the machine. -
Page 13: User Types And Qualifications
Operating Manual. All maintenance work should be performed by qualified maintenance personnel Qimarox can also give advice about actions and tasks to be carried out on the machine. It is also possible to get training on maintenance and service of the machine. -
Page 14: Safety Instructions
Safety 3.3 Safety instructions 3.3.1 General • Comply with the safety regulations given in this manual. Deviation from these regulations can lead to unacceptable risks. • Never close doors (if present) of the fenced area of the machine, when a person is inside this area. -
Page 15: Safety Provisions
• If changes and modifications are outside the scope of specifications given by Qimarox in this manual and Qimarox has not granted permission changes and modifications, then the changes and modifications will entirely be the responsibility of those persons responsible for carrying out the changes and modifications. - Page 16 Safety Some part of the safety equipment may be supplied by the System integrator/OEM. See the CE installation instructions in in chapter 8. Before the CE Installation instructions have been met completely, the machine must not be used. In case of non-compliance with the required safety measures, the EC Declaration of Conformity will become null and void.
- Page 17 For specific requirements to the safety fencing, see the CE installation instructions in chapter 8. Make sure that the fenced area complies with local law and rules for protection against danger. If Qimarox supplies the safety fencing, the specifications will be included in the machine layout drawing. 3.4.4 Safety controls Performance level...
-
Page 18: Electrical Safety
Safety Emergency stops The machine must have one or more emergency stops included in the safety circuits. When one of the emergency stop buttons is pressed, the main power and the control current of the machine are switched off immediately. For specific requirements, see the CE installation instructions in in chapter 8. -
Page 19: Residual Risks
3.8 Residual risks The machine is intended to be integrated into an automated production line. Qimarox has attempted to protect against as many hazards as possible, either though inherent safe design or by shielding off the dangers. Machine users should be aware of the following residual risks before working with the machine: 3.8.1 Falling of products... -
Page 20: Machine End Of Life And Disposal
Safety 3.8.3 Potential gravitational energy When applicable, cylinders are vented of trapped air for repair and maintenance, cylinders and machine parts may start moving, thus creating crushing and other hazards. 3.9 Machine end of life and disposal Proper use and maintenance of the machine will not involve any environmental risks. When the machine is no longer useable, the machine should be dismantled and disposed of in an environmentally responsible manner. -
Page 21: Description
(un)loaded while moving. Discontinuous: the machine can be stopped for the loading and unloading of forks, this is not preferred. This reduces the capacity of the machine. Consult Qimarox before using a machine discontinuously. UM Prorunner mk5 WD 1.0 EN... -
Page 22: Working Principles
Description 4.2 Working principles 4.2.1 Product infeed time frame To prevent that a product causes a blockage of a fork, then the infeed must occur in a certain timeframe. When there are no forks in the hatched area (C), it is safe to insert product (A). The height of the hatched area (C) is the maximum product height plus a small margin. - Page 23 Description 4.2.2 Product outfeed time frame To prevent that a fork causes a blockage of a product in the machine, the outfeed must occur within a certain timeframe. The outfeed of product (A) should start immediately after fork (B) has left the hatched area (C).
-
Page 24: Sensors
Description 4.3 Sensors The machine contains the following sensors: The sensors Infeed security sensor (B3) and Outfeed security sensor (B4) are installed on the strip (A). The exact position of the Infeed security sensor (B3) and Outfeed security sensor (B4) depends on the configuration. -
Page 25: Motor
The motor safety relays must meet EN-IEC 60204-1 specifications. The setting range depends on the motor specifications. Refer to the Qimarox Specifications document for drive parameters. The following page (example) of the Specifications document shows the main drive specifications. The OEM gearmotor specifications are given in the 'gearmotor mk5 WD(serial number)' document, which is part of the order documentation. -
Page 26: Control System
4.5.2 Control software The software of the machine is supplied by Qimarox and is described in the specification sheet. For information about the signals, refer to the applicable software block and functional description, that can be downloaded from the Qimarox website. -
Page 27: Guiding Of The Carriers
Description 4.6 Guiding of the carriers Each fork (A) is attached to a leveller (B). The leveller (B) can turn and is installed in the trolley (C). The leveller has 4 guide wheels (A) that follow the steel guides in the columns. -
Page 28: Machine In A System
Note Refer to the Specifications document for the correct settings for the machine and conveyors. A. Machine B. Discharge conveyor (optionally supplied by Qimarox) C. Outfeed conveyor (optionally supplied by Qimarox) D. Infeed conveyor (optionally supplied by Qimarox) E. Feeding conveyor (optionally supplied by Qimarox) UM Prorunner mk5 WD 1.0 EN... - Page 29 The feeding conveyor (optionally supplied by Qimarox) must be equipped with sensor S1 and a brake to start and stop the conveyor. Thus the feeding conveyor operates as a dosing conveyor.
-
Page 30: Specifications
Because the infeed is discontinuous, it may be necessary to buffer the product at the feeding conveyor(s). If this is not possible and stops of the infeed are undesired, contact Qimarox. 4.7.2 Product outfeed The outfeed conveyor (optionally included) must be equipped with sensor B8 monitoring the centre of the conveyor and sensor B16 monitoring the end of the conveyor. - Page 31 If you want to use the machine outside the recommended specifications, you must contact Qimarox to check if this is possible. Inappropriate and/or modified use of the machine can result in dangerous safety issues and/or damage. You must obtain written confirmation from Qimarox before using the machine in a modified or unspecified manner.
-
Page 32: Installation
Read all information on transport, lifting, preparation and such in this chapter before you install the machine. The machine is an assembled machine. 5.4 Unpacking 1. Check the packing list when unpacking the machine. 2. Immediately report damaged or missing parts to Qimarox. UM Prorunner mk5 WD 1.0 EN... -
Page 33: Location
Installation 5.5 Location Refer to the machine layout drawing for detailed information about the location of the machine. The minimum distance between the moving parts of the machine and other equipment or structures must be 100 mm (A). For maintenance, keep a free space of approximately 500 mm (B) on the rear side of the column. -
Page 34: On-Site Transport
5.6.2 General preparation Calculate the total weight before moving the machine. 1. The weight of the machine delivered by Qimarox is given on the type plate. Refer to section 2.1. - Add to the weight of the machine the weights of any attachments to the machine, for example, product conveyors. - Page 35 Installation 2. Check the floor load of the floor on which the machine will be placed. 3. Check the floor load of the floor on which the hoisting system is placed. 4. Make sure that the floor, on which the machine will be placed, is level and clean. 5.
-
Page 36: Preparations For A Qimarox Installation (Optional)
1. Indicate the contact person to whom the mechanic of Qimarox must report when arriving or leaving before and after the installation. 2. Make sure that the mechanic of Qimarox is assisted by qualified mechanics of the client. Refer to section 3. - Page 37 Installation 5.8.1 Preparation • Make sure that a hoisting system above the machine is available. • Make sure that the surface is level and meets the requirements for supporting the total weight of the transport system. Refer to the Machine layout drawing. •...
- Page 38 Installation 5.8.2 Installing a fully assembled machine 1. Position the machine using a hoisting system. 2. Make sure that products run smoothly over the gap: - from the feeding conveyor to the infeed conveyor, - from the outfeed conveyor to the discharge conveyor. The maximum gap size is 25 mm.
- Page 39 Installation 7. Attach the support brackets for lateral support. 8. Remove the hoisting belt or the hoisting chain from the machine. 9. Remove the transport support (A & B). 10. Check the tension of the chain. Refer to section 6.6. Note Keep the transport supports for any future transport.
-
Page 40: Installing Conveyors
Installation 5.9 Installing conveyors Preparation: WARNING Fix the bottom section to the floor if the machine is installed in the final position. • Make sure that a hoisting system is available above the conveyor. To install the conveyor: 1. Use hoisting system to position the conveyor. 2. -
Page 41: Maintenance
WARNING The maintenance schedule is based on 2000 running hours or annually. Adjust the maintenance frequency to the actual number of running hours per year. If required, Qimarox can carry out maintenance activities. 6.2 Specific safety regulations For optimum functioning of the machine the various machine parts must be regularly maintained. -
Page 42: Preventive Maintenance Schedule
Maintenance 6.3 Preventive maintenance schedule 6.3.1 Daily maintenance Daily preventive maintenance – vertical conveyor. Item Task Action when required by the task Guards and covers Examine for visible Replace damaged guards damage. and/or covers. Make sure that the Install the mounting mounting materials are materials correctly. - Page 43 Maintenance Item Task Action when required by the task Curve plates Examine for dirt. Clean. Refer to section 6.4. Examine for visible Replace the curve plate: deformation of the For the bottom side, running surface. refer to section 6.9.8. For the upper side, refer to section 6.9.9.
- Page 44 Maintenance Item Task Action when required by the task Clamping bush of driving Examine if the clamping Tighten the socket screws sprocket bush screws are tight. to the following torques: - shaft diameter ≤ 40 mm: 17 Nm - shaft diameter ≤ 65 mm: 41 Nm - shaft diameter ≤...
- Page 45 Maintenance Item Task Action when required by the task Rubber profile carriage in Examine for slack. Replace the rubber profile the trolleys. if required (every 2000 running hours). Other parts of the trolleys. Examine for slack and Replace the parts if wear.
-
Page 46: Cleaning
2. Lock the main switch with a padlock. 3. Remove deposit and dirt by hand. 4. Report any damage to the technically responsible person or to Qimarox. 5. Make sure that any damage is repaired before a start of the machine. -
Page 47: Lubrication
Maintenance 6.5 Lubrication 6.5.1 Lubricate the chain Foodgrade application: Lubricate the chain with Kluber UH1-1500 (foodgrade lube) or equivalent. Non foodgrade function: Lubricate the chain with Nigrider SNY-1 or equivalent. Lubricate should be a mineral oil of good quality. Viscosity should be SAE30. 6.5.2 Lubricate the wheels of the trolleys Lubricate the running surfaces of the wheels with Bel-Ray No-Tox HD Grease (62279, 62280) or equivalent. - Page 48 Maintenance If the chain elongation is 3% or more, replace the chain immediately. Refer to section 6.9.10. 6.6.3 Adjusting the chain tension 1. Loosen the four bolts M12 (A) at the side of the tension block. 2. Loosen the eight bolts (B) at the back, three bolts on each side, that attach the curve frame to...
-
Page 49: Bottom Sprocket Plain Bearing Rejection Dimension
3D-pdf for the specifications of the machine parts. WARNING Always replace parts with parts supplied or recommended by Qimarox. If parts are not replaced with supplied or recommended Qimarox parts, the machine warranty becomes null and void. Refer to section 2.3. UM Prorunner mk5 WD 1.0 EN... - Page 50 Maintenance 6.9.2 Trolley Remove the trolley (preparation) 1. Move the fork (A) to the bottom sprocket (B). 2. Switch the main switch to "OFF". 3. Lock the main switch with a padlock. 4. Loosen the tension of the chain. Refer to section 6.6.3. 5.
- Page 51 Maintenance 8. Carefully remove the leveller (A) from the machine and the shim ring (B). Remove the trolley 1. Remove the front cover (A). 2. Remove the curve plate (A). UM Prorunner mk5 WD 1.0 EN...
- Page 52 Maintenance 3. Remove the closing/master links (A, B, C) at both sides of the trolley. 4. Remove the trolley (A). Replace the trolley 1. Check the parts for wear. 2. Replace worn parts by new ones. Refer to section 6.9.3. 3.
- Page 53 Maintenance 6.9.3 Wheel of the trolley Remove the wheel 1. Remove the trolley. Refer to section 6.9.2. 2. Remove the bolt (A). 3. Use a pulley puller, when necessary, to remove the wheel (B) Replace the wheel 1. Check the parts for wear. 2.
- Page 54 Maintenance 3. Remove the rubber profile (B). Replace the rubber profile 1. Check the parts for wear. 2. Replace worn parts by new ones. 3. Reassemble the parts in reverse order. 6.9.5 Bearing of the trolley Remove the plain bearing – front side 1.
- Page 55 Maintenance 6. Remove the bearings at the front side (A) and rear side (B). Replace the leveller 1. Check the parts for wear. 2. Replace worn parts by new ones. 3. Reassemble the parts in reverse order. 6.9.6 Fork Remove the fork 1.
- Page 56 Maintenance 6. Remove the bolt (B). 7. Remove the fork (A). Replace the fork 1. Check the parts for wear. 2. Replace worn parts by new ones. 3. Reassemble the parts. 4. Make sure that the fork is level. 6.9.7 Wheel of the Leveller 1.
- Page 57 Maintenance 4. Remove the side covers (A). 5. Remove the curve plate (A). Replace the curve plate – bottom side 1. Check the parts for wear. 2. Replace worn parts by new ones. 3. Reassemble the parts in reverse order. UM Prorunner mk5 WD 1.0 EN...
- Page 58 Maintenance 6.9.9 Curve plate – top section Uninstall the curve plate 1. Move the fork (A) away from the upper curve plate (B). 2. Switch the main switch to “OFF” 3. Lock the main switch with a padlock. 4. Remove the side covers (A) and top cover (B). 5.
- Page 59 Maintenance 6.9.10 Chain General Warning Make sure that there are no products on the fork. Make sure that the whole chain is replaced when done. Replace the chain one section at a time. This provides for safe replacement of the complete chain without having to remove it from the top of the machine.
- Page 60 Maintenance 6. Release the tension of the chain by loosening the tensioning bolt. Refer to section 6.6.3. 7. Remove the locking plates (C) on both sides of the chain. The locking plates (C) attach the end link (A) to the catch (B). 8.
- Page 61 Maintenance 6.9.11 Bottom sprocket and bearing Remove the bottom sprocket 1. If necessary, remove the trolley. Refer to section 6.9.2. 2. Move the trolley away from the tensioning sprocket. 3. Remove or split the chain section. Refer to section 6.9.10. 4.
- Page 62 Maintenance Install the bottom sprocket Note Illustrations for the replacement procedure: see the illustrations for the removal procedure in reverse order. 1. Install the sprocket (B) onto the shaft. 2. Align the sprocket. 3. To align the sprocket with the side guides (B) of the chain, use a ruler (A).
- Page 63 Maintenance Caution Align the sprocket correctly to prevent damage to the white wheels of the trolley. 6.9.12 Upper sprocket and bearing Remove the drive sprocket 1. Remove the front cover. 2. Switch the main switch to “OFF”. 3. Lock the main switch with a padlock.
- Page 64 Maintenance 5. Tighten the clamping bush (A) in the indicated sequence (1 to 8). Use the following torques: ≤ 40 mm: 17 Nm Shaft diameter ≤ 65 mm: 41 Nm Shaft diameter ≤ 95 mm: 83 Nm Shaft diameter 6. Install the chain. Refer to section 6.9.9. 7.
- Page 65 Maintenance 6.9.13 Replace the drive – R-series General Lock the upper sprocket Warning To prevent the upper sprocket to tilt, fall or turn, use the auxiliary tool (item 1001052). The auxiliary tool attaches the sprocket to the frame. Attach the sprocket correctly to prevent injury and to easily remove and replace the drive or shaft.
- Page 66 Maintenance Warning Before you loosen the bolts, secure the drive to prevent it from tipping or falling down. 1. Lock the upper sprocket (B). 2. Disconnect the electrical wires. 3. Remove the clamping bush (A). 4. Remove the bolts (C). 5.
-
Page 67: Troubleshooting
Troubleshooting Troubleshooting This section includes the troubleshooting information of the vertical conveyor. Problem Possible cause Solution Product blockage at Sensor defect. 1. Go to manual control. conveyor. 2. Move the fork in the opposite direction to release the clamped product. 3. - Page 68 Troubleshooting 2. Contact the motor supplier or Qimarox. Problem Possible cause Solution The motor starts with Electrical faults such as 1. Check the starting difficulty. "The motor does not run current and the and makes a humming nominal power. noise". The motor uses 2.
- Page 69 Troubleshooting Short circuit in the Remove the motor for winding. Short circuit to repair. Refer to sections earth. 6.9.13 or 6.9.14. Problem Possible cause Solution The motor does not run. Incorrect setting of the Check and/or adjust the The motor protection is motor protection.
- Page 70 Troubleshooting Wheels, sprockets or 1. Examine wheels, bearings are damaged or sprockets and dirty. bearings for damage or dirt. 2. Replace or clean them if necessary. Problem Possible cause Solution Irregular movement of the The tension of the chain Tension the chain. Refer chain.
-
Page 71: Ec Declaration Of Conformity
EC declaration of conformity EC declaration of conformity The EC declaration in this user manual is unsigned. The specific declaration for the machine can be found either in the specification sheet or in the separate document supplied with the documentation of the machine. Note Additional installation instructions may apply to the machine. - Page 72 EC declaration of conformity Page 1 of conformity of the Declaration Machinery in accordance with Directory 2006/42/EC, Annex II, point (Original declaration) Qimarox B.V Nobelstraat 43 3846 CE Harderwijk The Netherlands Telephone +31 (0) 341 436 700 E-mail info@qimarox.com hereby declares that the undersigned is authorised to act on its behalf to compile...
-
Page 73: Ce Installation Instructions
Machinery Directive, the system integrator must have these tests performed by a competent person before initial commissioning. A test report must be signed by the integrator and added to the documentation. A copy must be sent to Qimarox. See the “Testing Qimarox vertical conveyors manual”. -
Page 74: Electrical Circuit Diagrams
Electrical circuit diagrams Electrical circuit diagrams 9.1 Standard electric drawings Download the electrical drawings of the machine from: https://www.qimarox.com. If the electrical drawings apply, the overview of all electrical components is listed on the Specifications document. Note The specifications document shown is an example If the standard electrical drawings do NOT apply, the electrical drawings are included with the machine. -
Page 75: Drives
Electrical circuit diagrams 9.2 Drives 9.2.1 Drive type: SEW 3PH Circuit diagram AC motor: https://www.qimarox.com/download/circuit-diagram-ac-motor/ Circuit Diagram TF protection - motor protection: https://www.qimarox.com/download/circuit-diagram-tf-protection-motor-protection/ Circuit Diagram brake protection: https://www.qimarox.com/download/circuit-diagram-brake-protection/ Common connection diagram: https://www.qimarox.com/download/common-connection-diagram/ UM Prorunner mk5 WD 1.0 EN... -
Page 76: Overload Test Report
Overload test report 10 Overload test report The overload test report in this user manual is unsigned. The specific report for the machine is a separate document supplied with the documentation of the machine. UM Prorunner mk5 WD 1.0 EN... - Page 77 Overload test report Nobelstraat 43 3846 CE Harderwijk Tel: +31 341 436 700 E-mail: info@qimarox.com Internet: www.qimarox.com UM Prorunner mk5 WD 1.0 EN...
Need help?
Do you have a question about the Prorunner mk5 Washdown and is the answer not in the manual?
Questions and answers