Denon DRA-F107 - AM-FM STEREO RECEIVER Manual
- Bedienungsanleitung (30 pages) ,
- Owner's manual (29 pages) ,
- Service manual (84 pages)
Advertisement
- 1 Getting Started
- 2 Connections
- 3 Setup
- 4 Playback
- 5 Setting the Timer
- 6 Other Functions
- 7 About System Functions
- 8 Troubleshooting
- 9 Specifications
- 10 IMPORTANT SAFETY INSTRUCTIONS
- 11 Documents / Resources
Getting Started
Accessories
Check that the following parts are supplied with the product.

- Remote control (RC-1127): 1
- R03/AAA batteries: 2
- Power cord:
- for continental model only (Cord length: Approx. 1.9 m): 1
- for UK model only (Cord length: Approx. 1.9 m): 1
- AM loop antenna: 1
- FM indoor antenna: 1
- DAB indoor antenna (for UK model only): 1
- Owner's manual: 1
- Service station list: 1
Cautions on Handling
- Before turning the power switch on
Check once again that all connections are correct and that there are no problems with the connection cables. - Power is supplied to some of the circuitry even when the unit is set to the standby mode. When traveling or leaving home for long periods of time, be sure to unplug the power cord from the power outlet.
- About condensation
If there is a major difference in temperature between the inside of the unit and the surroundings, condensation (dew) may form on the operating parts inside the unit, causing the unit not to operate properly.
If this happens, let the unit sit for an hour or two with the power turned off and wait until there is little difference in temperature before using the unit. - Cautions on using mobile phones
Using a mobile phone near this unit may result in noise. If so, move the mobile phone away from this unit when it is in use. - Moving the unit
Turn off the power and unplug the power cord from the power outlet. Next, disconnect the connection cables to other system units before moving the unit. ![warning]() Note that the illustrations in these instructions may differ from the actual unit for explanation purposes.
Note that the illustrations in these instructions may differ from the actual unit for explanation purposes.
Cautions on Installation
 Note: For proper heat dispersal, do not install this unit in a confined space, such as a bookcase or similar enclosure.

About the Remote Control Unit
Operations possible by remote control
- Operations on the DRA-F107
- Operating components connected to the DRA- F107 by system cable
When the DCD-F107 CD player (sold separately) is connected to the DRA-F107 by system cable, the remote control signals received by the DRA-F107 are transmitted to the DCD-F107 to operate the DCD-F107.
 For instructions on system connections, see "About System Functions".
Inserting the Batteries
- Remove the remote control unit's rear cover.
![]()
- Set two R03/AAA batteries in the battery compartment in the indicated direction.
![]()
- Put the rear cover back on.


NOTE
- Replace the batteries with new ones if the set does not operate even when the remote control unit is operated close to the unit.
- The supplied batteries are only for verifying operation.
- When inserting the batteries, be sure to do so in the proper direction, following the "
![]() " and "
" and "![]() " marks in the battery compartment.
" marks in the battery compartment. - To prevent damage or leakage of battery fluid:
- Do not use a new battery together with an old one.
- Do not use two different types of batteries.
- Do not attempt to charge dry batteries.
- Do not short-circuit, disassemble, heat or dispose of batteries in flames.
- If the battery fluid should leak, carefully wipe the fluid off the inside of the battery compartment and insert new batteries.
- Remove the batteries from the remote control unit if it will not be in use for long periods.
- Used batteries should be disposed of in accordance with the local regulations regarding battery disposal.
Operating Range of the Remote Control Unit
Point the remote control unit at the remote sensor when operating it.

NOTE
The set may function improperly or the remote control unit may not operate if the remote control sensor is exposed to direct sunlight, strong artificial light from an inverter type fluorescent lamp or infrared light.
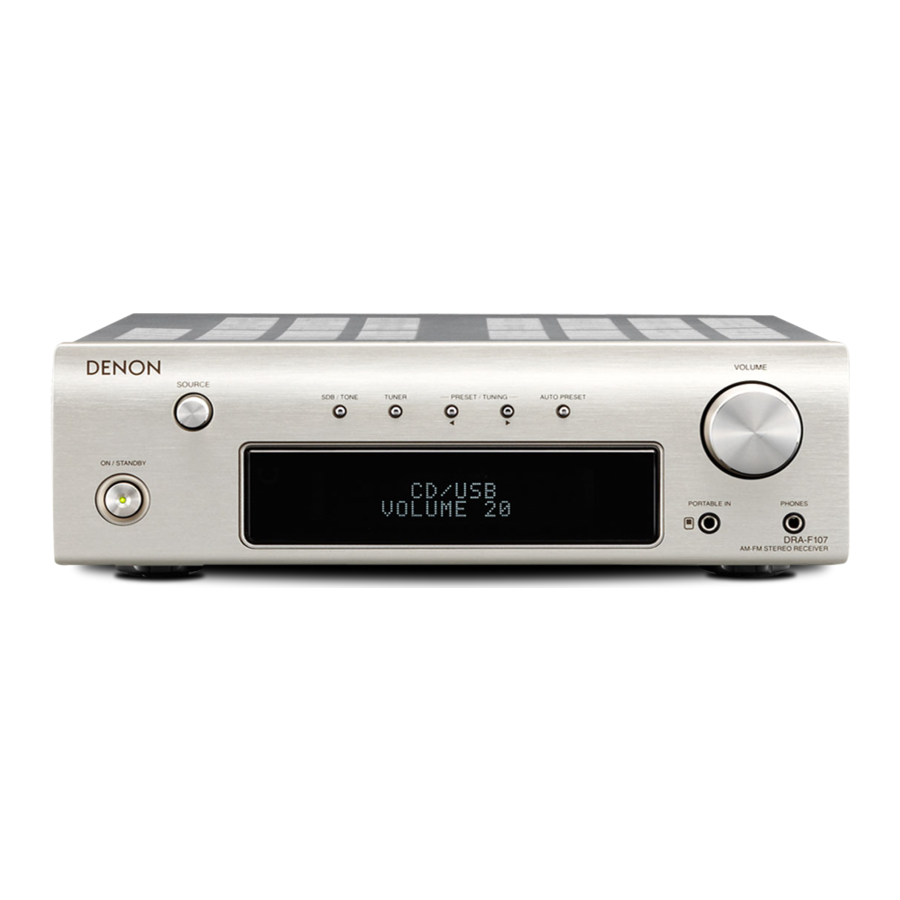
Part Names
Front Panel

- Power operation button (ON/STANDBY)
- Power indicator
- Remote control sensor
- Display
- PORTABLE IN jack
- Headphones jack (PHONES)
- Master volume control knob (VOLUME)
- Auto tuner preset button (AUTO PRESET)
- Preset/tuning buttons (PRESET/TUNING)
- TUNER button
- Super Dynamic Bass/Tone control button (SDB/TONE)
- Source selection knob (SOURCE)
Display

- Information display
Various information is displayed here. - Remote control signal reception indicator
- Timer operation indicator
- Tuner reception mode indicators
- Tone indicators
SDB: Lights when the super dynamic bass function is set to "ON".
TONE: Lights when the tone (bass/treble) is being adjusted.
Rear Panel

- Analog input terminals
- SIGNAL GND terminal
- Analog output terminals
- Speaker terminals (SPEAKERS)
- AC inlet (AC IN)
- AC outlet
- SYSTEM CONNECTOR jack
- DOCK CONTROL jack
- FM/AM antenna terminals
- DAB ANTENA terminal (UK model only)
- MONO OUT terminal
Remote Control Unit
Buttons for operating the receiver
Amplifier operations
The buttons below can be operated regardless of the currently set function.

- DIMMER button
- Sleep timer button (SLEEP)
- Source select button (SOURCE)
- Master volume control buttons (VOLUME)
- Super Dynamic Bass/Tone control selection button (SDB/TONE)
- CLOCK button
- ON/STANDBY button
- MUTE button
Tuner operations
The buttons below can be operated when the function is set to "TUNER".
- Number buttons (0 ~ 9, +10)
- TUNER button
- MENU button
- DAB/RDS button
- CLEAR/DEL button
- Tuning buttons (TU +/–)
- Preset channel buttons (CH +/–)
- Cursor buttons (
![]() )
) - ENTER/Memory button (ENTER/MEMO)
 )
) Buttons for operating Control Dock for iPod (ASD-11R or ASD- 3N/3W, sold separately)
Control Dock for iPod operations
The buttons below can be operated when the function is set to "iPod".

- RANDOM button
- Stop button (
![]() )
) - Cursor buttons (
![]() ) Item selection
) Item selection - Cursor buttons (
![]() ) Movement between menu layers
) Movement between menu layers - TIME/DISPLAY button
- REPEAT button
- Search button (
![]() )
) - Skip button (
![]() )
) - DOCK play/pause button (DOCK
![]() )
) - REMOTE/BROWSE button
- ENTER/Memory button (ENTER/MEMO)
 )
)  )
)  )
) Buttons for operating components connected by system cable
For system functions and components that can be operated, see "About System Functions".
CD operations
The buttons below can be operated when the function is set to "CD/USB".

- Number buttons (0 ~ 9, +10)
- PROG/DIRECT button
- RANDOM button
- CD play/pause button (CD
![]() )
) - Folder mode select button (FOLDER MODE)
- Cursor buttons (
![]() )
) - Display select button (TIME/DISPLAY)
- CLEAR/DEL button
- REPEAT button
- Search button (
![]() )
) - Skip button (
![]() )
) - Stop button (
![]() )
) - Folder select button (FOLDER +/–)
- ENTER/Memory button (ENTER/MEMO)
USB/iPod operations
When the function is set to "CD/USB", the USB memory device or iPod connected to the USB port on the DCD-F107 which is in turn connected by system cable to the DRA-F107 can be operated with the buttons below.

- Number buttons (0 ~ 9, +10)
- RANDOM button
- Stop button (
![]() )
) - Cursor buttons (
![]() )
) - Folder mode selection button (FOLDER MODE)
- Cursor buttons (
![]() )
) - Display selection button (TIME/DISPLAY)
- REPEAT button
- Search button (
![]() )
) - Skip button (
![]() )
) - USB/iPod play/pause button (USB/iPod
![]() )
) - REMOTE/BROWSE button
- ENTER/Memory button (ENTER/MEMO)
Connections
Preparations
For details about system connections, also see "About System Functions".
NOTE
- Do not plug in the power cord until all connections have been completed.
- When making connections, also refer to the operating instructions of the other components.
- Be sure to connect the left and right channels properly (left with left, right with right).
- Do not bundle power cords together with connection cables. Doing so can result in humming or noise.
Assembling the AM loop antenna

- Put the stand section through the bottom of the loop antenna from the rear and bend it forward.
- Insert the projecting part into the square hole in the stand.
Using the AM Loop Antenna
To use suspended on a wall

Suspend directly on the wall without assembling.
To use standing alone

Use the procedure below to assemble.
Antenna terminals
AM/FM
The AM and FM reception sensitivity depends on the place the antenna is set and the direction in which it is set. Set it so that reception is best.

Connecting the AM loop antenna
- Push the lever.
![]()
- Insert the conductor.
![]()
- Return the lever.
![]()


NOTE
- Make sure the AM loop antenna lead terminals do not touch metal parts of the panel.
- Do not connect two FM antennas simultaneously.
DAB (for UK Model Only)
Installing the DAB indoor antenna DAB station reception.

Cables Used for Connections
Select the cables according to the equipment being connected.
Audio cables
Analog connections (stereo)

Stereo pin-plug cable
Analog connections (for subwoofer)

Pin-plug cable
Analog connections (for portable player)

Stereo mini-plug cable
System connections
System cable (included with the system device)
Speaker connections

Speaker cables
Speaker Connections

When using an SC-F107 (speaker system, sold separately), we recommend using the receiver's optimizing filter.
Signals adjusted for the SC-F107's properties are output.
(" Convenient Functions").
Connecting the Speaker Cables
Carefully check the left (L) and right (R) channels and + (red) and – (black) polarities on the speakers being connected to the DRA-F107, and be sure to interconnect the channels and polarities correctly.
- Peel off about 10 mm of sheathing from the tip of the speaker cable, then either twist the core wire tightly or terminate it.
![]()
- Turn the speaker terminal counterclockwise to loosen it.
![]()
- Insert the speaker cable's core wire to the hilt into the speaker terminal.
![]()
- Turn the speaker terminal clockwise to tighten it.
![]()


NOTE
- Use speakers with an impedance of 4 to 16 Ω/ohms. The protection circuit may be activated if speakers with an impedance other than specified are used.
- Connect the speaker cables in such a way that they do not stick out of the speaker terminals. The protection circuit may be activated if the core wires touch the rear panel or if the + and – sides touch each other ("Protection circuit").
- Never touch the speaker terminals while the power supply is connected. Doing so could result in electric shock.
Protection circuit
The protection circuit will be activated in the following cases:
- When the speaker cable's core wires are touching the rear panel or screws or when the speaker cable's + and – sides are touching
- When the surrounding temperature is extremely high
- When the internal temperature rises due to extended use with a high output
When the protection circuit is activated, the speaker output is cut off and the power indicator flashes orange. If this happens, unplug the power cord, then check the connections of the speaker cables and input cables. If the set's temperature is extremely high, wait for it to cool off and improve surrounding ventilation. After doing this, plug the power cord back in.
If the protection circuit is activated though there are no problems in ventilation around the set or in connections, the set could be damaged. Turn off the power, then contact a DENON servicing and inquiry outlet.
Connecting a subwoofer

Connecting the Playback Components
CD Player

When connecting the DRA-F107 and DCD-F107 (CD player, sold separately), make system connections. This enables operation using the DRA-F107's remote control unit and the various system functions. ("About System Functions")
Record Player

- Playback with an MC cartridge is not possible with the DRA-F107. When using an MC cartridge, use a commercially available head amplifier or booster transformer.
- With some record players, noise may be generated when the ground wire is connected. If so, disconnect the ground wire.
NOTE
The DRA-F107's SIGNAL GND terminal is meant to reduce noise when a record player is connected. This is not a safety ground terminal.
iPod ®

Use a DENON control dock for iPod (ASD-11R or ASD-3N/3W, sold separately) to connect the iPod to the DRA-F107.
- When using a control dock for iPod, the Control Dock for iPod must be set. For details, refer to the operating instructions of the Control Dock for iPod.
- When the control dock for iPod is connected, the function indicator switches from "AUX1" to "iPod".
- To use an iPod, see "iPod ® Playback".
Connecting a portable player

Connecting the Recording Components

Connecting the Power Cord
Wait until all connections have been completed before connecting the power cord.
For Continental model only

SWITCHED (Total capacity: 100 W (0.43 A): The power supply to the outlet turns ON and OFF with the main unit's ON/STANDBY button. Make sure the total power consumption of the connected devices does not exceed 100 W (0.43 A).
For UK model only

NOTE
- Insert the AC plugs securely. Incomplete connections could cause noise.
Do not unplug the power cord before the power indicator turns off and the DRA-F107 enters Standby mode. - Only use the supplied power cord.
- Be sure the power cord is unplugged from the power outlet before connecting or disconnecting it to the AC IN.
- The AC outlet is for use with audio components. Do not use it to connect hair dryers or any equipment other than audio components.
Once Connections are Completed
Turning the Power On
Setup
Symbols used to indicate buttons in this manual
Button located on both the main unit and the remote control unit: BUTTON
Button only on the main unit: <BUTTON>
Button only on the remote control unit: [BUTTON]

Setting the Current Time (24-Hour Display)
[Example] Setting the current time to 10:15 am
- Press ON/STANDBY to turn the power on.
- Press [MENU].
Various types of setting menus are displayed. - Use [
![]() ] or [
] or [![]() ] to select "CLOCK SETUP", then press [ENTER/MEMO] or [
] to select "CLOCK SETUP", then press [ENTER/MEMO] or [![]() ]
]
![]()
- Use [
![]() ] or [
] or [![]() ] to set the "hours".
] to set the "hours".
![]()
- Press [ENTER/MEMO] or [
![]() ]
]
The "minutes" display flashes. - Use [
![]() ] or [
] or [![]() ] to set the "minutes".
] to set the "minutes".
![]()
- Press [ENTER/MEMO] or [
![]() ]
]
The current time is set, and the normal display reappears.


- Checking the current time when the power is on
Press [CLOCK].
Press once more and the display returns to its original condition. - Checking the current time when the power is set to standby
Press [CLOCK].
The current time is displayed for 10 seconds.
NOTE
The time cannot be set when in the standby mode. Turn on the power first.
Playback
Symbols used to indicate buttons in this manual
Button located on both the main unit and the remote control unit: BUTTON
Button only on the main unit: <BUTTON>
Button only on the remote control unit: [BUTTON]

Preparations
Turning the Power On
Press ON/STANDBY.
- The power turns on. Press again to set the power to standby.
- When the power is turned on, the function that was being used when the power was last turned off is selected ( "Last function memory").
- The receiver switches to the low power consumption mode about 30 seconds after it is set to standby.
Power indicator
Standby: Off
Power on: Green
When the timer is set: Orange
NOTE
Power continues to be supplied to some of the circuitry even when the power is in the standby mode. When leaving home for long periods of time or when traveling, unplug the power cord from the power outlet.
Completely turning off the power
Unplug the power cord from the wall outlet.
* Note that the time setting is cleared when the power cord is unplugged from the outlet.
* The settings made for the various functions may be cleared if the power cord is left unplugged from a power outlet for an extended period of time.
Operations During Playback
Adjusting the Master Volume
Either turn <VOLUME> or press [VOLUME  ].
].
The volume level is displayed.
[Variable range]

Switching the function (input source)
Either turn <SOURCE> or press [SOURCE].

- "PORTABLE IN" is only displayed when a portable player is connected.
- The "iPod (dock)" indicator is displayed when a Control Dock for iPod is connected.
Listening with Headphones
Plug the headphones (sold separately) into the <PHONES>
* The sound from the speakers is automatically cut off.
NOTE
To prevent hearing loss, do not raise the volume level excessively when using headphones.
Adjusting the Tone
- Use SDB/TONE to select the tone parameter to be adjusted.
![]()
- Adjust the volume with <SOURCE> or [
![]() ].
].
* To make other tone adjustments at this time, press SDB/TONE
* If no operation is performed for 5 seconds, the adjustment is retained and the normal display reappears.


 : Emphasize the +10dB bass sound.
[Selectable modes] 
 : Adjusts the bass sound.
[Variable range] 
 : Adjusts the treble sound.
[Variable range] 
 : Adjusts the left/right volume balance.
[Variable range] 
Press [![]() ] when you want to adjust the left channel, [
] when you want to adjust the left channel, [![]() ] when you want to adjust the right channel.
] when you want to adjust the right channel.
 : The tone is not adjusted.
Settings made upon purchase:
- SDB - OFF
- BASS - 0dB
- TREBLE - 0dB
- BALANCE - CENTER
SDB and BASS can be set simultaneously.
Turning the Sound Off Temporarily (Muting)
Press [MUTE].
The "MUTE ON" is displayed.
To cancel, press [MUTE] again.
(The mute mode is also canceled when the <VOLUME> is turned or a [VOLUME  ] is pressed.)
Switching the Brightness of the Display
Press [DIMMER].

* The display's brightness switches each time the button is pressed.
TUNER Playback
Tuning in Broadcast Stations
Connect the antenna beforehand.
- Press TUNER to select the reception band.
![]()
* UK model only
[About the display]
When "FM AUTO" is selected: "AUTO" is displayed.
When "FM MONO" is selected: "MONO" is displayed.
When "AM" is selected: The reception mode is not displayed. - Use [TU –, TU +] to select the reception band.
When a station is received, the "TUNED" indication will light.

- If the function is set to something other than "TUNER", press TUNER to switch the function to "TUNER".
- The function can also be switched to "TUNER" using <SOURCE> or [SOURCE].
- To tune automatically
Press and hold in [TU –, TU +] to tune in stations automatically.
* Stations whose signal is weak cannot be tuned in.
* In the DAB mode, tuning only moves to receivable stations, so auto tuning is not possible. - To stop auto tuning
Press [TU –, TU +]. - Tuning using the PRESET/TUNING buttons on the main unit
See "Operating using the PRESET/TUNING buttons on the main unit".
A humming sound may be heard when using a TV nearby while receiving AM programs. If this happens, move the system as far from the TV as possible.
Symbols used to indicate buttons in this manual
Button located on both the main unit and the remote control unit: BUTTON
Button only on the main unit: <BUTTON>
Button only on the remote control unit: [BUTTON]

About the FM Broadcast Reception Status Display
When the reception band mode is set to "FM AUTO", the "ST" indicator lights when a stereo broadcast is tuned in.
If the signal is weak and stable stereo reception is not possible, select "FM MONO" to receive in monaural.
Automatically Presetting FM Stations (Auto Preset)
Up to 40 stations can be preset. Auto preset is not possible with AM broadcast stations.
- Press <AUTO PRESET>.
- Press <AUTO PRESET> while "FM AUTO PRESET" is flashing.
Broadcast stations are preset automatically.
Auto presetting with the remote control unit
- Press [MENU].
- Select "TUNER SETUP" using [
![]() ] and [
] and [![]() ], then press [ENTER/MEMO] or [
], then press [ENTER/MEMO] or [![]() ].
]. - Select "FM AUTO PRESET" using [
![]() ] and [
] and [![]() ], then press the [ENTER/MEMO] or [
], then press the [ENTER/MEMO] or [![]() ].
]. - Press [ENTER/MEMO] while "FM AUTO PRESET" is flashing.
Broadcast stations are preset automatically.
- Canceling auto presetting
Press TUNER or [MENU].
Broadcast stations whose antenna signal are weak cannot be preset automatically. If you wish to preset such stations, tune them in manually.
NOTE
When the auto presetting operation is performed, the new presettings overwrite the previous presettings.
Giving station names to preset channels
Names of up to 8 characters can be input.
- Tune in the preset channel you want to name.
- Press [ENTER/MEMO] twice.
The display switches to the station name input display. - Input the station name.
Names of up to 8 characters can be input.- [
![]() ,
, ![]() ] button: Selects the character.
] button: Selects the character. - [
![]() ] button: Moves the cursor to the right.
] button: Moves the cursor to the right. - [CLEAR/DEL] button: Deletes the currently selected character.
* Characters that can be input.
A ~ Z, 0 ~ 9, ^ ' ( ) * +, -. / = (space)
- [
- Press [ENTER/MEMO].
The characters you have input are entered.
* To give names to other stations, repeat steps 1 to 4.
Presetting FM/AM Stations Manually
Up to 40 stations (total for FM and AM) can be preset.
- Tune in the station you want to preset.
- Press [ENTER/MEMO].
The minimum number display "P– –" for the unregistered preset flashes. - Select the number to be preset using [NUMBER] ( 0 ~ 9, +10 ) or [CH –, CH +] and press [ENTER/MEMO].
The reception frequency and reception mode are preset and the display switches to the station name input display. - Input the station name.
Names of up to 8 characters can be input.- [
![]() ,
, ![]() ] button: Selects the character.
] button: Selects the character. - [
![]() ] button: Moves the cursor to the right.
] button: Moves the cursor to the right. - [CLEAR/DEL] button: Deletes the currently selected character.
* Characters that can be input.
A ~ Z, 0 ~ 9, ^ ' ( ) * +, -. / = (space)
- [
- If you do not want to input a station name, press [ENTER/MEMO] without inputting anything else.
- If you make a mistake when inputting, perform the procedure again. Whatever was previously input is overwritten.
- Press [ENTER/MEMO].
The characters you have input are entered.
* To give names to other stations, repeat steps 1 to 4.
Listening to Preset Stations
Use [NUMBER] ( 0 ~ 9, +10 ) or [CH –, CH +] to select the preset number.
Operating using the PRESET/TUNING buttons on the main unit
PRESET/TUNING on the main unit can be used both for switching the preset channel and for tuning.
Before operating them, switch the receiver to the "preset mode" or "tuning mode" using the procedure below.
- Press [MENU].
- Select "TUNER SETUP" using [
![]() ] and [
] and [![]() ] , then press the [ENTER/MEMO] or [
] , then press the [ENTER/MEMO] or [![]() ].
]. - Select "MODE SELECT" using [
![]() ] and [
] and [![]() ] , then press the [ENTER/MEMO] or [
] , then press the [ENTER/MEMO] or [![]() ].
]. - Use [
![]() ] or [
] or [![]() ] to select "PRESET MODE" or "TUNING MODE", then press [ENTER/MEMO]
] to select "PRESET MODE" or "TUNING MODE", then press [ENTER/MEMO]
<PRESET/TUNING> are set to operate in the selected mode.
RDS (Radio Data System)
RDS (works only on the FM band) is a broadcasting service which allows a station to send additional information along with the regular radio program signal.
The following four types of RDS information can be received with this unit:
RDS Search
Use this function to automatically tune to FM stations that provide the RDS service.
- Press TUNER to select "FM".
- Press [DAB/RDS].
- Select "RDS SEARCH" using [
![]() ] and [
] and [![]() ] , then press the [ENTER/MEMO] or [
] , then press the [ENTER/MEMO] or [![]() ].
]. - Press [
![]() ].
].
Automatically begin the RDS search operation.
* If no RDS station is found, "NO STATION" is displayed.

PTY Search
Use this function to find RDS stations broadcasting a designated program type (PTY).
For a description of each program type, refer to "Program Type (PTY)".
- Press TUNER to select "FM".
- Press [DAB/RDS].
- Select "PTY SEARCH" using press the [
![]() ] and [
] and [![]() ], then press the [ENTER/MEMO] or [
], then press the [ENTER/MEMO] or [![]() ].
]. - Use [
![]() ] to call out the desired program type.
] to call out the desired program type. - Press [
![]() ].
].
Automatically begin the PTY search operation.
* If no program of the specified type is found, "NO STATION" is displayed.

Symbols used to indicate buttons in this manual
Button located on both the main unit and the remote control unit: BUTTON
Button only on the main unit: <BUTTON>
Button only on the remote control unit: [BUTTON]

Program Type (PTY)
PTY identifies the type of RDS program. The program types and their displays are as follows:
| NEWS | News | WEATHER | Weather |
| AFFAIRS | Current Affairs | FINANCE | Finance |
| INFO | Information | CHILDREN | Children's programmes |
| SPORT | Sports | ||
| EDUCATE | Education | SOCIAL | Social Affairs |
| DRAMA | Drama | RELIGION | Religion |
| CULTURE | Culture | PHONE IN | Phone In |
| SCIENCE | Science | TRAVEL | Travel |
| VARIED | Varied | LEISURE | Leisure |
| POP M | Pop Music | JAZZ | Jazz Music |
| ROCK M | Rock Music | COUNTRY | Country Music |
| EASY M | Easy Listening Music | NATION M | National Music |
| OLDIES | Oldies Music | ||
| LIGHT M | Light Classical | FOLK M | Folk Music |
| CLASSICS | Serious Classical | DOCUMENT | Documentary |
| OTHER M | Other Music |
TP Search
Use this function to find RDS stations broadcasting traffic programs (TP stations).
- Press TUNER to select "FM".
- Press [DAB/RDS].
- Select "TP SEARCH" using [ENTER/MEMO] [
![]() ] and [
] and [![]() ], then press the or [
], then press the or [![]() ].
]. - Press [
![]() ].
].
Automatically begin the TP search operation.
* "NO STATION" is displayed when there is no traffic information broadcast station.
Traffic Program (TP)
TP identifies programs that carry traffic announcements.
This allows you to easily find out the latest traffic conditions in your area before leaving home.
Viewing Information During Reception
Press [TIME/DISPLAY] while receiving a RDS to display the information currently being broadcast.

*1 Freq: Frequency
*2 PS: Program service name
Radio Text (RT)
RT allows RDS stations to send text messages that appear on the display.
- When the RT mode is turned on while an RDS radio station not offering an RT service is tuned in, "NO TEXT" is displayed on the display, then the mode automatically switches to the PS mode.
- In the same way, the mode automatically switches to the PS mode when the RT service is finished. In this case, the mode automatically switches from the PS mode back to the RT mode when an RT broadcast is resumed.
- The RT mode cannot be set in the AM band or for FM stations not offering RDS broadcasts.
NOTE
The operations described below selecting "RDS Search" will not function in areas in which there are no RDS broadcasts.
Clock Time (CT)
Use this to correct the time of the clock on the DRA-F107.
- During CT reception, press [MENU].
The "AUTO Adj mm: ss" is displayed. - Press [ENTER/MEMO] to set.
The "RDS mm: ss" is displayed.
* The time on the set's internal clock is updated to the currently displayed "CT" time.
Do not operate any buttons while the time is being updated. If buttons are operated, CT reception is not possible and the time is not updated.
Listening to DAB/DAB+ (For UK Model Only)
About DAB (Digital Audio Broadcasting)
- Since the DAB system is broadcasted in digital format, DAB system can supply crystal-clear audio and stable reception even in mobile objects. DAB is a new generation radio which can provide data service and supplementary multi-media services.
- DAB broadcasts multiple services under one Ensemble that are called service components.
- Each component contains inherent programmes; news, music, sports, and many more.
- Each Ensemble and service component has its label, and users can recognize a current broadcasting station and service contents by using the label.
- The main service component is broadcast as Primary while the others are broadcast as Secondary.
- Also rich character information is serviced through Dynamic Labels; song title, artist composer etc.
About DAB+
- The main difference between DAB and DAB+ is the type of audio codec used.
DAB: MPEG2
DAB+: MAEG4 (AAC) - The DRA-F107 can receive both DAB and DAB+ broadcasts.
Tuning in DAB Stations
- Press TUNER to select "DAB".
* When a DAB operation is performed for the first time after purchase, auto scanning is performed automatically. - Press [TU +, TU –] to select the desired broadcast station.
* The broadcast stations are displayed in the order in which they were scanned.
DAB stations can be stored in the preset memory and played in the same way as FM/AM stations.
- "Presetting FM/AM Stations Manually"
- "Listening to Preset Stations"
- Up to 40 stations can be preset (in addition to FM/AM stations).
Auto Scanning Broadcast Stations
Connect the antenna beforehand.
- Press [MENU] during DAB reception.
- Select "TUNER SETUP" using [
![]() ] and [
] and [![]() ], then press the [ENTER/MEMO] or [
], then press the [ENTER/MEMO] or [![]() ].
]. - Select "DAB AUTO SCAN" using [
![]() ] and [
] and [![]() ], then press the [ENTER/MEMO] or [
], then press the [ENTER/MEMO] or [![]() ].
]. - Press [ENTER/MEMO].
The receiver searches for receivable DAB stations.
Symbols used to indicate buttons in this manual
Button located on both the main unit and the remote control unit: BUTTON
Button only on the main unit: <BUTTON>
Button only on the remote control unit: [BUTTON]

Switching the Reception Information for the Currently Tuned in DAB Station
- Perform steps 1 to 2 under "Tuning in DAB stations" to tune in a DAB station.
- Press [TIME/DISPLAY].
* The display switches as shown below each time the button is pressed.
- Data Label Segment:
Text data included in the broadcast is scrolled.
↓ - Station Name:
The service station name is displayed.
↓ - Program Type:
The category of the tuned in station is displayed.
↓ - Ensemble Name:
The ensemble name is displayed.
↓ - Frequency:
The frequency is displayed.
↓ - Signal Quality:
The reception signal sensitivity is displayed (0 to 100).
* If the reception signal sensitivity is 80 or greater, the program can be received without noise.
↓ - Audio Information:
The mode of the currently tuned in station and its bit rate are displayed.
↓ - Data and Time:
The current date and time are displayed.
* When MENU is pressed, the set's internal clock is updated to the currently displayed time.
Making the DAB Settings
- Press [DAB/RDS] during DAB reception.
- Select "item" using [
![]() ] and [
] and [![]() ], then press the [ENTER/MEMO].
], then press the [ENTER/MEMO].
[Selectable items]
 :
:
The reception sensitivity of the currently tuned in frequency is displayed.
* The program can be received without noise when the cursor move to the right of the sensitivity display.

 :
:
The service list is created with the auto scan function.
MULTIPLEX (In order of frequency)  ALPHANUMERIC (In alphabetical order)
 ( Dynamic Range Control ):

 :
:
The DAB module's version is displayed.
DAB Initialize
When the "DAB Initialize" procedure is performed, all the preset memory settings for the stations and DABs are reset.
- Press [MENU] during DAB reception.
- Select "TUNER SETUP" using press the [
![]() ] and [
] and [![]() ], then [ENTER/MEMO] or [
], then [ENTER/MEMO] or [![]() ].
]. - Select "DAB INITIALIZE" using press the [
![]() ] and [
] and [![]() ], then [ENTER/MEMO] or [
], then [ENTER/MEMO] or [![]() ].
]. - Press [ENTER/MEMO].
* Once initialization is completed, auto scanning is performed automatically.
iPod® Playback
With the DRA-F107, you can listen to music on an iPod. It is also possible to operate the iPod from the main unit or remote control unit.
When using a Control Dock for iPod (ASD-11R, ASD-3N or ASD-3W, sold separately), music on an iPod can be played on the receiver. The iPod can be operated from the main unit or remote control unit.

iPod is a trademark of Apple Inc., registered in the U.S. and other countries.
* The iPod may only be used to copy or play contents that are not copyrighted or contents for which copying or playback is legally permitted for your private use as an individual. Be sure to comply with applicable copyright legislation.
Preparations
- Set the iPod on the DENON Control Dock for iPod.
(See the control dock for iPod's operating instructions.) - Either turn <SOURCE> or press [SOURCE] to select "iPod".
- Press [REMOTE/BROWSE] to select the display mode.
The mode switches each time the button is pressed.
| [Selectable mode] | Browse mode | Remote mode | ||
| Display location | Main unit display | iPod display | ||
| Playable files | Audio file | ◯ | ◯ | |
| Video file | ✕ | ◯* | ||
| Active buttons | Remote control unit (DRA-F107) | ◯ | ◯ | |
| iPod | ✕ | ◯ | ||
* Video may not be output, depending on the combination of ASD 11R and iPod.
Browse mode:
Operating mode that shows iPod information on the DRA-F107 display.
In this mode, it is not possible to operate the iPod directly or to perform the operations associated with the slide show function. Set the Remote mode to play slide shows.
Remote mode:
This mode is for operating the iPod directly while watching the information displayed on the iPod's screen.
Playing
- Use [
![]() ], [
], [![]() ], [ENTER/MEMO] or [
], [ENTER/MEMO] or [![]() ] to select the music file to be played.
] to select the music file to be played. - Press [DOCK
![]() ]. Playback starts.
]. Playback starts.
If the function is set to something other than "iPod", press [DOCK  ] to switch the function to "iPod" and start playback ("Auto Function Selector Function").
Remote control and iPod button relations
| Remote control unit buttons | iPod buttons | Operation on the DRA-F107 |
| Dock | | Play the track / Pause the track. |
 | | Play the track from the beginning/Play the next track. |
 Press and hold | Press and hold | Fast-reverse the track/Fast-forward the track. |
 | Click Wheel | Select an item. |
| ENTER/MEMO or ▷ | Select | Enter the selection or plays the track. |
| REMOTE/BROWSE | – | Switch between the browse mode and the remote mode. |
| REPEAT | – | Switch the repeat function |
| RANDOM | – | Switch the shuffle function |
| ◁ | MENU | Display the menu or return to the previous menu. |
Also see the control dock for iPod operating manual regarding connection and operation.
NOTE
- DENON will accept no responsibility whatsoever for any loss of iPod data.
- Depending on the type of iPod and the software version, some functions may not operate.
To Switch the Display
During playback, press [TIME/DISPLAY].
The display switches each time the button is pressed.

Disconnecting the iPod
- Press ON/STANDBY to set the standby mode.
- Remove the iPod from the control dock for iPod.
For instructions on playing an iPod on a DCD-F107 (CD player, sold separately) connected to the receiver by system cable, see the DCD-F107's owner's manual.
Symbols used to indicate buttons in this manual
Button located on both the main unit and the remote control unit: BUTTON
Button only on the main unit: <BUTTON>
Button only on the remote control unit: [BUTTON]

Recording
Recording on an External Device
First connect the device from which you want to record to the DRA-F107.
- Either turn <SOURCE> or press [SOURCE] to choose the input source to be recorded.
- Set the recorder to the recording mode.
* For instructions on operating, see the operating instructions of the connected component. - Start playback on the player.
* For instructions on operating, see the operating instructions of the connected component.
- The signals input to the AUX terminals are not output from the AUX output terminals ("REC").
- Adjusting the volume or tone does not affect the sound being recorded.
Setting the Timer
Timer Playback
The everyday timer, once timer and sleep timer can be set.
Timer order of priority
Timer order of priority The order of priority when the times set for the different timers overlap is as follows:
- Sleep timer
- Once timer
- Everyday timer
If the current time is not set, enter timer setting mode to get time setting mode.
Setting the Timer
- Everyday timer ("EVERY DAY")
Playback starts and stops (the power turns off) at the set times each day. - Once timer ("ONCE")
Playback starts and stops (the power turns off) once only at the set times.
- Press [MENU].
- Select "TIMER SETUP" using [
![]() ] and [
] and [![]() ], then press [ENTER/MEMO] or [
], then press [ENTER/MEMO] or [![]() ]
] - Use [
![]() ] and [
] and [![]() ] to select the timer mode, then press [ENTER/MEMO] or [
] to select the timer mode, then press [ENTER/MEMO] or [![]() ].
].
![]()
ONCE ↔ EVERYDAY - Select the source using [
![]() ] and [
] and [![]() ], then press [ENTER/MEMO] or [
], then press [ENTER/MEMO] or [![]() ].
].
![]()
![]()
* "DOCK" is displayed only connected.


Only when the "TUNER" function is selected
5-1. Select the reception band using [ ] and [
 ], then press [ENTER/MEMO] or [
 ] ( UK model only).
5-2. Select the preset number using [] and [], then press [ENTER/MEMO] [ ].
* When no name has been registered for the selected preset number, the program service or frequency appears after the preset number is displayed.
- Select the "hours" for the timer start time using [
![]() ] and [
] and [![]() ], then press [ENTER/MEMO] or [
], then press [ENTER/MEMO] or [![]() ]
]
![]()
- Select the "minutes" for the timer start time using [
![]() ] and [
] and [![]() ], then press [ENTER/MEMO] or [
], then press [ENTER/MEMO] or [![]() ]
]
![]()
- Select the "hours" for the timer stop time using [
![]() ] and [
] and [![]() ], then press [ENTER/MEMO] or [
], then press [ENTER/MEMO] or [![]() ]
]
![]()
- Select the "minutes" for the timer stop time using [
![]() ] and [
] and [![]() ], then press [ENTER/MEMO] or [
], then press [ENTER/MEMO] or [![]() ]
]
![]()
- Use [
![]() ] and [
] and [![]() ] to select "ON" or "OFF" for the timer, then press [ENTER/MEMO]
] to select "ON" or "OFF" for the timer, then press [ENTER/MEMO]


- The "
![]() " indicator lights and the timer setting is entered.
" indicator lights and the timer setting is entered.
![]()
- The timer settings are displayed for 3 seconds.
![]()


- Set the power to standby.
Timer standby mode is set, and the power indicator lights orange.
Setting the timer to on or off
- Press [MENU].
- Select "TIMER ON/OFF" using [
![]() ] and [
] and [![]() ], then press [ENTER/ MEMO].
], then press [ENTER/ MEMO]. - Use [
![]() ] and [
] and [![]() ] to select "ONCE" or "EVERYDAY".
] to select "ONCE" or "EVERYDAY". - Use [◁ ] and [ ▷] to select "ON" or "OFF" for the timer, then press [ENTER/MEMO]. The timer settings are displayed after this.
* When set to "OFF", time operation is disabled, but the timer settings remain unchanged.
To check the timer settings
- Press [MENU].
- Select "TIMER ON/OFF" using [
![]() ] and [
] and [![]() ], then press [ENTER/ MEMO].
], then press [ENTER/ MEMO]. - When "ON" is displayed for the timer setting, press [ENTER/ MEMO].
The timer settings are displayed for 3 seconds.
To change the timer settings
Perform the operations at "Setting the Timer".
To change the setting while setting the timer
Press <◁>.
The setting returns to the previous step. Display the setting you want to change, then make the desired setting.
When performing a timer setting with DENON control dock for iPod (ASD-11R, ASD-3N or ASD- 3W)
Pause the track you want to play, and keep the power on for DENON control dock for iPod.
Setting the Sleep Timer
Use this function to automatically switch the power to the standby mode after a specific amount of time (minutes).
The sleep timer can be set to up to 90 minutes, in steps of 10 minutes.
Press [SLEEP] during playback and select the setting time.

* After about 5 seconds, the setting is entered and the display returns to as it was before.
Canceling the sleep timer
Either press [SLEEP] to select "SLEEP OFF" or press ON/ STANDBY.
To check the time remaining until the sleep timer is activated
Press [SLEEP].
Symbols used to indicate buttons in this manual
Button located on both the main unit and the remote control unit: BUTTON
Button only on the main unit: <BUTTON>
Button only on the remote control unit: [BUTTON]

Other Functions
Convenient Functions
Setting the optimizing filter for the SC- F107 speaker system (sold separately)
The receiver's speaker output signal properties are set to be optimal for the SC-F107.
- Press [MENU].
- Select "SPK OPTIMISE" using [
![]() ] and [
] and [![]() ], then press the [ENTER/MEMO] or [
], then press the [ENTER/MEMO] or [![]() ].
]. - Select "ON" using [
![]() ] and [
] and [![]() ], then press the [ENTER/MEMO] or [
], then press the [ENTER/MEMO] or [![]() ]
]
The setting is entered.
Auto Function Selector Function
When one of the buttons below is pressed, the function switches to the respective function and playback of that source starts.
- [DOCK
![]() ]: The function switches to "iPod" and the iPod starts playing.
]: The function switches to "iPod" and the iPod starts playing. - [TUNER]: The functions switches to "TUNER" and the band last set is tuned in.
Last Function Memory
This stores the settings as they were directly before the standby mode was set.
When the power is turned back on, the settings are restored to as they were directly before the standby mode was set.
About System Functions
Device supporting system connections (sold separately)
DCD-F107 (CD Player)
What you can do with the system functions
When system connections are made between the DRA-F107 and DCD-F107 (CD Player, sold separately), the operations described below can be performed.
The DCD-F107 can be operated using the receiver's remote control unit
("Buttons for operating components connected by system cable")
Auto Power On Function ("System Function")
Auto Function ("System Function")
Timer Function ("System Function")
Making system connections
In addition to connection of the audio cables, also connect the system cable.
Also, connect the power cord of the DCD-F107 (CD player, sold separately) to the AC outlet on the back of the receiver (DRA- F107).
NOTE
Be sure to plug the DRA-F107's power cord into a wall power outlet.

System Functions

Auto Power On Function
When the CD  or USB/iPod button on the remote control unit is pressed, the power of the respective devices turns on and the DRA-F107's function switches automatically.
- CD
![]() : When a disc is loaded, playback starts.
: When a disc is loaded, playback starts. - USB/iPod
![]() : The device connected to the USB port is played.
: The device connected to the USB port is played.
NOTE
The auto power function does not work by pressing the play button on the front panel of the DCD-F107 (CD player, sold separately).
Auto Function
When the CD or USB/iPod button on the remote control unit is pressed, the DRA-F107's function switches automatically and playback starts.
- The currently playing source stops.
Timer Function
Playback can be performed at a set time using the DCDF107's timer function.
- See "Timer Playback" for details.
Troubleshooting
If a problem should arise, first check the following:
- Are the connections correct?
- Is the set being operated as described in the owner's manual?
- Are the other components operating properly?
If this unit does not operate properly, check the items listed in the table below. Should the problem persist, there may be a malfunction.
In this case, disconnect the power immediately and contact your store of purchase.
[General]
| Symptom | Cause | Countermeasure |
| When the power is turned on, the power indicator does not light and no sound is produced. |
|
|
| The power indicator lights but no sound is produced. |
|
|
| No sound is produced from one side. |
|
|
| For stereo sources, the positions of the instruments are inverted. |
|
|
[Record Player]
| Symptom | Cause | Countermeasure |
| When playing records, a wailing noise (howling) is produced when the volume is raised. |
|
|
[Remote Control Unit]
| Symptom | Cause | Countermeasure |
| Set does not work properly when remote control unit operated. |
|
|
[Tuner]
| Symptom | Cause | Countermeasure |
| Buzzing noise in FM broadcasts. |
|
|
| Hissing or buzzing noise is heard in AM broadcasts. |
|
|
| Humming noise is heard in AM broadcasts. |
|
|
[iPod]
| Symptom | Cause | Countermeasure |
| iPod cannot be played. |
|
|
Specifications
Receiver section
| Rated output: | 2-channel driving 65 W + 65 W (4 Ω/ohms, 1 kHz, T.H.D. 0.7%) |
| Dynamic power: | 80 W + 80 W (4 Ω/ohms) |
| High frequency distortion: | 0.1% (Rated output: –3 dB), 4 Ω/ohms, 1 kHz |
| Output terminals: | Speaker 4 ~ 16 Ω/ohms Suited for headphones/stereo headphones |
| Equalizer amplifier output (REC OUT terminals): | Rated output: 200 mV |
| Input sensitivity / Input impedance: | PHONO (MM): 2.5 mV / 47 kΩ/kohms CD/USB, AUX1, AUX2, Portable In: 200 mV / 47 kΩ/kohms |
| RIAA deviation: | PHONO: 20 Hz ~ 20 kHz ±0.5 dB |
| Reception frequency range: | FM: 87.50 MHz ~ 108.00 MHz AM: 522 kHz ~ 1611 kHz DAB: BAND III 170 MHz ~ 240 MHz |
| Reception sensitivity: | FM: 1.5 μV / 75 Ω/ohms AM: 20 μV DAB: –93 dBm |
| FM channel separation: | 30 dB (1 kHz) |
| FM S/N ratio: | Monaural: 74 dB Stereo: 70 dB |
| FM harmonic distortion: | Monaural: 0.3% Stereo: 0.4 % |
| S/N ratio: | PHONO (MM): 80 dB (With input terminals short-circuited, 5 mV input signal) |
| Tone control: | SDB: 100 Hz + 10 dB BASS: 100 Hz ± 8 dB TREBLE: 10 kHz ± 8 dB |
| Frequency response: | 10 Hz ~ 40 kHz (+0.5 dB, –3 dB) (SOURCE DIRECT: ON) |
Clock/Timer section
| Clock type: | Power line frequency synchronized method (Within ±30 seconds per month) |
| Timer: | Everyday timer / Once timer: One system each Sleep timer: Max. 90 minutes |
General
| General Power supply: | AC 230 V, 50 Hz |
| Power consumption: | 44 W 0.2 W (Standby) |
| Maximum external dimensions: | 250 (W) x 82 (H) x 283 (D) mm |
| Weight: | 2.6 kg |
Remote control unit (RC-1127)
| Remote control method: | Infrared pulse method |
| Batteries: | R03/AAA Type (two batteries) |
| Maximum external dimensions: | 49 (W) x 220 (H) x 24 (D) mm |
| Weight: | 110 g (including batteries) |
* : For purposes of improvement, specifications and design are subject to change without notice.
IMPORTANT SAFETY INSTRUCTIONS

RISK OF ELECTRIC SHOCK DO NOT OPEN

TO REDUCE THE RISK OF ELECTRIC SHOCK, DO NOT REMOVE COVER (OR BACK). NO USER-SERVICEABLE PARTS INSIDE. REFER SERVICING TO QUALIFIED SERVICE PERSONNEL.
 The lightning flash with arrowhead symbol, within an equilateral triangle, is intended to alert the user to the presence of uninsulated "dangerous voltage" within the product's enclosure that may be of sufficient magnitude to constitute a risk of electric shock to persons.
The exclamation point within an equilateral triangle is intended to alert the user to the presence of important operating and maintenance (servicing) instructions in the literature accompanying the appliance.

TO REDUCE THE RISK OF FIRE OR ELECTRIC SHOCK, DO NOT EXPOSE THIS APPLIANCE TO RAIN OR MOISTURE.
SAFETY PRECAUTIONS
- Read these instructions.
- Keep these instructions.
- Heed all warnings.
- Follow all instructions.
- Do not use this apparatus near water.
- Clean only with dry cloth.
- Do not block any ventilation openings. Install in accordance with the manufacturer's instructions.
- Do not install near any heat sources such as radiators, heat registers, stoves, or other apparatus (including amplifiers) that produce heat.
- Protect the power cord from being walked on or pinched particularly at plugs, convenience receptacles, and the point where they exit from the apparatus.
- Only use attachments/accessories specified by the manufacturer.
- Use only with the cart, stand, tripod, bracket, or table specified by the manufacturer, or sold with the apparatus. When a cart is used, use caution when moving the cart/ apparatus combination to avoid injury from tip-over.
![]()
Unplug this apparatus during lightning storms or when unused for long periods of time.- Refer all servicing to qualified service personnel. Servicing is required when the apparatus has been damaged in any way, such as power-supply cord or plug is damaged, liquid has been spilled or objects have fallen into the apparatus, the apparatus has been exposed to rain or moisture, does not operate normally, or has been dropped.
- Batteries shall not be exposed to excessive heat such as sunshine, fire or the like.

To completely disconnect this product from the mains, disconnect the plug from the wall socket outlet.
The mains plug is used to completely interrupt the power supply to the unit and must be within easy access by the user.
NOTE ON USE

Avoid high temperatures.
Allow for sufficient heat dispersion when installed in a rack.

Handle the power cord carefully.
Hold the plug when unplugging the cord.

Keep the unit free from moisture, water, and dust.

Unplug the power cord when not using the unit for long periods of time.

* (For apparatuses with ventilation holes)
Do not obstruct the ventilation holes.

Do not let foreign objects into the unit.

Do not let insecticides, benzene, and thinner come in contact with the unit.

Never disassemble or modify the unit in any way.
- The ventilation should not be impeded by covering the ventilation openings with items, such as newspapers, tablecloths, curtains, etc.
- No naked flame sources, such as lighted candles, should be placed on the unit.
- Observe and follow local regulations regarding battery disposal.
- Do not expose the unit to dripping or splashing fluids.
- Do not place objects filled with liquids, such as vases, on the unit.

Documents / ResourcesDownload manual
Here you can download full pdf version of manual, it may contain additional safety instructions, warranty information, FCC rules, etc.
Advertisement


Need help?
Do you have a question about the DRA-F107 and is the answer not in the manual?
Questions and answers