Denon DRA-700AE/700AEDAB - AM-FM STEREO RECEIVER Manual
- Operating instructions manual (30 pages) ,
- Service manual (62 pages)
Advertisement
- 1 Introduction
- 2 Getting Started
-
3
Connections
- 3.1 Cable indications
- 3.2 Speaker connections
- 3.3 Connecting a DVD player and monitor
- 3.4 Connecting a TV/DBS tuner
- 3.5 Connecting a CD player
- 3.6 Connecting a turntable
- 3.7 Connecting a tape deck, CD recorder or MD recorder
- 3.8 Connecting a VCR
- 3.9 Connecting the antenna terminals
- 3.10 Connecting the iPod
- 3.11 Connecting the MULTI ZONE terminals
- 3.12 Connecting the power supply cord
-
4
Operation
- 4.1 Before operating
-
4.2
Playing the input source
- 4.2.1 Turning the sound off temporarily (MUTING)
- 4.2.2 Listening over headphones
- 4.2.3 Switching the speakers
- 4.2.4 Checking the currently playing program source, etc.
- 4.2.5 Switching the brightness of the display
- 4.2.6 Selecting the play mode (PURE DIRECT)
- 4.2.7 Setting the tone control
- 4.2.8 Adjusting the speaker volume
- 4.3 Combining the currently playing sound with the desired image (VIDEO SELECT function)
- 4.4 Listening to the radio
- 4.5 Listening to DAB broadcasts (DRA-700AEDAB only)
- 4.6 Tuning mode
- 4.7 Sort mode (Sorting components)
- 4.8 Playing the iPod
- 4.9 Multi zone music entertainment system
- 4.10 Recording (audio and/or video)
- 4.11 About the memory functions
- 4.12 Initialization of the microprocessor
- 5 Troubleshooting
- 6 Specifications
- 7 SAFETY PRECAUTIONS
- 8 NOTE ON USE
- 9 Documents / Resources
Introduction
The DENON DRA-700AE/700AEDAB AM-FM Stereo Receiver has been engineered to provide outstanding high fidelity reproduction of your favorite music sources.
As this product is provided with an immense array of features, we recommend that before you begin hookup and operation that you review the contents of this manual before proceeding.
Getting Started
Accessories
Check that the following parts are attached in addition to the main unit:

- Operating instructions - 1
- Service station list - 1
- System remote control unit (RC-1054) - 1
- ZONE remote control unit (RC-1056) - 1
- R03/AAA batteries - 4
- AM loop antenna - 1
- FM indoor antenna - 1
- Power supply cord (Approx. 1.5 m) (DRA-700AEDAB only) - 1
- DAB indoor antenna (DRA-700AEDAB only) - 1
Before using
Pay attention to the following before using this unit:
- Moving the unit.
To prevent short-circuits or damaged wires in the connection cables, always unplug the power supply cord and disconnect the connection cables between all other audio components when moving the unit. - Cautions on using mobile phones.
Using a mobile phone near this unit may result in noise. If so, move the mobile phone away from this unit when it is in use. - Before turning the power operation button on.
Check once again that all connections are correct and that there are not problems with the connection cables. Always set the power operation button to the standby position before connecting and disconnecting connection cables. - Store the operating instructions in a safe place.
After reading the operating instructions, store them in a safe place as they could come in handy in the future. - Whenever the power operation button is in the STANDBY state, the unit is still connected to AC line voltage.
Please be sure to turn off the power switch or unplug the cord when you leave home for, say, a vacation. - Note that the illustrations in these instructions may differ from the actual unit for explanation purposes.
Cautions on installation
Note:
For heat dispersal, do not install this unit in a confined space such as a bookcase or similar enclosure.


About the remote control unit
In addition to controlling the DRA-700AE/700AEDAB, the attached system remote control unit (RC-1054) can also be used to control the following products:
- DENON component products
Inserting the batteries
- Remove the remote control unit's rear cover.
![]()
- Set two batteries in the battery compartment in the indicated direction.
![]()
- Put the rear cover back on.


Notes on batteries:
- Replace the batteries with new ones if the set does not operate even when the remote control unit is operated nearby the unit. (The attached batteries are only for verifying operation.)
- When inserting the batteries, be sure to do so in the proper direction, following the "<" and ">" marks in the battery compartment.
- To prevent damage or leakage of battery fluid:
- Do not use a new battery together with an old one.
- Do not use two different types of batteries.
- Do not short-circuit, disassemble, heat or dispose of batteries in flames.
- Remove the batteries from the remote if it will not be in use for long periods.
- If the battery fluid should leak, carefully wipe the fluid off the inside of the battery compartment and insert new batteries.
- When replacing the batteries, have the new batteries ready and insert them as quickly as possible.
Operating range of the remote control unit
- Point the remote control unit at the remote sensor when operating it.
- The remote control unit can be used from a distance of approximately 7 meters, at a horizontal angle of up to 30° with respect to the sensor.
![]()

NOTE:
- It may be difficult to operate the remote control unit if the remote sensor is exposed to direct sunlight or strong artificial light.
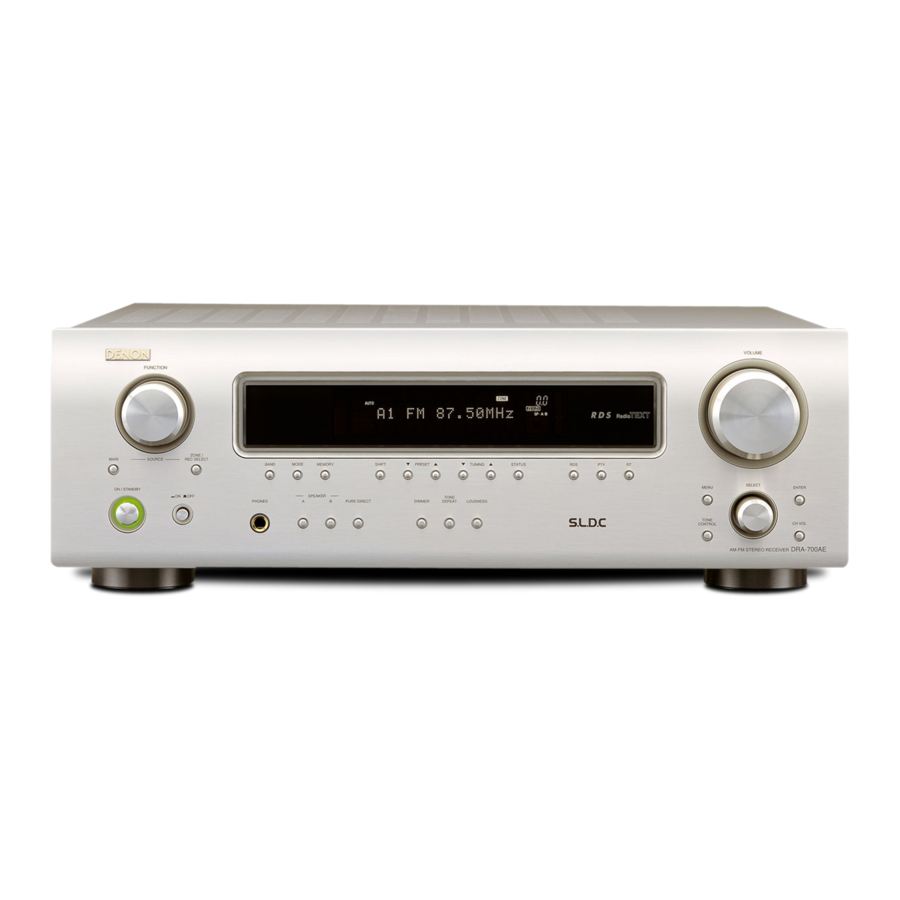
Part names and functions
Front panel
![]() The illustrations are for the DRA-700AE/700AEDAB.
The illustrations are for the DRA-700AE/700AEDAB.

- Power operation button (ON/STANDBY)
- Power indicator
- Power switch
- Headphones jack (PHONES)
- MODE button
- SPEAKER buttons
- PURE DIRECT button
- SHIFT button
- DIMMER button
- TONE DEFEAT button
- LOUDNESS button
- STATUS button
- MENU button
- TONE CONTROL button
- SELECT knob
- CH VOL button
- ENTER button
- VOLUME control knob
- RT button
- PTY button
- RDS button
- Display
- TUNING buttons (▲, ▼)
- PRESET buttons
- MEMORY button
- Remote control sensor
- BAND button
- ZONE select buttons
- FUNCTION knob
Display

- Information display
- Speaker indicators
This lights corresponding to the settings of the front speakers of the various surround modes. - ZONE2/ZONE3 output indicators
- Volume indicator
This displays the volume level. - ZONE/REC SELECT indicators
Lights while selecting the ZONE or REC SELECT mode. (Off when the "SOURCE" is selected.) - AUTO indicator
This lights when the broadcast station is selected in the AUTO tuning mode. - RDS indicator
This lights when an RDS broadcast has been received. - STEREO indicator
This lights when an FM stereo broadcast has been received. - TUNED indicator
This lights when an FM/AM broadcast has been received.
Rear panel

- AUDIO OUT terminals
- SUBWOOFER PRE OUT terminal
- AUDIO IN terminals
- ZONE PRE OUT terminals
- ZONE VIDEO OUT terminals
- Speaker terminals
- AC outlets
- Power supply cord
- VIDEO IN terminals
- VIDEO OUT terminals
- SIGNAL GND terminal
- DOCK CONTROL jack
- ANTENNA terminals
- REMOTE CONTROL jacks
- AC inlet
- DAB ANTENNA terminal
Remote control unit
System remote control unit (RC-1054)
")
ZONE remote control unit (RC-1056)
")
Connections
Cable indications
The hookup diagrams in the subsequent sections assume the use of the following optional connection cables (not supplied).

NOTE:
- Do not plug in the power supply cord until all connections have been completed.
- When making connections, also refer to the operating instructions of the other components.
- Be sure to connect the left and right channels properly (left with left, right with right).
- Do not bundle power cords together with speaker cables. Doing so could result in humming or noise.
Speaker connections
Connect the speaker terminals with the speakers making sure that like polarities are matched (+ with +, - with -).
NOTE:
When making connections, take care that none of the individual conductors of the speaker cable come in contact with adjacent terminals, with other speaker cable conductors, or with the rear panel and screws.
NEVER touch the speaker terminals when the power is on. Doing so could result in electric shocks.

Speaker impedance
| Speaker | Impedance |
| A, B | 4 ~ 16 Ω/ohms |
| A+B | 8 ~ 16 Ω/ohms |
| Note on speaker impedance | |
| When using speakers with an impedance below the designated value (for example 4 Ω/ohms), playing for long periods of time with the volume high could cause the temperature to rise, activating the protection circuit. When the protection circuit is activated, the output to the speakers is cut off and the power indicator blinks. If this happens, unplug the power cord, wait for the set to cool off and improve ventilation around the unit. Also check the wiring of the input cables and the speaker cables. After doing this, plug the power cord back in and turn the unit's power back on. If the protection circuit is activated again even though there are no problems with the wiring or the ventilation around the unit, switch off the power and contact a DENON service center. | |
Connections
- When making connections, also refer to the operating instructions of the other components.

Connecting a DVD player and monitor

![]()
- Connect a non-DVD video disc player (such as a laser disc, VCD/SVCD, or future high definition disc player) to the DVD/VDP terminals in the same way.
Connecting a TV/DBS tuner

Connecting a CD player

Connecting a turntable

![]()
- The phono input can accept signals from moving magnet (MM) and high output moving coil (MC) phono cartridges. If your turntable is equipped with a low output MC cartridge, you will need to use a separate MC head amplifier or step-up MC transformer.
NOTE:
- If humming or other noise is generated when the ground wire is connected to the SIGNAL GND terminal, disconnect the ground wire.
Connecting a tape deck, CD recorder or MD recorder

Connecting a VCR

Connecting the antenna terminals
Connecting the AM/FM antenna terminals
An FM antenna cable plug can be connected directly.

AM loop antenna assembly

Connection of AM antennas
- Push the lever.
![]()
- Insert the conductor.
![]()
- Return the lever.
![]()


NOTE:
- Do not connect two FM antennas simultaneously.
- Even if an external AM antenna is used, do not disconnect the AM loop antenna.
- Make sure the AM loop antenna lead terminals do not touch metal parts of the panel.
Connecting the DAB antenna terminals (DRA-700AEDAB only)
Connecting an DAB outdoor antenna
- If good reception cannot be achieved with the included DAB indoor antenna, use an DAB outdoor antenna. Connect an F male type connector to the coaxial cable and connect the antenna to the DAB COAX 75 Ω/ohms terminal.
Installing the DAB indoor antenna

- DAB station reception.
- Use "Tuning aid" to set position at which reception sensitivity is optimum.
DAB indoor antenna assembly
Mount the antenna's screw to the stand.

Connecting the iPod®
When using an iPod, you must connect the Control Dock for iPod (ASD-1R, sold separately) and the DOCK CONTROL jack on the DRA-700AE/700AEDAB with a mini-jack and assign the iPod to any AUDIO terminal(s).
The diagram below shows an example of connections for when the iPod is assigned to the CD-R/TAPE terminals.
 For instructions on assigning the iPod to a specific terminal, see "Setting the iPod Assignment".
For instructions on playing the iPod, see "Playing the iPod".

![]()
- The optional standard Control Dock for iPod is DENON ASD-1R sold separately.
Connecting the MULTI ZONE terminals
![]() For instructions on operations using the MULTI ZONE functions.
For instructions on operations using the MULTI ZONE functions.
ZONE2 (or ZONE3) PRE OUT connections
- If another power amplifier or pre-main (integrated) amplifier is connected, the ZONE2 (or ZONE3) pre-out (variable or fixed level) terminals can be used to play a different program source in ZONE2 (or ZONE3) the same time.
- The ZONE2 video out is only for the ZONE2.
- The ZONE3 video out is only for the ZONE3.
 PRE OUT connections")
![]()
- For the AUDIO output, use high quality pin-plug cables and wire in such a way that there is no humming or noise.
- For instructions on installation and operation of separately sold devices, refer to the devices' operating instructions.
Connecting the power supply cord

NOTE:
- Insert the plugs securely. Incomplete connections will result in the generation of noise.
- Only use the AC OUTLET for audio equipment. Never use it for hair driers, monitors or other electrical appliances.

Operation

About the button names in this explanation
< > : Buttons on the main unit
[ ] : Buttons on the remote control unit
Button name only: Buttons on the main unit and remote control unit
Before operating
- Press <POWER>.
![]() ON:
ON:
The power indicator lights red.
![]() OFF:
OFF:
The power turns off and the indicator is off. - Press <ON/STANDBY> or [POWER ON].
- The power indicator blinks green and the power turns on.
Playing the input source
- Use FUNCTION to select the input source you want to play.
- Start playback on the selected component.
![]() For operating instructions, refer to the component's manual.
For operating instructions, refer to the component's manual. - Use VOLUME to adjust the volume.
- The volume level is displayed on the volume level display.
Turning the sound off temporarily (MUTING)
Press [MUTING].

- Canceling MUTING mode:
To cancel the muting mode, either press [MUTING] or adjust the volume.
Listening over headphones
Connect the headphones to <PHONES>.
- No sound is produced from the speakers automatically.
NOTE:
- To prevent hearing loss, be careful not to raise the volume level excessively when using headphones.
Switching the speakers
Press <SPEAKER> to turn the corresponding speaker pair on.
Checking the currently playing program source, etc.
Press STATUS.
- The current program source and various settings are indicated on the display.
Switching the brightness of the display
Press <DIMMER>.
![]() The brightness of the display can be adjusted in three steps. The display can also be turned off.
The brightness of the display can be adjusted in three steps. The display can also be turned off.
Selecting the play mode (PURE DIRECT)
This mode reproduces the sound with extremely high quality. The audio signals do not pass through the tone circuits, etc., and the display that could affect the audio signals are turned "OFF".
Press <PURE DIRECT>.
Setting the tone control
Adjusting the tone
- Press <TONE CONTROL> to select "BASS" or "TREBLE".
- Use <SELECT> to set the level.
![]() Can be adjusted within the range of –10 dB to +10 dB.
Can be adjusted within the range of –10 dB to +10 dB.
When you do not want to adjust the tone
Press <TONE DEFEAT> to select "TONE DEFEAT ON".
When listening with the volume turned low
Press <LOUDNESS> to select "LOUDNESS ON".
Adjusting the speaker volume
- Press <CH VOL> to select the speaker.
![]() The settable speaker switches each time this button is pressed.
The settable speaker switches each time this button is pressed. - Use <SELECT> to adjust the volume.
![]() Can be adjusted within the range of –12 dB to +12 dB.
Can be adjusted within the range of –12 dB to +12 dB.
Combining the currently playing sound with the desired image (VIDEO SELECT function)
- Press MENU for at least 2 seconds.
- Use < SELECT > [
![]() ] or press until the desired image appears on the display.
] or press until the desired image appears on the display.
![]() To cancel, press [
To cancel, press [![]() ] to select "SOURCE".
] to select "SOURCE". - Press ENTER.
- The video source selected with the video select function is stored in the memory for the different input sources.
Listening to the radio
Auto preset memory
This unit is equipped with a function for automatically searching for FM broadcast stations and storing them in the preset memory.
- Press <ON/STANDBY> and set the DRA-700AE/700AEDAB's power to the standby mode.
- Hold PRESET▲ and press <ON/STANDBY>.
- The unit automatically begins searching for FM broadcast stations.
![]() When the first FM broadcast station is found, that station is stored in the preset memory at channel A1.
When the first FM broadcast station is found, that station is stored in the preset memory at channel A1.
![]() Subsequent stations are automatically stored in order at preset channels A1 to A8, B1 to B8, C1 to C8, D1 to D8, E1 to E8, F1 to F8 and G1 to G8 for a maximum of 56 stations. Channel A1 is tuned in after the auto preset memory operation is completed.
Subsequent stations are automatically stored in order at preset channels A1 to A8, B1 to B8, C1 to C8, D1 to D8, E1 to E8, F1 to F8 and G1 to G8 for a maximum of 56 stations. Channel A1 is tuned in after the auto preset memory operation is completed.
- The unit automatically begins searching for FM broadcast stations.
- If an FM station cannot be preset automatically due to poor reception, use the "Manual tuning" operation to tune in the station, then preset it using the manual "Preset memory" operation.
- To interrupt this function, press<ON/STANDBY>.
Default settings
| Auto tuner presets | |
| A1 ~ A8 | 87.5 / 89.1 / 98.1 / 108.0 / 90.1 / 90.1 / 90.1 / 90.1 MHz |
| B1 ~ B8 | 522 / 603 / 999 / 1404 / 1611 kHz, 90.1 / 90.1 / 90.1 MHz |
| C1 ~ C8 | 90.1 MHz |
| D1 ~ D8 | 90.1 MHz |
| E1 ~ E8 | 90.1 MHz |
| F1 ~ F8 | 90.1 MHz |
| G1 ~ G8 | 90.1 MHz |
Auto tuning
- Use <FUNCTION> to select "TUNER" or press [TUNER].
- Press BAND to select "AM" or "FM".
- Press <MODE> to set the auto tuning mode.
- The "AUTO" indicator lights.
- Press <TUNING>.
- Automatic searching begins.
- If tuning does not stop at the desired station, use to the "Manual tuning" operation.
Manual tuning

About the button names in this explanation
< > : Buttons on the main unit
[ ] : Buttons on the remote control unit
Button name only: Buttons on the main unit and remote control unit
- Use <FUNCTION> to select "TUNER" or press [TUNER].
- Press BAND to select "AM" or "FM".
- Press <MODE> to set the manual tuning mode.
![]() Check that the display's "AUTO" indicator turns off.
Check that the display's "AUTO" indicator turns off. - Press <TUNING>.
![]() The frequency changes continuously when the button is held in.
The frequency changes continuously when the button is held in.
- When the manual tuning mode is set, FM stereo broadcasts are received in monaural and the "STEREO" indicator turns off.
Preset memory
- Use the "Auto tuning" or "Manual tuning" operation to tune in the station to be preset in the memory.
- Press <MEMORY>.
- Press SHIFT to select the desired memory block (A to G).
- Press PRESET to select the desired preset channel (1 to 8).
- Press <MEMORY> again.
- Store the station in the preset memory.
- To preset other channels, repeat steps 2 to 5.
A total of 56 broadcast stations can be preset — 8 stations (channels 1 to 8) in each of blocks A to G.
Recalling preset stations
- Press SHIFT to select the memory block.
- Press PRESET to select the desired preset channel.
RDS (Radio Data System)
RDS (works only on the FM band) is a broadcasting service which allows a station to send additional information along with the regular radio program signal.
The following three types of RDS information can be received with this unit:
Program Type (PTY)
PTY identifies the type of RDS program.
The program types and their displays are as follows:

Traffic Program (TP)
TP identifies programs that carry traffic announcements.
This allows you to easily find out the latest traffic conditions in your area before leaving home.
Radio Text (RT)
RT allows RDS stations to send text messages that appear on the display.
NOTE:
- The operations described below using RDS, PTY and <RT> will not function in areas in which there are no RDS broadcasts.
RDS search
Use this function to automatically tune to FM stations that provide the RDS service.
- Use <FUNCTION> to select "TUNER" or press [TUNER].
- Press RDS until "RDS SEARCH" appears on the display.
- Press PRESET.
- The search for RDS stations begins automatically.
![]() If no RDS stations are found with the above operation, all the reception bands are searched.
If no RDS stations are found with the above operation, all the reception bands are searched.
![]() When a broadcast station is found, that station's name appears on the display.
When a broadcast station is found, that station's name appears on the display.
- The search for RDS stations begins automatically.
- To continue searching, repeat steps 2 to 3.
![]() If no RDS station is found when all the frequencies have been searched, "NO RDS" is displayed.
If no RDS station is found when all the frequencies have been searched, "NO RDS" is displayed.
PTY search
Use this function to find RDS stations broadcasting a designated program type (PTY).
For a description of each program type, refer to "Program Type (PTY)".
- Use <FUNCTION> to select "TUNER" or press [TUNER].
- Press RDS until "PTY SEARCH" appears on the display.
- Watching the display, press PTY to call out the desired program type.
- Press PRESET.
- PTY search begins automatically.
![]() If there is no station broadcasting the designated program type with the above operation, all the reception bands are searched.
If there is no station broadcasting the designated program type with the above operation, all the reception bands are searched.
![]() The station name is displayed on the display after searching stops.
The station name is displayed on the display after searching stops.
- PTY search begins automatically.
- To continue searching, repeat steps 2 to 4.
![]() If no station broadcasting the designated program type is found when all the frequencies have been searched, "NO PROGRAMME" is displayed.
If no station broadcasting the designated program type is found when all the frequencies have been searched, "NO PROGRAMME" is displayed.
TP search
Use this function to find RDS stations broadcasting traffic programs (TP stations).
- Use <FUNCTION> to select "TUNER" or press [TUNER].
- Press RDS until "TP SEARCH" appears on the display.
- Press PRESET.
- TP search begins automatically.
![]() If no TP station is found with the above operation, all the reception bands are searched.
If no TP station is found with the above operation, all the reception bands are searched.
![]() The station name is displayed on the display after searching stops.
The station name is displayed on the display after searching stops.
- TP search begins automatically.
- To continue searching, repeat steps 2 to 3.
![]() If no other TP station is found when all the frequencies have been searched, "NO PROGRAMME" is displayed.
If no other TP station is found when all the frequencies have been searched, "NO PROGRAMME" is displayed.
RT (Radio Text)
"RT" appears on the display when radio text data is received.
- Use <FUNCTION> to select "TUNER" or press [TUNER].
- Press <RT>.
![]() While receiving an RDS broadcast station, the text data broadcast from the station is displayed.
While receiving an RDS broadcast station, the text data broadcast from the station is displayed.
![]() To turn the display off, press <RT> again.
To turn the display off, press <RT> again.
![]() If no text data is being broadcast, "NO TEXT DATA" is displayed.
If no text data is being broadcast, "NO TEXT DATA" is displayed.
Switching RDS information display

About the button names in this explanation
< > : Buttons on the main unit
[ ] : Buttons on the remote control unit
Button name only: Buttons on the main unit and remote control unit
- Use the procedure described at "Auto tuning", "Manual tuning" or "Recalling preset stations" to tune in a frequency with an RDS station.
- Press STATUS to switch the RDS reception information.
![]() The display switches as shown below each time STATUS is pressed.
The display switches as shown below each time STATUS is pressed. - PS:
The programme service name of the station tuned in is displayed.
![]()
- PTY:
The programme type of the tuned in broadcast is displayed.
![]()
- Frequency:
The frequency is displayed.
![]()
- CT:
The current time is displayed.
![]()
- PS:


Listening to DAB broadcasts (DRA-700AEDAB only)
About DAB (Digital Audio Broadcasting)
- Since the DAB system is broadcasted in digital format, DAB system can supply crystal-clear audio and stable reception even in mobile objects. DAB is a new generation radio which can provide data service and supplementary multi-media services.
- DAB broadcasts multiple services under one Ensemble that are called service components.
- Each component contains inherent programmes; news, music, sports, and many more.
- Each Ensemble and service component has its label, and users can recognize a current broadcasting station and service contents by using the label.
- The main service component is broadcast as Primary while the others are broadcast as Secondary.
- Also rich character information is serviced through Dynamic Labels; song title, artist composer etc.

Tuning in DAB (Digital Audio Broadcasting) broadcasts

About the button names in this explanation
< > : Buttons on the main unit
[ ] : Buttons on the remote control unit
Button name only: Buttons on the main unit and remote control unit
- Press <ON/STANDBY> or [POWER ON] to turn on the power.
- Watching the display, press BAND to select the desired band (DAB).
![]()
- Press MENU to select menu.
- Either turn <SELECT> or press [
![]() ] to select "Auto Tuning".
] to select "Auto Tuning". - Press ENTER.
- Either turn <SELECT> or press [
![]() ] to select "UK Band" or "Full Band".
] to select "UK Band" or "Full Band". - Press ENTER.
![]()
![]() Using the DAB for the first time
Using the DAB for the first time
When you first switch on the unit and select DAB, the Auto Tuning function scans the Band III and L–band frequencies. After the scanning, the first scanned component will be selected.
Press the button and release it in less than 2 seconds to perform a local scan (UK band III).
(UK stations are in the range 11B to 12D).
Press the button for over 2 seconds then release it to perform the full scan operation (Full band III and L-band: 5A to LW).
Once auto scanning is completed, the number of broadcast stations is displayed, then the first station is tuned in.
If "Station not available" is displayed, check the antenna's connection.
You may want to re-tune at a later date if you move the DRA700AEDAB or if you want to receive a newly introduced ensemble.
Press PRESET. - Press <TUNING> to select the station.
- If the station you select is in stereo, the "STEREO" indicator will light up.
![]() About secondary service
About secondary service
When receiving a Secondary service, ">>" is indicated to the right of "station name".
When ENTER is pressed, the Secondary service Component is received and "<<" indicator lights.
Press ENTER to go back to the primary service again.
- If the station you select is in stereo, the "STEREO" indicator will light up.
- Press ENTER to listen to the selected station.
- After "Now tuning..." is displayed, the tuned in station appears.


Preset stations
- Follow steps 1 to 9 under "Tuning in DAB (Digital Audio Broadcasting) broadcasts" to tune in the station to be preset.
- Perform steps 2 to 5 under "Preset memory".
![]() Up to 56 "S. Component" can be preset (DAB alone).
Up to 56 "S. Component" can be preset (DAB alone).
Recalling preset stations
The same procedure as for FM/AM stations.
- Press SHIFT to select the memory block.
- Press PRESET to select the desired preset channel.
- Press ENTER to listen to the selected station.
- After "Now tuning..." is displayed, the tuned in station appears.
Tuning mode
Sorted list tuning mode
- You can select any component for listening from the list of sorted components.
- The sorted components are set in the sort mode.
- Press <MODE> to select "Tuning Mode (Sorted List)".
![]()
- Press ENTER to display the first channel on the Sorted List.
![]() You can select any component from the sorted list.
You can select any component from the sorted list.
![]()


Tuning aid
- Press <MODE> to select "Tuning Mode (Tuning aid)".
![]()
- Press <TUNING> to display the frequency of the ensemble that you want to receive.
![]()
- Press ENTER to display the signal strength for that ensemble.
- Move antenna while watching the display and to try to raise the current level to the ">" mark.
![]()
- Move antenna while watching the display and to try to raise the current level to the ">" mark.
- Press ENTER to display the first channel on this ensemble (Sounds comes out).
![]() The tuning mode at this time is set to "Sorted list tuning mode".
The tuning mode at this time is set to "Sorted list tuning mode".
![]()


Sort mode (Sorting components)
- You can sort and list scanned components by Alphanumeric, S. component or programme type.
- You can then select the component you want to listen to from the list.
Alphanumeric
The "S. Component" is sorted in alphanumerical order.
- Press MENU to select menu.
- Either turn <SELECT> or press [
![]() ] to display the sort mode selection screen.
] to display the sort mode selection screen.
![]()
- Press ENTER to set the sort mode.
- Either turn <SELECT> or press [
![]() ] to select "Sort Mode (Alphanumeric)".
] to select "Sort Mode (Alphanumeric)".
![]()
- Press ENTER to set the sort mode to "Sort Mode (Alphanumeric)".
![]() You can select any component from the sorted list.
You can select any component from the sorted list.
![]()


S. component

About the button names in this explanation
< > : Buttons on the main unit
[ ] : Buttons on the remote control unit
Button name only: Buttons on the main unit and remote control unit
- You can select a S.component for listening from the list of scanned S.components produced by using the "Tuning in DAB broadcasts".
- The "S. Component" is sorted in the order of the Service component frequencies.
- Press MENU to select menu.
- Either turn <SELECT> or press [
![]() ] to display the sort mode selection screen.
] to display the sort mode selection screen. - Press ENTER to set the sort mode.
- Either turn <SELECT> or press [
![]() ] to select "Sort Mode (S. Component)".
] to select "Sort Mode (S. Component)".
![]()
- Press ENTER to set the sort mode to "Sort Mode (S. Component)".
![]() You can select any component from the sorted list.
You can select any component from the sorted list.

PTY
The "S. Component" is sorted in the order of the Programme Type.
- Press MENU to select menu.
- Either turn <SELECT> [
![]() ] or press to display the sort mode selection screen.
] or press to display the sort mode selection screen. - Press ENTER to set the sort mode.
- Either turn <SELECT> [
![]() ] or press to select "Sort Mode (Programme Type)".
] or press to select "Sort Mode (Programme Type)".
![]()
- Press ENTER to set the sort mode to "Sort Mode (Programme Type)".
![]() You can select any component from the sorted list.
You can select any component from the sorted list.

Switching the DAB information display
- Follow steps 1 to 9 under "Tuning in DAB (Digital Audio Broadcasting) broadcasts" to tune in a DAB station.
- Press STATUS to switch the DAB reception information.
![]() The display switches as shown below each time the DISPLAY button is pressed.
The display switches as shown below each time the DISPLAY button is pressed. - DLS (Dynamic Label Segment):
The text data included in the broadcast scrolls.
![]()
- Ensemble Name:
The ensemble name is displayed.
![]()
- PTY (Programme Type):
The category of the broadcast being received is displayed.
![]()
- Channel and Frequency:
The frequency is displayed.
![]()
- Audio Information:
The bit rate and mode of the broadcast being received is displayed.
![]()
- Time and Date:
The current time and date are displayed.
![]()
- Bit Error Rate:
Noise may be generated and reception quality may become poor at bit error rates above 0.05. If a rate above 0.05 is displayed, move the antenna in different directions to find a position where the rate displayed is less 0.05.
![]()
- DLS (Dynamic Label Segment):


DRC (Dynamic Range Control)
- The DRC (Dynamic Range Control) function lets you change the dynamic range of the received sound depending on the content of the broadcast so that the sound is easier to hear even when the volume is low.
- Press MENU to select menu.
- Either turn <SELECT> or press [
![]() ] to select "DRC value".
] to select "DRC value". - Press ENTER.
- Either turn <SELECT> or press [
![]() ] to select "ON" or "OFF".
] to select "ON" or "OFF".
DRC OFF:
DRC is switched off.
Any DRC level broadcast will be ignored. This is the default setting.
DRC ON:
Applies DRC level as sent with the broadcast.
![]() This is effective when in a noisy environment and in quiet sections of broadcast programmes.
This is effective when in a noisy environment and in quiet sections of broadcast programmes.
The broadcast's DRC level is set at the broadcast station.
The DRC can be changed to achieve the optimum level. - Press ENTER.
Playing the iPod®

About the button names in this explanation
< > : Buttons on the main unit
[ ] : Buttons on the remote control unit
Button name only: Buttons on the main unit and remote control unit
The music recorded on the iPod can be played when using a Control Dock for iPod (ASD-1R, sold separately). The iPod can be controlled using the buttons on the main unit and the remote control unit.

iPod is a trademark of Apple Computer, Inc., registered in the U.S. and other countries.
With the iPod, non-copyrighted contents and contents that may be legally reproduced or played may be reproduced and played by individuals for their personal use. Violating copyrights is prohibited by law.
Setting the iPod Assignment
It is possible to assign the Control Dock for iPod's (ASD-1R, sold separately) audio and video signals to any input terminals on the DRA700AE/700AEDAB and play them.
- Press MENU.
- Use <SELECT> or press [
![]() ] to select the input terminals.
] to select the input terminals.
None:
This is the factory default setting.
DVD, V.A, VCR, CDR, CD:
When using a Control Dock for iPod, it is possible to connect with the audio input terminal of the assigned function. - Press ENTER.
 ] to select the input terminals.
![]()
- The optional standard Control Dock for iPod is DENON ASD-1R sold separately.
- To assign to a different function after a function has already been assigned, switch to a function other than the one that is assigned then repeat the procedure.
NOTE:
- DENON will accept no responsibility whatsoever for loss or damage of data on an iPod occurring when the iPod is used connected to the DRA-700AE/700AEDAB.
- Some of the functions may not operate, depending on the type of iPod and the software version.
Listening to music
- Connect the DRA-700AE/700AEDAB and iPod using the Control Dock for iPod (ASD-1R).
- Assign the input terminal at "Setting the iPod Assignment".
- Use FUNCTION to select the function assigned in step 2.
- Display "Remote iPod" on the main unit's display.
![]()
![]() If the screens above are not displayed, the iPod may not be properly connected. Check the connections and settings.
If the screens above are not displayed, the iPod may not be properly connected. Check the connections and settings.
- Display "Remote iPod" on the main unit's display.
- Operate using MENU, <SELECT>, [
![]() ] and ENTER while watching the iPod's screen.
] and ENTER while watching the iPod's screen.

 ] and ENTER while watching the iPod's screen.
- The optional standard Control Dock for iPod is DENON ASD-1R sold separately.
Listening to music in the Browse mode
The mode switches between the Remote mode and the Browse mode if <MODE> is pressed for at least 2 seconds.
- Use <SELECT> or press [
![]() ] to select the music file, ENTER then press or [
] to select the music file, ENTER then press or [![]() ].
].
![]() Press [
Press [![]() ] or MENU to return to the music menu screen.
] or MENU to return to the music menu screen. - Press ENTER or [
![]() ].
]. - Playback starts.


Pause:
Press ENTER during playback.
Press again to resume.
Manual search:
Press and hold in [ ] during playback.
![]() : Fast reverse
: Fast reverse![]() : Fast forward
: Fast forward


Track search:
Press [] during playback.
![]() : Move to beginning of previous track
: Move to beginning of previous track![]() : Move to beginning of next track
: Move to beginning of next track
Stop:
Press ENTER for at least 2 seconds during playback.
Repeat play:
Press <MODE>.
The mode switches as follows each time <MODE> is pressed.
- Repeat One: Single track repeat
- Repeat All: All track repeat
Shuffle play:
Press <MEMORY>.
The mode switches as follows each time <MEMORY> is pressed.
- Shuffle Songs: Single track shuffle
- Shuffle Albums: Album shuffle
In the Remote mode, only <SELECT>, [ ], and ENTER can be used.
- When STATUS is pressed during playback, the front panel display switches between the title name, artist name and album name.
- Depending on the iPod's software version, it may not be possible to operate the iPod from the DRA-700AE/700AEDAB. Use the latest version of the software. Information on the latest version of the software can be obtained on the Apple Computer website.
- With the DRA-700AE/700AEDAB it is possible to display folder names and file names on the screen like titles. The DRA- 700AE/700AEDAB can display up to 64 characters, consisting of numbers, capital letters and small letters. A "?" mark is displayed in place of non-compatible characters.
Viewing still pictures and videos (only for iPods equipped with the slideshow / video function)
Use this procedure to view photo and video data stored on the iPod on a monitor.
- Press <MODE> for at least 2 seconds to switch from the Browse mode to the Remote mode.
- "Remote iPod" is displayed on the DRA-700AE/700AEDAB's display.
- Watching the iPod's screen, press [
![]() ] to select "Photos" or "Video", then press ENTER or [
] to select "Photos" or "Video", then press ENTER or [![]() ].
]. - The iPod's photo and video data are displayed on the monitor.
- To output photo or video data recorded on the iPod to the monitor, the iPod's "TV Out" setting (under "Video Settings") must be set to "ON".
For details, refer to the iPod's operating instructions.
Disconnecting the iPod
Press <ON/STANDBY> or [POWER OFF] and set the DRA-700AE/700AEDAB's power to the standby mode.
![]() The iPod can be disconnected after switching to a function other than the one to which the iPod input is assigned.
The iPod can be disconnected after switching to a function other than the one to which the iPod input is assigned.
Multi zone music entertainment system

About the button names in this explanation
< > : Buttons on the main unit
[ ] : Buttons on the remote control unit
Button name only: Buttons on the main unit and remote control unit
- When the outputs of the ZONE2 (ZONE3) OUT terminals are wired and connected to power amplifiers installed in other rooms, different sources can be played in rooms other than the MAIN ZONE in which this unit and the playback devices are installed. (Refer to ZONE2 (ZONE3) on the diagram below.)
- When a sold separately room-to-room remote control unit is wired and connected between the MAIN ZONE and ZONE2 (ZONE3), the remote-controllable devices in the MAIN ZONE can be controlled from ZONE2 (ZONE3) using the remote control unit.
![]() To control playback devices other than the ones above, either use that device's remote control unit or preset a separately sold programmable remote control unit.
To control playback devices other than the ones above, either use that device's remote control unit or preset a separately sold programmable remote control unit.
- For instructions on installation and operation of separately sold devices, refer to the devices' operating instructions.
Multi-zone playback using the ZONE2 and ZONE3 PREOUT terminals
When using the power amplifier as the MAIN ZONE output
- The DRA-700AE/700AEDAB is equipped with pre-out terminals for which the volume is adjustable and video output terminals (composite) as the ZONE2 (ZONE3) output terminals, and variable output level as the ZONE2 (ZONE3) output terminals.
[System configuration and connections example]
Using external amplifier.

Refer to "Connections"
Outputting a program source to amplifier, etc., in the ZONE2 (or ZONE3) room (ZONE2 or ZONE3 SELECT mode)
- Press <ZONE/REC SELECT> to select "M-ZONE".
![]()
- Use FUNCTION to select the source you want to output appears on the display.
- The "ZONE" indicator and the indicator for the selected source light.
- Start playing the source to be output.
![]() For operating instructions, refer to the manuals of the respective components.
For operating instructions, refer to the manuals of the respective components.

- The signals of the source selected in the ZONE mode are also output from the VCR and CD-R/TAPE recording output terminals.
Remote control unit operations during multi source playback
- Press [ZONE2 (ZONE3) ON] to turn on the zone power.
![]() To cancel the ZONE2 or ZONE3 mode:
To cancel the ZONE2 or ZONE3 mode:
Press [ZONE2 OFF] or [ZONE3 OFF]. - Use [FUNCTION] to select the input source you wish to output.
- The "ZONE" indicator and the indicator for the selected source light.
![]() The MULTI ZONE source switches directly.
The MULTI ZONE source switches directly.
![]() When the MULTI ZONE SOURCE function is set to "TUNER", the preset channel can be selected pressing [PRESET].
When the MULTI ZONE SOURCE function is set to "TUNER", the preset channel can be selected pressing [PRESET].
- The "ZONE" indicator and the indicator for the selected source light.
- The volume of the outputs of the different zones can be adjusted with [VOLUME].
![]() Default volume setting
Default volume setting
ZONE2/ZONE3: – – – dB (Minimum)
![]() The zone volume can be adjusted within the range of –80 to 18 dB, in steps of 0.5 dB.
The zone volume can be adjusted within the range of –80 to 18 dB, in steps of 0.5 dB.
- When using ZONE2 or ZONE3, it is possible to turn the power for the MAIN ZONE only on or off by pressing [MAIN ON/OFF].
Recording (audio and/or video)
- Press <ZONE/REC SELECT> until "RECOUT" appears on the display.
![]()
- Use FUNCTION to select the source to be recorded (audio and/or video).
- The "REC" indicator lights.
- Record (the audio or video signals).
![]() For operations, see the operating instructions of the device from which you are recording (audio or video signals).
For operations, see the operating instructions of the device from which you are recording (audio or video signals).
- To cancel, press <ZONE/REC SELECT> and set the function to "ZONE".
NOTE:
- When the REC OUT mode is selected, [ZONE2 (ZONE3) ON] and FUNCTION (ZONE) cannot be operated.
About the memory functions
Last function memory
The various settings set when the DRA-700AE/700AEDAB's power is switched to standby are stored in the memory. When the power is turned back on, the settings made when the power was switched to standby are recalled.
Backup memory
The various settings are stored in the memory for about 1 week, even when the power is turned off or the power cord is unplugged.
Initialization of the microprocessor
If the indication on the display is not normal or if the operation of the unit is not correct, then the microprocessor should be reset by the following procedure.
- Switch off the unit using <POWER>.
- Keep both <SPEAKER> (A and B) depressed and turn on the unit by pressing <POWER>.
- Check that the entire display is flashing at 1-second intervals and release the buttons.
- The microprocessor will be initialized.
- If step 3 does not work, start over from step 1.
- If the microprocessor has been reset, all the button settings are reset to the default values (the values set upon shipment from the factory).
Troubleshooting
If a problem should arise, first check the following.
- Are the connections correct?
- Have you operated the receiver according to the Operating Instructions?
- Are the speakers and other components operating properly?
If this unit is not operating properly, check the items listed in the table below. Should the problem persist, there may be a malfunction. Disconnect the power immediately and contact your store of purchase.
| Symptom | Cause | Measures |
| Display not lit and sound not produced when POWER switch set to on. |
|
|
| Display lit but sound not produced. |
|
|
| Nothing is displayed on monitor. |
|
|
| Copying from DVD to VCR is not possible. |
|
|
| No sound is produced from subwoofer. |
|
|
| This unit does not operate properly when remote control unit is used. |
|
|
| Power has turned off and the power indicator is blinking red. |
|
|
| Display says "Station not Available". |
|
|
| I can not access secondary services. |
|
|
| I hear a burbling sound on some stations. |
|
|
Specifications
Audio section
| |||
| Rated output: | 80 W + 80 W (8 Ω/ohms, 20 Hz ~ 20 kHz with 0.08% T.H.D.) | ||
| Output terminals: | A or B: 4 ~ 16 Ω/ohms A + B: 8 ~ 16 Ω/ohms | ||
| |||
| Input sensitivity / input impedance: | 200 mV / 47 kΩ/kohms | ||
| Frequency response: | 10 Hz ~ 100 kHz: +1, –3 dB (TONE DEFEAT ON) | ||
| S/N: | 98 dB (IHF-A weighted) (TONE DEFEAT ON) | ||
| Total harmonic distortion: | 0.009% (–3 dB at rated output, 8 Ω/ohms) (1 kHz) | ||
| Rated output: | 1.2 V | ||
Video section
| |
| Input / output level and impedance: | 1 Vp-p, 75 Ω/ohms |
| Frequency response: | 5 Hz ~ 10 MHz — +1, –3 dB |
Tuner section
| [FM] (note: µV at 75 Ω/ohms, 0 dBf = 1 x 10–15 W) | [AM] | ||
| Receiving Range: | 87.50 MHz ~ 108.00 MHz | 522 kHz ~ 1611 kHz | ||
| Usable Sensitivity: | 1.0 µV (11.2 dBf) | 18 µV | ||
| 50 dB Quieting Sensitivity: | MONO: 1.6 µV (15.3 dBf) STEREO: 23 µV (38.5 dBf) | |||
| S/N: | MONO: 77 dB (IHF-A weighted) STEREO: 72 dB (IHF-A weighted) | |||
| Total Harmonic Distortion (at 1 kHz): | MONO: 0.15 % STEREO: 0.3% | |||
| ||||
| Frequency range: | 174.928 (5A) ~ 239.200 (13F) MHz (BAND III) 1452.960 (LA) ~ 1490.624 (LW) MHZ (L–BAND) | |||
| Sensitivity: | –97 dBm | |||
| S/N: | 100 dB (IHF-A weighted) | |||
| THD+N: | 0.01% (1 kHz) | |||
| Channel separation: | 87 dB (1 kHz) | |||
| Selectivity: | 40 dB (at adjacent channel) | |||
| Frequency response: | +0.5/–0.5 dB (5 Hz ~ 20 kHz) | |||
| Aerial terminal: | 75 Ω/ohm, F female | |||
General
| Power supply: | AC 230 V, 50 Hz | ||
| Power consumption: | 245 W 1 W Max (Standby) | ||
| Maximum external dimensions: | 434 (W) x 147 (H) x 417 (D) mm | ||
| Mass: | DRA-700AE: 9.7 kg DRA-700AEDAB: 9.9 kg | ||
Remote control unit (RC-1054)
Batteries: R03/AAA Type (Two batteries)
External dimensions: 49 (W) x 220 (H) x 23 (D) mm
Mass: 115 g (included batteries)
ZONE remote control unit (RC-1056)
Batteries: R03/AAA Type (Two batteries)
External dimensions: 54 (W) x 115 (H) x 23 (D) mm
Mass: 80 g (included batteries)
* For purposes of improvement, specifications and design are subject to change without notice.
DAB frequency table (DRA-700AEDAB only)
Band III (174 to 240 MHz)
| Frequency | Level | Frequency | Level |
| 174.928 MHz | 5A | 208.064 MHz | 9D |
| 176.640 MHz | 5B | 209.936 MHz | 10A |
| 178.352 MHz | 5C | 211.648 MHz | 10B |
| 180.064 MHz | 5D | 213.360 MHz | 10C |
| 181.936 MHz | 6A | 215.072 MHz | 10D |
| 183.648 MHz | 6B | 216.928 MHz | 11A |
| 185.360 MHz | 6C | 218.640 MHz | 11B |
| 187.072 MHz | 6D | 220.352 MHz | 11C |
| 188.928 MHz | 7A | 222.064 MHz | 11D |
| 190.640 MHz | 7B | 223.936 MHz | 12A |
| 192.352 MHz | 7C | 225.648 MHz | 12B |
| 194.064 MHz | 7D | 227.360 MHz | 12C |
| 195.936 MHz | 8A | 229.072 MHz | 12D |
| 197.648 MHz | 8B | 230.784 MHz | 13A |
| 199.360 MHz | 8C | 232.496 MHz | 13B |
| 201.072 MHz | 8D | 234.208 MHz | 13C |
| 202.928 MHz | 9A | 235.776 MHz | 13D |
| 204.640 MHz | 9B | 237.488 MHz | 13E |
| 206.352 MHz | 9C | 239.200 MHz | 13F |
L-Band (1452 to 1490 MHz)
| Frequency | Level |
| 1452.960 MHz | LA |
| 1454.672 MHz | LB |
| 1456.384 MHz | LC |
| 1458.096 MHz | LD |
| 1459.808 MHz | LE |
| 1461.520 MHz | LF |
| 1463.232 MHz | LG |
| 1464.944 MHz | LH |
| 1466.656 MHz | LI |
| 1468.368 MHz | LJ |
| 1470.080 MHz | LK |
| 1471.792 MHz | LL |
| 1473.504 MHz | LM |
| 1475.216 MHz | LN |
| 1476.928 MHz | LO |
| 1478.640 MHz | LP |
| 1480.352 MHz | LQ |
| 1482.064 MHz | LR |
| 1483.776 MHz | LS |
| 1485.488 MHz | LT |
| 1487.200 MHz | LU |
| 1488.912 MHz | LV |
| 1490.624 MHz | LW |
SAFETY PRECAUTIONS

RISK OF ELECTRIC SHOCK
DO NOT OPEN

TO REDUCE THE RISK OF ELECTRIC SHOCK, DO NOT REMOVE COVER (OR BACK). NO USER-SERVICEABLE PARTS INSIDE. REFER SERVICING TO QUALIFIED SERVICE PERSONNEL.
 The lightning flash with arrowhead symbol, within an equilateral triangle, is intended to alert the user to the presence of uninsulated "dangerous voltage" within the product's enclosure that may be of sufficient magnitude to constitute a risk of electric shock to persons.
 The exclamation point within an equilateral triangle is intended to alert the user to the presence of important operating and maintenance (servicing) instructions in the literature accompanying the appliance.

TO REDUCE THE RISK OF FIRE OR ELECTRIC SHOCK, DO NOT EXPOSE THIS APPLIANCE TO RAIN OR MOISTURE.
NOTE ON USE
- Avoid high temperatures.
Allow for sufficient heat dispersion when installed on a rack.
![]()
- Handle the power cord carefully.
Hold the plug when unplugging the cord.
![]()
- Unplug the power cord when not using the set for long periods of time.
![]()
- Do not let insecticides, benzene, and thinner come in contact with the set.
![]()
- Do not obstruct the ventilation holes.
![]()
* (For sets with ventilation holes) - Do not let foreign objects in the set.
![]()
- Keep the apparatus free from moisture, water, and dust.
![]()
- Never disassemble or modify the set in any way.
![]()


- The ventilation should not be impeded by covering the ventilation openings with items, such as newspapers, tablecloths, curtains, etc.
- No naked flame sources, such as lighted candles, should be placed on the apparatus.
- Attention should be drawn to the environmental aspects of battery disposal.
- Do not expose the set to dripping or splashing fluids.
- No objects filled with liquids, such as vases, shall be placed on the apparatus.
To completely disconnect this product from the mains, disconnect the plug from the wall socket outlet. The mains plug is used to completely interrupt the power supply to the unit and must be within easy access by the user.

Documents / ResourcesDownload manual
Here you can download full pdf version of manual, it may contain additional safety instructions, warranty information, FCC rules, etc.
Download Denon DRA-700AE/700AEDAB - AM-FM STEREO RECEIVER Manual
Advertisement


Need help?
Do you have a question about the DRA-700AE and is the answer not in the manual?
Questions and answers