
Related Manuals for Clarke SHHHAIR MAX 24/150


Summary of Contents for Clarke SHHHAIR MAX 24/150
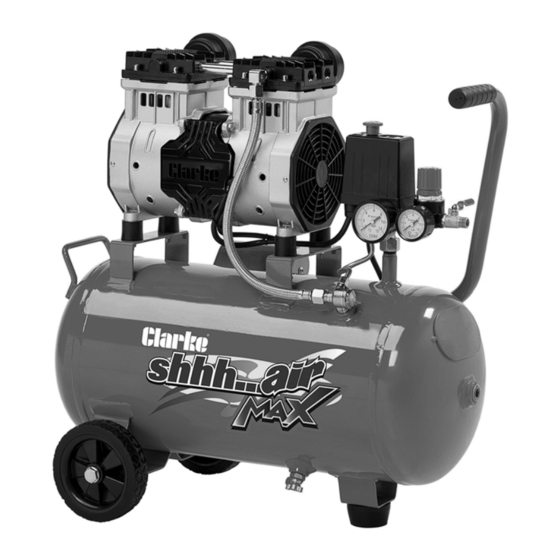
- Page 1 LOW NOISE AIR COMPRESSOR MODEL NO: SHHHAIR MAX 24/150 PART NO: 2242040 OPERATION & MAINTENANCE INSTRUCTIONS ORIGINAL INSTRUCTIONS DL1123...
-
Page 2: Environmental Recycling Policy
INTRODUCTION Thank you for purchasing this CLARKE Air Compressor. Before attempting to operate the machine, it is essential that you read this manual thoroughly and carefully follow all instructions given. In doing so you will ensure the safety of yourself and that of others around you, and you can also look forward to the product giving you long and satisfactory service. -
Page 3: General Safety Warnings
GENERAL SAFETY WARNINGS WARNING: WHEN USING ELECTRICAL TOOLS, BASIC SAFETY PRECAUTIONS SHOULD ALWAYS BE FOLLOWED TO REDUCE THE RISK OF FIRE, ELECTRIC SHOCK AND PERSONAL INJURY WARNING: READ ALL THESE INSTRUCTIONS BEFORE ATTEMPTING TO OPERATE THIS PRODUCT AND KEEP THESE INSTRUCTIONS IN A SAFE PLACE. WORK AREA 1. - Page 4 GENERAL MACHINE USE AND CARE 1. Prior to use, all operators should become familiar with the instructions in this booklet especially the ON/OFF switch for emergency stopping. 2. ALWAYS maintain the compressor with care and keep it clean for best / safest performance.
- Page 5 AIR COMPRESSOR SAFETY INSTRUCTIONS 1. ONLY USE WITHIN THE RECOMMENDED OPERATING TEMPERATURE RANGE: This compressor should only be used in an ambient temperature of between 0 C and +35 C (never below freezing temperatures). 2. NEVER USE AN AIR COMPRESSOR WHICH APPEARS DEFECTIVE OR IS OPERATING ABNORMALLY: If the compressor operates unusually or makes strange noises, switch off immediately and purge the air reservoir.
-
Page 6: Electrical Connections
ELECTRICAL CONNECTIONS WARNING! READ THESE ELECTRICAL SAFETY INSTRUCTIONS THOROUGHLY BEFORE CONNECTING THE PRODUCT TO THE MAINS SUPPLY. Before switching the product on, make sure that the voltage of your electricity supply is the same as that indicated on the rating plate. This product is designed to operate on 230VAC 50Hz. - Page 7 OVERVIEW DESCRIPTION DESCRIPTION Drain Valve Regulator One Way Check Valve On/Off Pressure Switch Discharge Pipe Air Filters Tank Pressure Gauge 10 Safety Valve Outlet Pressure Gauge 11 Pump 2 x 1/4” BSP Airline Outlet Fixing 12 Air Tank Point With Tap...
-
Page 8: Discharge Pipe
ON/OFF PRESSURE SWITCH Switch on - Auto/Off. The compressor will automatically switch off when the tank pressure reaches the maximum preset pressure (0.8Mpa, 8 Bar, 116psi) and will run automatically when the tank pressure reaches the minimum preset pressure (0.6Mpa, 6 Bar, 87psi). In the ‘OFF’... -
Page 9: Preparing For Use
PREPARING FOR USE CONNECTING THE WHEELS & RUBBER FOOT 1. Unscrew the nut and two washers from the wheel axle. 2. Pass the wheel axle through the axle hole in the wheel support frame, as shown, with a washer either side of the hole. 3. -
Page 10: Operation
OPERATION Before connecting your compressor to the mains supply, check the following:- 1. Firstly, ensure the compressor is on level ground. DO NOT allow it to run if it is standing on an incline. 2. Check that the mains voltage corresponds with that shown on the data label on the side of the compressor and the specification page (p18) of this manual. -
Page 11: Safety Valve
3. Pull the ON/OFF switch to the On (Auto) position and let the pump run. 4. Turn the regulator fully counterclockwise. The compressor will build to maximum preset pressure and then shut off. 5. Turn the regulator clockwise to bleed off the air. The compressor will restart at a preset pressure (about 6 bar). -
Page 12: Troubleshooting
TROUBLESHOOTING PROBLEM PROBABLE CAUSE REMEDY Compressor does not start 1.No electrical power, 1.Make sure the or restart. Wire connection loose. machine is connected to power. Check wire connections. 2.Fuse blown. 2.Change fuse. 3.Circuit break. 3.Reset the circuit breaker, check for low voltage conditions. - Page 13 2.Low power due to poor 2.Check connections, connection. eliminate extension cord if used, check circuit with voltmeter. 3.Motor short circuit. 3.Replace motor. Return to CLARKE dealer or contact CLARKE Service Department. 4.Check valve is 4.Disassemble check blocked. valve to check if it is blocked and replace is necessary.
- Page 14 2.Defective bearing on 2.Replace bearing eccentric or motor shaft. and/or motor shaft. Return to CLARKE dealer or contact CLARKE Service Department. 3.Cylinder or piston ring is 3.Repair or replace as scored.
- Page 15 2.Clean or replace. pressure. 3.Air leaks in piping (on 3.Replace leaking machine or in outside components or system). tighten as necessary. Return to CLARKE dealer or contact CLARKE Service Department. 4.Broken inlet valve. 4.Replace compressor valves. Return to CLARKE dealer or contact CLARKE Service Department.
-
Page 16: Maintenance
PROBLEM PROBABLE CAUSE REMEDY Air leaking from release 1.Check valve stuck in an 1.Remove and valve on pressure switch. open position. replace check valve. NEVER disassemble the check valve under pressure, release tank pressure first. MAINTENANCE Daily Weekly Monthly Monthly Drain the condensation from the air receiver via the drain valve Check for air leaks... -
Page 17: Replacing The Air Filters
REPLACING THE AIR FILTERS NOTE: The compressor must be completely depressurised before carrying out this procedure. 1. Unscrew the air filters from the pump head assembly. 2. Unscrew the air filter cover and clean or replace the air filter. 3. Screw the air filter cover back together and screw back onto the pump head assembly. -
Page 18: Specification
SPECIFICATION Product Model ShhhAir Max 24/150 Operating Temperature Range C - 35 IP Rating IP20 Overload Protection Device Automatic Thermal Protector Protection Class Class I Duty Cycle S3 50% 10mins Cycle Time Dimensions Fully Assembled (D x W x H) - Page 19 COMPONENT DIAGRAMS & PARTS LIST PUMP ELECTRIC DIAGRAM...
-
Page 20: Exploded Diagram
EXPLODED DIAGRAM... -
Page 21: Parts List
PARTS LIST DESCRIPTION Pump Assembly Air Filter x 2 Elbow Connector Pump Pad M6 x 4 Motor Side Cover x 2 Capacitor Cover Capacitor 25uF Discharge Tube Air Tank Wheel x 2 Release Tube One Way Check Valve Drain Valve Rubber Foot Power Cord, 3G1.0 Pressure Gauge 40psi... -
Page 22: Declaration Of Conformity
DECLARATION OF CONFORMITY... - Page 23 OTHER CLARKE AIR PRODUCTS 1/4” Mini Air Filter - 5 Piece Air Tool Kit - Sandblast Kit & Pick Up CAT152 KIT1100 Hose - SB4 •Max. Flow Rate: 6.2 •Includes: Spray Gun, •Includes: 3m Suction Wash Gun, Tyre Hose Inflator, Blow Gun &...
Need help?
Do you have a question about the SHHHAIR MAX 24/150 and is the answer not in the manual?
Questions and answers