
Subscribe to Our Youtube Channel
Related Manuals for Heinner HBO-V6510GCDRC-GBK


Summary of Contents for Heinner HBO-V6510GCDRC-GBK
- Page 1 UNREGISTERED Created by Unregistered Version BUILT IN OVEN Model: HBO-V6510GCDRC-GBK UNREGISTERED Created by Unregistered Version UNREGISTERED Created by Unregistered Version Built In Oven Energy Class A Volume 69 L...
- Page 2 UNREGISTERED Created by Unregistered Version INTRODUCTION Before using the appliance, please read carefully this instruction manual and keep it for future reference. This instruction manual is designed to provide you with all required instructions related to the installation, use and maintenance of the appliance.
-
Page 3: Safety Precautions
III. SAFETY PRECAUTIONS UNREGISTERED 1. Safety instructions Created by Unregistered Version • Carefully read all instructions before using your appliance and keep them in a convenient place for reference when necessary. • This manual has been prepared for more than one model therefore your appliance may not have some of the features described within. - Page 4 UNREGISTERED Created by Unregistered Version • Before connecting your appliance, make sure that the local distribution conditions (nature of the gas and gas pressure or electricity voltage and frequency) and the specifications of the appliance are compatible. The specifications for this appliance are stated on the label.
- Page 5 UNREGISTERED 1.3 During use Created by Unregistered Version • When you first use your oven you may notice a slight smell. This is perfectly normal and is caused by the insulation materials on the heater elements. We suggest that, before using your oven for the first time, you leave it empty and set it at maximum temperature for 45 minutes.
-
Page 6: Product Description
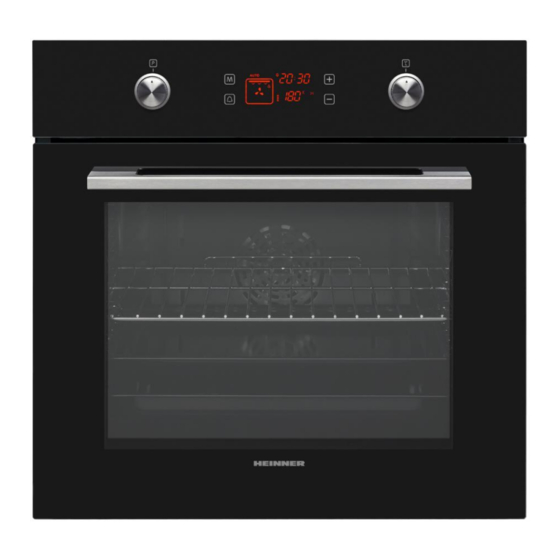
PRODUCT DESCRIPTION UNREGISTERED Created by Unregistered Version Important: specifications for the product vary and the appearance of your appliance may differ from that shown in the figures below: List of components UNREGISTERED Created by Unregistered Version 1. Control panel 2. -
Page 7: Installation Of The Oven
INSTALLATION UNREGISTERED Created by Unregistered Version WARNING : This appliance must be installed by an authorised service person or qualified technician, according to the instructions in this guide and in compliance with the current local regulations. • Incorrect installation may cause harm and damage, for which the manufacturer accepts no responsibility and the warranty will not be valid. - Page 8 UNREGISTERED Created by Unregistered Version UNREGISTERED Created by Unregistered Version After making the electrical connections, insert the oven into the cabinet by UNREGISTERED pushing it forward. Open the oven door and insert 2 screws in the holes located on the oven frame.
- Page 9 UNREGISTERED Electrical Connection and Safety Created by Unregistered Version WARNING: The electrical connection of this appliance should be carried out by an authorised service person or qualified electrician, according to the instructions in this guide and in compliance with the current local regulations.
-
Page 10: Using The Product
VI. USING THE PRODUCT UNREGISTERED Created by Unregistered Version Oven Controls Oven function control knob Turn the knob to the corresponding symbol of the desired cooking function. For the details of different functions see ´Oven Functions`. Oven thermostat knob After selecting a cooking function, turn this knob to set the desired temperature. - Page 11 UNREGISTERED Static Cooking Function: The oven’s thermostat and warning lights will switch on, and the lower and upper heating elements will start operating. The static cooking Created by Unregistered Version function emits heat, ensuring even cooking of food. This is ideal for making pastries, cakes, baked pasta, lasagne and pizza.
- Page 12 UNREGISTERED Faster Grilling Function: The oven’s thermostat and warning lights will switch on, and the grill and upper heating elements will start operating. This function is used for faster Created by Unregistered Version grilling and for grilling food with a larger surface area, such as meat. Use the upper shelves of the oven.
-
Page 13: Cooking Table
UNREGISTERED Cooking table Created by Unregistered Version Function Dishes min. Puff Pastry 2-3-4 170-190 35-45 Cake 2-3-4 170-190 30-40 Cookie 2-3-4 170-190 30-40 Stew 175-200 40-50 Chicken 2-3-4 45-60 Puff Pastry 2-3-4 170-190 25-35 UNREGISTERED Cake 2-3-4 150-170... -
Page 14: Adjusting The Minute Minder
Adjusting the Minute Minder UNREGISTERED Use of the Visio touch programmer Created by Unregistered Version To set a Minute Minder timer, press the alarm sensor button “ ”, “0.00” will appear on the Timer display and the “ ” symbol will flash. Use the “+” and “-”... - Page 15 UNREGISTERED Adjusting the Cooking End Time Created by Unregistered Version This function is used to begin cooking after a certain period of time and for a specific duration of time. Prepare the food for cooking and put it in the oven.
- Page 16 VII. ACCESSORIES UNREGISTERED Created by Unregistered Version The EasyFix Wire Rack UNREGISTERED Created by Unregistered Version • Insert the accessory to the correct position inside the oven • Allow at least a 1 cm space between the fan cover and accessories.
- Page 17 UNREGISTERED The wire grid Created by Unregistered Version The wire grid is best used for grilling or for processing food in oven-friendly containers. UNREGISTERED Warning place the grid to any corresponging rack in the oven cavity correctly Created by Unregistered Version and push it to the end.
-
Page 18: Cleaning And Maintenance
VIII. CLEANING AND MAINTENANCE UNREGISTERED Created by Unregistered Version Warning: Switch off the appliance and allow it to cool before cleaning is to be carried out. General Instructions • Check whether the cleaning materials are appropriate and recommended by the manufacturer before use on your appliance. - Page 19 UNREGISTERED Catalytic Cleaning Created by Unregistered Version Catalytic liners are installed within the oven cavity. These are the matte-finished, light- coloured panels on the sides and/or the matte-finished panel at the rear of the oven. They work by collecting any grease and oil residue during cooking.
- Page 20 Cleaning Painted Surfaces (if available) UNREGISTERED • Spots of tomato, tomato paste, ketchup, lemon, oil derivatives, milk, sugary Created by Unregistered Version foods, sugary drinks and coffee should be cleaned with a cloth dipped in warm water immediately. If these stains are not cleaned and allowed to dry on the surfaces they...
- Page 21 UNREGISTERED Created by Unregistered Version Removal of the Inner Glass You must remove the oven door glass before cleaning, as shown below. Push the glass in the direction of B and release from the location bracket (x). Pull the glass out in the direction of A.
-
Page 22: Maintenance
UNREGISTERED Created by Unregistered Version Removal of the Wire Shelf To remove the wire rack, pull the wire rack as shown in the figure. After releasing it from the clips (a), lift it up. UNREGISTERED Created by Unregistered Version... -
Page 23: Troubleshooting
TROUBLESHOOTING UNREGISTERED Created by Unregistered Version If you still have a problem with your appliance after checking these basic trouble shooting steps, please contact an authorized service person or wualified technician. Problem Possible Cause Solution Check whether there is power supplied. -
Page 24: Technical Specifications
UNREGISTERED Created by Unregistered Version X. TECHNICAL SPECIFICATIONS BUILT IN OVEN Type of Oven ELECTRIC Mass 30,0 Energy Efficiency Index - conventional 103,6 Energy Efficiency Index - fan forced 94,1 UNREGISTERED Energy Class Created by Unregistered Version Energy consumption (electricity) - conventional... - Page 25 UNREGISTERED Created by Unregistered Version Environment friendly disposal You can help protect the environment! Please remember to respect the local regulations: hand in the non-working electrical equipment’s to an appropriate waste disposal center. UNREGISTERED Created by Unregistered Version HEINNER is a registered trademark of Network One Distribution SRL.
Need help?
Do you have a question about the HBO-V6510GCDRC-GBK and is the answer not in the manual?
Questions and answers