Table of Contents
Advertisement
Advertisement
Table of Contents

Related Manuals for BRIO Moderna CLPOU730UVRO4CF


Summary of Contents for BRIO Moderna CLPOU730UVRO4CF
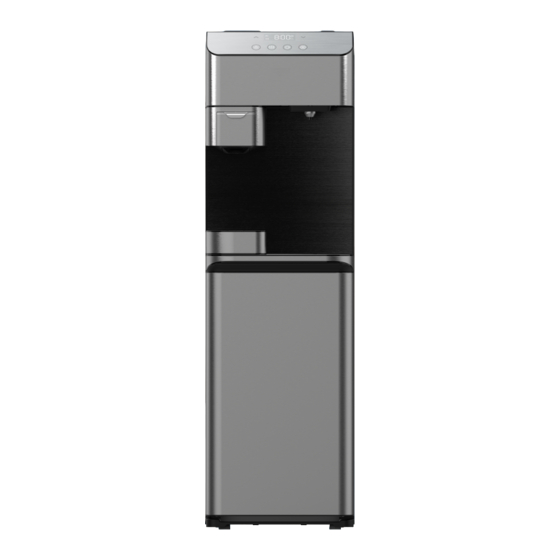
- Page 1 Point-of-Use Water Dispenser & Co ee Maker User’s Manual Model: CLPOU730UVRO4CF...
-
Page 2: Table Of Contents
Table of Contents Safety Information . . . . . . . . . . . . . . . . . . . . . . . . . . . . . . . . . . . . . . . . . . . . . . . . . . . . . . . . . . . . . . . . 3 Intended Use . -
Page 3: Safety Information
Safety Information WARNING: To reduce risk of injury and property damage, you must read this entire guide before assembling, installing and operating the dispenser . WARNING: This product dispenses water at very high temperatures . Failure to use properly can cause personal injury . -
Page 4: Intended Use
Intended Use This appliance is intended to be used in household and similar applications such as: • Staff kitchen areas in shops, offices and other working environments Farm houses • Hotels, motels and other residential-type environments • Bed-and-breakfast environments • Catering and similar non-retail applications •... -
Page 5: Touch Panel Description
Touch Panel Description No . Description Up arrow button Change PCB filter icon Change RO filter icon LED display Self-cleaning UV icon Water production icon Down arrow button Lock button Hot water button Brew button Cold water button Operational Specifications Model No . -
Page 6: Package Contents
Package Contents Part Description Quantity Part Description Quantity Feedwater adapter Filter flushing tube (with extra nut) Shut-off valve tube Plumber’s tape (7 ft .) Drain saddle with Filter housing (for foam gasket filter flushing) RO water outlet tube Filters Tube cutter Materials Needed Wrench Electric drill with 1/4 in . -
Page 7: Connect To The Cold Water Supply
3 . Connect to the Cold Water Supply CAUTION: DO NOT CONNECT THIS WATER LINE TO A HOT WATER SUPPLY LINE . The water supply to the unit MUST be from the COLD WATER LINE . Using HOT WATER will severely damage your filters . -
Page 8: Make The Reverse Osmosis Waste Connections
Turn off the cold water supply, then disconnect the cold water pipe from the cold water supply line . Connect the feedwater adapter (E) to the cold water supply line . Connect the cold water pipe to the top of the feedwater adapter (E) . NOTE: An extra adapter nut is included on top of the feedwater adapter... - Page 9 OD (outer diameter) drain pipe . Always install the drain saddle before the P-trap and on a straight vertical or horizontal section of the pipe . To avoid clogging the drain line with debris, do not install the drain saddle after the drain pipe meets a garbage disposal or dishwasher drain .
-
Page 10: Flush The Filters
5 . Flush the Filters Follow this procedure each time you replace your filters . IMPORTANT: Ensure water supply is off before you begin . IMPORTANT: Flush ONLY the sediment, pre carbon, and post carbon filters . The reverse osmosis (RO) filter should not be flushed . Connect a filter (D) to the filter housing (C) by twisting the filter (D) clockwise . -
Page 11: Install The Filters And Complete The Installation
6 . Install the Filters and Complete the Installation After flushing, twist each filter (D) clockwise into the filter housings located inside the dispenser cabinet . The sediment filter goes on the left, followed by the pre carbon, RO, and post carbon filters . -
Page 12: Operation
Operation IMPORTANT: This unit has been tested and sanitized prior to packing and shipping . During transit, dust and odors can accumulate in the tank and lines . Dispense and dispose at least one liter of water prior to drinking any water . Turn the Dispenser On/Off IMPORTANT: Before activating heating and cooling switches, ensure water has filled the tanks inside the... -
Page 13: Dispense Cold Water
Dispense Cold Water NOTE: Water will take approximately 1 hour after plugging in and turning on to become completely chilled . Place a drinking glass or container under the tap and press the cold water button to dispense cold water . Release the button when your container is full . -
Page 14: Prepare Beverages
Prepare Beverages Pull out the brewer cup drawer and remove it completely from the dispenser . Insert coffee capsule of your choice (sold separately) and press it firmly into place until the needle has fully punctured the bottom of the capsule, and the top of the capsule is level with the top of the drawer . Slide the drawer into the dispenser and press until firmly in place . -
Page 15: Troubleshooting
Troubleshooting Problem Solution • It takes up to one hour after setup to dispense cold water . • Make sure the power cord is properly connected to a working outlet . • Make sure the back of the dispenser is at least 20 cm from a wall and there is The cold water is not cold . -
Page 16: Filter Replacement Schedule
Filter Replacement Schedule Filter Type Model No . Replacement Schedule Function Performs coarse filtration of inlet water, Sediment NFMPP5M 6-12 months or 950 gallons removing sand, rust, dirt, and other suspended solids . Removes chlorine, and other unpleasant Pre Carbon NFMGAC 6-12 months or 950 gallons tastes and odors . - Page 20 Contact Us Call: +1 844-257-4103 ©2023 Brio Water Technology, Inc.
Need help?
Do you have a question about the Moderna CLPOU730UVRO4CF and is the answer not in the manual?
Questions and answers