
Related Manuals for Victoria Arduino EAGLE TEMPO


Summary of Contents for Victoria Arduino EAGLE TEMPO
- Page 1 LIBRETTO ISTRUZIONI (Istruzioni Originali) USER HANDBOOK (Translation of the Original Instructions) MANUEL D’INSTRUCTIONS (Traduction des Instructions Originales)
- Page 2 PRESCRIZIONI DI SICUREZZA • Il presente libretto costituisce parte integrante ed essenziale del prodotto e dovrà essere consegnato all’utilizzatore. Leggere attentamente le avvertenze contenute nel presente libretto in quanto forni- scono importanti indicazioni riguardanti la sicurezza di installazione, d’uso e manutenzione. Conser- vare con cura questo libretto per ogni ulteriore consultazione.
- Page 3 al dispositivo stesso. Qualora fosse necessario l’utilizzo di altra componentistica, l’installatore deve verificare l’idoneità dello stesso ad essere utilizzato a contatto con l’acqua per consumo umano. L’in- stallatore deve eseguire i collegamenti idraulici rispettando le norme di igiene e sicurezza idraulica di tutela ambientale vigenti nel luogo di installazione.
- Page 4 neggiamento, spegnere l’apparecchio e per la sua sostituzione rivolgersi esclusivamente a personale professionalmente qualificato. • In caso di necessità di sostituzione del cavo di alimentazione questa può essere eseguita solo da un centro assistenza autorizzato o dal costruttore. • L’alimentazione del dispositivo deve essere effettuata con acqua idonea al consumo umano confor- me alle disposizioni vigenti nel luogo di installazione.
- Page 5 • Allorché si decida di non utilizzare più un apparecchio di questo tipo si rac- comanda di renderlo inoperante facendo disconnettere il cavo di alimenta- zione da un tecnico specializzato o servizio assistenza autorizzato. • Non disperdere la macchina nell’ambiente: per lo smaltimento rivolgersi ad un centro autorizzato o contattare il costruttore che darà...
- Page 6 PREDISPOSIZIONE A CARICO DELL’ACQUIRENTE • Predisposizione luogo installazione. L’acquirente deve predisporre una superficie di appoggio idonea a sostenere il peso della macchina (vedere il capitolo di installazione). • Predisposizione elettrica. L’impianto elettrico deve essere conforme a quanto indicato dalle norme nazionali vigenti nel luogo di installazione e dotato di una efficiente messa a terra.
- Page 7 RICEZIONE MACCHINA TRASPORTO La macchina viene trasportata in pallet con più macchine dentro scatoloni assicurati al pallet con delle centine. Prima di procedere a qualsiasi operazione di trasporto o movimentazione, l’o- peratore deve indossare guanti e scarpe antinfortunistiche ed una tuta con elastici alle estremità.
- Page 8 DISIMBALLO Una volta liberata la macchina del pallet o del contenitore, non disperderlo nell’ambiente. CONTROLLO CONTENUTI Al ricevimento della scatola, verificare che l’imballo sia integro e visivamente non danneggiato. All’in- terno dell’imballo deve esserci il libretto istruzioni e il relativo corredo. In caso di danneggiamenti o anomalie, contattare il concessionario di zona.
- Page 9 SAFETY INDICATIONS • The present manual is an integral and essential part of the product and is to be delivered to the user. Carefully read all warnings in the manual as they provide important information required to install, use and maintain the unit safely. Keep this manual in a safe place for further consultation. •...
- Page 10 ability for use in contact with water for human consumption. The installer must Make the hydraulic connections respecting the rules of hygiene and water safety to environmental protection in force in the place of installation. So for the hydraulic plant contact an authorized technician. Always utilise the new hose supplied for connection to the water supply.
- Page 11 • The device needs to be supplied with water that is suitable for human consumption and compliant with the regulations in force in the place of installation. The installation engineer needs confirmation from the owner/manager of the system that the water complies with the requirements and stand- ards stated above.
- Page 12 INFORMATION TO THE USERS Under the senses of the Directives 2015/863/EU concerning the reduction of the use of dangerous substances in electric and electronic equipment, as well as the disposal of wastes. The symbol of the crossed large rubbish container that is present on the machine points out that the product at the end of its life cycle must be collected separate- ly from the other wastes.
- Page 13 SYMBOLS General hazard Electrical shock hazard Burns hazard Hazard of damage to the machine Operation reserved for the qualified technician, in compliance with current standards RESIDUAL RISKS Although the manufacturer has provided mechanical and electrical safety systems, dangerous areas persist during the use of the machine: •...
- Page 14 MOVEMENTS • Slowly lift the pallet about 30 cm from the ground and reach the loading area. • After checking that there are no obstacles, things or people, proceed with the loading. • Once you arrive at your destination, always with a suitable lifting device (e.g. forklift), after making sure that there are no things or people in the unload- ing area, take the pallet to the ground and move it about 30 cm from the ground, until to the storage area.
- Page 15 CONTENTS CHECK Upon receipt of the box, check that the packaging is intact and visually undamaged. Inside the pack- aging must be the instruction manual and the relative kit. In case of damage or faults, contact your local dealer. For any communication, always communicate the serial number. The communication must be carried out within 8 days from the receipt of the machine.
- Page 16 PRESCRIPTIONS DE SÉCURITÉ • Ce manuel est partie intégrante et essentielle du produit et il doit par conséquent être remis à l’uti- lisateur. Lire attentivement les conseils qu’il contient car ils fournissent des indications particulière- ment importantes sur la sécurité de l’installation, son utilisation et son entretien. Conserver ce ma- nuel avec soin de façon à...
- Page 17 • Durant l’installation du dispositif, utiliser les composants et les matériaux fournis en dotation avec le dis- positif. Si l’utilisation de composants supplémentaires s’avère nécessaire, l’installateur doit vérifier l’adé- quation de ces derniers pour un emploi au contact de l’eau pour la consommation humaine. L’installa- teur doit effectuer les branchements hydrauliques en respectant les normes d’hygiène et de sécurité...
- Page 18 • Le câble d’alimentation de cet appareil ne doit pas être remplacé par l’utilisateur. En cas d’endom- magement du câble, éteindre l’appareil et le faire remplacer uniquement par un technicien qualifié. • Si le cordon d’alimentation doit être remplacé, cette opération doit être effectuée exclusivement par un centre d’assistance agréé...
- Page 19 • Si vous décidez de ne plus utiliser cet appareil, il est vivement conseillé de le rendre inefficace en coupant le câble d’alimentation, après avoir débranché le câble du réseau d’alimentation électrique. • Ne jamais abandonner l’appareil dans l’environnement: pour son élimina- tion totale, s’adresser à...
- Page 20 PRÉDISPOSITION À LA CHARGE DE L’ACHETEUR • Prédisposition du lieu d’installation. L’acheteur doit prédisposer une surface d’appui appropriée pour supporter le poids de la machine (voir le chapitre installation). • Prédisposition électrique. Le système électrique doit être conforme aux réglementations nationales en vigueur sur le lieu d’ins- tallation et doit être muni d’une mise à...
- Page 21 RÉCEPTION DE LA MACHINE TRANSPORT La machine est transportée sur des palettes avec d’autres machines et à l’inté- rieur de cartons fixés aux palettes au moyen des courroies appropriées. Avant de procéder à toute opération de transport ou de manutention de la machine, l’opérateur doit porter des gants et des chaussures de protection et une salopette avec des élastiques aux extrémités.
- Page 22 DÉBALLAGE Après avoir retiré la machine de la palette ou de sa caisse, n’abandonner pas l’emballage dans l’environnement. CONTRÔLES DES CONTENUS Au moment de la réception de la caisse, vérifier que l’emballage soit intègre et visuellement intact. L’emballage doit contenir le manuel d’instructions et l’équipement. En cas de dommages ou d’anomalies, contacter le concessionnaire de zone.
- Page 23 Congratulazioni per aver acquistato una macchina Victoria Arduino! Legga con attenzione ciò che il presente libretto consiglia per “preparare” al meglio la sua Grazie all'intelligenza e alla praticità di questa macchina, si accorgerà di quanto sia facile preparare ottimi caffè espressi, unici caffè filtro e cremosi cappuccini. Col tempo inoltre, si renderà conto dell'ef- ficienza delle nuove tecnologie da noi sviluppate e di quanta poca manutenzione servirà.
-
Page 25: Table Of Contents
INDICE INDEX SOMMAIRE INFORMAZIONI GENERALI / GENERAL INFORMATIONS / INFORMATIONS GÉNÉRALES DATI TECNICI /TECHNICAL DATA / DONNÉES TECHNIQUES DESCRIZIONE DELL’APPARECCHIO / APPLIANCE DESCRIPTION / DESCRIPTION DE L’APPAREIL INSTALLAZIONE / INSTALLATION / INSTALLATION REGOLAZIONI DEL TECNICO QUALIFICATO / QUALIFIED TECHNICIAN ADJUSTMENTS / RÉGLAGES DU TECHNICIEN QUALIFIÉ... -
Page 26: Informazioni Generali General Informations Informations Générales
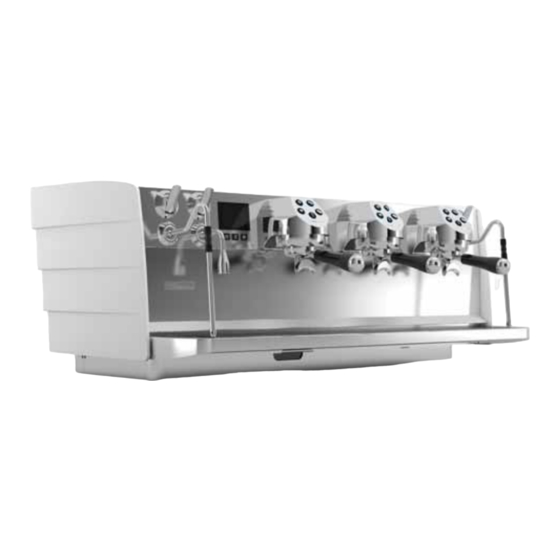
INFORMATIONS GÉNÉRALES COSTRUTTORE: SIMONELLI GROUP - Via E. Betti, 1 - Belforte del Chienti, Macerata (MC) - Italia MACCHINA DA CAFFÈ MODELLO: EAGLE TEMPO MANUFACTURER: SIMONELLI GROUP - Via E. Betti, 1 - Belforte del Chienti, Macerata (MC) - Italy COFFEE MACHINE MODEL: EAGLE TEMPO FABRICANT: SIMONELLI GROUP - Via E. -
Page 27: Dati Tecnici /Technical Data / Données Techniques
DATI TECNICI TECHNICAL DATA DONNÉES TECHNIQUES Gruppi Groups Groupes Voltaggio Voltage 220-240 / 380-145 Voltage Potenza Power 6000 7400 Puissance Potenza con scaldatazze Power with cup warmer 6400 7900 Puissance avec chauffe-tasse Capacità caldaia vapore Steam boiler capacity Capacité chaudière vapeur Capacità... - Page 28 DESCRIZIONE MACCHINA MACHINE DESCRIPTION DESCRIPTION DE LA MACHINE 89,3 90,4 91,6 °C 1.2 bar 1.2 bar...
- Page 29 EAGLE TEMPO è una macchina da caffè EAGLE TEMPO is a solid and compact intelli- EAGLE TEMPO est une machine à café pro- professionale intelligente solida e compatta, gent professional coffee machine, suitable for fessionnelle intelligente, solide et compacte, adatta a tutti coloro che dedicano la propria all those who dedicate their lives to coffee.
- Page 30 USO PREVISTO INTENDED USE USAGE PRÉVU • Macchina progettata e costruita rispettan- • Machine designed and built respecting • Machine conçue et construite conformé- do quanto espresso nella dichiarazione di what is expressed in the declaration of con- ment au contenu de la déclaration de conformità.
-
Page 31: Installazione Installation Installation
INSTALLAZIONE INSTALLATION INSTALLATION 30°C Per sollevare la macchina sono necessarie al- To lift the machine are necessary 2 or more Au moins 2 personnes sont nécessaires pour meno 2 persone. operators. soulever la machine. POSIZIONAMENTO POSITIONING POSITIONNEMENT Prima di installare la macchina, controllare Before installing the machine, make sure the Avant d’installer la machine, vérifier que la che l’area adibita sia compatibile con le di-... - Page 32 ALLACCIAMENTO IDRICO WATER CONNECTION BRANCHEMENT D’EAU Evitare strozzature nei tubi di collega- Avoid throttling in the connecting Éviter les étranglements des tubes de mento. Verificare che lo scarico sia in tubes. Assess that the drain pipe is able connexion. Vérifier que l’évacuation soit en grado di eliminare gli scarti.
- Page 33 1 2 3 ALLACCIAMENTO ELECTRICAL BRANCHEMENT ELETTRICO CONNECTION ÉLECTRIQUE Prima di allacciare la macchina a una rete Prior to connecting the machine to the elec- Avant de brancher a machine à un réseau elettrica verificare che i dati indicati sulla tar- trical mains, assess that the voltage shown on électrique, vérifier que le voltage indiqué...
- Page 34 60’’ 10’’ 10’’ 10’’ 10’’ 60’’ OPERAZIONI PRELIMINARY OPÉRATIONS PRELIMINARI OPERATIONS PRÉLIMINAIRES Al termine dell’installazione, il dispositivo vie- At the end of installation, the device is Au terme de l’installation, le dispositif doit être ne attivato e portato fino alla condizione no- switched on and taken to rated operating actionné...
-
Page 35: Regolazioni Del Tecnico Qualificato Qualified Technician Adjustments Réglages Du Technicien Qualifié
REGOLAZIONI DEL TECNICO QUALIFICATO QUALIFIED TECHNICIAN ADJUSTMENTS RÉGLAGES DU TECHNICIEN QUALIFIÉ Le operazioni di seguito descritte devo- The operations described below must opérations décrites ci-dessous no essere svolte solo da tecnici specia- be carried out only by specialized tech- doivent être effectuées exclusivement lizzati. - Page 36 REMPLISSAGE AUTOMATIQUE CALDAIA BOILER FILLING DE LA CHAUDIÈRE Tutti i modelli EAGLE TEMPO sono muniti di All models EAGLE TEMPO are equipped with Tous les modèles EAGLE TEMPO sont munis sonda di livello, per mantenere costante il li- a level gauge to keep the water level inside d’une sonde de niveau, afin de maintenir le...
- Page 37 REGOLAZIONE PRESSURE SWITCH / PUMP RÉGLAGE PRESSOSTATO / POMPA ADJUSTMENT PRESSOSTAT / POMPE Regolazione pressione pressostato Pressure switch setting Réglage de la pression du pressostat Per modificare la pressione di esercizio della To adjust the service pressure of the boiler, Pour modifier la pression de service de la caldaia, quindi la temperatura dell’acqua, in thus regulating the water temperature, ac-...
-
Page 38: Utilizzo Use Utilisation
Il display mostrerà la schermata di benvenuto The display will show the welcome page with L'écran affichera la page de bienvenue avec le con il logo EAGLE TEMPO per 10 secondi. the EAGLE TEMPO for 10 seconds. logo EAGLE TEMPO pour 10 seconds. - Page 39 89,3 90,4 91,6 °C 1.2 bar 1.2 bar Automaticamente inizia caricamento The water filling of the boiler starts automat- Le remplissage d'eau dans la chaudière dé- dell’acqua in caldaia. ically. marre automatiquement. Raggiunto il livello, inizia il riscaldamento se- When the level is reached, the display indi- Lorsque le niveau est atteint, le chauffage gnalato dal display.
- Page 40 EROGAZIONE ESPRESSO COFFEE DISTRIBUTION CAFÉ CAFFÈ ESPRESSO DISPENSING ESPRESSO Scegliere il portafiltro desiderato (caffè Select the desired filter holder (single or Choisir le porte-filtre désiré (café simple singolo o doppio). double coffee). ou double). Riempire con caffè macinato fino al livello Fill with ground coffee up to the maxi- Remplir de café...
- Page 41 Posizionare la/le tazzina/e sotto i beccucci Place the cups, or the cup, in the case of Placez la ou les tasses sous les becs et ap- e premere il pulsante caffè desiderato. a single filter holder, correctly under the puyez sur le bouton du café désiré. spouts.
- Page 42 EROGAZIONE VAPORE STEAM DISPENSING DISTRIBUTION VAPEUR Durante l’uso della lancia del vapore, While using the steam nozzle, you Lors de l’utilisation de la lance à va- prestare molta attenzione a non met- must pay attention to not place your peur, veiller à ne pas placer les mains tere le mani sotto di essa e non toc- hands beneath it or touch just after it sous la lance et à...
- Page 43 PREPARAZIONE MAKING PRÉPARATION DEL CAPPUCCINO CAPPUCCINO DU CAPPUCCINO Prima di usare la lancia vapore, eseguire lo Before use the steam wand, cleaning out of Avant d’utiliser la lance vapeur, vidanger le spurgo della condensa per almeno 2 secon- the condensation for at least 2 seconds to condensat pendant au moins 2 secondes di, per rimuovere eventuale sporcizia.
- Page 44 65°C Durante la montatura del latte si sentirà un While the milk is being whipped, a gurgling Pendant la moussage du lait, vous enten- gorgoglio e saranno visibili le bollicine in sound will be heard and bubbles will be vis- drez un gargouillement, et des bulles à...
- Page 45 Se dopo la montatura sono presenti gran- If there are large bubbles on the surface af- S’il y a de grosses bulles à la surface après di bolle in superficie, dare dei lievi colpet- ter whipping, knock gently on the outside avoir fouetté, tapoter légèrement l’exté- ti nella parte esterna del recipiente per ri- of the bowl to remove them.
- Page 46 Quando il caffè e il latte sono ben When the coffee and milk are well Lorsque le café et le lait sont bien combinati e il volume nella tazza è circa combined and the volume in the cup mélangés et que le volume de la tasse a metà...
- Page 47 Tirare la manopola verso la parte frontale Pull the knob towards the front (DOWN) or Tirer le bouton vers la partie frontale (BAS) ou (GIÙ) o spingerla verso la parte posteriore (SU) push it towards the back (UP) to dispense hot le pousser vers la partie arrière (HAUT) pour per erogare acqua calda.
- Page 48 Per utilizzare il vapore: To use the steam: Pour utiliser la vapeur: Osservare che il beccuccio della lancia sia Make certain that the spout of the nozzle Contrôler que l’embout de la lance se all’interno della griglia. is within the grill. trouve à...
-
Page 49: Programmazione Programming Programmation
PROGRAMMAZIONE PROGRAMMING PROGRAMMATION 89,3 90,4 91,6 °C 1.2 bar 1.2 bar I T I T PANORAMICA ICONE ICONS OVERVIEW VISION DES ICONES Queste icone e funzioni si ripetono all’inter- These icons and functions are repeated on Ces icônes et fonctions sont répétées sur no delle schermate del display. - Page 50 All'accensione il display mostra il logo EAGLE When switched ON, the display shows the Lors de l'allumage, l'écran affiche le logo EA- TEMPO per 10 secondi. EAGLE TEMPO logo for 10 seconds. GLE TEMPO pendant 10 secondes. SCHERMATA INIZIALE HOME PAGE ÉCRAN D'ACCUEIL...
- Page 51 Recipe Coffee Easycream MENU RICETTE RECIPES MENU MENU RECETTES Premere A nella Schermata Iniziale per en- Press A on the Home Page to enter the Rec- Appuyez A sur l'Écran d'Accueil pour accéder trare nel Menu Ricette. ipe Menu. au Menu Recettes. Premere un'icona per accedere alle ricette Press an icon to access the specific recipes: Appuyez une icône pour accéder à...
- Page 52 Recipe > Coffee Recipe > Coffee > Add Coffee Group Temperature (°C) Default Grounded Coffee (gr) Custom 1 Custom 2 Single Espresso (ml) 7.3.1 7.3.1 7.3.1 RICETTA CAFFÈ COFFEE RECIPE RECETTES DE CAFÉ Permette di gestire le ricette di caffè: Allows to manage the coffee recipes: Permet de gérer les recettes de café: Aggiungere una nuova ricetta...
- Page 53 Recipe > Easycream Recipe > Easycream > Add Easycream Temperature Key Up (°c) Default Air Temperature Key Up (°c) Custom 1 Delay (S) Custom 2 7.3.2 7.3.2 7.3.2 RICETTA LATTE (EASYCREAM) MILK RECIPE (EASYCREAM) RECETTES DE LAIT (EASYCREAM) Questa funzione è attiva solo se l'optional This function is active only if the optional Cette fonction est active uniquement si Easycream è...
- Page 54 Recipe > Easycream Recipe > Easycream Recipe > Name Name Do you really want to delete? Custom 1 DEFAULT DEFAULT Custom 1 Custom 1 Custom 2 Custom 2 7.3.3 7.3.3 7.3.3 SALVA RICETTA SAVE RECIPE SAUVER RECETTE Dopo aver impostato i parametri delle ricet- After setting the recipe parameters and con- Après avoir réglé...
- Page 55 Alarm dd-mm-yyyy Error description dd-mm-yyyy Error description MENU ALLARMI ALARMS MENU MENU ALARMES Premere B nella Schermata Iniziale per acce- Press B on the Home Page to access the Appuyez B sur l'Écran d'Accueil pour accéder dere al Menu Allarmi, dove sono descritti tutti Alarm Menu, where all errors in the machine au Menu Alarmes, où...
- Page 56 Connectivity Menu Language Hot Water Temperatures Bluetooth Connections Wifi Cleaning Counters Settings MENU CONNESSIONI CONNECTIVITY MENU MENU CONNECTIVITÉ Premere C nella Schermata Iniziale per acce- Press C on the Home Page to access the Con- Appuyez C sur l'Écran d'Accueil pour accéder dere al Menu Connettività, che permette di: nectivity Menu, which allows to: au Menu Connectivité, qui permet de:...
- Page 57 Language Hot Water Hot Water Up (s) Language Hot Water Off English Hot Water Down (s) Off 7.6.1 7.6.1 7.6.1 IMPOSTAZIONE LINGUA LANGUAGE SETTING CONFIGURATION LANGUE Permette di selezionare con i tasti J e K la lin- Use keys J and K to select the desired display Utilisez les touches J et K pour sélectionner la gua del display desiderata: language:...
- Page 58 Temperatures Cleaning Cupwarmer (°C) Temperatures Cleaning Steam boiler (bar) Autopurge Groups 7.6.3 7.6.3 7.6.3 IMPOSTAZIONE TEMPERATURE TEMPERATURE SETTING CONFIGURATION TEMPÉRATURES Permette di impostare con i tasti J e K: Allows setting with the J and K keys: Permet le réglage avec les touches J et K: Temperatura scaldatazze (°C) Cup warmer temperature (°C) Température du chauffe-tasse (°C)
- Page 59 Cleaning > Autopurge Enable Delay (s) Autopurge Duration (s) AUTOSPURGO AUTOPURGE AUTOPURGE Permette di impostare con i tasti J e K: Allows setting with the J and K keys: Permet le réglage avec les touches J et K: Abilitare / disabilitare l'autospurgo Enable / disable autopurge Activer / désactiver l'auto-purge Ritardo di partenza dell'autospurgo (s)
- Page 60 Cleaning > Groups Cleaning > Groups Enable Alarm Group Washing Cycle Groups Alarm Hour Group Rinsing Cycle Alarm Minute Washing Duration (s) LAVAGGIO GRUPPI GROUP CLEANING LAVAGE DU GROUPES Permette di impostare con i tasti J e K: Allows setting with the J and K keys: Permet le réglage avec les touches J et K: Numero di cicli di lavaggio Group washing cycle...
- Page 61 Counters Counters Absolutes Group 1 Counters Maintenance Group 2 Liters Group 3 7.6.5 7.6.5 7.6.5 CONTATORI COUNTERS COMPTEURS Permette di visualizzare: Allows to view: Permet de visualiser: • Contatori gruppi 1-2-3: numero dei caffè • Grups 1-2-3 counters: number of coffees •...
-
Page 62: Programmazione Avanzata (Area Riservata) Advanced Programming (Reserved Area) Programmation Avancée (Zone Réservée)
PROGRAMMAZIONE AVANZATA (Area Riservata) ADVANCED PROGRAMMING (Reserved Area) PROGRAMMATION AVANCÉE (Zone Réservée) 89,3 90,4 91,6 °C **** 1.2 bar 1.2 bar I T I T Questa sezione del display touch screen This section of the touch screen display al- Cette section de l'écran permet de régler permette di impostare parametri delicati lows sensitive parameters to be set which, des paramètres sensibles qui, s'ils sont mal... - Page 63 Menu > Technical Settings Menu > Technical Settings **** Settings Energy Saving Diagnostics Password Calendar Info FW L'accesso alle Impostazioni Tecniche è pos- Access to the Technical Settings is possible L'accès aux Paramètres Techniques n'est sibile solo dopo l'inserimento della password, only after entering the password, which con- possible qu'après avoir saisi le mot de passe, composta da 4 numeri.
- Page 64 Energy Saving Energy > Weekly Prog. Energy Saving Weekly Program Enable Weekly Program Standby Monday Tuesday Active Groups Power Man. Wednesday RISPARMIO ENERGETICO ENERGY SAVING ÉCONOMIE D'ÉNERGIE Questo menu permette di abilitare la gestio- This menu enables eco-friendly manage- Ce menu permet de gérer la consommation ne ecocompatibile dei consumi della macchi- ment of machine consumption through the de la machine dans le respect de l'environne-...
- Page 65 Weekly Prog. > Sunday Weekly Prog. > Sunday Stop Hour Start Hour Weekly Program Start Minute Stop Minute La schermata di modifica, tramite i tasti J e The edit screen, using buttons J and K, allows L'écran de modification, à l'aide des boutons J K, permette di impostare per il giorno scelto: you to set up for the chosen day: et K, vous permet de configurer le jour choisi:...
- Page 66 Energy > Standby Energy > Standby Enable Standby Boiler Pressure (bar) Enabled 8.1.2 8.1.2 8.1.2 STANDBY STANDBY VEILLE Permette di abilitare o disabilitare la funzione Enables or disables the Standby 1 function. Active ou désactive la fonction Standby 1. di Standby 1. Se abilitata, permette di impostare con i ta- If enabled, allows to set with keys J and K, the Si activée, permet de programmer à...
- Page 67 Energy > Active Groups Energy > Power Man Power Man. Active Groups Enabled 8.1.3 8.1.3 8.1.3 GESTIONE POTENZA POWER MANAGEMENT GESTION PUISSANCE Permette di abilitare o disabilitare la gestione Enables or disables power management. Active ou désactive la gestion de l'énergie. della potenza.
- Page 68 Password Diagnostics Cup Warmer Heating Diagnostics Password Hot Water Valve Pump Enable Reset Permits Boiler Filling Valve Boiler Heating SSR1 DIAGNOSTICA DIAGNOSTIC DIAGNOSTIC Questo menu permette di verificare il cor- This menu is used to check the correct func- Ce menu permet de vérifier le bon fonction- retto funzionamento dei singoli componenti tioning of individual machine components.
- Page 69 Type the old password Type the new password **** **** Reset 8.3.1 8.3.1 8.3.1 MODIFICA PASSWORD PASSWORD RESET RÉINITIALISER MOT DE PASSE Permette di modificare la password di acces- Allows to change the password for access to Permet de modifier le mot de passe d'accès so alle impostazioni tecniche.
- Page 70 Password > Permits Language Hot Water Reset Temperatures Cleaning 8.3.2 8.3.2 8.3.2 GESTIONE PERMESSI PERMITS MANAGEMENT GESTION AUTORISATIONS Questa schermata permette di scegliere a This screen allows you to choose to which per- Cet écran vous permet de choisir à quelle per- quale persona (utente o tecnico) assegnare i son (user or technician) to assign access per- sonne (utilisateur ou technicien) attribuer les...
- Page 71 Info FW CPU conf. Version Info FW Groups Display 92.3 Steam 1 INFO FW INFO FW INFO FW Questo menu permette di visualizzare: This menu allows you to view: Ce menu affiche: Versione firmware CPU CPU firmware version Version du firmware de la CPU Versione firmware display Display firmware version Version du firmware de l'écran...
- Page 72 Date/Time Date/Time Hour Calendar Month Minute Year 2022 DATA E ORA DATA AND TIME DATA ET HEURE Questo menu permette di impostare con i ta- This menu allows using keys J and K to set the Ce menu permet de régler, avec les touches J sti J e K la data e l'orario visibile sul display: date and time visible on the display: et K, la date et l'heure visibles sur l'écran:...
- Page 73 Units Temperature °C Date DD/MM/YY Unit UNITÀ DI MISURA UNIT OF MEASURE UNITÉS DE MESURE Questo menu permette di impostare con i ta- This menu allows setting using the keys J and Ce menu permet de régler avec les touches sti J e K: J et K: Unità...
- Page 74 Maintenance Maintenance Enable Month Maintenance Year Cycles 2022 MANUTENZIONE MAINTENANCE ENTRETIEN Questo menu permette di selezionare, con i This menu allows to select, with keys J and Ce menu permet de sélectionner, avec les tasti J e K, la modalità con cui richiamare la K, the mode in which maintenance is to be touches J et K, le mode d'appel de la main- manutenzione.
- Page 75 Offsets Pump Offsets Steam Boiler Cupwarmer OFFSET OFFSET OFFSET Offset indica la differenza da un valore rilevato Offset indicates the difference between a Offset indique la différence entre une valeur a uno di riferimento. measured value and a reference value. mesurée et une valeur de référence.
- Page 76 Keys and Leds Keys and Leds Display Brightness (%) Led Bar Brightness (%) Keys and Leds Keys Brightness (%) Brewing Info Persistence (s) Led Bar Enable 8.10 8.10 8.10 TASTI E LED KEYS AND LEDS TOUCHES ET VOYANTS Questo menu permette di impostare, con i This menu allows to set, with keys J and K: Ce menu permet de régler, avec les touches tasti J e K:...
-
Page 77: Pulizia Cleaning Nettoyage
PULIZIA CLEANING NETTOYAGE I T I T Excluding the cleaning of the dis- A l'exception du nettoyage du groupe Esclusa la pulizia del gruppo eroga- pensing group ( highlighted on the de distribution (mis en évidence sur tore (evidenziato sulla tabella che se- table below), any cleaning must be le tableau ci-dessous), tout nettoyage gue), qualsiasi tipo di pulizia deve es-... - Page 78 I T I T Elemento da pulire Dopo l’uso Giornaliera Settimanale Item to be cleaned After use Daily Weekly Lancia vapore Steam wand Filter and filter Filtro e portafiltro holder Carrozzeria Body machine macchina Griglia Cup grid porta tazze Vaschetta di Water collection raccolta liquidi tray...
- Page 79 PULIZIA LANCIA VAPORE STEAM WAND CLEANING NETTOYAGE LANCE VAPEUR Spurgare la lancia vapore da eventuali residui Purge the steam wand of any residue and Purger la lance vapeur de tout résidu et la e pulirla con un panno inumidito con acqua clean it with a cloth moistened with hot water nettoyer avec un chiffon imbibé...
- Page 80 PULIZIA CARROZZERIA BODY MACHINE CLEANING NETTOYAGE CARROSSERIE Pulizia zona lavoro Work area cleaning Nettoyage zone de travail Togliere la griglia del piano lavoro solle- Remove the worktop, lifting it up from the Retirer la grille du plan de travail en la vandolo anteriormente verso l’alto e sfi- front and sliding it out.
- Page 81 PULIZIA SHOWER AND GASKET NETTOYAGE DOUCHETTE DOCCIA E GUARNIZIONE CLEANING ET JOINT Svitare la vite posta al centro del diffusore Unscrew the screw placed in the centre Dévisser la vis située au centre du diffu- e della doccetta. Automaticamente ca- of the diffuser and shower.
- Page 82 89,3 90,4 91,6 °C 1.2 bar 1.2 bar 3’’ 3’’ PULIZIA GRUPPO GROUP CLEANING NETTOYAGE DU GROUPE Effettuare il lavaggio almeno una volta al Carrying out a washing cycle at least once Effectuer le lavage au moins une fois par giorno.
-
Page 83: Manutenzione Maintenance Entretien
MANUTENZIONE MAINTENANCE ENTRETIEN I T I T In caso di manutenzione, spegnere la mac- In the event of maintenance, switch OFF the En cas de maintenance, éteindre la machine china tramite l’interruttore OFF e scollegare il machine using the switch and unplug the à... - Page 84 89,3 90,4 91,6 °C 1.2 bar 1.2 bar 10.1 10.1 10.1 CAMBIO DELL’ACQUA BOILER WATER CHANGER L'EAU DE LA IN CALDAIA CHANGE CHAUDIÈRE È necessario cambiare quotidianamente It is necessary to change the water in the Il est nécessaire de changer l'eau de la l’acqua in caldaia a fine utilizzo, per avere boiler daily at the end of its use, in order to chaudière quotidiennement à...
-
Page 85: Schemi Elettrici / Electrical Diagrams / Schémas Électriques
SCHEMI ELETTRICI ELECTRICAL DIAGRAMS SCHÉMAS ÉLECTRIQUES I T I T LEGENDA SCHEMI ELETTRICI ELECTRICAL DIAGRAM LEGEND LÉGENDE SCHÉMAS ÉLECTRIQUES EVHW Elettrovalvola vapore/acqua calda EVHW Steam/hot water solenoid valve EVHW Électrovanne vapeur/eau chaude EV1-2-3 Elettrovalvola erogazione gruppo EV1-2-3 Group dispensing solenoid valve EV1-2-3 Électrovanne groupe de distribution Motore pompa... - Page 86 11.1 SCHEMA ELETTRICO (2 gruppi) 11.1 ELECTRICAL DIAGRAM (2 groups) 11.1 SCHÉMA ÉLECTRIQUE (2 groupes) STEAM 1 HOT WATER STEAM 2 Touch display EVHW EVHW VAP2 VAP1 Keyboard AIR1 AIR2 Touch display Sensors board Keyboard Sensors board DOS2 DOS1...
- Page 87 11.2 SCHEMA ELETTRICO (3 gruppi) 11.2 ELECTRICAL DIAGRAM (3 groups) 11.2 SCHÉMA ÉLECTRIQUE (3 groupes) Touch display STEAM 1 HOT WATER STEAM 2 EVHW EVHW VAP2 VAP1 Keyboard AIR1 AIR2 Touch display Sensors board Keyboard Sensors board DOS3 DOS2 DOS1...
- Page 88 11.3 SCHEMA ELETTRICO (2 gruppi - versione CSA) 11.3 ELECTRICAL DIAGRAM (2 groups - CSA version) 11.3 SCHÉMA ÉLECTRIQUE (2 groupes - version CSA) STEAM 1 HOT WATER STEAM 2 Touch display EVHW EVHW VAP2 VAP1 Keyboard AIR1 AIR1 Touch display Sensors board...
- Page 89 11.4 SCHEMA ELETTRICO (3 gruppi - versione CSA) 11.4 ELECTRICAL DIAGRAM (3 groups - CSA version) 11.4 SCHÉMA ÉLECTRIQUE (3 groupes - version CSA) Touch display STEAM 1 HOT WATER STEAM 2 EVHW EVHW VAP2 VAP1 Keyboard AIR1 AIR2 Touch display Sensors board...
-
Page 90: Schema Idraulico Hydraulic Diagram Schéma Hydraulique
SCHEMA IDRAULICO HYDRAULIC DIAGRAM SCHÉMA HYDRAULIQUE LEGENDA SCHEMA IDRAULICO HYDRAULIC DIAGRAM LEGEND LÉGENDE SCHÉMA HYDRAULIQUE Rubinetto generale General tap Robinet général Pompa Pump Pompe Pressostato digitale (LP) Digital pressostat (LP) Pressostat digital (LP) Valvola di scarico Discharge valve Vanne de décharge Elettrovalvola livello Refill solenoid valve Électrovanne de niveau... -
Page 92: Schemi Caldaia Boiler Diagrams Schéma Chaudière
SCHEMI CALDAIA BOILER DIAGRAMS SCHÉMA CHAUDIÈRE I T I T 13.1 13.1 13.1 SCHEMA CALDAIA VAPORE STEAM BOILER DIAGRAM SCHÉMA CHAUDIÈRE 2/3 GRUPPI 2/3 GROUPS VAPEUR 2/3 GROUPES DATI PROGETTO DIRETTIVA PED PROJECT DATA FOR DIRECTIVE PED DONNÉES PROJET DIRECTIVE PED 2014/68/CE VOLUME VOLUMES... - Page 93 I T I T 13.2 13.2 13.2 SCHEMA CALDAIA CAFFÈ COFFEE BOILER DIAGRAM SCHÉMA CHAUDIÈRE CAFÉ DATI PROGETTO DIRETTIVA PED PROJECT DATA FOR DIRECTIVE PED DONNÉES PROJET DIRECTIVE PED 2014/68/CE VOLUME VOLUMES 0,14 l VOLUMES 95°C P.V.S. 16 Bar 4 Bar FLUIDO FLUID FLUIDE...
-
Page 94: Parametri Display Display Parameters Paramétrés Écran
PARAMETRI DISPLAY DISPLAY PARAMETERS PARAMÉTRÉS ÉCRAN Parametro Minimo Massimo Predefinito Passo Parameter Minimum Maximum Default Step Paramétré Minimum Maximum Défaut Étape 14.1 PARAMETRI DOSI CAFFÈ Temperatura gruppo Group temperature 40 °C 130 °C 93,4 °C 0,1 °C Température du groupe Caffè... - Page 95 Parametro Minimo Massimo Predefinito Passo Parameter Minimum Maximum Default Step Paramétré Minimum Maximum Défaut Étape 14.2 PARAMETRI DOSI ACQUA CALDA Leva acqua calda SU Hot water lever UP 25 s Levier eau chaude en HAUT 14.2 HOT WATER DOSES PARAMETERS Leva acqua calda GIÙ...
- Page 96 I T I T PRESSIONE - TEMPERATURA PRESSIONE - TEMPERATURA PRESSURE - TEMPERATURE PRESSURE - TEMPERATURE 14.3.1 PRESSION - TEMPÉRATURE PRESSION - TEMPÉRATURE PRESSIONE CALDAIA VAPORE °C °F °C °F 0,50 110,5 230,9 1,05 119,5 247,1 0,55 111,5 232,7 1,10 120,5 248,9 0,60...
- Page 97 Parametro Minimo Massimo Predefinito Passo Parameter Minimum Maximum Default Step Paramétré Minimum Maximum Défaut Étape 14.5 PARAMETRI STANDBY ON / OFF 14.5 STANDBY PARAMETERS Pressione caldaia vapore Steam boiler pressure 0 bar 2,5 bar 1,0 bar 0,1 bar Pression chaudière à vapeur 14.5 PARAMÉTRÉS VEILLE Parametro...
- Page 98 Parametro Minimo Massimo Predefinito Passo Parameter Minimum Maximum Default Step Paramétré Minimum Maximum Défaut Étape 14.7 Offset sonda pressione PARAMETRI OFFSET Pressure probe offset -1,0 bar +1,0 bar 1,0 bar 0,1 bar Offset de la sonde de pression Offset pressione caldaia vapore Steam boiler pressure offset -1,0 bar +1,0 bar...
- Page 99 Parametro Minimo Massimo Predefinito Passo Parameter Minimum Maximum Default Step Paramétré Minimum Maximum Défaut Étape 14.8 2 / 3 gruppi PARAMETRI CPU 2 / 3 groups 2 / 3 groupes Versione Digit / Neo Digit / Neo version Version Digit / Neo 14.8 Vapore 1 Steam 1...
- Page 100 14.9 14.4.1 14.4.1 VERIFICHE DIAGNOSTICA DIAGNOSTICS CHECKS CONTRÔLES DIAGNOSTIC Verificare: Check: Vérifier: • Riscaldamento scaldatazze • Cup warmer heating • Chauffage du chauffe-tasses • Elettrovalvola acqua calda • Hot water solenoid valve • Électrovanne d'eau chaude • Funzionamento pompa • Pump functioning •...
- Page 101 DICHIARAZIONE DI CONFORMITÀ CE ATTREZZATURA A PRESSIONE EC DECLARATION OF CONFORMITY PRESSURE EQUIPMENT DÉCLARATION DE CONFORMITÉ CE MACHINE SOUS PRESSION Simonelli Group dichiara sotto la propria responsabilità che la macchina per caffè espresso sotto identificata è conforme alle seguenti direttive CEE sotto ri- portate e soddisfa i requisiti essenziali di cui all’allegato A.
- Page 102 Matricola Modello e anno di fabbricazione Vedi targa dati su macchina Serial number Model and production See label on machine Matricule Modèle et année de fabrication Contrôler les donnes sur la machine Volume / Volume / Volume 139°C Caldaia DATI PROGETTO DIRETTIVA PED 2014/68/CE Boiler PROJECT DATA FOR DIRECTIVE PED 2014/68/CE P.V.S.
- Page 104 Simonelli Group | Via E. Betti, 1 | 62020 Belforte del Chienti (MC) | Italy T +39 0733 9501 | F +39 0733 950242 | info@victoriaarduino.com www.victoriaarduino.com...
Need help?
Do you have a question about the EAGLE TEMPO and is the answer not in the manual?
Questions and answers