ViewSonic Pro8400 User Manual
Viewsonic pro8400: user guide
Hide thumbs
Also See for Pro8400:
- Service manual (60 pages) ,
- Specification sheet (2 pages) ,
- User manual (78 pages)
Table of Contents
Advertisement
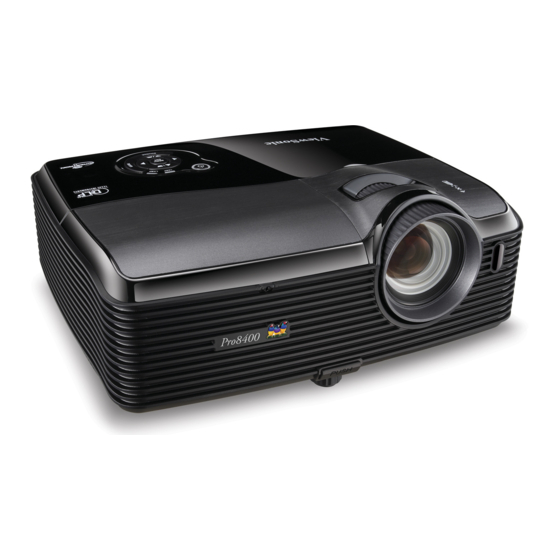
ViewSonic
Pro8400
DLP Projector
IMPORTANT: Please read this User Guide to obtain important
information on installing and using your product in a safe
manner, as well as registering your product for future service.
Warranty information contained in this User Guide will describe
your limited coverage from ViewSonic Corporation, which is
also found on our web site at http://www.viewsonic.com in
English, or in specific languages using the Regional selection
box in the upper right corner of our website.
"Antes de operar su equipo lea cuidadosamente las
instrucciones en este manual"
®
- User Guide
- Guide de l'utilisateur
- Bedienungsanleitung
- Guía del usuario
- Guida dell'utente
- Guia do usuário
- Användarhandbok
- Käyttöopas
- Руководство пользователя
- 使用手冊 (繁體)
- 使用手册 (简体)
- 사용자 안내서
- คู ่ ม ื อ การใช้ ง าน
- Podręcznik użytkownika
- Kullanιcι kιlavuzu
Model No. : VS13647
Advertisement
Table of Contents

Related Manuals for ViewSonic Pro8400


Summary of Contents for ViewSonic Pro8400
- Page 1 Warranty information contained in this User Guide will describe your limited coverage from ViewSonic Corporation, which is also found on our web site at http://www.viewsonic.com in English, or in specific languages using the Regional selection box in the upper right corner of our website.
-
Page 2: Compliance Information
If the batteries, accumulators and button cells included with this equipment, display the chemical symbol Hg, Cd, or Pb, then it means that the battery has a heavy metal content of more than 0.0005% Mercury or more than, 0.002% Cadmium, or more than 0.004% Lead. ViewSonic Pro8400... -
Page 3: Important Safety Instructions
ViewSonic Pro8400... -
Page 4: Declaration Of Rohs Compliance
4. Lead as an allotting element in steel containing up to 0.35% lead by weight, aluminium containing up to 0.4% lead by weight and as a cooper alloy containing up to 4% lead by weight. ViewSonic Pro8400 Proposed Maximum Concentration 0.1%... -
Page 5: Copyright Information
To meet your future needs, and to receive any additional product information as it becomes available, please register your product on the Internet at: www.viewsonic.com. The ViewSonic provides an opportunity for you to print the registration form, which you may mail or fax to ViewSonic. Product Name:... -
Page 6: Table Of Contents
Cleaning the Filter Cover ... 53 Replacing the Lamp ... 54 Specifications ...56 Dimensions ... 57 Ceiling mount installation ... 57 Appendix ...58 ViewSonic Pro8400 LED Indicator Messages ...58 Compatibility Modes ...59 Troubleshooting ...61 RS-232 Command and Configuration ...62 IR Control Code ...64... -
Page 7: Introduction
Introduction Projector Features The projector integrates high-performance optical engine projection and a user - friendly design to deliver high reliability and ease of use. The projector offers the following features: Single chip 0.65" Texas Instruments DLP® technology 1080p (1920 x 1080 pixels) Compatibility with Macintosh®... -
Page 8: Package Contents
Package Contents When you unpack the projector, make sure you have all these components: Projector with Lens Cap VGA Cable (D-SUB to D- SUB) Optional accessories Filter cover P/N: P4R34-4600-00 ViewSonic Pro8400 AC Power Cord HDMI Cable RS232 cable P/N: J2552-0208-00... - Page 9 Save the original shipping carton and Packing material; they will come-in handy if you ever to ship your unit. for maximum protection, repack your unit as it was originally packed at the factory. ViewSonic Pro8400...
-
Page 10: Projector Overview
Projector Overview Front View Lens cap Elevator button Elevator foot Lens cap strap Projection lens Front IR remote control sensor Ventilation holes (intake) ViewSonic Pro8400 Filter cover Speaker Focus ring Zoom ring Control panel Lamp cover... -
Page 11: Rear View
Ceiling mount holes (M4*8) Tilt-adjustment feet Security bar This projector can be used with a ceiling mount for support. The ceiling mount is not included in the package. Contact your dealer for information to mount the projector on a ceiling. -
Page 12: Using The Product
ENTER Enter to sub-menu and confirm the menu selection. SOURCE Display the source selection bar. MENU/EXIT Display or exit the on-screen display menus. Power Turn the projector on or off. Right/Panel key Activate panel key lock. ViewSonic Pro8400 /Up, /Down) -
Page 13: Connection Ports
Connection Ports RS-232 When operating the projector via a computer, connect this to the controlling computer's RS-232C port. Monitor Out Connect to a computer display, etc. Component (Y Cb/Pb Cr/Pr) Connect Y Cb/Pb Cr/Pr output from video equipment to this jack. - Page 14 Connect composite video output from video equipment to this jack. Computer in 2 Connect image input signal (analog RGB or component) to this jack. Computer in 1 Connect image input signal (analog RGB or component) to this jack. ViewSonic Pro8400...
-
Page 15: Remote Control
Cut off the screen temporarily. Press again to cancel the Blank Screen function. Light Enable backlight functions of the remote control’s buttons. Compo Display Component video (YPbPr/ YCbCr) signal. ViewSonic Pro8400 HDMI1 HDMI2 Compo Video Swap Default HDMI 2 Display HDMI 2 signal. - Page 16 PIP/POP Switch screen to PIP/POP by sequence. Swap Swap input source in PIP or POP image. ViewSonic Pro8400 Aspect Select the display aspect ratio. RGBCMY Change indivial RGBCMY color (user color setting). Default Restore settings to factory default.
-
Page 17: Installing The Batteries
Batteries should not be in or near to fire or water, keep batteries in a dark, cool and dry place. If suspect battery leakage, wipe out the leakage and then replace new batteries. If the leakage adheres to your body or clothes, rinse well with water immediately. ViewSonic Pro8400... -
Page 18: Remote Control Operation
Do not drop the remote control or jolt it. Keep the remote control out of locations with excessively high temperature or humidity. Do not get water on the remote control or place wet objects on it. Do not disassemble the remote control. ViewSonic Pro8400... -
Page 19: Connection
Connection When connecting a signal source to the projector, be sure to: Turn all equipment off before making any connections. Use the correct signal cables for each source. Ensure the cables are firmly inserted. VGA cable (D-Sub to D-Sub) VGA to DVI-A cable... -
Page 20: Connecting A Computer Or Monitor
Connecting a computer or monitor Connecting a computer The projector provides two VGA input sockets that allow you to connect them to both ® compatibles and Macintosh connecting legacy version Macintosh computers. To connect the projector to a notebook or desktop computer: Take the supplied VGA cable and connect one end to the D-Sub output socket of the computer. -
Page 21: Connecting Video Source Devices
S-Video Video (composite) You need only connect the projector to a Video source device using just one of the above connecting methods, however each provides a different level of video quality. The method you choose will most likely depend upon the availability of matching... -
Page 22: Connecting A Component Video Source Device
VGA (D-Sub) adaptor, connect the other end of the cable (with a D-Sub type connector) to the Computer in 1 or Computer in 2 socket on the projector. If you are using the Component Video Cable, connect the other end of 3RCA type connectors to the Y Cb/Pb Cr/Pr sockets on the projector. -
Page 23: Connecting A Composite Video Source Device
Take a Video cable and connect one end to the composite Video output socket of the Video source device. Connect the other end of the Video cable to the Video socket on the projector. Important If the selected video image is not displayed after the projector is turned on and the correct video source has been selected, check that the Video source device is turned on and operating correctly. -
Page 24: Operation
When the Power LED begins flashing, the projector has entered stand-by mode. If you want to turn the projector back on, you must wait until the projector has completed the cooling cycle and has entered stand-by mode. Once in stand- by mode, simply press Disconnect the AC power cord from the electrical outlet and the projector. -
Page 25: Adjusting The Projector Height
Adjusting the Projector Height The projector is equipped with an elevator foot to adjust the image height. To raise or lower the image: To raise or lower the image, press the elevator button and raise or lower the front of the projector. Release the button to lock the adjustment. -
Page 26: Adjusting Projection Image Size
Position the projector in a horizontal position; other positions can cause heat build-up and damage to the projector. Keep a space of 30 cm or more between the sides of the projector. Do not use the projector in a smoky environment. Smoke residue may build-... -
Page 27: Locking Control Keys
Keys on the remote control are still functional when panel key lock is enabled. If you press lock, the projector will still be in locked status the next time it is turned on. ViewSonic Pro8400 Power to turn off the projector without disabling panel key Power. -
Page 28: Menu Operation
Menu Operation The projector has multilingual on-screen display menus that allow you to make image adjustments and change a variety of settings. Video/Audio Noise Reduction Microphone Volume ViewSonic Pro8400 Brightest, Standard, Theater 1, Color Mode Theater 2, ViewMatch, User1, User2... - Page 29 Setting ViewSonic Pro8400 Auto Keystone Keystone -30 - +30 Auto, 4:3, 16:9, 16:10, Aspect Ratio ANAMORPHIC 1, ANAMORPHIC 2 Front-Table, Front-Ceiling, Rear-Table, Rear-Ceiling Filter Mode*2 High Altitude Quick Power On Quick Power Off DC 12V Trigger Input Password Password Delete...
- Page 30 Information *1 Adjustable range and default setting vary depending on signal type. *2 This function is only available when the projector is installed an optional filter cover. *3 The selectable Function list includes Color Mode, Gamma, Overscan, Noise Reduction, Keystone and Filter Mode.
-
Page 31: How To Operate
How to operate Press MENU on the projector or Menu on the remote control to open the OSD menu. When OSD is displayed, use After selecting the desired main menu item, press setting. to select the desired item and adjust the settings with Press MENU on the projector or Menu on the remote control, the screen will return to the main menu. - Page 32 Video/Audio Frequency Adjust the timing of the projector relative to the computer. Tracking Adjust the phase of the projector relative to the computer. H Position (Horizontal Position) Adjust the image left or right within the projection area. V Position (Vertical Position) Adjust the image up or down within the projection area.
- Page 33 ANAMORPHIC 2: Scale an image so that it is displayed in the center of the screen with a 2.35:1 aspect ratio. Projection Adjust the picture to match the orientation of the projector: upright or upside-down, in front of or behind the screen. Invert or reverse the image accordingly. Power Saving If the input source is not detected and no operation is performed for a specific period of time, projector will automatically turn off.
- Page 34 Use this function to allow the fans operates at full speed continuously to achieve proper high altitude cooling of the projector. Quick Power On Enable the projector to turn on automatically after the power cord has been connected and power has been applied. Quick Power Off Enable the projector to turn off quickly.
- Page 35 IP Address: Numerical address to identify networked computers. This function can only be used when DHCP is set to No. The IP Address is the number that identifies this projector on the network. You cannot have two devices with the same IP Address on the same network.
- Page 36 IP Address: Numerical address to identify networked computers. This function can only be used when DHCP is set to No. The IP Address is the number that identifies this projector on the network. You cannot have two devices with the same IP Address on the same network.
- Page 37 Display the lamp’s elapsed operating time (in hours). Equivalent Lamp Hours Reset Reset the lamp Hour to 0 hours. Factory Default Restore settings to factory default. Language Select the language used by the on-screen menu. ViewSonic Pro8400...
-
Page 38: Controlling The Projector Through A Lan Environment
Default Gateway, and DNS settings will display 0.0.0.0. Make sure the cables are properly connected and perform the procedures above again. If you wish to connect to the projector in its standby mode, be sure you have selected RJ45 and obtained the IP Address, Subnet Mask, Default Gateway, and DNS information when the projector is on. - Page 39 Default Gateway, and DNS settings will display 0.0.0.0. Make sure the cables are properly connected and perform the procedures above again. If you wish to connect to the projector in its standby mode, be sure you have selected RJ45 and obtained the IP Address, Subnet Mask, Default Gateway, and DNS information when the projector is on.
-
Page 40: Wireless Connection
Wireless connection ViewSonic wireless dongle To connect to the projector wirelessly, you have to plug a ViewSonic wireless dongle (optional) to the USB Type A connector on the projector, and then only a few OSD configuration steps are required. Make sure the projector is turned on. -
Page 41: Controlling The Projector Through A Web Browser
Controlling the projector through a web browser Once you have the correct IP address for the projector and the projector is on or in standby mode, you can use any computer that is on the same local area network to control the projector. - Page 42 Network Setup: Provides wired and wireless network settings. Presenter Setup: Allows you to change Admin and User passwords for web control. Reset to Default: Allows you to restore the device to the factory default settings. Reboot System: Allows you to reboot the device immediately. ViewSonic Pro8400...
- Page 43 The Crestron (eControl) page displays the Crestron eControl user interface. The eControl page provides a variety of virtual keys to control the projector or adjust the projected pictures. You can press to reveal more buttons. These buttons function the same as the ones on the OSD menus or remote control.
- Page 44 The tools page allows you to manage the projector, configure the LAN control settings and secure access of remote network operation on this projector. This section is only used with the Crestron Control System. Please contact Creston or refer to its user manual for setup information.
- Page 45 Please pay attention to the limitation of input length (including space and other punctuation keys) in the list blow: Category Item Crestron Control Projector Network Configuration User Password Admin Password ViewSonic Pro8400 Input Length IP Address IP ID Port Projector Name Location Assigned To...
- Page 46 The info page displays the information and status of this projector. After pressing the button “Contact IT Help”, the HELP DESK window will appear in the upper right corner of the screen. You will be able to deliver messages to RoomView software administrators/users who connect to the same local area network.
-
Page 47: Displaying Images Through Pwpresenter
Click the desired projectors in the Search result list, and click Connect directly. You can also type a desired projector name and click Search. iii. You can link to the ViewSonic webpage control system on ViewSonic Pro8400 for details. &... - Page 48 To display a full screen, click FullScreen. To display a partial screen, click FixedSize. A square appears on your screen. You can place it where you want to project. iii. If you wish to change the square, click Alterable. ViewSonic Pro8400...
- Page 49 User can use the mirror driver for presenter capture image, if the system has installed the mirror driver. To allow notification messages to appear, click Yes. Click Apply. The Software Information is available on this page. ViewSonic Pro8400...
- Page 50 To adjust the image quality, click the down arrow to reveal a drop-down list and select a desired quality level. Click Apply. To adjust the capture rate, move the slide bar. The network bandwidth may also affect the performance. iii. Network port setting for fixed or manual type. ViewSonic Pro8400...
- Page 51 Change password allows you to change password for the user type. iii. Disconnect allows you to disconnect the projector from network. Access device via webpage allows you to access ViewSonic webpage con- trol system. View device status displays device setting information and allows you to enter conference control mode.
- Page 52 Management allows you to select which computer to be connected and transfer the desktop content to the network projector. Disconnect allows you to disconnect from the projector(s) by clicking the Disconnect icon. Important Be sure to turn off other virtual network control programs before using pwPresenter.
-
Page 53: Displaying Pictures With A Usb Storage Device
Take a USB cable and connect the larger end to the USB A socket on the projector, and smaller end to the USB port of the device. If you are using a USB flash drive, connect it directly to the USB A socket. - Page 54 EXIF ON/EXIF OFF: Display the Exif information of the image or not. File Name On/File Name Off: Display the file name or not. The projector supports the following image formats: JPEG (JPG) Bitmap (BMP) Portable Network Graphic (PNG) Graphics Interchange Format (GIF) Tagged Image File Format (TIFF) ViewSonic Pro8400...
-
Page 55: Maintenance
Cleaning the Filter Cover The filter cover, which is located at the side of the projector, should be cleaned after every 100 hours of use. If it is not cleaned periodically, it can become clogged with dust and prevent the projector from being ventilated properly. -
Page 56: Replacing The Lamp
Do not attempt to replace the lamp yourself. Contact the qualified service personnel for replacement. The lamp is extremely hot right after turning off the projector. If you touch the lamp, you may scald your finger. When you replace the lamp, wait for at least 45 minutes for the lamp to cool down. - Page 57 Insert the new lamp module into the projector and tighten the screws. Replace the lamp cover and tighten the screw. Turn on the projector. If the lamp does not turn on after the warm-up period, try reinstalling the lamp. Reset the lamp hour. Refer to the “Information” menu.
-
Page 58: Specifications
AC 100-240 V, 50 - 60 Hz, 3.8A Power consumption 390 W Dimension (W x D x H) 334.6 x 264.5 x 109.5 mm Weight 3.63 kg (8 lb) Note: Design and Specifications are subject to change without prior notice. ViewSonic Pro8400... -
Page 59: Dimensions
Dimensions 334.6 mm (W) x 264.5 mm (D) x 109.5 mm (H) 264.5 Ceiling mount installation ViewSonic Pro8400 334.6 64.5 109.5 Ceiling mount screws: M4 x 8 (Max. L = 8 mm) 84.9 Unit: mm... -
Page 60: Appendix
Blue Lamp LED Temp LED Power LED Blue Lamp LED Temp LED Power LED Blue Lamp LED Temp LED ViewSonic Pro8400 Status Meaning Solid Lamp life end Flash Flash Solid Standby mode when green mode is turned on. Flash Standby mode when green mode is turned off. -
Page 61: Compatibility Modes
Compatibility SVGA SXGA UXGA Mac 13 Mac 16 Mac 19 1080i30 1080i25 480p 576p 720p60 720p50 1080p60 1080p50 ViewSonic Pro8400 Resolution H-Sync [KHz] 640 x 480 24.69 31.5 37.9 37.5 43.3 800 x 600 30.99 35.2 37.9 48.1 46.9 53.7 1024 x 768 39.63... - Page 62 1920 x 1080 720p 1280 x 720 720p 1280 x 720 576p 720 x 576 576i 720 x 576 480p 720 x 480 480i 720 x 480 ViewSonic Pro8400 H-Sync [KHz] V-Sync [Hz] 67.5 56.3 33.8 28.1 37.5 31.3 15.6 31.5 15.8...
-
Page 63: Troubleshooting
Use the remote control within the effective range. Aim the remote control at the screen or at the front or back of the projector. Move the remote control so it is more directly in front of or behind the projector and not as far to the side. -
Page 64: Rs-232 Command And Configuration
DCR ON DCR OFF ECO ON ECO OFF VOLUME INC VOLUME DEC KEYSTONE INC KEYSTONE DEC FACTORY RESET LAMP HOURS RESET FILTER HOURS RESET Projector status ViewSonic Pro8400 BE,EF,10,05,00,C6,FF,11,11,01,00,01,00 BE,EF,02,06,00,6D,D2,34,00,00,00,00,00 BE,EF,02,06,00,BC,D3,35,00,00,00,00,00 BE,EF,02,06,00,8F,D3,36,00,00,00,00,00 BE,EF,02,06,00,5E,D2,37,00,00,00,00,00 BE,EF,02,06,00,A1,D2,38,00,00,00,00,00 BE,EF,02,06,00,70,D3,39,00,00,00,00,00 BE,EF,02,06,00,43,D3,3A,00,00,00,00,0 BE,EF,02,06,00,92,D2,3B,00,00,00,00,00 BE,EF,02,06,00,C8,D7,01,00,00,00,00,00 BE,EF,02,06,00,FB,D7,02,00,00,00,00,0 BE,EF,02,06,00,2A,D6,03,00,00,00,00,00... - Page 65 D-Sub 9 pin 1 CD ViewSonic Pro8400 Wire List COLOR Black Brown Orange Yellow Green Blue Purple White SHELL SHELL...
-
Page 66: Ir Control Code
IR Control Code System Code: 83F4 Format : NEC HDMI1 HDMI2 Compo Video Swap Default ViewSonic Pro8400... -
Page 67: Customer Support
Renta y Datos, 29 SUR 721, COL. LA PAZ, 72160 PUEBLA, PUE. Tel: 01.222.891.55.77 CON 10 LINEAS Electroser, Av Reforma No. 403Gx39 y 41, 97000 Mérida, Yucatán. Tel: 01.999.925.19.16 Other places please refer to http://www.viewsonic.com/la/soporte/index.htm#Mexico Latin America (Peru) www.viewsonic.com/la/ Macau www.hk.viewsonic.com... -
Page 68: Limited Warranty
If a product proves to be defective in material or workmanship during the warranty period, ViewSonic will, at its sole option, repair or replace the product with a like product. Replacement product or parts may include remanufactured or refurbished parts or components. - Page 69 2. To obtain warranted service, you will be required to provide (a) the original dated sales slip, (b) your name, (c) your address, (d) a description of the problem, and (e) the serial number of the product. 3. Take or ship the product freight prepaid in the original container to an authorized ViewSonic service center or ViewSonic.
-
Page 70: Mexico Limited Warranty
Exclusion of damages: ViewSonic’s liability is limited to the cost of repair or replacement of the product. ViewSonic shall not be liable for: Damage to other property caused by any defects in the product, damages based upon inconvenience, loss of use of the product, loss of time, loss of profits, loss of business opportunity, loss of goodwill, interference with business relationships, or other commercial loss, even if advised of the possibility of such damages. - Page 71 Tel: (52) 999-925-1916 E-Mail: rrrb@sureste.com Tijuana: Av Ferrocarril Sonora #3780 L-C Col 20 de Noviembre Tijuana, Mexico 4.3: ViewSonic Mexico Limited Warranty ViewSonic Pro8400 Villahermosa: Compumantenimietnos Garantizados, S.A. de C.V. AV. GREGORIO MENDEZ #1504 COL, FLORIDA C.P. 86040 Tel: 01 (993) 3 52 00 47 / 3522074 / 3 52 20 09 E-Mail: compumantenimientos@prodigy.net.mx...
Need help?
Do you have a question about the Pro8400 and is the answer not in the manual?
Questions and answers