Table of Contents
Advertisement
Available languages
Available languages
Quick Links
Advertisement
Table of Contents

Related Manuals for TEFAL Mini Pro Spherical Pot IH


Summary of Contents for TEFAL Mini Pro Spherical Pot IH
- Page 1 Mini Pro Spherical Pot IH Rice Cooker www.tefal.com...
- Page 2 14-15...
- Page 3 4 cups MAX. 4 cups MAX.
-
Page 4: Control Panel
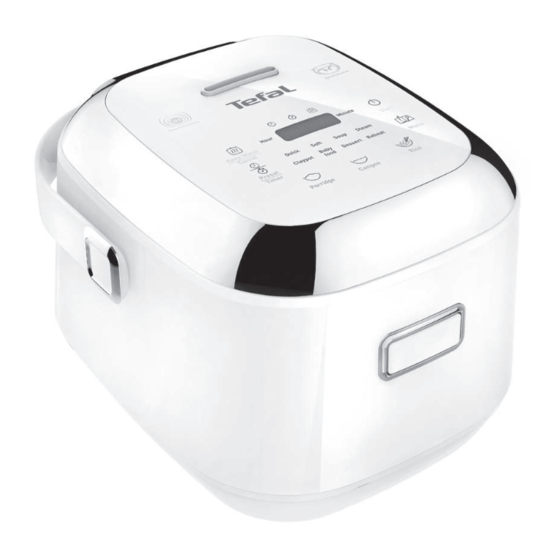
CONTROL PANEL Hour Minute Soft Quick Soup Steam Baby Claypot Dessert Reheat food DESCRIPTION 1 Steam basket e Rice key 2 Graduation for water and rice f Menu key 3 Removable pot g Start key 4 Measuring cup h Hour key 5 Rice spatula i Minute key 6 Soup spoon... - Page 5 IMPORTANT SAFEGUARDS SAFETY INSTRUCTIONS Read and follow the instructions for use. Keep them safe. • This appliance is not intended to be operated by means of an external timer or a separate remote- control system. • This appliance can be used by children aged from 8 years and above if they have been given supervision or instruction concerning use of the appliance in a safe way and if they understand the...
- Page 6 or mental capabilities, or lack of experience and knowledge, unless they have been given supervision or instruction concerning use of the appliance by a person responsible for their safety. • Children should be supervised to ensure that they do not play with the appliance. •...
- Page 7 • The appliance must not be immersed in water or any other liquid. • Use a damp cloth or sponge with diswashing liquid to clean the accessories and parts in contact with the aliments. Rince with a damp cloth or sponge. Drying accessories and parts in contact with food with a dry cloth.
-
Page 8: Connecting To The Power Supply
• Do not get face and hands close to the steam outlet. Do not obstruct the steam outlet. • For any problems or queries please contact our Customer Relations Team or consult our web site. • The appliance can be used up to an altitude of 4000 m. -
Page 9: Protect The Environment
• Do not allow the base of the appliance to come into contact with water • Never try to operate the appliance when the pot is empty or without the pot. • The cooking function/knob must be allowed to operate freely. Do not prevent or obstruct the function from automatically changing to the keep warm function. -
Page 10: Before The First Use
BEFORE THE FIRST USE Unpack the appliance • Remove the appliance from the packaging and unpack all the accessories and printed documents. • Open the lid by pushing the opening button on the housing – Fig.1. Read the Instructions and carefully follow the operation method. Clean the appliance •... - Page 11 Never place your hand on the steam vent during cooking, as there is a danger of burns – Fig.10. After start the cooking, if you wish to change the selected cooking menu because of an error, press “Keep Warm / Cancel” key and re- choose the menu you want.
- Page 12 RECOMMENDATIONS FOR BEST RICE COOKING • Before cooking, measuring the rice with measuring cup and rinse it except risotto rice. • Put the rinsed rice well distributed around the whole surface of the pot. Fill it with water to the corresponding water level (The graduations in cups).
- Page 13 RICE COOKING FUNCTION • Place the appliance on a flat, stable, heat-resistant work surface away from water splashes and any other sources of heat. • Press < Rice > key ” to select rice cooking function. • Pour the required quantity of rice into the pot using the measuring cup provided –...
- Page 14 • At the end of cooking, the buzzer will ring five “beep”, the rice cooker will enter keep warm status with the < Keep Warm > indicator turning on and the screen will start to count the time of keeping warm. CLAYPOT FUNCTION •...
- Page 15 BABY FOOD FUNCTION • Press < Menu > key to select < Baby food > function. The screen displays the default cooking time, the light of < Start > flickers. • Press < Preset/Timer > key to active the time setting function and then press < hour > and < minute > to change the time for preset or timer. •...
-
Page 16: Steam Function
STEAM FUNCTION • Press < Menu > key to select < Steam > function. The screen displays the default cooking time, the light of < Start > flickers red. • Press < Preset/Timer > key to active the time setting function and then press < hour > and < minute > to change the time for preset or timer. •... - Page 17 PRESET/ TIMER FUNCTION Preset: • The preset time corresponds to the time for end of cooking. • Available for all cooking functions, except < Claypot >, < Dessert > and < Reheat > function. • After selecting the desired cooking function, press the < Preset/ Timer > key (the preset indicator will turn on), and then use < Hour > and < Minute >...
-
Page 18: Cleaning And Maintenance
CLEANING AND MAINTENANCE • To ensure the rice cooker is unplugged and completely cooled down before cleaning and maintenance. • It is strongly advised to clean the appliance after each use with a sponge – Fig.12. • The pot, cup, rice spatula and soup spoon are dishwasher safe - Fig.13. Pot, steam basket •... - Page 19 Cleaning and care of the other parts of the appliance • Clean the outside of the rice cooker – Fig.18, the inside of the lid and the cord with a damp cloth and wipe dry. Do not use abrasive products. •...
- Page 20 Malfunction Solutions Causes description Automatic warm-keeping fails (product Send to the authorized stay in cooking service center for repair. position, or no heating). The sensor on the top open circuit or short circuit. Send to the authorized The sensor on the service center for repair.
- Page 21 控制板面 Hour Minute Soft Quick Soup Steam Baby Claypot Dessert Reheat food 描述 1 蒸盤 e 「Rice」煮飯鍵 2 水量及米量刻度 f 「Menu」選單鍵 3 可拆式內膽 g 「Start」開始鍵 4 量杯 h 「Hour」時鍵 5 飯勺 i 「Minute」分鍵 6 湯勺 15 功能指示燈 7 蓋 a 「Quick」快煮功能 8 可拆式內蓋...
- Page 22 重要建議 安全指示 請閱讀並遵循本使用說明書,並妥善保存。 • 請閱讀本說明書並妥善保存。 • 本產品不得使用外部定時器或獨立遙控系統操 作。 • 此電器用品可由8歲或以上兒童使用,但必須在 成人監督下,或兒童曾受指導,知道如何安全使 用本產品,亦明白當中所牽涉的風險。清潔及 保養工作不應由兒童進行,除非他們已年滿8歲 或以上,並有成人監督。請將本產品及相連電 線放置於8歲以下兒童不能觸及的地方。 • 此產品亦可由身體、感官或心智障礙,或經驗 及知識不足之人士使用,但必須在使用時獲指 導,確保他們知道如何安全使用本產品,並明白 當中的風險。 • 兒童不可將本產品當作玩具。 • 該電器產品不適合以下人士使用(包括兒童):身 體、感官或心智障礙的人士,缺乏相關經驗或 知識的人士,除非他們在負責其安全的人士給予 指導或監督下使用。 • 應照看好兒童, 確保他們不玩耍該電器產品。 • 本產品設計僅供家庭使用,並非為以下用途而 設,且不會得到保養: – 商店,辦公室或其他工作環境的員工廚房範 圍;...
- Page 23 – 農舍; – 酒店、汽車旅館及其他住宿性質環境的客戶 使用; – 供住宿及早餐的旅館。 • 如果電器產品配備可拆卸電源線:如果電源線 損壞,必須到授權服務中心更換其提供的電源 線。 • 如果電器產品配備固定電源線:如果電器產品 的電源線損壞,為了您的安全,必須由授權服務 中心或合資格的人士進行更換。 • 切勿將產品浸入水中。 • 請使用微濕的抹布或海棉及洗潔精,清潔配件及 與食物有接觸的零件,再用濕布或海棉沖洗。用 乾布抹乾配件及與食物有接觸的零件。 • 若電器上印有 標記, 表示「小心:使用時表面 可能變熱」。 • 小心:加熱配件表面在使用後可能仍然燙熱。 • 小心:不正確使用產品可能導致損傷。 • 小心:若產品的電源線可拔除,切勿弄濕連接 器。 • 以下情況下, 請務必斷開該電器產品的電源: – 使用後, – 移動時, –...
- Page 24 • 能會被燙傷。 • 在烹調期間,產品會產生高溫和蒸汽。請將手和 臉部遠離蒸汽孔。請勿陼塞蒸汽出口。 • 如有任何問題,請聯繫售後服務部或瀏覽我們的 網站。 • 此產品最高可於海拔 4000公尺使用。 • 該電器產品符合所有相關的安全法規,包括低電壓指令、電磁相容性 法規、食品接觸材料立法及環境立法。 • 檢查產品銘牌上的電壓與供電電壓相符(交流電)。 • 如果您在購買地以外的國家使用本產品, 請先將產品送交到當地的授 權服務中心進行檢查。 接通電源 • 下列情況下請勿使用產品: – 產品或電源線受損。 – 產品意外墜落, 造成損傷或不正常運作。 – 在這些情況下,為了您的安全,必須將該電器產品送往授權服務中 心。切勿自行拆除該電器產品。 • 請勿讓電源線隨意懸垂。 • 務必確保該產品接在接地插座上。 • 請勿使用延長線。如果您自己承擔責任, 請只使用完好的及與該產品 功率相符的接地延長線。 • 不要拉扯電源線來拔取電源插頭。...
- Page 25 使用時 • 請在平穩和耐熱的工作表面使用, 並避免被水濺濕。 • 在內鍋未放入主機中或內鍋為空的時候, 請勿啟動操作。 • 必須讓烹調功能/汽閥自由運作。請勿阻礙其切換至自動保溫功能。 • 當電器運作時, 請勿拿出內鍋。 • 請勿將產品直接放在燙熱的表面上、或其他熱源或火源上, 否則產品 會受到損壞或發生故障, 甚至發生危險。 • 內鍋應與加熱盤直接接觸。任何異物放在該兩者之間都將可能導致 故障。 • 請勿將產品放置於熱源附近或置於焗爐內, 以防對其造成嚴重損害。 • 在內鍋未放入主機中前, 請勿放任何食物或水在主機裡。 • 根據內鍋的刻度來調節米、水比例。 • 一旦產品某部份著火, 請勿直接用水撲滅, 您可以用一塊濕布蓋住著 火部位來滅火。 • 所有對產品作出之改動必須由授權服務中心進行, 並使用原裝配件。 • 本產品只能作為家用。任何專業性用途、不當使用或未遵照本說明 書使用引起的故障, 本公司均不負任何責任, 此等故障損壞不在保養 範圍內。...
- Page 26 初次使用前 拆開包裝 • 拆開包裝,取出電飯煲,並取出所有配件及印刷品。 • 按下煲外的開蓋按鈕,打開煲蓋– 圖1. 小心閱讀以下指引,並按照所示方法操作。 清洗電飯煲 • 拆出內膽 - 圖2,內蓋及微壓閥 – 圖3a及3b。 • 用海綿及梘液清洗內膽、微壓閥及內蓋。 • 用濕布擦拭機身表面及蓋。 • 小心擦乾。 • 將所有組件放回原位。將內蓋裝在電飯煲頂蓋正確的位置。然後將 內蓋放在兩個勾位後,並向下按直至固定為止。將可拆式電線插入 電飯煲底座插頭。 本裝置之事項以及所有功能 • 小心擦拭內膽外面部分(特別是底部)。確定內膽底下或發熱元件上 無任何殘餘食材或液體– 圖5。 • 將內膽放進電飯煲,確定位置妥當– 圖6。 • 確定內蓋已放置妥當。 • 關上煲蓋,確定電飯煲有發出一下「咔」聲。 • 將電源線插入電飯煲底座插頭;將另一端插上電源。電飯煲會發出 一聲長「嗶」,控制面板上所有指示燈會隨即亮起。預設烹調程式 為...
- Page 27 烹調程式表 烹調時間 溫度 程式 保溫 預設時間 時間設定 預設溫度 溫度設定 「Quick」 自動 自動 有 快煮 「Soft」軟身 自動 自動 有 「Claypot」 自動 自動 有 煲仔飯 「Rice」煮飯 自動 自動 有 「Baby 1小時至2小時30 2小時 100°C 有 food」嬰兒餐 分鐘 「Dessert」 低筋麵粉﹕40分鐘 40分鐘 120°C 有 甜品 自發麵粉﹕2小時...
- Page 28 達至最佳煮飯效果的建議 • 除意大利飯外,煮飯前請先用量杯量米,然後洗米。 • 將洗好的米均勻地鋪滿整個內膽表面。依照量杯數加水至相應高度 (內膽有相應刻度)。 • 飯煮好後,「Keep Warm」保溫指示燈會亮起,為令飯粒分明,請 攪拌並讓飯留在鍋中數分鐘。 煮飯建議表: 白米烹調指南 量杯數 白米重量 內膽中的水位(連米) 享用人數 300克 2杯刻度 3-4人 600克 4杯刻度 5-6人 選單鍵 • 當插上電源,電飯煲會進入快煮模式。 當按「Menu」選單鍵,電 飯煲會進入「Quick」快煮 「Claypot」煲仔飯 「Soft」軟身 「Baby food」嬰兒餐 「Soup」煲湯 「Dessert」甜品 「Steam」蒸煮 「Reheat」翻熱。 •...
- Page 29 煮飯功能 • 將產品放在穩固防熱的平坦工作面上,並遠離熱源及避免水濺。 • 按「Rice」煮飯鍵開始煮飯功能。 • 用電飯煲附送的量杯將所需的米倒入內膽中– 圖8。然後將凍水加至 內膽相應的水位– 圖9。 • 關蓋。 注意:煮飯時要先放米再放水,否則水量會太多。 • 按「P re s e t/Timer」預設 /計時鍵啟動時間設定功能,然後按 「Hour」時及「Minute」分更改預設時間。 • 按「Start」開始鍵,電飯煲進入「Rice」煮飯狀態,「Start」開始 鍵會亮起,螢幕會閃出「 」。 • 烹調完畢,會發出五下「嗶」聲;電飯煲進入保溫狀態,「Keep Warm」保溫指示燈會亮起,螢幕開始計算保溫時間。 快煮功能 • 按「Menu」選單鍵選擇「Quick」快煮功能。 • 按「P re s e t/Timer」預設 /計時鍵啟動時間設定功能,然後按 「Hour」時及「Minute」分更改預設時間。 • 按「Start」開始鍵,電飯煲進入「Quick」快煮狀態,「Start」開 始鍵會亮起,螢幕會閃出「...
- Page 30 煲仔飯功能 • 按「Menu」選單鍵選擇「Claypot」煲仔飯功能。 • 按 「 St a r t 」 開 始 鍵 , 電 飯 煲 進 入 「 C l a y p o t 」 煲 仔 飯 狀 態 , 「Start」開始鍵會亮起,螢幕會閃出「 」。 • 飯 煮 好 時 , 電 飯 煲 會 發 出 提 示 聲 。 打 開 煲 蓋 , 加 入 材 料 並 按 「Start」開始鍵繼續烹調過程。...
- Page 31 嬰兒餐功能 • 按「Menu」選單鍵選取「Baby Food」嬰兒餐功能。螢幕顯示預 設烹調時間;「Start」開始燈閃爍。 • 按「Pre s e t/Ti mer」預設/計時鍵啟動時間設定功能,然後按 「Hour」時及「Minute」分更改預設或計時的時間。 • 按「Start」開始鍵。電飯煲進入「Baby food」嬰兒餐狀態, 「Start」開始鍵會亮起,螢幕會顯示剩餘的烹調時間。 • 烹調完畢,發出五下「嗶」聲;電飯煲進入保溫狀態,「Keep Warm」保溫指示燈會亮起,螢幕開始計算保溫時間。 煲湯功能 • 按「Menu」選單鍵選取「Soup」煲湯功能。螢幕顯示預設烹調時 間;「Start」開始燈閃爍。 • 按「Pre s e t/Ti mer」預設/計時鍵啟動時間設定功能,然後按 「Hour」時及「Minute」分更改預設或計時的時間。 • 按「Start」開始鍵。電飯煲進入「Soup」煲湯狀態,「Start」開 始鍵會亮起,螢幕會顯示剩餘的烹調時間。 • 烹調完畢,發出五下「嗶」聲;電飯煲進入保溫狀態,「Keep Warm」保溫指示燈會亮起,螢幕開始計算保溫時間。 甜品功能 • 按「Menu」選單鍵選擇「Dessert」甜品功能。螢幕顯示預設烹調 時間;「Start」開始燈閃爍。 •...
- Page 32 蒸煮功能 • 按「Menu」選單鍵選取「Steam」蒸煮功能。螢幕顯示預設烹調 時間;紅色「Start」開始燈閃爍。 • 按「Pre s et/Ti m e r」預設 /計時鍵啟 動時間 設定功能, 然後按 「Hour」時及「Minute」分更改預設或計時的時間。 • 按「Start」開始鍵。電飯煲進入「Steam」蒸煮狀態,「Start」開 始鍵會亮起,螢幕會顯示剩餘的烹調時間。 • 烹調完畢,發出五下「嗶」聲;電飯煲進入保溫狀態,「Keep Warm」保溫指示燈會亮起,螢幕開始計算保溫時間。 翻熱功能 • 按「Menu」選單鍵選擇「Reheat」翻熱功能。螢幕顯示預設烹調 時間;「Start」開始燈閃爍。 • 按「Start」開始鍵。電飯煲進入「Reheat」翻熱狀態,「Start」 開始鍵會亮起,螢幕會顯示剩餘的烹調時間「 」。 • 烹調完畢,發出五下「嗶」聲;電飯煲進入保溫狀態,「Keep Warm」保溫指示燈會亮起,螢幕開始計算保溫時間。 保溫/取消功能 • 在待機狀態下按「Keep warm/Cancel」保溫/取消鍵, 該燈會亮 起,螢幕會顯示「00:00」並開始計算保溫時間。 • 在功能設定或烹調狀態按「Keep warm/Cancel」保溫/取消鍵,所 有設定會消取並回到待機狀態。...
- Page 33 預設/計時功能 預設﹕ • 烹調將在預設時間後結束。 • 適用於「Claypot」煲仔飯、「Dessert」甜品、「Reheat」翻熱以 外的所有烹調功能。 • 選 好 要 用 的 烹 調 功 能 後 , 按 「 P r e s e t / t i m e r 」 預 設 / 計 時 鍵 ( 「Preset」預設指示燈會亮起),然後按「hour」時/「minute」分...
- Page 34 清潔及維修 • 清潔與保養電飯煲前,請確定電源已拔除,而且電飯煲已徹底冷 卻。 • 建議每次使用後都用海綿清潔 –圖12。 • 內膽、量杯、飯勺、湯匙均可放入洗碗機清洗 - 圖13。 內膽及蒸盤 • 不建議使用砂粉及鋼絲刷。 • 如有食物黏在鍋底,可在清洗前先浸水一段時間。 • 小心擦乾內膽。 小心處置內膽 請按照以下指示小心清洗內膽: • 為保養內膽的材質,建議避免在裏面切食物。 • 確保將內膽放回電飯煲內。 • 使用附送的膠匙或木匙,盡量避免使用金屬器具,以免損壞內膽表 面 – 圖14。 • 為防止腐蝕,請勿將醋加入內膽中。 • 初次使用或多次使用後,內膽表面的顏色可能會產生變化。這是由 蒸汽及水所造成,不會影響電飯煲的使用,亦不會對人體有害。可 放心繼續使用。 清理微壓閥 • 如要清埋微壓閥,請先將其從煲蓋拆出 - 圖3b。清理後 - 圖16,請 擦乾並裝回電飯煲蓋上...
- Page 35 技術疑難排解 異常情況描述 原因 解決方法 檢查電飯煲電源線是否 有指示燈未亮 電飯煲未插上電源。 已插上底座插頭以及電 而且不加熱。 源。 有指示燈未亮 顯示燈有連接問題或 送交授權服務中心維 但加熱。 顯示燈損壞。 修。 未妥善關蓋。 打開蓋再蓋上。 停止烹調(拔除電源線)並 使用時洩漏蒸 微壓閥未放好或不完 檢查閥是否完整(兩部分 汽。 整。 互相緊鎖)和安放妥當。 蓋或微壓閥墊片損 送交授權服務中心維 壞。 修。 飯半熟或烹調 相對於米量放水太多 參閱使用水量表。 時間過長。 或太少。 自動保溫失靈( 電飯煲停留在 送交授權服務中心維 烹調狀態,或 修。 不加熱) 頂部的感應器斷路或...
-
Page 36: Panel Kawalan
PANEL KAWALAN Hour Minute Quick Soft Soup Steam Baby Claypot Dessert Reheat food PERIHALAN 1 Bakul kukus f Kekunci Menu 2 Penanda untuk air dan nasi g Kekunci Start (Mula) 3 Periuk boleh tanggal h Kekunci Hour (Jam) 4 Cawan penyukat i Kekunci Minute (Minit) 5 Senduk nasi 15 Penunjuk fungsi... - Page 37 KESELAMATAN PENTING ARAHAN KESELAMATAN Baca dan ikuti arahan untuk kegunaan. Simpan dengan selamat. • Alat perkakas ini tidak dimaksudkan untuk dikendalikan menggunakan pemasa luaran atau sistem kawalan jauh yang berasingan. • Alat perkakas ini boleh digunakan oleh kanak- kanak berusia 8 tahun ke atas jika mereka diberi penyeliaan atau arahan berkenaan penggunaan alat perkakas dengan cara yang selamat dan jika mereka faham akan bahaya yang...
- Page 38 • Kanak-kanak tidak patut bermain dengan alat perkakas. • Alat perkakas ini tidak dimaksudkan untuk digunakan oleh orang (termasuk kanak-kanak) yang kurang upaya dari segi fizikal, deria atau mental, atau kurang berpengalaman dan pengetahuan, kecuali jika mereka telah diberi pengawasan atau arahan berkenaan penggunaan alat perkakas ini oleh orang yang bertanggungjawab atas keselamatan mereka.
- Page 39 • Jika alat perkakas anda dilengkapi kod kuasa tetap: jika kod bekalan kuasa rosak, ia mesti digantikan oleh pengilang, jabatan khidmat selepas jualan pengilang atau individu yang mempunyai kelayakan yang sama untuk mengelak sebarang bahaya. • Alat perkakas tidak patut direndam dalam air atau sebarang cecair lain.
- Page 40 • Selalu cabut alat perkakas daripada soket: – selepas digunakan – apabila menggerakkannya – sebelum membasuh atau penyelenggaraan – jika ia gagal untuk berfungsi dengan betul • Lecur mungkin berlaku dengan memegang permukaan panas pada alat perkakas, air panas, stim atau makanan. •...
- Page 41 SAMBUNG KEPADA SUMBER KUASA • Jangan gunakan alat perkakas jika: – alat perkakas atau kord rosak – alat perkakas telah jatuh atau menunjukkan kerosakan atau tidak berfungsi dengan baik – Jika berlaku perkara di atas, alat perkakas harus dihantar ke Pusat Perkhidmatan yang diperakui.
- Page 42 • Sebarang campur tangan sepatutnya dibuat hanya oleh pusat perkhidmatan dengan alat ganti asal. LINDUNGI ALAM SEKITAR • Alat perkakas anda telah direka untuk penggunaan selama beberapa tahun. Tetapi, apabila anda ingin menggantinya, jangan lupa tentang cara anda boleh menyumbang dalam melindungi alam sekitar. •...
-
Page 43: Sebelum Penggunaan Pertama
SEBELUM PENGGUNAAN PERTAMA Keluarkan alat perkakas daripada pembungkusan • Keluarkan alat perkakas daripada pembungkusan dan keluarkan semua aksesori dan dokumen bercetak. • Buka tudung dengan menekan butang pembuka di permukaan – Rajah Baca Arahan dan berhati-hati mengikut kaedah operasi. Bersihkan alat perkakas •... - Page 44 • Alat perkakas ini hanya untuk kegunaan dalaman. Jangan letakkan tangan anda pada lubang kukus semasa memasak, bahaya melecur – Rajah Selepas memasak, jika anda hendak menukar pilihan menu masakan kerana terdapat kesilapan, tekan kekunci “Keep Warm (Kekal Panas)/ Cancel (Batal)” dan pilih-semula menu yang anda mahu. Anda boleh menghentikan proses memasak dengan menekan “Keep warm (Kekal panas) / Cancel (Batal)”.
- Page 45 SYOR UNTUK MEMASAK NASI TERBAIK • Sebelum memasak, sukat beras dengan cawan penyukat dan bilas kecuali beras risoto. • Letak beras yang telah dibilas dengan meratakan sebaiknya di seluruh permukaan periuk. Isikan dengan air sehingga paras air yang sepadan (Penanda dalam cawan). •...
- Page 46 FUNGSI MEMASAK NASI • Letak perkakasan secara rata, stabil, permukaan tahan kepanasan jauh dari percikan air dan sumber-sumber haba yang lain. • Tekan kekunci < Rice (Nasi) > untuk memilih fungsi memasak nasi. • Tuang kuantiti beras yang diperlukan ke dalam periuk menggunakan cawan penyukat yang disediakan –...
- Page 47 FUNGSI MEMASAK BERAS LEMBUT • Tekan kekunci < Menu > untuk memilih fungsi memasak nasi < Soft (Lembut) >. • Tekan kekunci < Preset (Praset)/Timer (Pemasa) > untuk mengaktifkan fungsi tetapan masa dan kemudian tekan < hour (jam) > dan < minute (minit) >...
- Page 48 • Pada penghujung masak, pembaz akan berbunyi “bip” lima kali, pemasak nasi akan memasuki status panas dengan penunjuk < Keep Warm (Kekal Panas) > menyala dan skrin akan mula mengira masa mengekalkan panas. FUNGSI PORRIDGE (BUBUR) • Tekan kekunci < Porridge (Bubur) > untuk memilih fungsi < Porridge (Bubur) ...
- Page 49 FUNGSI SOUP • Tekan kekunci < Menu > untuk memilih fungsi < Soup (Sup) >. Skrin memaparkan masa memasak lalai, lampu < Start (Mula) > berkelip. • Tekan kekunci < Preset (Praset)/Timer (Pemasa) > untuk mengaktifkan fungsi tetapan masa dan kemudian tekan < hour (jam) > dan < minute (minit) >...
- Page 50 • Tekan kekunci < Start (Mula) >. Pemasak nasi memasuki status memasak < Steam (Kukus) > dengan lampu < Start (Mula) > menyala dan skrin memaparkan masa memasak yang tinggal. • Pada penghujung masak, pembaz akan berbunyi “bip” lima kali, pemasak nasi akan memasuki status panas dengan penunjuk < ...
- Page 51 FUNGSI PRASET/ PEMASA Praset: • Masa praset sepadan dengan masa untuk penghujung memasak. • Tersedia untuk semua fungsi, kecuali fungsi < Claypot (Periuk tanah)>, < Dessert (Pencuci mulut) > dan < Reheat (Panas semula >. • Selepas memilih fungsi memasak yang dikehendaki, tekan kekunci < Preset (Praset) / Timer (Pemasa) > (penunjuk praset akan menyala) dan kemudian gunakan kekunci <...
-
Page 52: Pembersihan Dan Penyelenggaraan
PEMBERSIHAN DAN PENYELENGGARAAN • Untuk memastikan periuk pemasak nasi telah dicabut palam dan disejukkan sebelum pembersihan dan penyelenggaraan. • Amat dinasihatkan agar membersihkan alat perkakas setiap kali selepas digunakan menggunakan span – Rajah • Periuk, cawan, senduk nasi dan senduk sup selamat digunakan di dalam mesin pencuci pinggan - Rajah Periuk, bakul kukus... - Page 53 pencuci - Rajah 16. Kemudian lap sehingga kering dan letakkan semula di belakang rusuk dan tekan pada bahagian atas sehingga ia tetap. Pembersihan dan penjagaan bahagian perkakas yang lain • Bersihkan luaran pemasak nasi – Rajah 18, bahagian dalam tudung dan kord dengan kain lembap dan lap kering. Jangan guna produk yang kasar.
- Page 54 Perihalan Punca Penyelesaian pincang tugas Terlebih atau Nasi separuh terkurang air masak atau Rujuk jadual kuantiti air. berbanding dengan terlebih masak. kuantiti beras. Kegagalan mengekalkan hangat automatik Hantar ke pusat (produk perkhidmatan diiktiraf terus dalam untuk dibaiki. kedudukan memasak, atau tidak memanas).
- Page 55 BẢNG ĐIỀU KHIỂN Hour Minute Soft Quick Soup Steam Baby Claypot Dessert Reheat food MÔ TẢ 1 Xửng hấp e Phím Cơm 2 Thang chia độ cho nước và f Phím Trình Đơn g Phím Khởi Động gạo 3 Nồi có thể tháo ra h Phím Giờ...
- Page 56 BIỆN PHÁP BẢO VỆ QUAN TRỌNG HƯỚNG DẪN VỀ AN TOÀN Đọc và thực hiện theo các hướng dẫn sử dụng này. Cất chúng đi. • Thiết bị này không được thiết kế để được vận hành bằng thiết bị hẹn giờ bên ngoài hay một hệ...
- Page 57 • Trẻ em phải được giám sát để đảm bảo chúng không nghịch phá thiết bị này. • Vì thiết bị này chỉ dành cho mục đích gia dụng, nên nó không được thiết kế để sử dụng trong các ứng dụng sau đây và bảo hành sẽ không áp dụng đối với: –...
- Page 58 một tấm vải khô. • Nếu biểu tượng được đánh dấu trên thiết bị, biểu tượng này có nghĩa là “ Thận trọng: các bề mặt có thể nóng lên trong quá trình sử dụng ”. • Thận trọng: bề mặt của bộ gia nhiệt có thể còn nhiệt tồn dư...
- Page 59 • Có thể sử dụng thiết bị này ở độ cao lên đến 4000 m. • Vì sự an toàn của bạn, thiết bị này tuân thủ các quy định và chỉ thị về an toàn có hiệu lực tại thời điểm sản xuất (Chỉ Thị về Điện Áp Thấp, Tính Tương Thích Điện Từ, Các Quy Định về...
- Page 60 hoặc làm tắc chức năng tự động chuyển sang chức năng giữ ấm. • Không được tháo nồi trong khi thiết bị đang hoạt động. • Không được đặt thiết bị trực tiếp lên một bề mặt nóng, hoặc bất kỳ nguồn nhiệt hay lửa nào, vì...
- Page 61 TRƯỚC KHI SỬ DỤNG LẦN ĐẦU Tháo bao bì của thiết bị • Tháo thiết bị ra khỏi bao bì và tháo bao bì tất cả các phụ kiện và tài liệu in. • Mở nắp bằng cách nhấn nút mở trên vỏ – Hình Đọc Hướng Dẫn và...
- Page 62 Sau khi bắt đầu nấu, nếu bạn muốn thay đổi trình đơn nấu đã chọn vì có lỗi, nhấn phím "Giữ Ấm / Hủy" và chọn lại trình đơn bạn muốn. Bạn có thể dừng nấu bằng cách nhấn phím “Giữ Ấm / Hủy”. Chỉ...
- Page 63 CÁC KHUYẾN CÁO ĐỂ NẤU CƠM HIỆU QUẢ NHẤT • Trước khi nấu, đo gạo bằng gáo đo và vo gạo trừ gạo risotto. • Phân bố đều gạo đã vo quanh toàn bộ bề mặt của nồi. Rót nước đến mức nước tương ứng (thang chia độ...
- Page 64 CHỨC NĂNG NẤU CƠM • Đặt thiết bị lên một bề mặt làm việc bằng phẳng, ổn định, chống nhiệt, cách xa nước bắn và bất kỳ nguồn nhiệt nào khác. • Nhấn phím < Cơm > ” để chọn chức năng nấu cơm. •...
- Page 65 đặt giờ và sau đó nhấn phím < giờ > và < phút > để thay đổi thời gian cài đặt sẵn. • Nhấn phím < Khởi Động >, nồi cơm sẽ chuyển sang trạng thái nấu cơm < Mềm >, đèn của phím < Khởi Động > sáng lên, màn hình nhấp nháy “...
- Page 66 CHỨC NĂNG CHÁO ĐẶC • Nhấn phím < Cháo Đặc > để chọn chức năng < Cháo Đặc >. Màn hình hiển thị thời gian nấu mặc định, đèn < Khởi Động > nhấp nháy. • Nhấn phím < Cài Đặt Sẵn/Hẹn Giờ > để kích hoạt chức năng cài đặt giờ...
- Page 67 • Nhấn phím < Khởi Động >. Nồi cơm chuyển sang trạng thái nấu < Súp > với đèn của phím < Khởi Động > sáng lên và màn hình hiển thị thời gian nấu còn lại. • Khi nấu xong, chuông báo sẽ phát ra 5 tiếng “bíp”, nồi cơm sẽ chuyển sang trạng thái giữ...
- Page 68 CHỨC NĂNG HÂM LẠI • Nhấn phím < Trình Đơn > để chọn chức năng < Hâm Lại >. Màn hình hiển thị thời gian nấu mặc định, đèn < Khởi Động > nhấp nháy. • Nhấn phím < Khởi Động >. Nồi cơm chuyển sang trạng thái nấu <...
- Page 69 CHỨC NĂNG CÀI ĐẶT SẴN / HẸN GIỜ Cài đặt sẵn: • Thời gian cài đặt sẵn tương ứng với thời gian để kết thúc nấu ăn. • Khả dụng đối với tất cả các chức năng nấu, trừ chức năng < Niêu >, <...
- Page 70 VỆ SINH VÀ BẢO DƯỠNG • Để đảm bảo nồi cơm đã được rút phích cắm và nguội hẳn trước khi vệ sinh và bảo dưỡng. • Bạn nên vệ sinh thiết bị sau mỗi lần sử dụng bằng một miếng xốp –...
- Page 71 Vệ sinh và chăm sóc các bộ phận khác của thiết bị • Vệ sinh bên ngoài nồi cơm – Hình 18, bên trong nắp và dây điện bằng một tấm vải ẩm và lau khô. Không được sử dụng các sản phẩm mài mòn.
- Page 72 Mô tả sự cố Nguyên nhân Giải pháp Không tự động giữ ấm (sản phẩm ở vị Gửi đến trung tâm bảo trì trí nấu, hoặc ủy quyền để sửa chữa. không gia nhiệt). Cảm biến trên mạch mở trên cùng hoặc bị...
- Page 73 4 – 21 p. 22 – 37 p. 38 – 57 p. 58 – 76 9100027647 - 02...
Need help?
Do you have a question about the Mini Pro Spherical Pot IH and is the answer not in the manual?
Questions and answers