Delta RT Series User Manual
Hide thumbs
Also See for RT Series:
- User manual (74 pages) ,
- User manual (28 pages) ,
- User manual (32 pages)

Subscribe to Our Youtube Channel
Related Manuals for Delta RT Series


Summary of Contents for Delta RT Series
- Page 1 The power behind competitiveness Delta UPS - Amplon Family RT Series, Single Phase 1/ 2/ 3 kVA User Manual www.deltapowersolutions.com...
- Page 2 Failure to heed these instructions and warnings will void the warranty. Copyright © 2020 by Delta Electronics Inc. All Rights Reserved. All rights of this User Manual (“Manual”), including but not limited to the contents, information, and figures are solely owned and reserved by Delta Electronics Inc.
-
Page 3: Table Of Contents
Table of Content Chapter 1 : Important Safety Instructions ................5 Safety Instructions ................5 Standard Compliance ................. 7 Storage ....................7 Chapter 2 : Introduction ......................8 General Overview ................8 ... - Page 4 Measurement Menu ................37 Chapter 10: Optional Accessories ..................47 Chapter 11 : Troubleshooting....................48 Chapter 12: Maintenance ....................50 Appendix 1 : Technical Specifications ................. 51 Appendix 2 : Warranty ......................54 Amplon RT Series...
-
Page 5: Chapter 1 : Important Safety Instructions
It is not recommended to connect the UPS with the following types of loads. For the load suitability, please contact Delta customer service before purchasing: 1. regenerative loads (e.g. CNC machines and lifts). 2. asymmetrical loads (e.g. fans with half-bridge drivers and laser printers). - Page 6 Remove every battery grounding during installation and maintenance to reduce the likelihood of electric shock. If any part of the batteries is grounded, please remove the grounding connection. Do not connect the batteries in reverse; otherwise, a risk of electric shock or fire accidents might occur. Amplon RT Series...
-
Page 7: Standard Compliance
The batteries might lose their power during shipment or storage. Before you use the UPS for the first time, please fully charge the batteries until the battery percentage shown on the UPS’s LCD is 100% ( ). If the UPS needs to be stored for an extended period of time, please recharge the batteries every three months and ensure that, every time after recharging, the battery percentage shown on the UPS’s LCD is 100% ( WARNING: ... -
Page 8: Chapter 2 : Introduction
Chapter 2 : Introduction General Overview The RT series UPS is a single-phase input, single-phase output on-line uninterruptible power supply which provides reliable and consistent sine-wave quality power to your electronic equipment. It adopts the latest technology and the highest quality components providing output power factor up to 0.9, and its efficiency in on-line mode reaches up to 91%. - Page 9 UPS202R1RT0B0B5 • (Figure 2-2: 2kVA Exterior & Dimensions) UPS302R1RT0B0B5 • (Figure 2-3: 3kVA Exterior & Dimensions)
-
Page 10: Package List
If there is any damage or anything missing, please immediately contact the dealer from whom you purchased the unit. If the UPS needs to be returned, carefully repack the UPS and all of the accessories using the original packing material that came with the unit. Amplon RT Series... -
Page 11: Chapter 3 : Operation Panel
Chapter 3 : Operation Panel On the front panel of the UPS, you’ll see two LED indicators, a LCD display, and multi-function buttons. (Figure 3-1: Operation Panel) LED Indicators Description ON: The output is protected. OFF: The output is not protected. ON: The UPS detects an internal fault or environmental abnormality. -
Page 12: Multi-Function Buttons
To eliminate the fault detected, please refer to Chapter 11: Troubleshooting for relevant solutions. The function mentioned above is only applicable to the condition when the UPS has a fault and the inverter is off. Amplon RT Series... - Page 13 Multi- Description function Button The button has multiple functions. Please refer to the following for detailed information. Enter the Main Menu In the Main Screen (that shows the current operation mode), press Enter the button for 0.1 second and the UPS will enter the Main Menu (setup Button ...
-
Page 14: Lcd Display
3 seconds and release it after you hear one beep. After that, the buzzer will stop sounding unless a new fault occurs. NOTE: If the LCD display goes dim, press any button mentioned above for 0.1 second to wake up the LCD display and enable each button function. LCD Display Amplon RT Series... -
Page 15: Icon/ Display Definition
3.3.1 Icon/ Display Definition Icon Description There is output for the Load 1 and Load 2. Indicates the output status for the There is output for the Load 1, but connected loads. When there is there is no output for the Load 2. output, the load's icon will light up. -
Page 16: Operation Mode Diagram Definition
In Frequency Conversion mode, the power flow diagram will change according to the UPS’s input voltage and frequency. However, the icon Freq. Conv. shown in the upper-left corner will not change even if the UPS transfers to battery mode. Amplon RT Series... - Page 17 Diagram Description Indicates AC STANDBY mode. Indicates DC STANDBY mode. NOTE: The error code and the alarm message will appear alternatively for every 5 seconds.
-
Page 18: Chapter 4 : Rear Panel
UPS202R1RT0B0B5 (Figure 4-2: 2kVA Rear Panel) UPS302R1RT0B0B5 (Figure 4-3: 3kVA Rear Panel) Amplon RT Series... - Page 19 Item Functions Input Power Cord Connects to the mains. For installation of an optional mini card, such as Mini SNMP IPv6 MINI Slot card, Mini Relay I/O card, or Mini MODBUS card. Refer to 5.1 MINI Slot for details. Connects to the external battery pack(s) (optional) to extend back up time.
-
Page 20: Chapter 5 : Communication Interfaces
You can use a RS-232 cable (user supplied) to connect the UPS with a computer and install the UPSentry 2012 software* to check and monitor the UPS status. The RS-232 port provides the following functions 1. RS-232 communication (baud rate: 2400) 2. UPS configuration 3. Firmware upgrade (baud rate: 9600) Amplon RT Series... -
Page 21: Usb Port
Pin Assignment 1. PIN 2: TXD <Transmitting Data> 2. PIN 3: RXD <Receiving Data> 3. PIN 5: GND <Signal Ground> Hardware 1. Baud Rate: 2400/ 9600bps 2. Data Length: 8 bit 3. Stop Bit: 1 bit 4. Parity: None NOTE: You can download the software from the following link: https://datacenter-softwarecenter.deltaww.com.cn Do not use the USB port and the RS-232 port simultaneously. - Page 22 To increase the battery backup time, you can connect several external battery packs to the UPS. Delta external battery pack is optional. Please refer to the Quick Guide, User Manual or Installation & Operation Guide included in the package of the external battery pack.
- Page 23 Battery/ Battery Pack Connection Warnings Only use the same type of batteries from the same supplier. Never use old, new and different Ah batteries at the same time. The number of batteries must meet UPS requirements. Do not connect the batteries in reverse. Use the voltage meter to measure whether the total voltage, after battery pack connection, is around 12.5Vdc ×...
-
Page 24: Chapter 6 : Installation
Attach the included ear brackets to the lateral mounting holes of the UPS. See Figure 6-1. (Figure 6-1: Ear Bracket Installation) Follow steps to to install the UPS in Delta’s rail kit (provided). See Figure 6-1. Step : Adjust the length of the rail according to the rack. -
Page 25: Tower Mounting
If you want to use a non-Delta rail kit, please only follow step . (Figure 6-2: Rack Mounting) Tower Mounting Use the included tower stands to mount the UPS in an upright tower position by following the steps below. Assemble the tower stands (see Figure 6-3). - Page 26 Unscrew the screws and pull out the UPS’s front bezel . (Figure 6-4: Remove the screws.) Pull out the control panel , rotate the panel and the Delta logo nameplate 90° clockwise and re-insert the control panel (see Figure 6-5). Re-attach the front bezel to the UPS and tighten the screws ...
- Page 27 Carefully lift the UPS upright (at least two people are required) with the Delta logo nameplate and buttons on the LCD facing up. Facing Up Lift Up 90∘ (Figure 6-7: Place the UPS Upright) Fit the whole unit into the tower stands (at least two people are required).
-
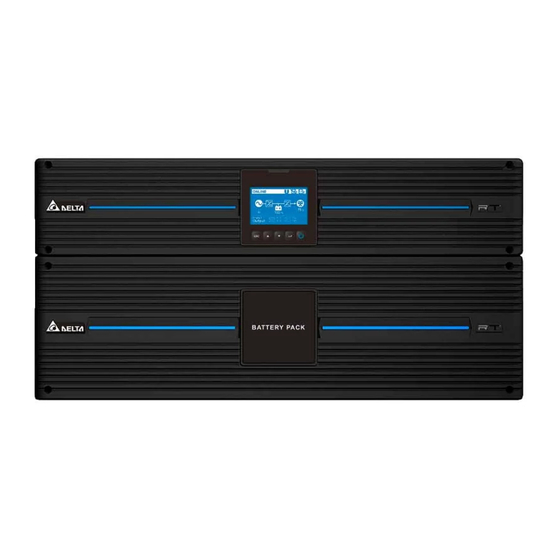
Page 28: Battery/ Battery Pack Replacement
Pull out the battery from the left battery compartment and insert a new one. Follow the same procedure to replace the battery in the right battery compartment . Reassemble the battery pack in reverse order. Amplon RT Series... -
Page 29: Chapter 7 : Connection And Wiring
Insert the battery cable into the external battery connector and firmly fix the battery cable. Connect the other end to the external battery connector on the Delta external battery pack. Make sure that the positive cable (+) connects to the positive pole (+) and the negative cable (-) -
Page 30: Chapter 8 : Operation
Start-up with AC Input If you don’t connect the Delta external battery pack(s) to the UPS: Verify if the UPS’s input cord meets with N, L & G of the wall socket and the utility AC power works normally. - Page 31 Verify if the UPS’s input cord meets with N, L & G of the wall socket and the utility AC power works normally. Check the ‘+’and ‘-’ poles of the Delta external battery pack(s) and ensure that wiring is correct.
-
Page 32: Turn-Off
) to select ‘Yes’, and (4) press the Enter button ( ) to confirm your selection. Disconnect the UPS from the AC power. If you connect the external battery pack(s) to the UPS, disconnect the UPS from the external battery pack(s). Amplon RT Series... -
Page 33: Operation Mode
Operation Mode Standby Mode After the UPS is connected to the utility AC power, it will supply power to the UPS and the batteries will be charged. The default setting of the UPS is set in Standby mode Online Mode In on-line mode, the connected loads are supplied by the inverter, which derives its power from the utility AC power, and the UPS charges the batteries and provides power protection to its connected... -
Page 34: Chapter 9 : Lcd Display & Settings
The default settings may vary according to different models. Press the Scrolling Down button to continue if there is no need to change. After initial settings, the Main Screen will appear and show the current operation mode. Amplon RT Series... -
Page 35: Main Menu
The Initial Setting Screen will no longer appear after initial configurations. Next time, when the UPS is powered on, the LCD display will show DELTA welcome page for 3 seconds and then directly go to the Main Screen that shows the current operation mode. - Page 36 5 minutes, the LCD will exit the setup mode and go back to the original display automatically. Please refer to the Menu Tree below for all the setup items. (Figure 9-1: Menu Tree) Amplon RT Series...
-
Page 37: Measurement Menu
9.2.1 Measurement Menu In Main Menu, select and press the button to enter the Measurement Menu. The Measurement Menu displays the UPS’s status readings, such as Output, Input, Bypass and Battery information. 9.2.2 Setting Menu In Main Menu, select and press the button to enter the Setting Menu. - Page 38 5-15% (per step: 1%) +10% ECO Min. Voltage* 5-15% (per step: 1%) -10% NOTE: The setup items ECO Max. Voltage and ECO Min. Voltage will only be shown on the display when the UPS is in ECO Mode. Amplon RT Series...
- Page 39 On/ Off Settings Setup Item Selectable Value Default Value Option 1* : Enable/ Disable Energy Saving Option 2: 1-15 mins (per step: 1 min) Disable Option 3: 100W-270W (per step: 10W) Option 1: Enable/ Disable Sleep Mode Option 2: 10-120 mins Disable (per step: 10 mins) Auto Restart...
- Page 40 Quantity will be changed according to Battery Voltage and Total Capacity. General Setup Item Selectable Value Default Value Language English/ Japanese Japanese Audible Alarm Enable/ Disable Enable Site Wiring Enable/ Disable Enable Fault Wiring LCD Back Light Always On/ Auto Off Auto Off Amplon RT Series...
- Page 41 Outlet Control Selectable Value- Selectable Value- Default Setup items Level 2 Level 3 Output Reboot Disable/ 5/ 6/…/ 300 Disable Duration Seconds (per step: 1 sec) Outlets - Group 1 Load Bank Disable/ 1/ 2/…/ 240 mins Disable Runtime Limitation (per step: 1 min) Output Reboot Disable/ 5/ 6/…/ 300...
- Page 42 To set up Bypass Output, please go to → Output → Standby Mode → Bypass Output. The item Delay Alarm Again under Control → Alarm → Clear Prediction Warning can be set from 1 week to 52 weeks. Amplon RT Series...
- Page 43 For example, if you need the UPS to reboot the output immediately, please go to → Output → Outlet Group 1 → Output Reboot Immediately → Yes. 9.2.4 Maintenance Menu In Main Menu, select and press the button to enter the Maintenance Menu.
- Page 44 Battery Date/ Time, Item, Output Aging Average Load (W), Battery Discharging power, Total Actual Discharging Time, History discharging Estimated Remaining Time, time Total Discharging Time Reset Power Usage Yes/ Cancel Calculator Reset Restore Factory Yes/ Cancel Setting Amplon RT Series...
- Page 45 Level 1 Level 2 Level 3 Level 4 Level 5 Description Event code Event List Error Description YYYY/ MM/ DD HH:MM:SS Clear Log Yes/ Cancel Model Name: RT-1K UPS - Part No. UPS102R1RT0B0B5 UPS - Serial No. Maintenance 1BA0150001 UPS - Manufacture Date About YYYY-MM...
- Page 46 Once the test is completed, the test result will be shown as follows. Test Result_ Fail: The alarm icon will show at the left bottom of the LCD display. Tests Result_ Pass: No alarm icon occurs, and the UPS runs normally. Amplon RT Series...
-
Page 47: Chapter 10: Optional Accessories
Chapter 10: Optional Accessories There are several optional accessories available for this RT series UPS. Please refer to the table below for the optional accessories and their functions. Function Item Prevents dust from entering into the UPS to ensure UPS Dust Filter reliability and to prolong product life. -
Page 48: Chapter 11 : Troubleshooting
Chapter 11 : Troubleshooting When a problem occurs, please check if the following situation exists before contacting Delta service personnel: Is the main input voltage present? Please have the following information ready before contacting the Delta service personnel: ... - Page 49 Error Meaning Possible Cause Solution Code The UPS is not properly Check whether the UPS is connected to the external properly connected to the Battery battery pack(s). 0x1003 external battery pack(s). Disconnected The battery/ batteries is Contact service personnel. (are) damaged. NOTE: If all possible causes are eliminated but the alarm still appears, please contact your local dealer or customer service.
-
Page 50: Chapter 12: Maintenance
UPS. If not, contact service personnel to replace the fans. NOTE: Please ask your local dealer or customer service for more maintenance information. Do not perform maintenance if you are not trained for it. Amplon RT Series... -
Page 51: Appendix 1 : Technical Specifications
Appendix 1 : Technical Specifications Model RT-1K RT-2K RT-3K Power Rating 1kVA/0.9KW 2kVA/1.44kW 3kVA/2.2kW Waveform Pure Sinewave Nominal 100/110/115/120 Vac Voltage 100 Vac: 90 ~ 150 Vac (full load) & 55 ~ 90 Vac (50 ~ 100% linear load) Voltage Range 110/115/120 Vac: 100 ~ 150 Vac (full Load) &... - Page 52 Audible Noise* < 40 dB < 45 dB < 45 dB Display Graphic and multilingual LCD Communication MINI Slot × 1, RS-232 Port × 1, USB Port × 1, Interfaces REPO/ROO × 1, Dry Contact × 4 Amplon RT Series...
- Page 53 Model RT-1K RT-2K RT-3K 440 × 335 × 88.2 440 × 430 × 88.2 440 × 565 × 88.2 Dimensions (17.3'' × 13.2'' × (17.3'' × 16.9'' × (17.3'' × 22.2'' × (W × D × H ) Physical 3.5'') 3.5'') 3.5'') Weight...
-
Page 54: Appendix 2 : Warranty
The User Manual must be carefully followed. Seller makes no representation or warranty as to the suitability or fitness of this product for any specific application. No. : 501300000000 Version : V 0.0 Release Date : 2020_12_29 Amplon RT Series... - Page 55 - Regional Office The United States Australia Delta Electronics (Americas) Ltd. Delta Energy Systems Australia Pty Ltd. 46101 Fremont Blvd. Fremont, CA 94538 Unit 20-21, 45 Normanby Road, Notting Hill VIC 3168, Australia T +1 510 344 2157 T +61 3 9543 3720 E ups.na@deltaww.com...
Need help?
Do you have a question about the RT Series and is the answer not in the manual?
Questions and answers